quote:
Originally posted by wbg pete:
Sorry for delay in responding - we were out most of yesterday.

Harry Doyle basically described how to superelevate track: I used both wire and balsa stripwood shims. I used a 1" long balsa shim about every three inches to prevent "Sag". You do not need a lot of shim height to get the proper effect. Too much doesn't look right and can induce stringlining.

As soon as the track was in place, the ties and rails were painted using a cheap flat interior Latex paint. Eliminating the black ties and all three shiny rails greatly improves the track and overall layout appearance.

My ballast comes from roofing shingle granules: three 50# buckets worth are on the layout - Gargraves ties are thick and it takes a lot to cover them.

CTT is the only way to see photos of the layout. Sorry.

TAG is correct; scale stuff does not look good on O-72 curves. My large steam and diesel locos are Lionmaster or RailKing and I use "6464" size (Lionel, K-Line, Indust. Rail, etc.) freight cars and 16" MTH RailKing pax cars. 99% of the layout visitors have no clue, nor do they care, whether the trains are scale or not, all they see are trains that "look good" rounding the layout's many curves. I don't run any MTH RailKing freight cars, they just don't look right on my layout - too large.

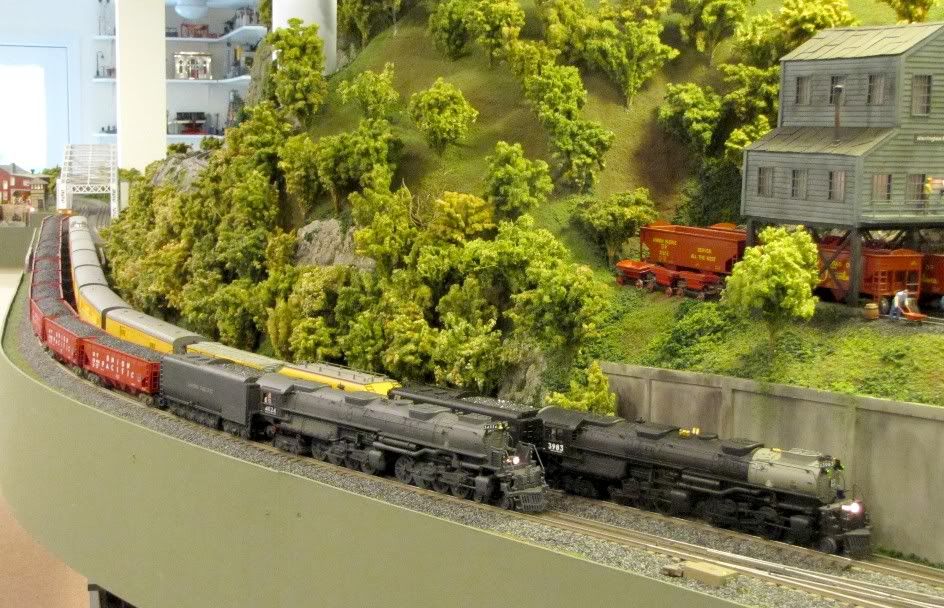
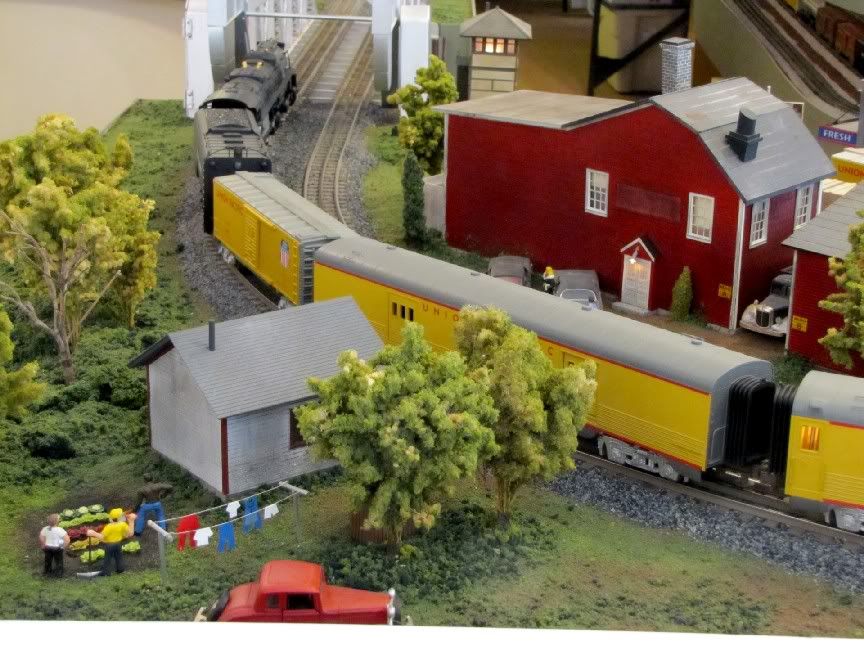
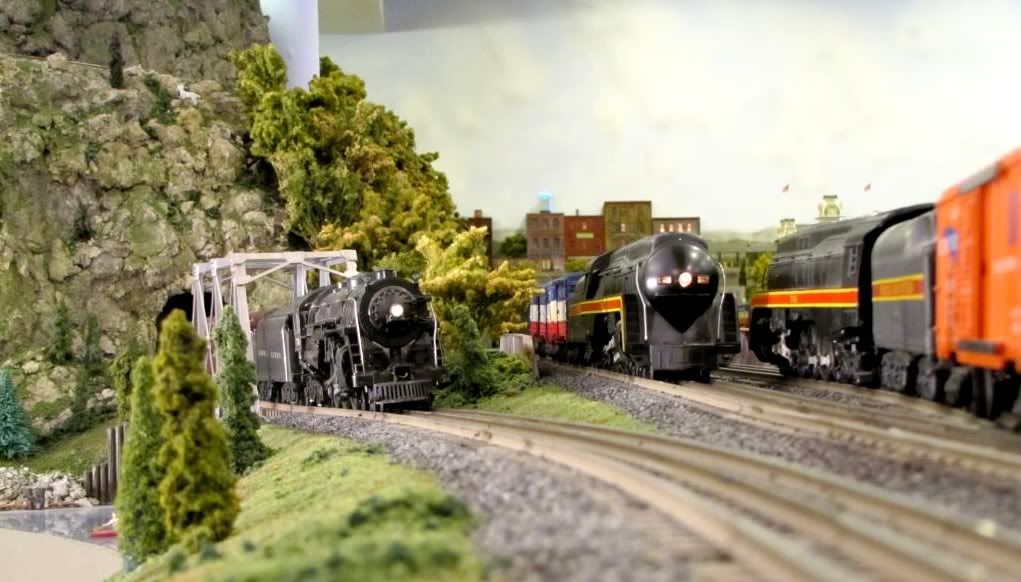
This is a Lionmaster Challenger leading a modified MTH "6464" sized boxcar and MTH 16" Railking pax cars around a curve:


Pete, you have one of the best hi rail layouts I have seen. I do have the CTT magazines that said you have a captive audience here that would like to see more.
One question. Where does he loop underneath the main peninsula go? It does not show in the CTT track plan?
George
quote:
One question. Where does he loop underneath the main peninsula go? It does not show in the CTT track plan?
George


Seacoast,
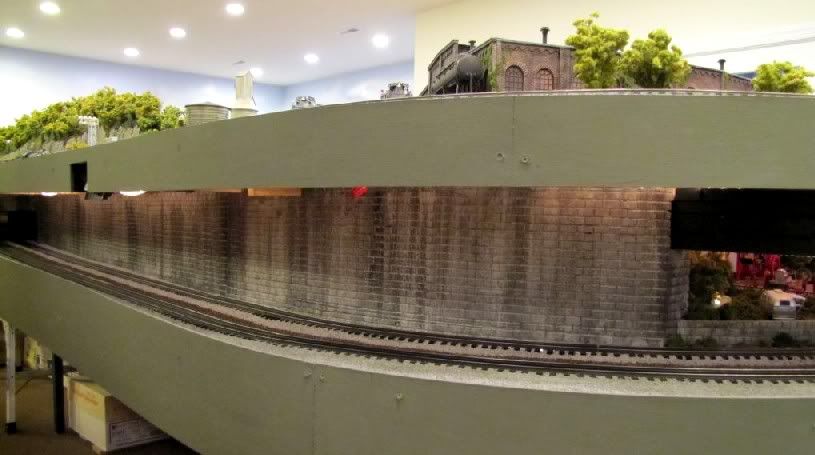
The lower level on the peninsula is part of the mainline - the outer track is the main, the inner is a passing siding that I use to store two trains.

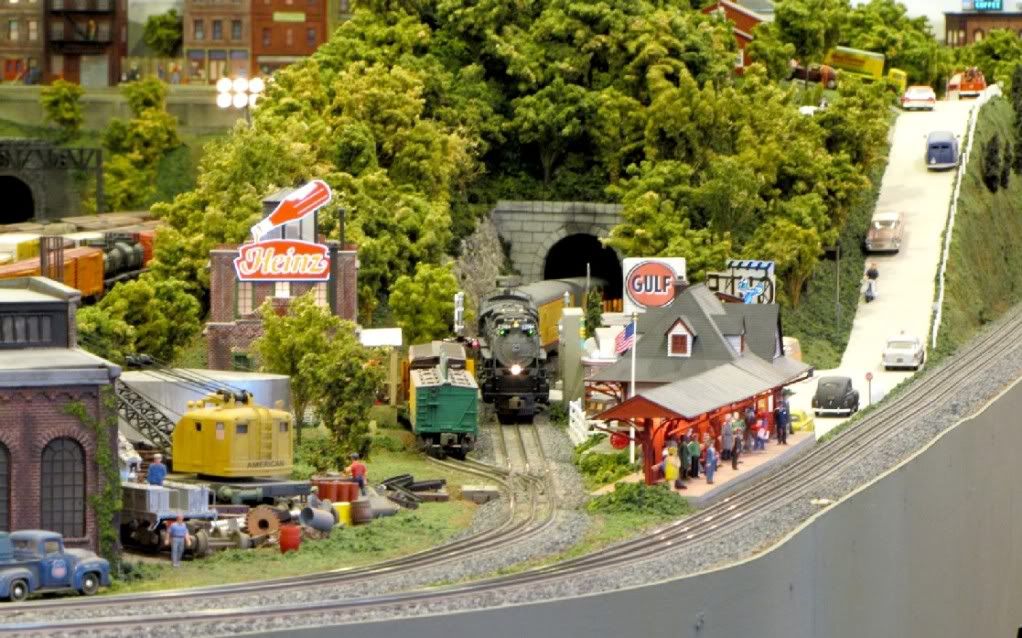
The Challenger in the layout photo you copied/pasted is about to cross the "bascule" bridge. Afterwards, it's mainline track bears slighly left and enters a tunnel. The photo below shows a Hudson emerging from the tunnel:


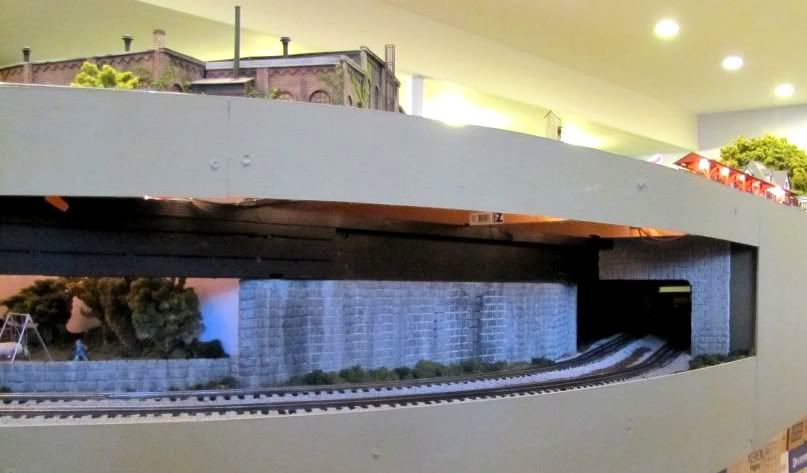
The track continues underground to the far end of the room and turns right 180^ and then emerges as the outer track on the lower level of the peninsula as seen in this photo:


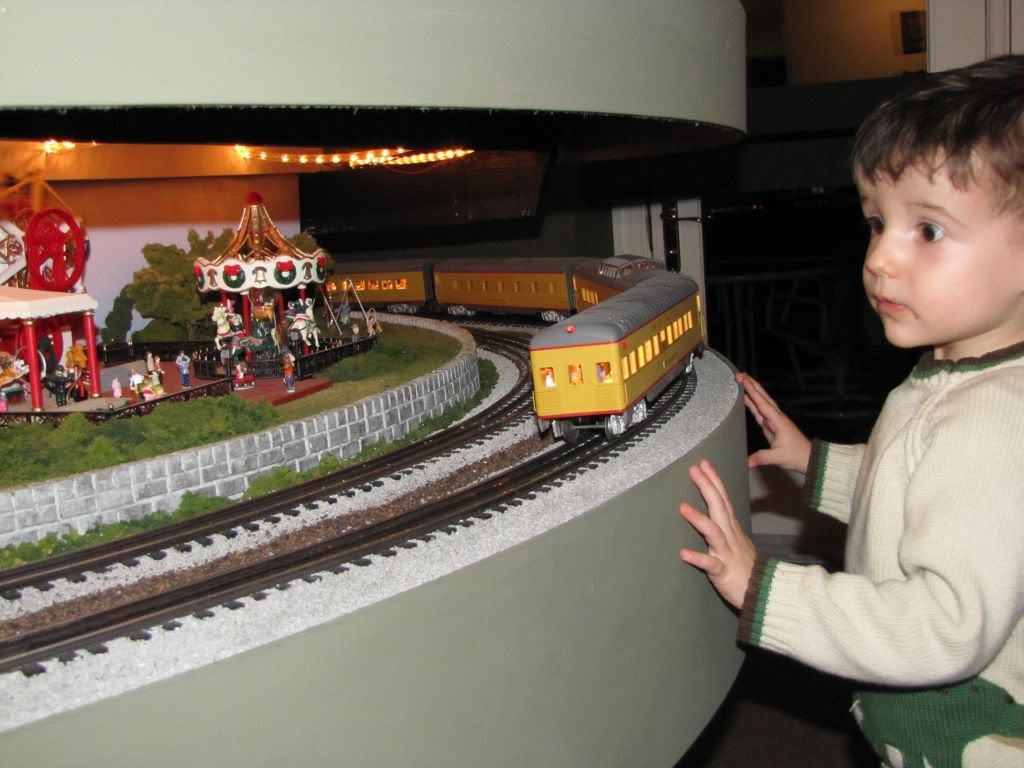
It curves back 180^ in the open past an amusement park on the lower peninsula level

and again continues underground

back to the far end of the room where it makes another climbing 180^ turn to re-emerge on the top level of the peninsula and go around the round house on the inner loop of track.


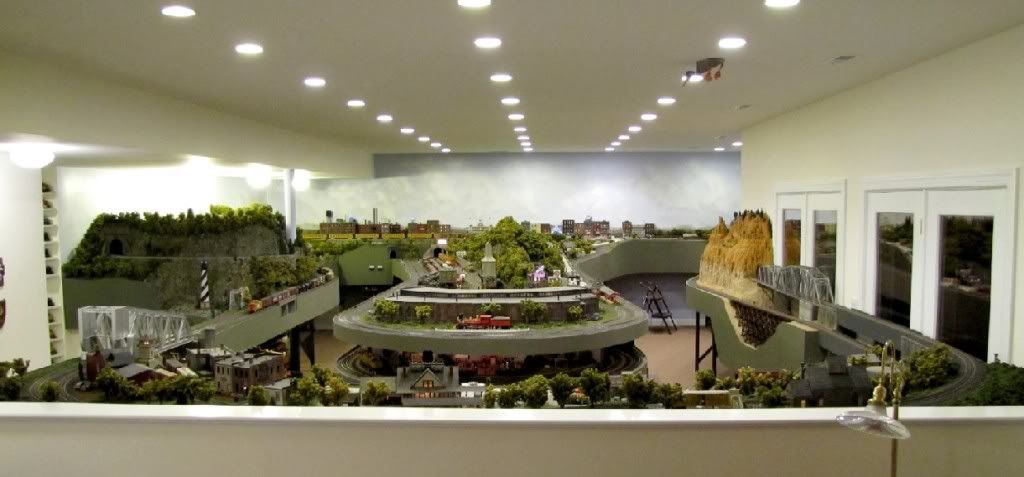
Here's an overall photo of the layout:


I hope this helps answer your question.
Hi Again Groupies!

wgbpete: Some more nice pics of a very nice layout! Thanks for sharing!

Of FA's 'n Traditional Diesel Switchers:

Above I lamented the lack of "traditional" sized diesel switchers. Well... RMT to the rescue!

By virtue of a review I read that was written by a fellow hobbiest, I "rediscovered" the RMT "BANG" Alco S-4. Yup, looks like a "caracature" of an Alco S-4, no doubt about it. However the review said it ran slowly and was smooth as silk: Both good things for a switcher! As for the "caracature" part, so are the Lionel FA's that I like so well. Gotta' remember, as long as I keep 3 rail in the "toy" category... I'm good to go. It's when I try to make them too "scale" that the "toy" illusion breaks down for me.

Anyway, seeing as they're on sale until the Witching Hour tonight, I picked one up for a song and thought I'd check it out. It just might be the answer I need for a smooth running "traditional" sized diesel switcher! We shall see!

Andre
My FA's (pictured above) arrived today.

The Good News is: After a quick cleaning of the rollers and wheels, I already have them running/reversing reliably.

The Bad News is: Well... there really isn't any bad news!

In all, they're not as bad (cosmetically) in person as they appear in the sale pic above. (Or other sale pics I have.)

First order of business will pretty much be a complete disassembly and thorough cleaning of the motor/mechanism/etc, followed by a LaBella lube job. Once I have it running as best it can run... then it will be time to decide on the factory paint job's fate. Smile

Anyway... not bad for $130!

Andre
I have the May 2011 issue of CTT. As good as the article and photos in it are, they did not have the impact of the first photo in this thread. This shows the "added value" the OGR forum provides. In line with what Andre wrote, I never realized postwar could look so amazingly good. Carefully selecting the rolling stock so that everything fits together makes a big difference. That first photograph is a real inspiration for what can be done with traditional size O gauge.
Hi Ginsaw!

Thank you much for the input. Good food, indeed.

I've learned that IF I take my 3 rail trains toward the "scale" look... I start becoming dissatisfied with the concept (that 3rd rail and such). Several years ago, that's what caused me to leave 3 rail for S scale. For me, I must keep them "toys". That pretty much means Traditional sized trains and approaches. I have my S scale stuff for when I want to split hairs and count rivets. Big Grin

Having said that: The jury's still out on what I'll do with my Erie's. They are cleaning up pretty good... but of course, there's some paint dings n' chips and some of the decals are bit tattered. Still, they have a pleasing "worked n' worn" look... so who knows?

The original idea seemed simple: Buy a set of orphans and repaint them to my liking! Not so cut and dried now. Smile

Andre
quote:
Posted January 13, 2012 11:04 PM Hide Post
I have the May 2011 issue of CTT. As good as the article and photos in it are, they did not have the impact of the first photo in this thread. This shows the "added value" the OGR forum provides. In line with what Andre wrote, I never realized postwar could look so amazingly good. Carefully selecting the rolling stock so that everything fits together makes a big difference. That first photograph is a real inspiration for what can be done with traditional size O gauge.


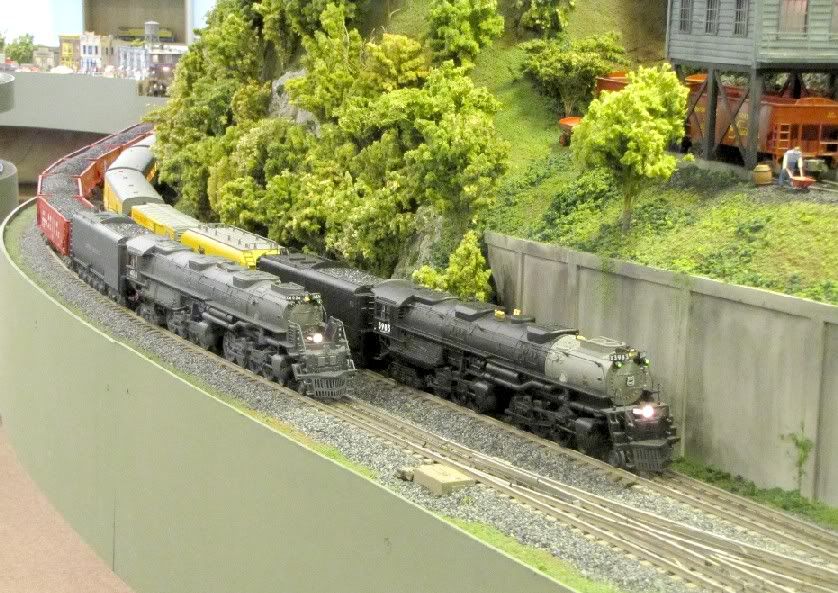
Not to hijack Andre's refocused thread but this is what "modern" Lionmaster (BigBoy and Challenger) led trains of semi-scale cars look like:


quote:
I've learned that IF I take my 3 rail trains toward the "scale" look... I start becoming dissatisfied with the concept (that 3rd rail and such).
Like elsewhere, there're compromises we make. I did. The third rail is something I came to grips with and learned to coexist with by the mid '50s. Ditto truck mounted couplers. And large flanges. And swinging pilots. For that matter, along with railroads that don't really go anywhere or haul anything or carry anybody but only go around 'n around in endless circles. So that's no biggie for me.

What is though, is being able to put together a train that is a reasonable facsimile of the prototype. And if the object is Frisco (or Rock Island or Mopac or Cotton Belt), that ain't easy in O Gauge except in scale sized or proper dimensioned equipment. Even then, you can't be picky about where to get the equipment. You get 'um from everywhere.

In Frisco alone, the way I do it -

Lionel Modern - Frisco PS-1 boxcar
Crown Model Products (Austrian Atlas) plug door boxcar
Weaver PS-1 boxcar (red)
Weaver PS-1 boxcar (yellow)
Weaver steelside boxcar (cream/brown)
K-Line steelside boxcar (the one with the half ladders and no roof walk)
Atlas USRA single sheathed boxcar
Atlas steelside re-blt USRA boxcar
Atlas 6-bay cyl hopper
Atlas pulpwood flatcar
Atlas ext. vis. caboose (red/black)
Atlas ext. vis. caboose (white/red)

So that's how to put together a train. I even have the Lionel PWC Texas Special ABA F3s as freight engines. That's because they have the Frisco emblems.
Post
×
×
×
×
Link copied to your clipboard.
×
×