its a simple trick, take a peice of card stock

or thick 3x5 card and cut it to a size to cover

both brush holes. cut a slot in the middle of the card

to allow the armature to drop into the hole between

the brushes. install brushes with springs and hold them in place

with the card. slide everything back on top of the motor

and armature. after everything is in place, slide the card

out and viola!!!! instant brush instalation via a card trick.

been using it for yrs after fumbling around and dropping brushes

all over the place.

So I'm sitting here thinking about the one running slower than the other.  Going back to the conversation yesterday (I think), I'm wondering if it is indeed the size of the brushes.  If you look at the second picture I posted late last night, you can see the diameter of the brush where it touches the commutator is smaller than the rest of the brush.  That means less brush surface touching the commutator.  The brushes from the e-unit issue train are the same diameter from top to bottom.  Obviously more of a surface touching the commutator.  I'm wondering if this is just due to normal wear

Originally Posted by mjrodg3n88:

I borrowed my dad's to turn a small bedroom 9x9 into my fiance's closet... (She's spoiled). 

Mike, Mike, Mike,

While they are getting you on the path to repairman you are missing the side lesson. "She's pretty", "She's wonderful", "She's kind and generous", "She has a fantastic assortment of beautiful clothes", etc. but never ever "She's Spoiled"!!!

That leads to dope slaps and "She's letting me sleep in the garage..."


Forgot to add, make sure the allen screw is not too loose or tight on top. We had two SD-18's purchased at different times that ran pretty close after good tune ups.

Last edited by Lima

Mike: The brush could theoretically have an influence on the voltage drop across the contact point. Theoretically, the larger surface area would have a lower voltage drop if the materials and other contact conditions (such as any impurities and perhaps even the pressure) are the same. I have never tested it. Most likely you have an original one (#8040-150) with the reduced surface area and the common current substitute (#622-121) which is uniform cross section end to end. The latter one wears well and in my opinion does not seem to cause as much wear or visible scratching on the armature end contacts, but I have not done any validating tests. It is the latter that I mailed to you this morning.

Originally Posted by Popi:

its a simple trick, take a peice of card stock

or thick 3x5 card and cut it to a size to cover

both brush holes. cut a slot in the middle of the card

to allow the armature to drop into the hole between

the brushes. install brushes with springs and hold them in place

with the card. slide everything back on top of the motor

and armature. after everything is in place, slide the card

out and viola!!!! instant brush instalation via a card trick.

been using it for yrs after fumbling around and dropping brushes

all over the place.


What a great idea. I am going to make one for the shop. I could not get the photo to open, but I will try some different applications. However I can clearly visualize what you describe. Thank you for sharing a wonderful tip!


Ok so cleaning the frame was an epic fail....

After spraying/soaking in the liquid wrench for a day and a half, I went to clean it off today.  Using dishsoap and my fingers, I could see fresh metal.  Its almost like it ate the paint right off of the frame.  So I'm off to Home Depot to buy some spray paint for the frame.

Also a note to anybody else going to try this, plastic does not like liquid wrench!!!  (at least not on this frame it didnt)


After the frame is painted, I will post pictures.  Hopefully I can find something with not a very high gloss. 

Sorry about the plastic, Mike. A naked frame is wearing no plastic. Hope you didn't melt something nice. Apparently your rust was deeper than it looked in the photos. Nonetheless, it had to come off.


I recommend a hot water wash with Dawn to degrease it before painting.  Maybe two or three washes and a final overnight dry. And you may need some sanding ro remove pits before painting. The primer will cover very light pits, but it is better to get it smooth to about a 400 grit.


I like Rustoleum Satin Black over Rustoleum primer.  It will take 2 or 3 coats of black to look right without paint sag. I hook mine on a wire such as a coat hangar and paint it outside on a 70 degree plus day with no wind or very light wind at your back (just like spitting and the other male function -- never into the wind  .  I form the wire so that I can hang it inside to dry after final coat, but note on the instructions that you can give multiple coats with a very short dry in between. The final dry will take overnight or even 24 hours to be sure it is hard.


I look forward to seeing it.

Bill,

No worries at all!!   I appreciate all the help given to me!  The plastic was the little under belly piece.  Not sure exactly what that is called.  It dissolved the little pieces holding it onto the frame so I will have to repair that somehow.  


The whole method actually worked very well.  After I removed the liquid wrench, I did use the Marvel's Mystery Oil and the wire-wheel type deal for my Dremel.  It made the rust spots disappear to the touch.  

What I ended up doing after is:

- Hit all the rust marks with the Dremel.  

- After, I took 800 grit sandpaper along with the MMO and sanded the whole thing until it was smooth.  You can see from the picture that I didnt take it down to bare metal.

- Did a dish soap scrub (toothbrush) and rinse twice.

- Dried off with a paper towel and blew out the cracks with the compressed air can.


To prep for paint, I taped off the bracket for the e-unit (was in really good shape, paint wise) and all rivets.


At Home Depot, and before I saw your post (Bill), I picked up a can of Rust-Oleum gray primer and a can of Rust-Oleum semi-gloss black.  They didnt have satin, which I was originally looking for.  Looking at my original GP20 frame, I think the semi-gloss may look ok.  We will see.  Thanks for the coat hanger tip, thats how I used to paint the bodies to all the model cars I used to paint.  Again, before I saw this post, I did what you can see in the picture.  The frame can be rotated 360 degrees.


I put a coat of primer on tonight to both the frame and the plastic (in hopes that I can get it back to a decent visible state).  As long as its not snowing tomorrow, I'll put the first coat of black on when I get home from work.


Thanks again,
Mike 

IMG_2258

Attachments

Images (1)
  • IMG_2258

Ok, I think I'm finished... well minus getting some electrical grease for the bare metal for grounding.  C W, thanks for that heads up, I would've been confused why it wasnt doing anything like it did before I scraped the paint off tonight.  Bill, I installed those brushes, thank you very much (and sent an email thanking you).  Its still a little slower than my original, but thats ok.  When they are hooked up together, I dont think it will matter.


I had a few people from the forum send me replacement fuel tanks (under frames) and I painted the one that got screwed up from the Liquid Wrench.  That one didnt turn out too bad actually.


I've attached quite a few pictures here (sorry if I wasnt to put them all directly into the post) so the progress can be seen.  Bill, I also went back to Home Depot to get black satin paint, after the first coat of semi-gloss, I realized it was way too shiny.


So here is the frame after paint but before I removed the painter's tape


IMG_2273


Everything needed cleaned on this thing.  Here are the hand rails, the bottom one I cleaned and left the top the way I received it for comparison.


IMG_2275


Bottom with tape that was over rivets removed


IMG_2278


I used painter's tape on all the rivets.  Used an exacto blade to trim the excess tape off, pre-paint


IMG_2279


All tape removed, ready for reassembly!!


IMG_2281


Mechanics back together!  You can see where I removed the paint for the cup washers in front of and behind the motor.  


IMG_2283


Shell back on, and ready for a fully dressed run (rear one is the cleaned and newly painted).  Now, my question is, which setup looks better?


This one?

IMG_2284


Or this one?


IMG_2285


Hand rail that was bent, but now straight (top train)


IMG_2287


Finished product


IMG_2288


IMG_2289


For comparison


IMG_2286


I want to thank all of you for your help.  It is/was very much appreciated and I'm not sure how I would've done without you.


Thank You,
Mike 

Attachments

Images (12)
  • IMG_2273
  • IMG_2275
  • IMG_2278
  • IMG_2279
  • IMG_2281
  • IMG_2283
  • IMG_2284
  • IMG_2285
  • IMG_2286
  • IMG_2287
  • IMG_2288
  • IMG_2289

Beautiful job, Mike. Either lashup configuration is prototypical, so just change it up from time to time. It is possible that the speeds could be more closely matched with one arrangement over the other. This has to do with the way the motor armature thrusts upwards in one direction and pulls downwards in the other direction.


A couple of quickies: 


Labelle makes a lubricant that conducts electricity just fine. I use it on my gears as well as the truck guides. And it is plastic safe. I think it is number 103 (I am too lazy to go down to my shop just now).


Secondly, there is a product called Liquid Mask that you just brush or dab on for paint masking. I use it on small areas such as plastic lenses and rivets. I put a couple of coats on, let it sit a few hours -- usually overnight -- then I just peel it off like a blister when the paint dries. It is available from MicroMark, and probably from other places as well.


Again, your train looks gorgeous. It sounds like it was an enjoyable project for you.

Bill,


Thank you!  The fiance likes the second lashup, I like the first, so we will see.  The fixed up GP20 runs as fast in reverse as my original does going forward so it might just stay like that.  Here we go with you getting me to spend money again, you said you would ! Just kidding, I appreciate all of this.  Where would I find the Labelle?  Liquid Mask, I'll keep that in mind for the next one, which I'm sure there will be.  I did in fact enjoy this.  The end result made it ever more enjoyable.  The painter's tape worked great, but maybe that will be easier. 
I'm really really happy with the way it turned out.  Cant wait to have a layout built and see it run on more than a test track!


Don,


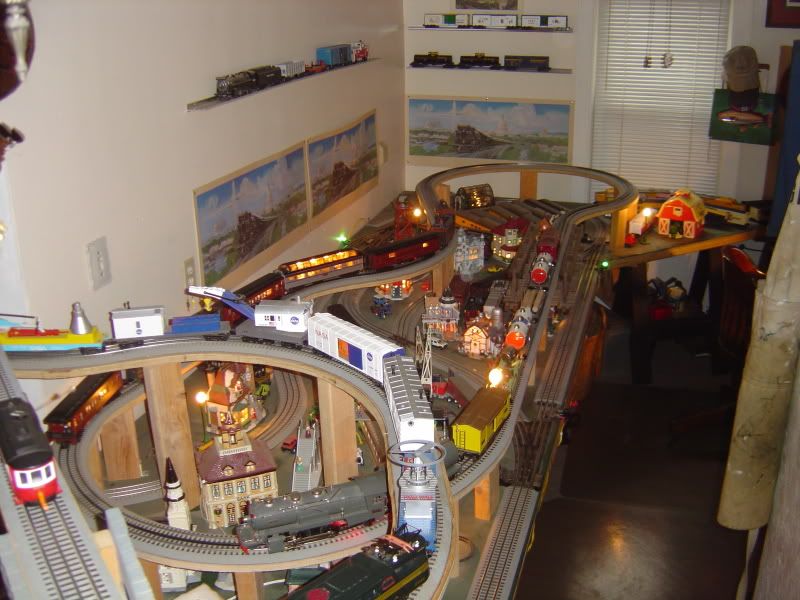
I'm sorry!!  Its brand new, I only finished building it at Thanksgiving!  What's neat is that all that wood you see was the platforms my dad and I used for our trains up until 1998 (the last time we had them running)


Mike

Your fiance has good taste, the back-to-back consist always looks better IMO.  Plus, coming from a real railroading background, it's much easier on the crew when they have to change direction.  Your Lionel engineers will curse you if they have to run long-hood forward!


Good job on the engines, they look great. You can find Labelle products at many hobby shops, I'm pretty sure Niedzalkoski's on Jeannette carries them.

Originally Posted by mlavender480:

Your fiance has good taste, the back-to-back consist always looks better IMO.  Plus, coming from a real railroading background, it's much easier on the crew when they have to change direction.  Your Lionel engineers will curse you if they have to run long-hood forward!


Good job on the engines, they look great. You can find Labelle products at many hobby shops, I'm pretty sure Niedzalkoski's on Jeannette carries them.

Thanks, the last thing I'd want is for my engineers to be swearing at me!  Well, once they have some rails to run on.  
Thanks!  One I didnt do anything too, just cleaned the motor.  I'm going to try my LHS Bill and Walt's tomorrow to see if they have it and a bulb I'm looking for.


Mike

(P.S. She does have great taste, I mean she said yes to me )

Mike,

   I have been following your thread with great interest, these gentlemen definitely did right by you, with their technical input.  Please bring your engine to the Breakfast get together on Saturday, I really want to see how it came out.  Looks like a fantastic job.


Bill,

  No doubt about it the ladies who tolerate us men who play with trains are a very special group of ladies.  I think Mike is just starting to realize how lucky he really is.   Me I have known for over 30 years now.  I know she loves him, she ask why he had put his trains away, to please her, when company was coming home with her.

This son is a keeper, few around like this one, I know cause I married one myself.

I had my last large layout up for over 10 years in our game room, one day I started taking it down, my wife actually ack me why.  I simply said I love you, thanks for asking.


Don,

   You are absolutely correct, Mikes work bench is definitely way to clean,

young engineers, what can you do with them any way.


PCRR/Dave


One section of the Pine Creek Railroad


Last edited by Pine Creek Railroad

Bill,


A few numbers?  I think I'll accept that .  Once I saw that it was 106 in the hobby shop, I thought to myself "Bill said is was 10.... eh, I bet its this one."  Its greased up now and ready to go!


Dave,


Thank you for the kind words!  I definitely plan on bringing it tomorrow, possibly my MTH SD70M-2 also.  Yeah....she's a keeper (I think... ).  Yes my bench is clean! Sorry, I'm sort of a neat freak!


Trains,


Thank you.  It definitely was an educating experience.  Before this, I had NO idea what an E-Unit was or even how these trains of our's worked.  I must say that when I first painted the frame (with the semi-gloss) I was kind of bummed out with it.  I thought, this does not look good at all, but thanks to Bill, I went an bought satin.  That was a great move because I'm very happy with the way it turned out.  Pride...I think that you hit the nail on the head with that one.


Thanks,
Mike 

Mike,
So, I am glad I found this thread and the photos of the SD20 project you told me about today.  You did a great job.  I am sorry I had to leave before you got to run yours.  Thank you for sharing the photos.

The comments about your fiance being enthusiastic about your trains reminds me of my wife.  When we were engaged my HO trains were in storage at my parents, and the plastic had deteriorated.  I had told my fiance about it, and thought I may try N scale since we wouldn't have much room.  She bought me an N-scale train set.  That was 29 years ago.  Now, my eyes have gotten bad, so I progressed from N to HO, now O, and she is with me all the way.  If it wasn't you I mentioned it to, my wife was the one who suggested I put some shelves around the family room near the ceiling, and run trains until one of our daughters in college move out, and I can claim a room.

Nice meeting you today at Patrick's.
Originally Posted by LocoMods:
Originally Posted by Popi:

What a great idea. I am going to make one for the shop. I could not get the photo to open, but I will try some different applications. However I can clearly visualize what you describe. Thank you for sharing a wonderful tip!


LocoMods,

here it is, the file was an MS publisher file


card trick

Attachments

Images (1)
  • card trick
Originally Posted by Mark Boyce:
Mike,
So, I am glad I found this thread and the photos of the SD20 project you told me about today.  You did a great job.  I am sorry I had to leave before you got to run yours.  Thank you for sharing the photos.

The comments about your fiance being enthusiastic about your trains reminds me of my wife.  When we were engaged my HO trains were in storage at my parents, and the plastic had deteriorated.  I had told my fiance about it, and thought I may try N scale since we wouldn't have much room.  She bought me an N-scale train set.  That was 29 years ago.  Now, my eyes have gotten bad, so I progressed from N to HO, now O, and she is with me all the way.  If it wasn't you I mentioned it to, my wife was the one who suggested I put some shelves around the family room near the ceiling, and run trains until one of our daughters in college move out, and I can claim a room.

Nice meeting you today at Patrick's.


Thanks Mark!!


Its ok I understand.  I wanted everybody to get a chance to run theirs before I put mine on.  It was really nice talking to you!!


Mike

Post
×
×
×
×
Link copied to your clipboard.
×
×