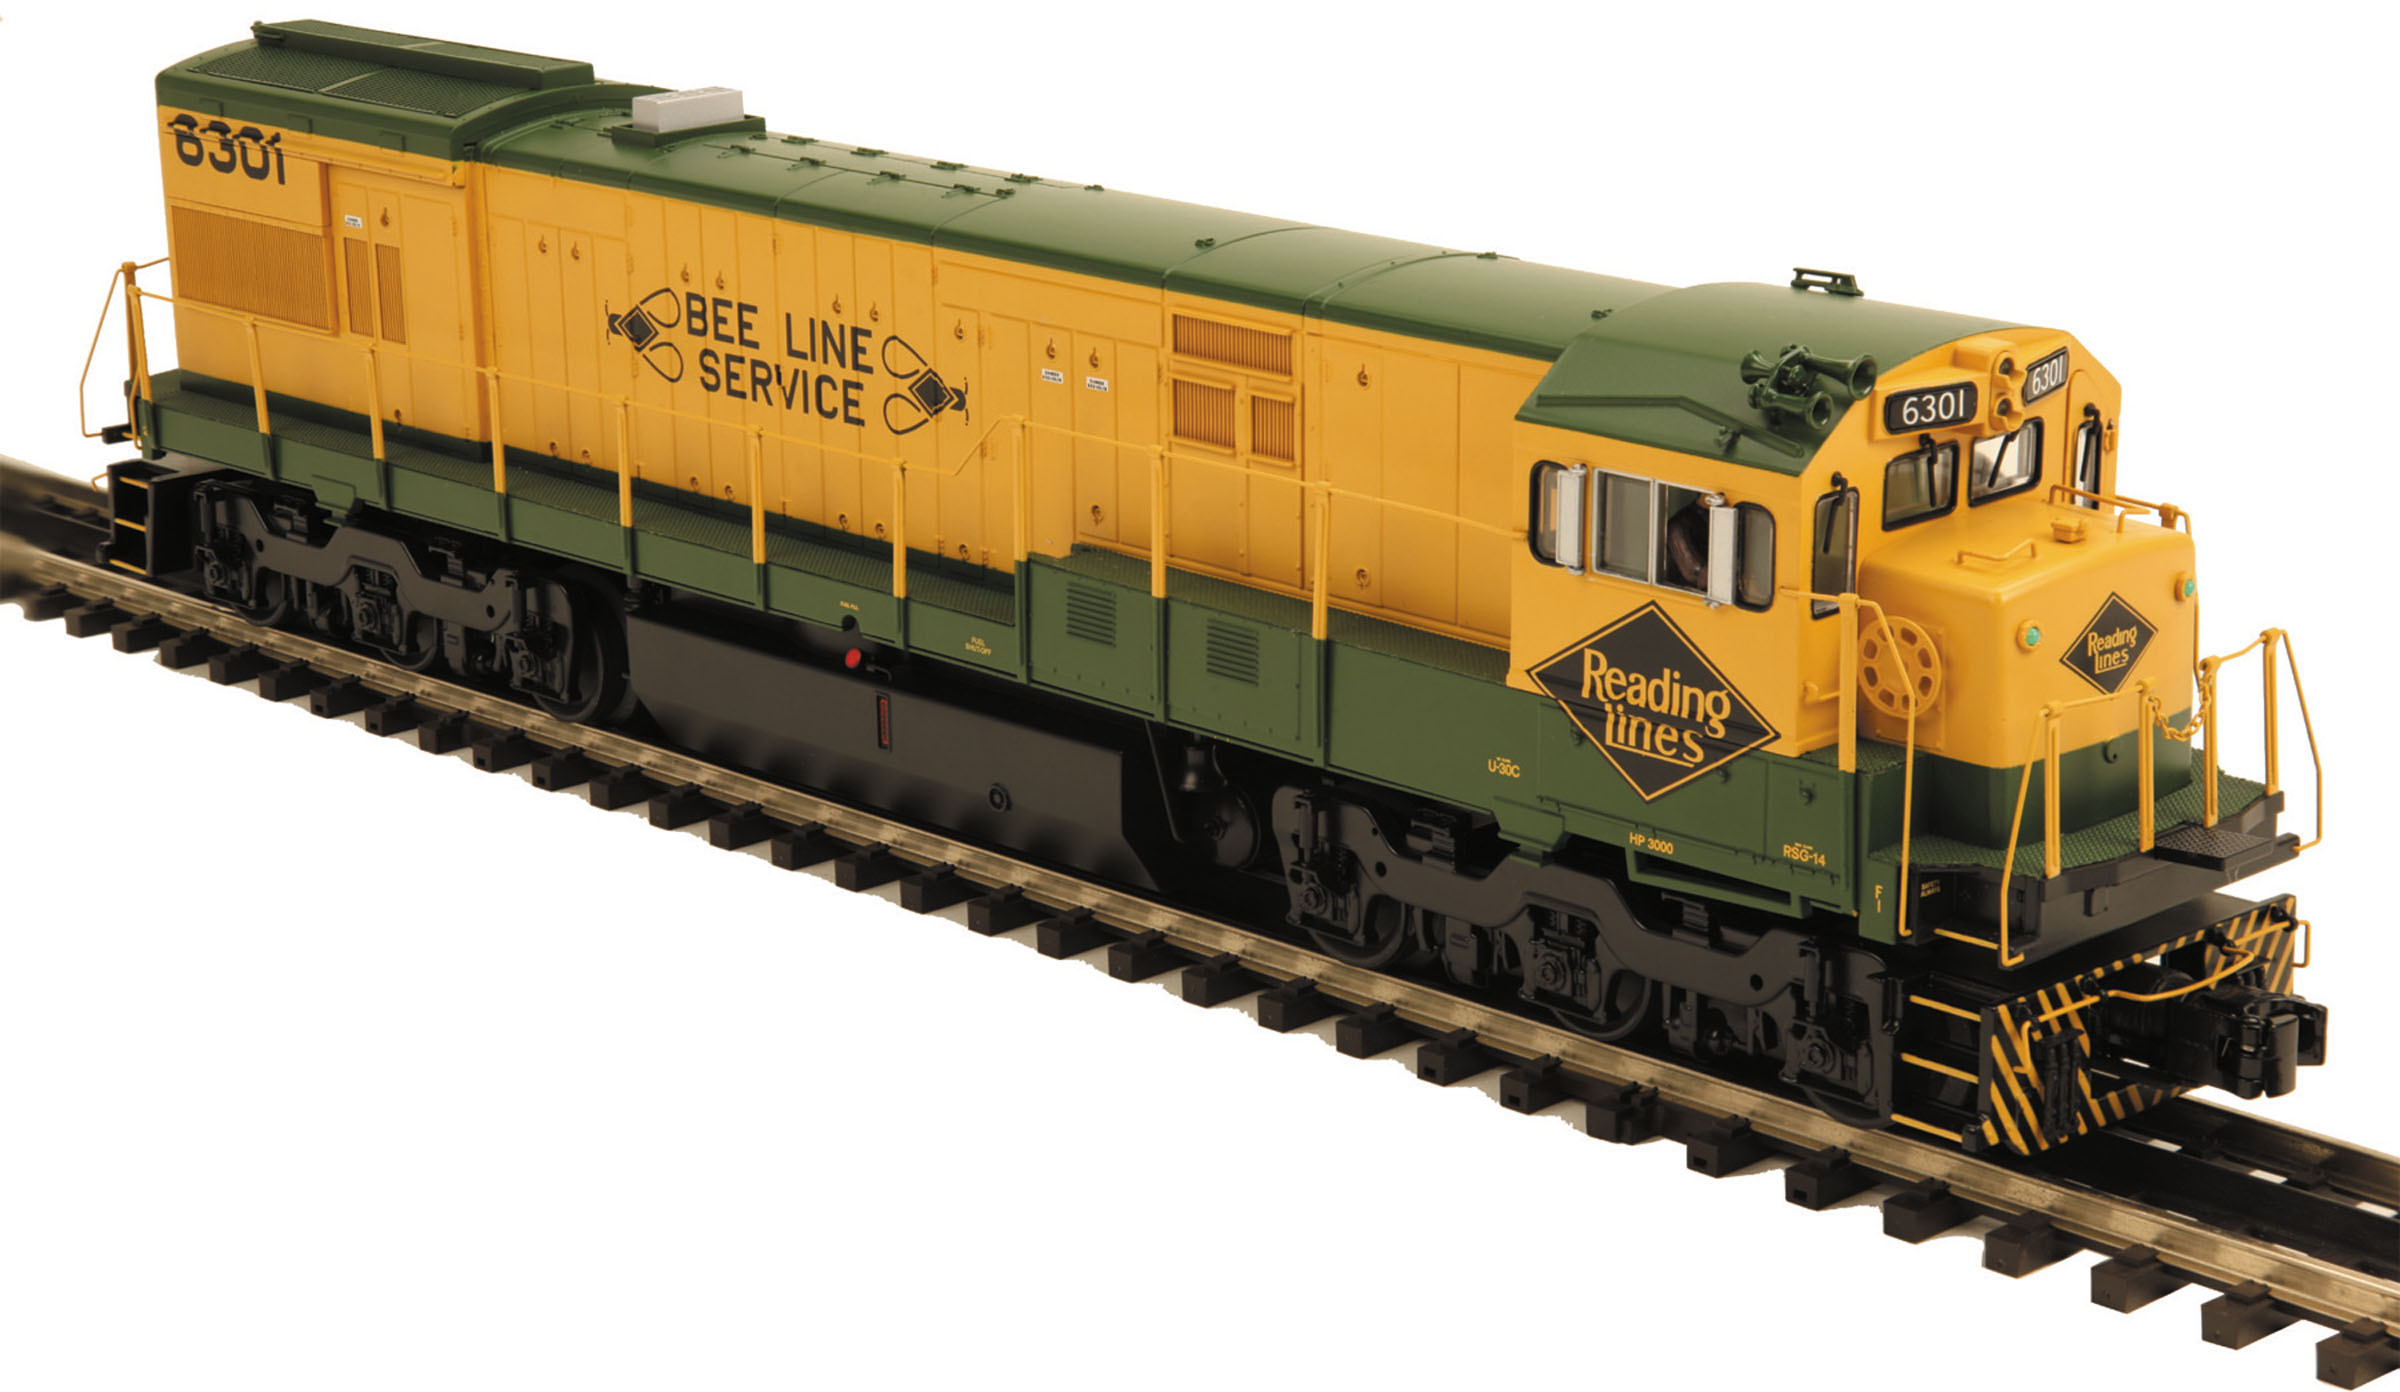
Hi Everyone,

I am in the process of 3-rail scaling this unit. I know there are several posts about this and I have read everyone I could find. The problem I am having is getting the correct height for the unit to attach to my already converted rolling stock. For those that have been doing this conversion you know shimming is part of the process. On this unit, the pilot sits really high. It takes 3 pieces of 0.80 styrene to get the correct height. This just doesn't seem right. Not to mention my 1-72 X 3/8 screws are not long enough. What am I doing incorrectly?

Lastly, I know there are a couple of gentleman that 3D print pilots for 3-rail scale conversion, but I didn't see one for this particular unit. This is my first attempt at 3-rail scaling a locomotive and I would appreciate any advise and suggestions anyone has.

Thanks,

Dave

Last edited by luvindemtrains
Original Post

Replies sorted oldest to newest

Dave, photos would be very helpful here.  Are you talking about 3 pieces of .80 styrene between the top of the coupler box and the pilot opening?  If so, did you factor in a shim between the top of the original swinging truck pilot and the underside of the frame when you “fix” the two together?

If you mount the “as-built” pilot (that you detached from the 3-rail truck) directly to the underside of the frame without a spacer, the bottom of the pilot will probably sit too high off the rails.  This would necessitate quite a bit of shimming on top of the coupler box to bring it down to the correct height.

Also, do you own a Kadee coupler height gauge?  They are extremely useful when doing 3-rail scale conversions.

Last edited by CNJ #1601

Joe,

I appreciate your reply. I believe you meant mount the pilot and not truck but to answer your question I did temporarily mount the pilot to the underside of the frame which is why I needed quite a bit of shimming. What should I do if this is incorrect? I thought this was how you fixed the pilot to the locomotive.

I do have a Kadee coupler height gauge.

Dave

Well? they did make a 2 rail version if you are describing the premier version here?

Product Spotlight - 2018 Premier GE U30C Diesel Engine w/Proto-Sound 3.0 | MTH ELECTRIC TRAINS (mthtrains.com)

So I guess it may depend on what engine and what year it was made to go further?

Most of the later MTH engines had pilot mounting holes in the body. Some did not. I mount the pilots directly to the metal frame on those older ones.

I shim to get the steps to look right and match up with what height the coupler needs to be at. A KD shim gauge is helpful there.

here's my stock 2 rail version:

Last edited by Engineer-Joe

I'll have to get a close look at mine with the shell off. Whenever I convert one to my layout, I try and look at getting the step spacing even, and correct. I also take into consideration the height needed for the couplers. I made my own version of a shim that matches certain pilots. I forget if it's for EMD or GEs.

I simply took the pilot and put it upside down on a sheet of plastic. Drew around the pilot with a fine pencil. Then carved it out.

I took some quick pics of the MTH 2 rail version and the shim I make for others.

DSC_1330DSC_1331

Attachments

Images (2)
  • DSC_1330
  • DSC_1331

Gentleman,

Thanks for your replies.

Matt,

I am trying to 3-rail scale the engine to run on Atlas 3 rail track. From what I understand 2 rail versions won't run well on Atlas 3 rail unless wheel sets are changed out. Is that true?


Joe,

Thanks for the photos. I have tried to create a shim as well. The problem is I need 3 of them to get the correct height on the 3 rail version. It doesn't look good at all. Specifically, the steps are made to be very uneven and railroad workers would have quite a jump to get to the next step. I can see many worker's comp claims going out. 


Joe,

Thanks for the photos. I have tried to create a shim as well. The problem is I need 3 of them to get the correct height on the 3 rail version. It doesn't look good at all. Specifically, the steps are made to be very uneven and railroad workers would have quite a jump to get to the next step. I can see many worker's comp claims going out.

I can't see having to make 3 shims for each. Sounds like you need to get some thicker plastic!

Just how thick are your shims?

I have converted several MTH 3 rail engines. This one, was already set up for 2 rail.

I have several Hi-rail MTH locomotives and the gap in the pilots actually place the steps in the right place (very close). The gap is around 1/8". However, the coupler mounting will require shims to get the right height -- this even applies to the scale-wheel offerings in some cases. My GP35's actually needed two shims to get the right height on the rear coupler. Best bet is to shim the pilot to get the steps right, then play with the coupler mounting.

On the issue of track, my scale-wheel engines ran fine on the club layout on both the Gargraves and Atlas track. Factors that hurt 6-axle diesels on 3-rail flat-top track include:

  • Curves too sharp -- need to be MINIMUM of 36" radius at the center line (FasTrack doesn't qualify). My ES44's (the longest GE's I have) go through fine on the hidden O-72 curve on the primary mainline. Even the Big Boy went through just fine.
  • Uneven track. Situations where the track is twisted will cause problems. You can get a situation where the locomotive pickup rollers ride up on the center rail and the small flanges walk out of the track gauge.
  • Curve-replacement turnouts taken at high speed. The curve arc extends through the frog and the engine will pick it if taken too fast. For testing purposes, I was able to get my scale-wheel MTH BIg Boy through a Ross O-72 turnout successfully. In my YouTube video of the testing, it derailed in spots where the track was uneven (fixed since then).
  • Kinks/Gaps in Curve joints. Enough said.
Last edited by AGHRMatt

So far I have taken the pilot off and created my first shim for it. The thickness of the styrene is .40. I said incorrectly said .60 in an earlier post. Obviously the pilot has to be disconnected from the trucks. From all of the conversions I have seen, only one shim was used between the pilot and underside of the locomotive.

I am using  Kadee #746 couplers for this locomotive to insure it takes my curves with no problems. I tried to temporarily install the coupler using a second gear box for a shim. Even with that the coupler is too high. What am I doing incorrectly?

The third photo shows where I have trimmed back the part of the truck so that it doesn't hit the gear box for the coupler. I apologize I don't know the proper name for that section of the truck. The same photo also shows the holes created for the pilot shim. Am I on the right track? If I could get a step by step run through of the process, this might help.

Attachments

Images (3)
  • iO23kvHeTsa2BfV0wYRZMQ
  • boVa7gHDSpqFW1qReqN5cQ
  • vV2iasFqSMeLa+JhoRynJQ

I must stop here. I forgot about the height of the 3 rail wheel sets. Does that make the engine sit higher?

Here's a 3 rail engine I converted that uses a shim for the pilot  and one for the coupler. It is now 2 rail.

I have many different thicknesses of plastic on hand. I make G scale shims sometimes that are at least twice as big! I do have to stack plastic in some cases.

To save time on these, I made a mold and cast the pilot spacer with spare plastic resin from other projects. The coupler shim is hand made for each engine. It should be a complete box. I skipped that for something easy and quick. My engines are in consists and I barely get to see the ends most of the time.

DSC_1333

Attachments

Images (1)
  • DSC_1333

So far I have taken the pilot off and created my first shim for it. The thickness of the styrene is .40. I said incorrectly said .60 in an earlier post. Obviously the pilot has to be disconnected from the trucks. From all of the conversions I have seen, only one shim was used between the pilot and underside of the locomotive.

I am using  Kadee #746 couplers for this locomotive to insure it takes my curves with no problems. I tried to temporarily install the coupler using a second gear box for a shim. Even with that the coupler is too high. What am I doing incorrectly?

...

My recollection is that the pilot gap on MTH hi-rail locomotives is about .120-.125 so it would take three .040 styrene shims to make up the space (I think Evergreen makes up to .125 styrene sheets).

You CAN use Kadee #746 long-shank couplers for more swing, but you'll need to shave about 1/8" off the back of the box to clear the truck's coupler mount (which applies to the 2-rail versions of the locomotives as well). You'll get more swing, but it won't look right. On MTH diesels, the appropriate coupler is the Kadee #806 or #743 short shank/short box coupler. On some MTH engines, even shaving the box won't work (GP35 rear truck and SD45's come to mind). With the Kadees installed, they will work on 36" radius (O-72 curves) but there are a couple of things to be mindful of:

  • The end of the locomotive swings out from the center of the curve as does the end of the coupled car. So you have to watch out for coupling long cars directly to the locomotive. An 85-foot passenger car with standard couplers will bind and possibly derail. In practice, when I ran at the club, I would typically couple a 40 or 50-foot car to the locomotive. An Atlas 2-rail 89-foot trailer flat has long-shank couplers (as do prototype) with extra swing and are the exception.
  • Long-shank couplers have some vertical play, so proper height is important so they don't ride up/down and de-couple. This was problematic with my Atlas 89-foot flats out of the box which had plastic long-shank couplers that flexed when you have a few of them in tow. I replaced the plastic couplers with Kadee 746's and problem solved.

Also, make sure your trip pins properly clear as some coupler trip pins hang low enough to snag the center rail which can lead to some interesting mishaps. Fortunately, the Kadee height gauge has a clearance gauge for this.

Last edited by AGHRMatt

Engineer-Joe,

Yes I am constantly checking it with rolling stock and the height gauge.

Matt,

Plenty of information there. Thanks for taking the time to explain. That's about what I though with the shimming. I would rather use one single shim but am concerned about how this will affect the steps. Also, I discovered that I would have to shave off part of the gear box but wanted to make sure it didn't disrupt the actual coupler. This engine would run on my outside loop which has a minimum 0-72 curve. I have #805's on hand but will try the #806 as you have suggested. One of the main reasons for this conversion is so it will "look right", so I want to do everything I can to accomplish that but also maintain a good running unit.

Add Reply

Post
×
×
×
×
Link copied to your clipboard.
×
×