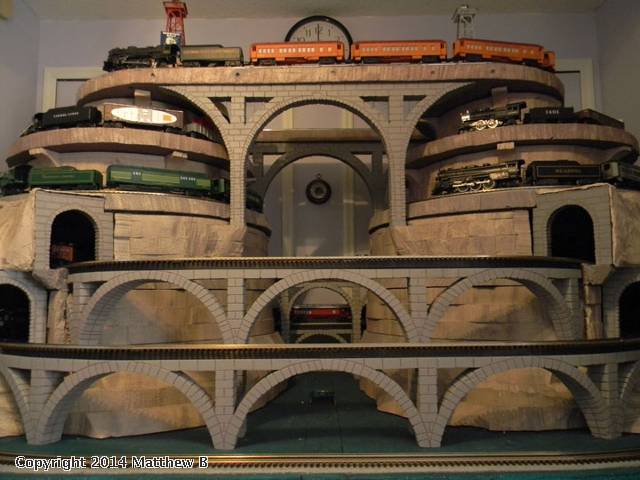
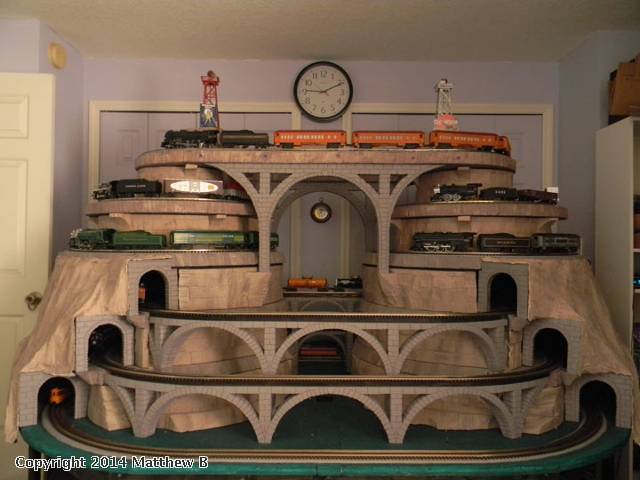
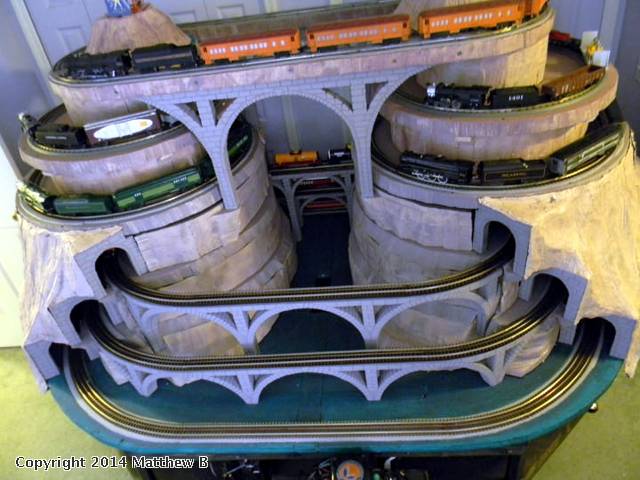
Editing this thread to include the transition to a year round display. Follow the progress in later posts below...


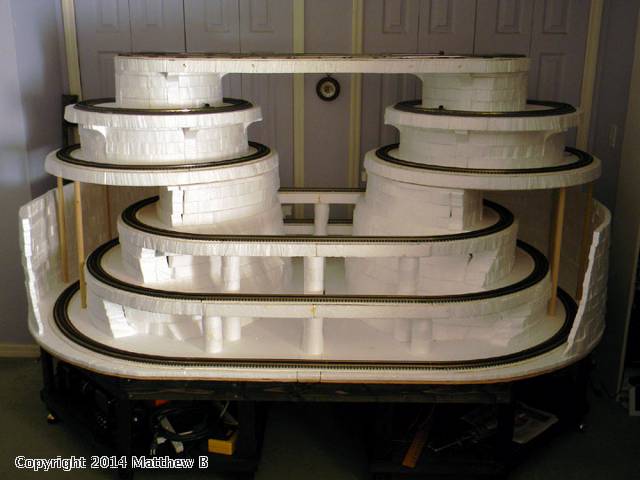
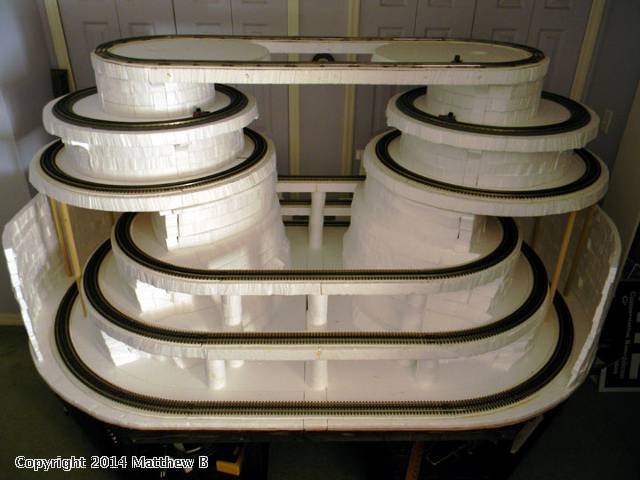
This is a the first mockup. Now I'm going to take it down tear by tear. As it comes down to be moved into the garage I'll be making adjustments and creating power conduits. Then I'll make the new pedestal in the garage and build back up to test everything before it's installed in front of our sliding glass doors in the living room.


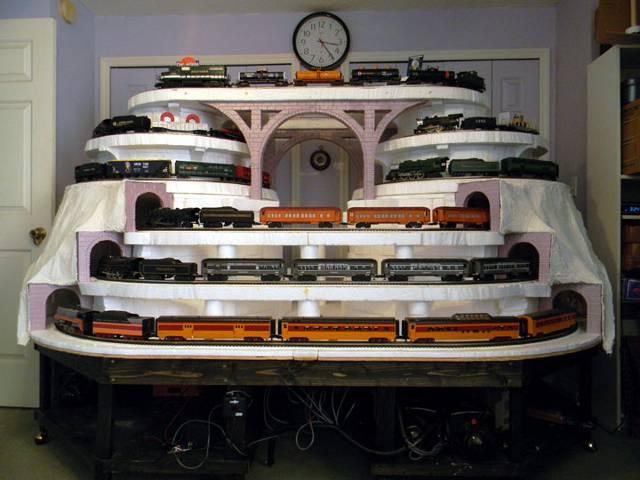
The display currently is 8' x 5' x 38" high. for Christmas I'll chop down the 2nd and 3rd tears so the display will stand 30" high.


Last edited by Matthew B.
Original Post

Replies sorted oldest to newest

Yes Mike I hope to place a 6' tree in the center of the display. I'm not sure how it will work out but I hope there'll be an illusion of the top loop running in the tree.
 
Originally Posted by mike.caruso:

Very nice, Matthew.  Looks like something you would see in a department store or hardware store window.  Are you intending to place a tree in the center or is it meant to be a stand-alone holiday scene?  


- Mike


Before the display could be moved upstairs we needed to make a new cart. Last years cart was about 7’ x 4’ and 27” high Because we are now supporting a 54” loop at the base and the height will increase by approximately 8”. We started from scratch. The only things we’re able to salvage are the legs and ball casters. The new cart will again use 14 ball casters and measure 8’ x  5’ x  20” high. From bottom railhead to top railhead the display will be approximately 40”


Here’s a picture of the new bench work while we were creosoting it (ebony mimwax). The frame is upside down at this point. It’s made of two pieces that will be joined together with two 1” x 4”s later in assembly.

When working with dark colors I tend to stain everything that is visible from any angle. The reason is because after the piece is completely assembled there always seem to be a few spots that stand out I didn’t think would be visible and didn’t bother to coat. Light seems to magnify these imperfections and it will nag at me every time I see it. So I jam the brush into every crevice attempting to get the most complete coverage possible. I know something will be missed but at least there won’t be as many white spots had I not tried. A Sharpy is a great tool after assembly.


The grid work for the bottom shelve consists of 2” x 2” cross members with a dado joint at the center junction and 1” x 2” joists. The grid work is recessed ¼” below the outside frame to make sure the shelve will be flush when I lay down the ¼” plywood. Some people like a lip around their shelving. But the shelve only being 6” off a carpeted floor I’m not too worried about damage to anything falling off. Besides that’s a pretty low shelve and with everything flush it will make it easier to access what ever I deside to stow on it.


Now to disassemble the Christmas Display and put the decorations away, so I can get to the wheels.

Last edited by Matthew B.

I use 7/8" dowels out side and between the track. They're screwed into 1/4" plywood above and Velcro is used to hold them in place below. On the inside behind the Styrofoam and along the inside track I use Folgers Coffee canisters. They measure 6 1/2" tall, which pretty much allows clearance for anything I want to run. 

In moving all the pieces of display upstairs alone, the most challenging task was in getting the 5’ X 8’ table top that forms the base of display through a narrow hallway and around a china cabinet. I wrapped the table top in moving blankets to avoid damaging the Styrofoam and track and protect the hallway’s walls. I made a handle by cutting out a 6’ long 1” x 4” and attached it to the bottom grid work of the table with C Clamps making sure the clamps were as close to cross members on the grid as possible for the best structural integrity. This made it much easier to lift and maneuver around obstacles.


Now that I've accumulated all the pieces of the display in the upstairs bedroom I'll stack them all on top of the cart for orientation and take a few days to contemplate how I want the final display to look. I'm haven't quite decided whether I want to stack the individual tiers on columns to open everything up and the trains can be viewed from the front as they move around the back of the display. Or if I want to close the display up creating a mountainous illusion with tunnel portals.


Last edited by Matthew B.


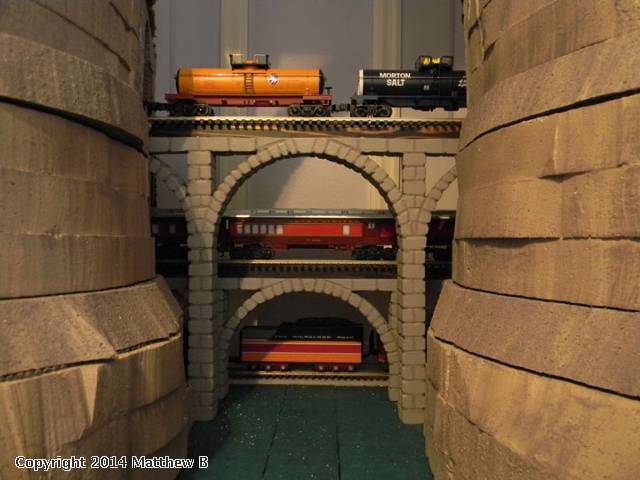
Getting ready to start painting. I’ll start from the top down cutting away any non structural Styrofoam as I go. I plan to encase the upper bridge crossings in plywood. I think I'm going to cut away all the 2" Styrofoam from the four lower crossings, laying 1" X 1" under the track and support the bridges with arches similar to the upper supports. I'll use four piers instead of the current three so the center view will be framed to look through to the trains crossing the gorge at the back of the display. I’m thinking of using a patterned dark brown stained glass for the river with flat ribbon LED multi functional lights underneath to simulate a moving current and maybe even a small targeted orange spot light as a simulation of a moon reflection.


Phase II complete, the display now measures 8' X 5' x 7' high from the floor to the top of the beacons.


Phase 3 will include encasing the Styrofoam of the upper bridges in 1/8” plywood, the addition of a river and completing the four bridges on the lower tiers. I plan on cutting away all of the 2” Styrofoam across those spans and replacing it with 1” oak the bridge supports will be archs to compliment the bridges at the top of the display and allow a more unobstructed view to the trains as they cross the gap along the back of the display.

Last edited by Matthew B.
Post
The Track Planning and Layout Design Forum is sponsored by

AN OGR FORUM CHARTER SPONSOR
×
×
×
×
Link copied to your clipboard.
×
×