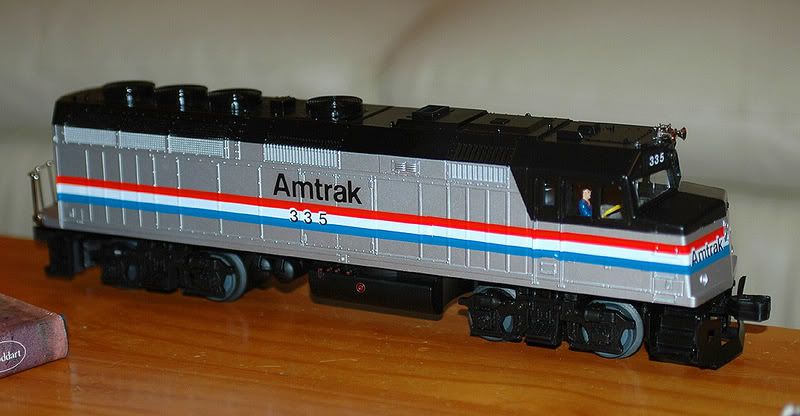
I'm repainting an MTH FP-45 Amtrak engine in the Kool-Aid design for a friend. I'm trying to remove the stripes, but it's very tough getting them off! I've tried Scalecoat wash-away paint stripper and Polly S easy lift off (which dissolves paint on Lionel and MPC engines right before my eyes) but those stripes don't want to come off! Does anyone have any suggestions on how to remove these stripes?
Replies sorted oldest to newest
Bead blasting.
MTH is known for using paint that is, well... durable. It's been well documented over the course of MTH's history that their paint is very difficult to strip using conventional solvent or other liquid-based methods.
As gunrunnerjohn stated, bead-blasting is your best bet.
I tried stripping an MTH shell with several solvents, it laughed at me. It stopped laughing when I hit it with the beat blaster. ![]()
Now, how would I go about bead blasting? That doesn't seem to be something I can do at home. Do I take it to an auto body shop? Is there some other alternative that I can do by myself?
You need to find someone with a bead blaster. I'm fortunate in that our club has one, as well as a local hobby shop. It makes short work of pretty tough paint, never seen anything it won't take off.
I found that MTH uses multiple coats of clearcoat above the paint. I also found that using CA adhesive remover will remove your stipes. you need to use it SPARINGlY or the rest of the paint will come off too!
I used a microbrush soaked in the remover. I gently rubbed the area I wanted removed and the logos came off in a few minutes[ it took a minute for the ca remover to eat through all those layers of clearcoat]
This is the stuff that I used:

Bob Smith Industries "Un-Cure"
BTW- The MTH Railking FP45's are out!![]()
![]()
Aha! CA adhesive remover! Perfect! I was sanding down the stripes with nail files, which did take some of the paint off, but it was pretty tedious going. I will definitely try using CA adhesive remover! Thanks!
Yep, and Acetone is a whole lot cheaper! ![]()
Drat! And I just bought the stuff from the hobby shop! Oh, well - they need the money over there more than Home Depot.
Isn't CA adhesive remover just Acetone?
Yep, and Acetone is a whole lot cheaper!
Funny how I tried acetone and it didn't work.![]() Yet this CA adhesive remover did.
Yet this CA adhesive remover did.![]()
Found on a web search.
Acetone, commonly found in nail polish remover, is a widely available solvent capable of softening cured cyanoacrylate. Other solvents include nitromethane, dimethyl sulfoxide, and methylene chloride. gamma-Butyrolactone may also be used to remove cured cyanoacrylate.
800 grit wet/dry sandpaper.
800 grit the edges of the stripes and primer. Mask and primer if you are not painting the whole body.
Sounds like he's repainting the whole engine.
Yes, I am repainting the whole engine (except for the top) in these garish Kool-Aid colours. The shell is silver - it's not painted, that's the colour of the plastic. The stripes are not only painted, but raised, so they have to be removed or else they'd show through the paint. I, going to try the un-cure first, then sand off whatever it doesn't take off. I find that nail files work pretty well for sanding, especially in tight areas on the shell. It's interesting the PRR Horseshoe Curve found the acetone wasn't that effective! Thanks again, guys!
Good Luck, I went through this about 2 months ago with a MTH Amtrak F40-ph. I ruined the first shell. I was lucky a forum member had a yellow caterpillar shell I was able to prime and paint without the hassel. You can try rubbing alcohol on a magic eraser sponge to remove the stripes. I did this to remove the white caterpillar logo on my engine.
Hence my recommendation for bead blasting. It really works very good and will remove all the raised paint ridges.
I'm happy to report that the CA remover did work, but it was still tough slogging! Those aren't just stripes - they're painted layers that cover the whole shell. The ridge I felt between the red stripe and the silver wasn't cause by the stripe, but of the silver paint, which was applied last. It took several tries to get most of it off, but I stopped when it started to eat into some of the rivet detail. I'm tackling the next side tomorrow, with less CA remover, and more elbow grease (sandpaper and nail files).
BTW- The MTH Railking FP45's are out!![]()
![]()
I wouldn't count on a lot of detail changes on the Railking line, if you want extra detailing, that's normally at least the Imperial and more likely the Premier products.
You have a lot of patience there, Winnipeg train guy. I've never gotten into a stripping project that complex. I sure hope the whole painting project comes out well for you. Can you show us a photo when completed please?
I most certainly will post a photo of the finished shell, but it's going to take a while. I've spent far less time painting rooms in my house! I'm doing this for a friend, and he is paying me, but he and I had no idea what the job entailed. I'm accustomed to slapping on a coat of Polly S Easy Lift Off or Scale Coat wash away paint remover and letting that stuff do all the work. This job, to say the least, is challenging! I only wish my buddy had the Catepillar or Home Depot shell instead of this one!
I've repainted Plenty of MTH Shells and soaked None of them. Sand the lines with 3m sandpaper 800 grit wet and you'll not lose any details.


Beautiful work, SPSF! That's what I decided to do a few hours before I read your post! I didn't like losing the rivet and brace detail, and the CA remover gave uneven results that required sanding smooth anyway. Thankfully, I only did this to one side. I cut small strips of sandpaper just wide enough to fit in between the braces and sanded down the stripes on the other side just enough to feather them. Then I took a smoother grit to feather it further. It's like working on a tiny, tiny piece of drywall. So far, so good on the other side!
Thanks. I removed a few rivets in order to make the decal fit better on the C part of the yellow/black stripe of the warbonnet. I also used microsol to get the "Santa Fe" lettering to fit over the carbody lines.


