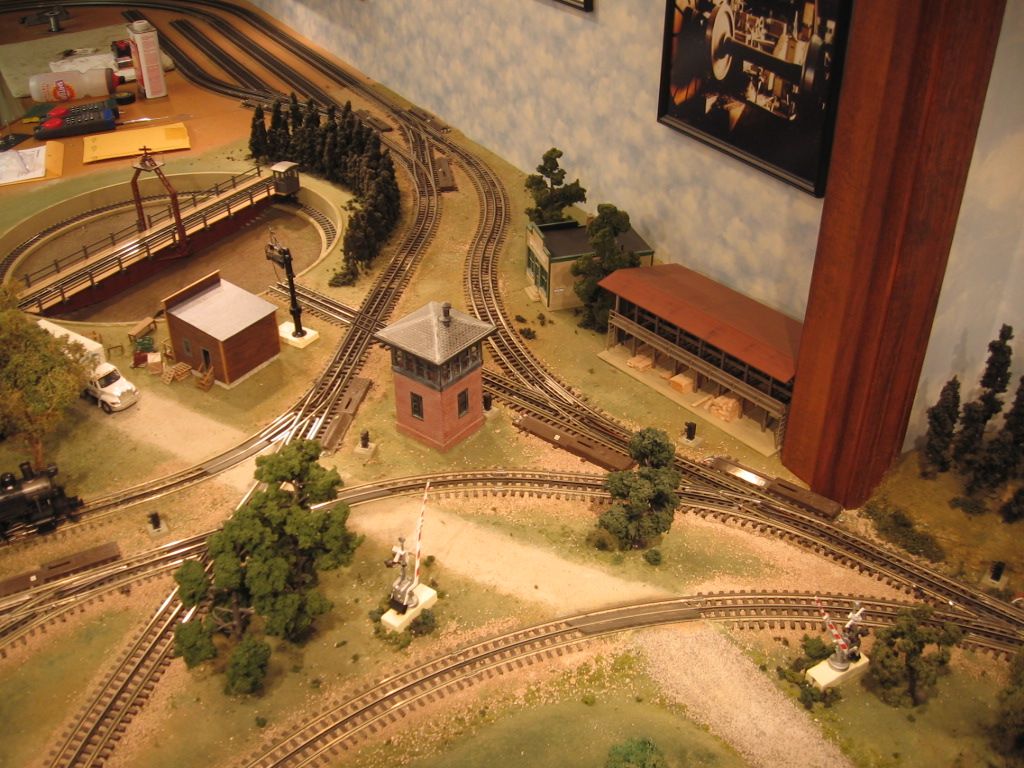
Hi All,


I'm writing down my material list for the new layout and at first I planned on using all 1x4 pine. That came out to be about $250, I then looked at 2x4 doug fir and came up with $87 and finally 2x3 at $62. My question is what does the group recommend for a typical permanent layout when it comes to materials? I want to build it right but at the same time if I can save a few bucks I'm all for it.


Thanks,

Sam


Original Post

Replies sorted oldest to newest

We used 2x4's because they cost half as much as 1x4's. Did spend more $$ on better plywood though because the cheap plywood don't stay flat. We have climbed all over the layout and it won't move an inch. It does leave a mark when you walk into it or hit your head on the benchwork. 

So 2x stock it i, thanks guys.
 
What grade of plywood did you use? BC or furniture grade birch/oak?
 
Originally Posted by Laidoffsick:

We used 2x4's because they cost half as much as 1x4's. Did spend more $$ on better plywood though because the cheap plywood don't stay flat. We have climbed all over the layout and it won't move an inch. It does leave a mark when you walk into it or hit your head on the benchwork. 


My 2 cents, I buy premium 2X4s and 2X6s then plane down to 1 1/4, 1 3/16, 1 1/8 and 1-inch thick base on use.   And also rip to width.  So I use actual 1 X 3 1/4 where most use purchased "milled" 1 X 4 which is actually less then 3/4 X 3 1/2.  This gives me nice true and even dimensioned lumber.  I fashion legs from true 1 X 4 and 1 X 6 assembled into a L shape which are tapered.  Also use BC grade 3/8-inch Ply for triangular gussets.  My table is built into sections (modular) for "portability."  In fact my sections are still lying around upstairs since last move. 

2X4 framing

1/2" FIR underlayment

1/2" homasote


If you are using 1x4, get the finger jointed primed pine, not regular #2 pine with knots.  I've built layouts in my garage and had to transport them to the job.  Hence weight and maneuverability of the sections was a factor so I used the 1X4 FJP.  Framing grade 2X4s are cheaper than supposedly finish grade #2 pine.  So if you can find some nice kiln dried 2X4s for a home layout, go for it.   I hope you build it.  Have fun.  


Originally Posted by Laidoffsick:

We used 2x4's because they cost half as much as 1x4's. Did spend more $$ on better plywood though because the cheap plywood don't stay flat. We have climbed all over the layout and it won't move an inch. It does leave a mark when you walk into it or hit your head on the benchwork. 

I agree with this. The money needs to go into the surface. Your house is made of 2x4s... surely they can hold a 25 lb locomotive. I also doubt 2x3 vs 2x4 matters, pick whichever pile has fewer knots and warped boards.

2x3 or 2x4 sides depends on how far apart the legs are.  I use 2x3 legs if I can find good ones otherwise 2x4. I know some folks who use two 1x4 pieces to make a leg.  I believe Lionel did this with some of their factory layouts.  1/2" B/C plywood tops are a lot lighter and easier to transport and install than 3/4"  I have never had a problem in 60 years of building layouts.  If I do 4' x8' tables I generally add a leg right in the center.

A lot depends on the "I want ot stand on it" part.  If that's you (and many mention that), then heavier wood is better for strength.


Obviously if you're building a large layout and standing on it is unavoidable to get to some areas once it's done, then that's a factor you should heavily consider.


The height of the layout can alter your decision as well.  Something quite stable at a small height may not be so much when it's taller.


I learned from my dad using 2x3 legs and 1x4 sides to make 4'x8' tables to support a piece of plywood.  We went with 3 feet for the table height.  Used 6 legs and and two additional 1x4s underneath(one on each side of the middle legs if I recall, though maybe we used just one there) to break the table roughly into 2 4'x4' squares.  I would never try to stand on this though.


More recently, I went a little up in the lumber used for the sides and tried out 1 1/4 x 4, I forget the technical name for the grade, but it's in the better finished section of the home store, not the racks of knotted hockey sticks (i.e., curved) section.  I used these to make my modular tables I had in my apartment and moved to my house.  These tables are only 2 feet wide each, anywhere from 4 feet to 7 feet long.  I raised the height a little to 42 inches.  I wouldn't stand on these either, but basically that's still because of the 2x 3 legs and the height.


-Dave

Couldn't agree more.....you can always under build, but can't  really over build!
 
Originally Posted by wb47:

2x4s and 3/4 inch sanded one side plywood topped with homosote.  Your basic farmer construction technique.  Overbuild and overbrace.


IMG_0665

IMG_0777

IMG_0798

Attachments

Images (3)
  • IMG_0665
  • IMG_0777
  • IMG_0798
Last edited by Former Member
Originally Posted by Paul Edgar:

I went with 2x4 for the legs and 1x4 for everything else.  I used 9/16ths sheathing for the table top(plywood with one side finished the other rough) with 1/2" homasote.  You can dance on my table and I weigh in over 300lbs.


Paul Edgar

Paul!  You definitely have to demonstrate your dance routine at our next NCHR meeting!  I know you're a musician but never knew you could dance too!  Do you and Liz do a duet around the mountain on the layout??!!


Anyway, I used 2X3 lumber for framing and 2X4's for legs that I positioned about 12" from the frame's edge so that they wouldn't be kicked by people walking around the layout.  Against the wall the framing is attached to the wall studs.  I also used 3/4" plywood for the top.


P5111356

P5111355

P6081436

Attachments

Images (3)
  • P5111356
  • P5111355
  • P6081436
Originally Posted by Laidoffsick:
Couldn't agree more.....you can always under, build but can't over build!
 
Originally Posted by wb47:

2x4s and 3/4 inch sanded one side plywood topped with homosote.  Your basic farmer construction technique.  Overbuild and overbrace.


"Over-building" is fine for a "permanent" layout, but if you want the layout or layout portions to be potentially movable, don't build it any heavier than necessary.

Thanks Brian - and good idea!  You learn something new on this forum every day!


How do you keep the sections of plywood together?  (Do they float on the underlaymate or you have to screw them down to prevent warping over time?)


Also is the foam board glued to the plywood or just layed on top?


After the underlayment and foam board do you still use a road bed under your track?


How do you attach the track to the foam board? - the only layout I've built in the past had foam roadbed on plywood and I still used screws to keep the track in place. 


Sorry about the twenty questions routine but I'd like to replicate your technique.  I'm hoping to get started this winter on my permanent home layout and I'm soaking up ideas like at thirsty sponge!


JZ

No need to be sorry JZ.  Here's what I do.


I screw down the plywood in each of the four corners, one screw on each side half the length from each end and one or two at the center of the sheet.  At that point if there is any warping I'll add a screw to that spot.


The styrofoam is fastened to the plywood with tubes of Liquid Nails for Projects with a calking gun.  You could also use wood glue if you like.


I use Woodland Scenics Foam Roadbed under the track.  I attach the foam roadbed and the track with two-sided carpet tape.  It really holds well and it's easy to pull it up to make changes.  Just make sure the surface is clean.  I've had the carpet tape in place for 10 years now without a track problem.  I'm going to try the tape to attach track ballast on the side profile of the tracks.  This method was suggested to me by the late Kirk Mitchell of JusTrains in Delaware.  He also suggested, for using Atlas O track, to attach the feeder wires into the rail joiners and then join the track together, locking the wire against the rail.  I tried it using 16 Ga. wire.  It was a bit tedious at first, but once I got the hang of it I was really surprised at how sturdy and tight the connection is.


At the apex of the curves I'll use one screw to stabilize the track placement.


Here's some early construction pictures of a cross section view of the benchwork.  The framing, underlayment, plywood, foam and roadbed. 


P2263585


 Here is the track with the two-sided carpet tape under the tracks.  You can see it sandwiched between the track and roadbed in the lower right of the picture.  It's also holding the roadbed.  The track doesn't move anywhere and the trains are quiet.


On the upper levels I used 1/2" styrofoam on top of 1/2" plywood.


P2263578

Attachments

Images (2)
  • P2263585
  • P2263578

Hi all,

Thanks for all of the tips. I decided to go with 2x4 stock, it looked better then the 2x3 at the lumber yard. Here are a couple pictures from yesterday which was day one of construction. Today I hope to have the legs braced and the plywood down.


For some reason my pictures are not coming up right side up even though they are on my desktop, sorry

Thanks,
Sam
20130921_192304
20130921_192208

Attachments

Images (2)
  • 20130921_192304
  • 20130921_192208
Originally Posted by Ace:
Originally Posted by Laidoffsick:
Couldn't agree more.....you can always under, build but can't over build!
 
Originally Posted by wb47:

2x4s and 3/4 inch sanded one side plywood topped with homosote.  Your basic farmer construction technique.  Overbuild and overbrace.


"Over-building" is fine for a "permanent" layout, but if you want the layout or layout portions to be potentially movable, don't build it any heavier than necessary.

In his original post, he was asking about a permanent layout, not a portable or moveable layout.

Post
The Track Planning and Layout Design Forum is sponsored by

AN OGR FORUM CHARTER SPONSOR
×
×
×
×
Link copied to your clipboard.
×
×