Hi guys,


I was asked to share my information regarding my use with Alclad2 on model Budd and Pullman Standard passenger cars.  I really enjoy this process and am always glad to be of help anytime.   I've been experimenting with Alclad2 since the mid 2000s and along with several other modelers have been providing Alclad's owner, Mr. Tony Hipp, with feedback. The steps I've used apply to N, HO, S, and O scales.  Originally modelers complained of Alclad2 finishes appearing too dark, when compared to the prototypes.  After some experimentation, I discovered that the key change required was to switch from black basecoat colors to gray basecoat colors.  The basecoat is the foundation used underneath the Alclad2 metalizer. 


I realize that this is an O-Gauge forum, but the purpose here is to show the Alclad2 application process.  I hope you don't mind. The unit below is a past project that I did for a friend of mine, a Santa Fe and BNSF modeler ( I've forgiven him for that, LOL!)

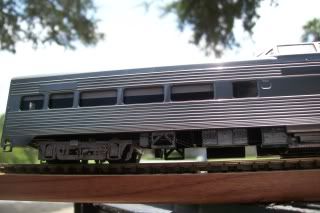
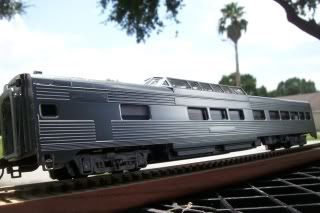
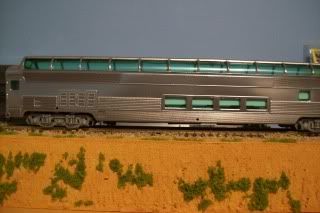
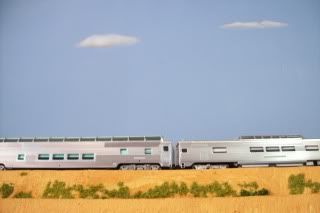
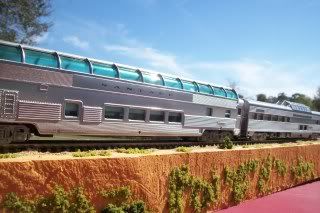
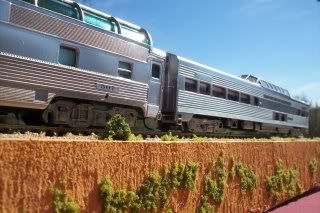
A. Subjects : 1980's production HO IHC dome car and an HO Bachmann full length dome car.  The models are based on prototype Santa Fe units.
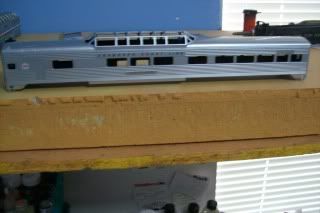
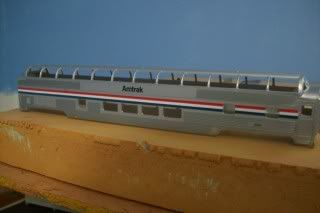


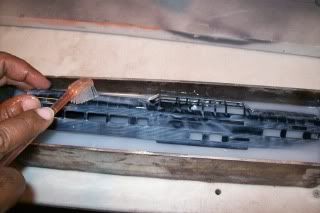
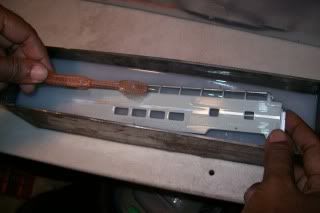
1. Paint Stripping.  After removing the shells from their chassis', they were immersed in a 91% isoporpyl alcohol bath.  After soaking approximately 5 to 10 minutes, the factory silver paint lifted off as I scrubbed thoroughly with a toothbrush.  After stripping, the shells were washed with a generic version of Dawn dish washing liquid.

NOTE: You should not use soaps that contain lanolins, aloe, or other strong moisturizers as that could weaken the adhesion of the paint that you will be applying on the shell later.  
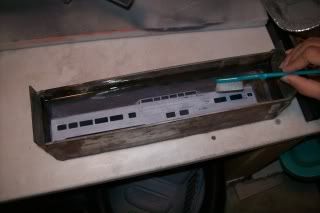


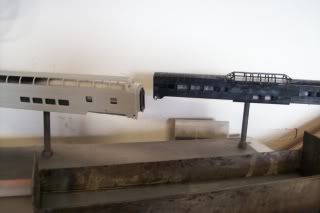
2. Basecoat Color (foundation) -  Scalecoat 2, New York Central Light Gray. Thinned 50%-60%.   Airbrush Paasche VL.  Needle and aircap sizes: #3 (medium).  Air pressure at tip: 25psi.  Spray Distance to shell:  3" inches. Total number of coats: Two, medium wet.
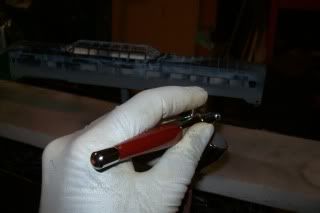
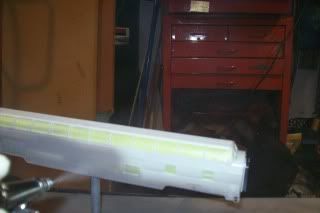


3. Critical stage: Gray finish must be SMOOTH and GLOSSY!*  After drying; check the shell for dry or rough spots. If mistakes are discovered, this is the time to fix them. Wet sand dry or rough spots. Clean and apply another coat over shell if needed.  When finished, flush out & clean airbrush with lacquer thinner.

*For those not using a high gloss gray, you can apply Alclad's High Gloss Clear Base #303. The foundation must have a smooth high gloss surface to obtain the realistic effect provided by Alclad2's natural metal finish
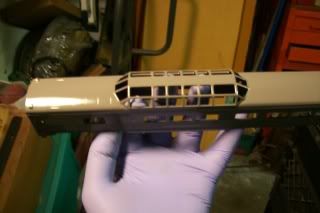
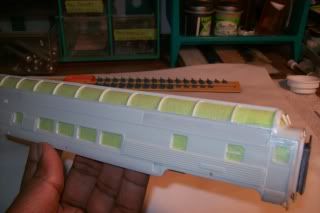


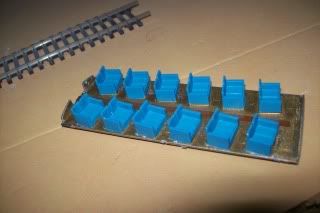
4. Interior:  As the basecolors cured, I took the molded plastic seating modules that were inside the dome sections and hand painted them with Polyscale acrylic colors based on photos I saw from a Santa Fe modeler .
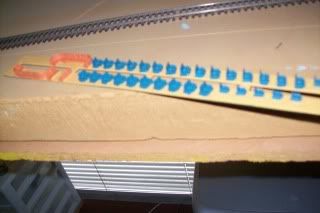


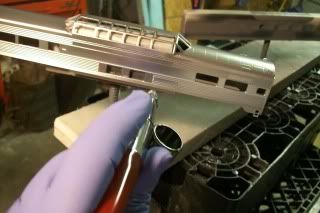
5. Alclad Application - Formula: #107.   No thinning.  Airbrush Needle and air cap sizes:  #1 (fine).  Air pressure at tip: 15psi.  Spray distance to shell: 2" inches. Number of coats: 3.   FIRST, I spent a minute testing myself on the back section of a scrap FP45 shell to check that my airbrush was spraying well and that my distance/stroke speed were good. This step is a headache preventer as I discovered that I needed to increase my speed, slightly.

5a. Test Check:
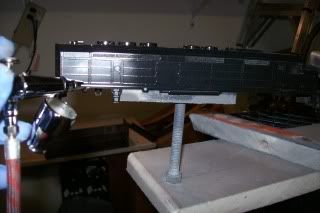
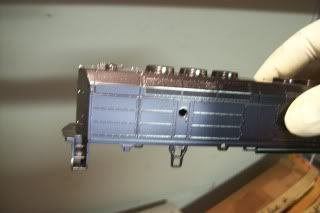


As you apply the Alclad2.  --->  Relax and enjoy! (I had my smooth jazz tunes playing)  Maintain the airbrush parallel to the surface. Spray horizontally in a LIGHT MIST COAT pattern, never "wet it".  For the sides and roof, stroke your airbrush as if you were painting with a modeler's paint brush.  For the ends, stroke vertically, also in mist coats.  DO NOT PILE IT ON.

TIP: ( Wearing an appropriate respirator) As you spray, keep your head within 10" of your model, but over it, and either to the right or left of the airbrush so you can monitor your speed and distance.  Some modelers have a tendency of standing directly behind the airbrush while spraying and not clearly seeing if they're getting too close or far.  (yes, been there, done that!)  Wait a minimum of 5 minutes between coats if the temperature is over 75F. Wait longer at lower temps. Check your shell(s) carefully for any areas missed; and stroke over on the next coat if needed.  Flush out and clean your airbrush upon finishing

Note: Your 1st coat will appear almost invisible but don't worry, it's there.  Your 2nd coat will be quite noticeable and you should be smiling by your 3rd mist coat.  Practice this on a small scap of plastic first.  Compact disk cases are excellent for airbrush practice.  With practice, you'll be able to properly cover passenger car shells with just 2 mist coats of the natural metal finish.

7. Sealing/Toning down sheen -  Instead of Future Floor Finish,  Testor's Acryl or Pollyscale clears, I applied *Alclad's NEW waterbased clear; #ALC 600. Thinning: None. Airbrush needle & aircap sizes #3 (medium). Air pressure at tip 20 psi.  Distance 3" inches. Number of coats: One:


In addition to sealing the metalizer and toning down the sheen, the clear will provide the foundation for decals.  After testing my airbrush on the scrap FP45 shell, I applied the Aqua Clear to the shells.  I was impressed with how finely this atomizes and smoothly lays on top of the Alclad finish. IMHO, this performed superior to the clears I've used before, including Future.  However, upon finishing the airbrush should be cleaned asap. I used a mixture of distilled water and alcohol to flush out.

* If you prefer a solvent based clear instead of waterbase, you can use Alclad's ALC #310 High Gloss Clear.

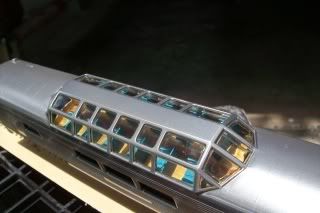
The sheen toned down beautifully, imho, to a natural metal  appearance of highly polished, reflective stainless steel. Only one coat was applied since this will be the foundation for the Santa Fe decals. Afterwards, 1 to 2 more coats of clear will seal the decals and tone down the sheen more.  These are shots before re-assembly:
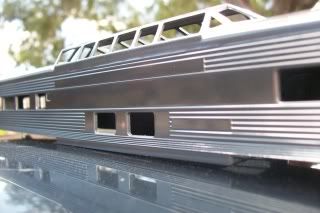
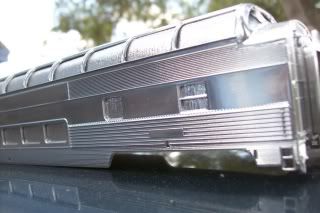


9.  Window Tint:  ( only the full length dome's glazing was tinted)

I applied Alclad2  #408 "Armored Glass" to simulate the green tint on the windows.  I tested a couple of transparent scrap pieces. I then airbrushed the tint on the "inside" of the one-piece window sections (upper and lower).  When I first applied the tint to the lower piece,  it hazed up.  However, it leveled out nicely with a 2nd coat.  Tony Hipp from Alclad, explained to me that in high humidity conditions the older formula tints blushed. This does not occur with the newer tint formulas that were released last year. My camera doesn't do it justice. Overall, I like it and plan on using this tint on my Walthers cars.
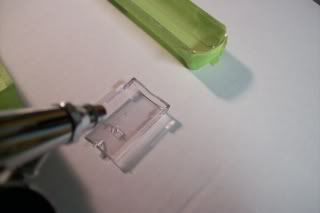
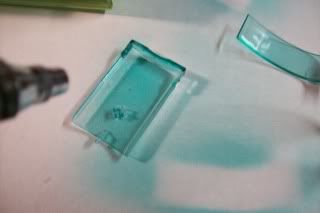
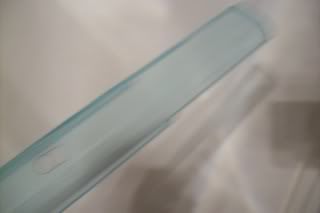


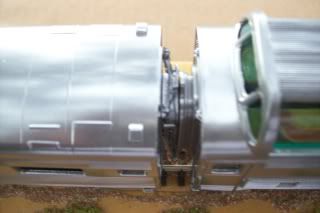
10.  Re-assembly:  After lightly weathering the underframe and diaphrams, white styrene strips were positioned and glued in place to resemble window shades. Dome interior seat module was reinstalled and body installed on to chassis.  

[u]OUTDOOR PHOTOS:[/u]
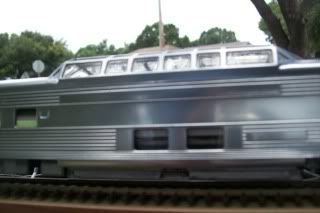


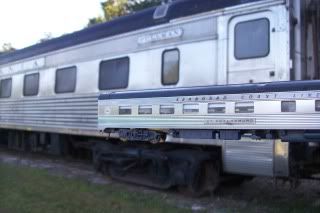
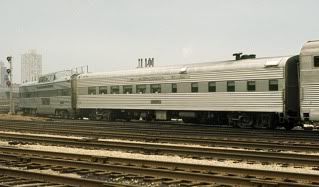
Light weathered rust/grime on diaphram compared to a prototype unit.
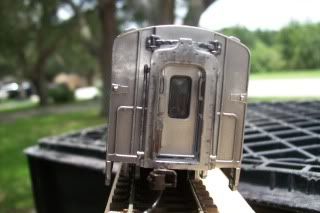
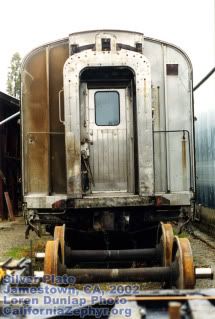


Prototypes and Models:
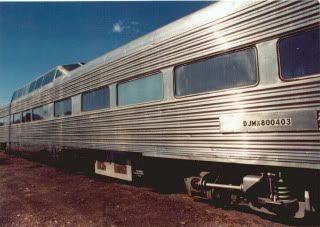
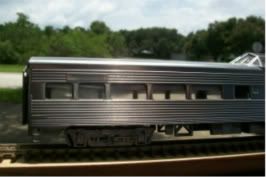


Finished results:
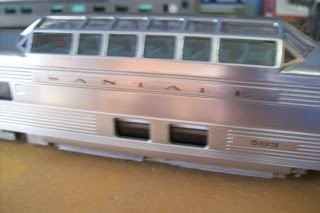
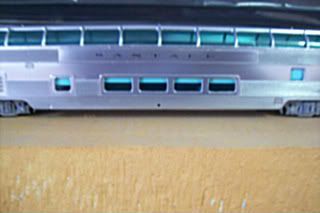


These inexpensive cars were fun to to do and look quite nice running on my friend's layout on his freelanced BNSF OCS train.  

Imho, passenger rail car modelers starting out with Alclad2, should not feel intimidated as this product is easy to use. Consider practicing on small scrap styrene pieces or smaller scale discarded rail car shells so that they you may fine tune your techniques the decision is made to "go for it".


BTW:  Good news is that Alclad2 will shortly be introducing new basecoat gray colors.  So instead of waiting 3 to 5 days for Scale Coat 2 to cure, the Alclad basecolors dry and harden in 20 minutes in 75+ degree temperatures.


More details will be forthcoming.


High Greens


Last edited by AntonioFP45
Original Post

Replies sorted oldest to newest

Thank you very much, Ron.


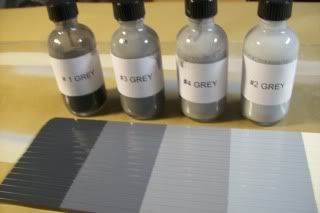
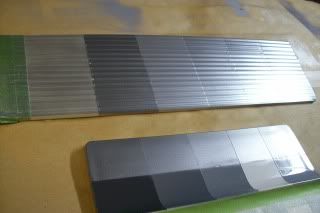
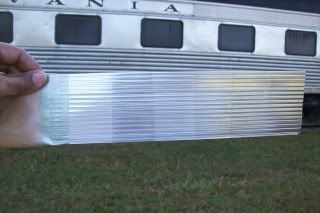
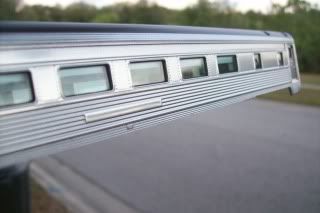
These are photos of some of the test panels I've produced in my Alclad2 experiments, looking for the basecoat color that would enable the Alclad metalizers to best resemble Austenitic stainless steels with #7 and #8 finishes.


I performed my comparisons to a prototype classic 85ft. Budd car.  Ex-Pennsy sleeper "Bradenton". 


Looks beautiful.  We use the metalizer finishes on model planes.  Main issues(s) with the stuff is durability.  I'm not sure how well the finish will hold up to handling.  Static model planes aren't usually picked up and moved around and some of the sealers used to protect the metal finish can also discolor over time.  They can also become the subject of wear issues from handling.  


I do appreciate your sharing the technique and it does look great.  I hope the cars hold up to real world use.  Good luck.

Impressive method and results.  thanks for sharing.


Like chuck, I think about durability because most of my projects are cars I will handle from time to time.  I've had surprisingly good results (considering the low cost and little time involved) using spray on "chrome" and silver rattle cans.  I concede that it does not quite match the metallic sheen of real, extruded/polished alumni cars, but then nothing I've seen really does completely.  What I like about simple silver and chrome spray can paint is that when done well it is durable and it matches well the look (sheen or grain, consistency) of factory "metallic" and silver paint jobs, (except for chrome plating like on some tanker cars), if not always getting the exact shade of silver/aluminum/brass just right (which it usually gets pretty close). 

Gentlemen,


Respectfully, handling and durability won't be an issue.  This method calls for the Alclad2 Metalizer to be "Sealed" with a durable Clear Coat.  The suggested choices are either Alclad2 Aqua 600 Klear (water base) or Alclad #310 Klear (solvent base).  Once sealed, the cars may be handled regularly (although preferably with clean hands). 


http://alclad2.com/finishes/aqua-klears/


So far the units that I metalized back in 2005 have been handled considerably and still retain their sheen, gloss level with no damages to the surface.


The intent of using Alclad2 in our hobby is to duplicate the natural metal finishes seen on prototype stainless steel rail passenger cars.   It's difficult to do this with silver paints.


The basecoat color influences Alclad's appearance.  Hence, we can create stainless steel finishes that look new, aged but in good condition, or worn out.


In addition to sealing, the clear coats tone down the sheen. So if you feel that your finish is too shiny, just add additional coat(s) of clear until you achieve the appearance you want. 


For those that want very subdued finishes while maintaining the natural metal appearance, Alclad2 makes clears in Semi gloss, Matt, and Flat finishes (see the link above).


Forgive me for sounding like a salesman, as I don't work for Alclad. But in the HO and N scale worlds we've been excited about this and as I result I've received emails a while back from fellow modelers in the larger scales asking questions about Alclad2 and its applications for trains.  For me it's been very enjoyable as since the 1980s, I had fantasized about having my SS passenger cars appear as if they were constructed of stainless steel.  Even the bright silver paints turned me off as they did not look like the Budd cars I grew up riding in. 


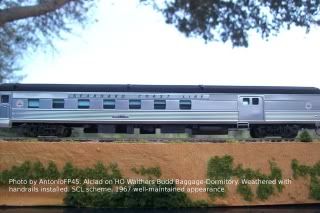
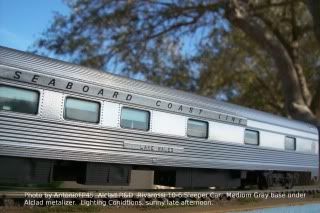
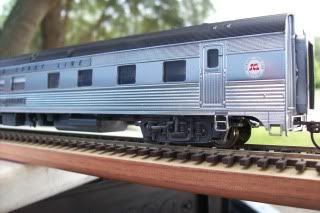
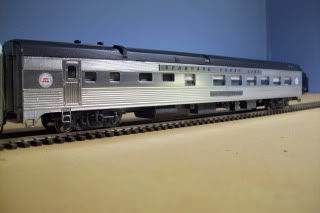
Photos:


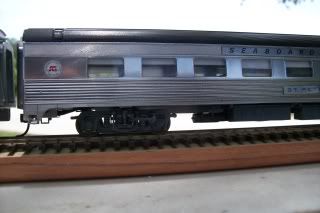
The Sleeper is finished in a "worn, but good condition" appearance.


The Baggage-Dorm is in "Well maintained/good" condition.


The Diner (hard to tell with the photo) is in "Excellent" condition with a high reflective surface.  With the diner, normally this would be the appearance applied to cars that are new or less than 5 years old but I wanted to have a sample with a "new finish".


As I mentioned earlier, you can basically "Dial In" your appearance with the satisfactory feeling that it will still look prototypical. 


Last edited by AntonioFP45

Great post Antonio! I noticed that Alclad also makes "115 Stainless steel". Have you tried this and if so why didn't you use this instead of the "chrome" color? Also as I have some Testors solvent base gloss gray, have you tried using a solvent paint base before settling on the water base Scalecoat II? I know lacquers can lift solvent paints but not always.


Pete

Hi Norton,


Re:  Solvent & Water Base:


I've used solvent based base coats underneath Alclad, not water base. Scale Coat II is solvent based (thinned with lacquer thinner) and it works very well underneath Alclad2. The prmary "catch" with Scale Coat II is that you must allow it to cure a number of days, otherwise Alclad2 metalizers can attack it (been there done that). The cooler the room temperature the more cure time required for SC II.


Good news is that Alclad2 is about to release new Gray basecoat colors specifically targeted for model rail passenger cars to achieve the stainless steel appearances.  The dry/cure time for the new base coat grays ranges between 20 minutes and 1 hour! So now instead of taking 3 to 5 days to metalize a car........you will be able to do it within the same day.  For modelers with "fleets" of cars they would like to metalize, this will hopefully be good news.


The only water based product I've used with Alclad2 is the Aqua 600 Klear, which I use to seal the finish.  I've also used the Alclad 310 Clear, which is solvent based and works well also.  The advantage the 600 Klear (yes, spelled with a "K") offers is that it dries quickly, making it convenient for decal installations which are applied directly on top of the clear finish.  Essentially, from my understanding, the Aqua 600 was targeted for modelers that often seal their paint jobs with "Future Floor Finish" as well as for modelers that prefer water based clears.  Future works well but it will "gum up" your airbrush if you leave it inside too long.  The Aqua 600 gives you more working time and does not run as easily as Future.  It's become quite popular.  You can airbrush it or even dip your parts in it.


Re:  115 Stainless Steel.  This Alclad2 formula, imho, more closely resembles the polished, low Chromium stainless steel finishes that we see on kitchen sinks and traffic signal boxes.  This is why I do not use it on rail cars.


I typically use Alclad #105, which is listed as "Polished Aluminum". But when used over a gloss gray, it more closely resembles the stainless steel used by Budd.  I also have used Alclad #107, which is the "Chrome" formula, for the "brand new, off the assembly line" look.  The clear coat will tone down the brilliant "chrome" finish to a much more realistic appearance.


Last edited by AntonioFP45

Antonio,

This is very interesting in that it goes against what aircraft modelers have to say about the undercoat. Up until today, everything that I have seen published in magazines and online say to use black as an under coat.


Thanks for posting all of this information. Your cars look very nice.


Hi Big Jim,


You're absolutely correct!  Black has been the recommendation with aircraft and scale model car hobbyists.


Of course isn't it funny that, compared to other scale transportation modes, model trains are always the "oddball" in various scenarios, including painting? As I mentioned, modelers years back complained that Aclad2 was not a good product for scale SS rail cars because the results were too dark for Austenitic 300 Series Stainless Steel. 


I applied Alclad 107 to a Rivarossi passenger car shell and noted that the tone appeared much too dark. It was frustrating, but I felt that this product had too much potential so I started experimenting with it. I went into "Paint and Body mode"  (I ran a transit system body shop years back).  It eventually dawned on me that the metalizer wasn't the problem.....the foundation was.  After performing research on Austenitic stainless steel's characteristics and consulting with a friend who is a CSX manager, I narrowed my focus to dark blue and gray. Gloss Grays ranging in tones, from Light to Charcoal, won out and it's been a fun ride since! I shared my results on several forums and the interest and response has been positive.


Norton,


I haven't refinished any O-Scale units yet, but that is on my agenda.  Based on my experiments, I'm estimating that if you are good with the airbrush in laying smooth coats, one bottle of Alclad 105 will metalize 1 to 2 cars, depending on your application technique.  Remember that the key to applying Alclad is to "mist it on", not splashing it on wet. I normally apply 2 to 3 mist coats in long, even horizontal strokes with 3 to 5 minutes between coats in warm temperatures.  Once I'm happy, then seal it with Clear. 


However, consider these factors.


1. Are the roofs of your cars being metalized too, or just the sides and the ends?  For ACL, FEC, SCL, NYC, and Nickel Plate, the roofs would not be metalized so that's less Alclad that would be used.


2. Do you have a good compressor that is equipped with a water trap and maintains steady air pressure?


3. Airbrush:  Needle and aircap set up.  A medium size needle and aircap works well, but a "fine" needle and aircap set up atomizes very well and uses less material. 


By all means go for it and if I can be of help, email me anytime.  I would respectfully suggest that you practice first on clean scrap plastic.  (Smooth compact disc cases are excellent airbrush fodder! People nowadays throw them away. )


Charlie,


Thank you.  Do you have photos that you can post?


High Greens


Antonio - I really appreciate you taking time to post your work.  I model primarily Santa Fe, which has so much stainless that I have become frustrated with the difference in results various manufacturers have used to replicate stainless. 


Although I've been thinking about it for years, I have only started looking at metalizers.  I've seen some great results on airplane and automobile models.  Your Seaboard cars are spectacular.


I hope I can develop the skills to take what looks like a checkerboard of stainless passenger cars and standardize the stainless look of the cars.


Your post went a long way to pointing me in the right direction.  Thanks.

I've got an old AC500 compressor and Iwata Cr and have used those for years. One of the things I learned from model cars and semis is that when using the chrome one could use black enamel as the base and hit it with the AlcladII chrome before it fully gases out to give the chrome some "bite"...the old porblem with the chrome was if you sealed it the luster was toned way down and that's a problem with chrome. I've actually used red as a base coat as well as other colors and shown the results on the modeling forum eons ago..also used different base finishes as well to alter one top coat{flat/satin/eggshell/semi gloss}...that was kind of neat for aircraft panels giving the illusion of different metal panels using one top coat{cheating- I know}. Leaving the ALcladII chrome unsealed left you to the mercy of handling marks if you touched it later{cleaning/taking to a model show...}.


Antonio, have you tried the new acrylic sealer on any chrome?...how'd it do? If it works well I'll have to find another use for my "pledge with Future".

I have a nickel- silver PA and a matching silicon bronze PB.  I almost matched them by spraying Testor's buffable stainless, coated with Future, then Scale Coat 1 clear, and finally polishing compound.  But I am with Lee - nothing matches shiny metal like shiny metal.  In the end, I will find new warbonnet decals, and have both units nickel- plated.


i guess that does not help plastic models.  There is a plating process for plastic, but it is too shiny for realism.

Guys, thank you kindly for the replies.


Marker,


Thank you.  If you can handle an airbrush, you'll be fine! Just takes a little practice. It's helpful to take your time and to make certain that the basecoat is "smooooooth"!


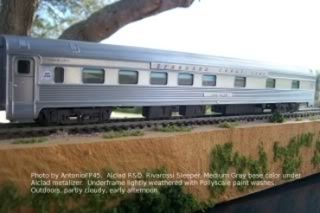
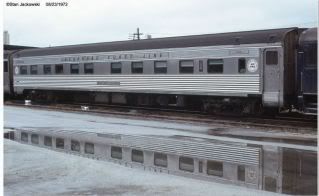
Re Walthers units: Something I respectfully suggest to modelers to keep in mind is that, except for when brand new, stainless steel cars within the same train did not always match, finish wise.  Look at the two units in this photo:


From the factory, the "sheathed" Pullman Standard units tended to be slightly darker and "bluer" than Budd units.  The sheathed ACF cars were "whiter" than PS and Budd units. I worked with metals (welding/fabricating) and have seen that the percentage content amounts of Chromium, Nickel and Molybdenum influenced the final appearance after polishing.  It almost drove me nuts when I saw modelers bickering on forums as to what "real SS" looks like (warmer, colder, bluer, browner, faded, shiny, slightly shiny, mildly reflective, highly reflective, duller than Penn Central.......etc).  The answer I often gave was: "Why are you arguing? Generally you are all correct!" They could not seem to fathom that SS exhibits a wide variety of appearances depending on a number of factors.  Again, that's where "dialing in your finish" with Alclad2 yields the advantages.


BTW: I learned from a creditable photographer that railroads taking publicity shots of their streamliners performed quite a bit ofcreative editing in their photos (especially Santa Fe!). In those shots, the streamliners looked nearly flawless even if they were already 7 to 10 years old.  But pay attention when you see photos of streamliners "snapped shot" by railfans that did very little photo editing. The differences are quite noticeable.  This is one reason why in my research I've looked for ways to duplicate multiple appearances with Alclad2 and have been encouraging modelers to give it a go as well.  So if the SS cars on your train don't match.......you can easily say that in many instances the real ones didn't either.


Bob (Burlington Route),


You've had some really cool results with experimenting on aircraft.  If you've posted them on one of the model aircraft forums please send me a link.


Yes, the Aqua 600 works well over the Chrome #107 with no problem.  One thing to keep in mind is that for model rail cars, slightly toning down the brilliance is actually a good thing if you're going for a realistic stainless steel look.  If you prefer a finish that is similar to my Baggage-Dorm unit, don't use Chrome.  Formula 105 is a better finish to use (sealed with clear).


Bob2,


RE: Plating of plastic.  Actually the reflectivity and DOI (distinctiveness of image) is easy for the manufactuer to control.  Have you seen Rapido's HO passenger cars for the Canadian?  They're plated to a moderate sheen with a warm hue.


http://www.rapidotrains.com/canadianvia2.html


Regarding "But I am with Lee - nothing matches shiny metal like shiny metal". I respect your view, but will say that we've come a long way and technology advances within the past decade has made it possible to match metal more closely with refinishing products than in years past.  As a tech that often worked with metals, I was skeptical when I first tried Alclad2.  But as I improved my technique, I was intrigued by the surprised reactions from people when they viewed my passenger cars. They actually thought that the cars were constructed of metal that I polished.  


(1st photo, prototype unit:  used with permission from Stan Jackowski)


Thank you Southwest.


A tidbit to share.  A friend of my critiqued me for my finishes in the SCL scheme, saying "They're too shiny!".  He believed that most SCL passenger trains were not very clean.


I suggested to my friend to view this YouTube video clip.  To get to the passenger action, allow the video to load then move the play bar forward to time index 02:25 and play the video from that point.  As the saying goes, a picture is worth 1000 words!


http://www.youtube.com/watch?v=Iia8Qf09jA0


This was just before or after Amtrak took over. Ironically it was after the creation of Amtrak that the ex-SCL equipment started to look dingy as it took Amtrak a few years to get its act together as far as dedicated maintenance. 


SCL was one of the few railroads in the late 60s that was still making a profit (albeit a small one) on its long distance passenger trains and made the effort to provide decent service and clean equipment (inspite the interference from Penn Central). Historical speculation has been that if it had not been for the 1968 wreck of the Silver Meteor near Winter Haven, Florida....... SCL may have opted out of Amtrak, like the Southern did.  

Antonio - A question.  Sunset/Golden Gate stainless streamline cars are aluminum.  I have never been pleased with the finish on a set of Santa Fe cars they did a few years ago.  (The earlier ESE cars had a different finish that was too expensive to use again.)   For Stainless, the color you chose is Alclad Formula #107 Chrome for Plastic.  Is it just for plastic, or is it a formula that can be used on plastic?  Do you have any idea what might be useable for aluminum?  Thanks.


In '69-'70 I was stationed at Hunter Army Airfield in Savannah, GA.  The SCL mainline bordered the facility and there were tracks that entered the facility for supplies.  It used to be an Air Force base with B-47's.  There was a yard across from the facility.  If you look at a Google map of Hunter you can see that area.  It is still all there. 


I watched the streamlined SCL trains pass by all the time.  The trains were mostly clean including engines.  I rode the Silver Star and Meteor to Florida a couple of times and even rode the doodlebug in central Florida.


I have pictures to prove those trains were still in nice condition at that time.  I always enjoyed when the more colorful RF&P diesels were part of the train.


Disembarking from the Silver Star one night in Savannah, I took a picture that really highlighted the shine from those cars.


There was still mail service on some trains and I would go down to the station and hand mail to the guys in the RPO to get the RPO stamps.  I still have a couple of those mailings.


Savannah was actually a nice place for a railroad enthusiast at that time.  I was shocked when I walked into the C of Ga roundhouse and found a steam engine.  That was years before they made the facility a museum.  Aside from the SCL trains, the Nancy Hanks with dome also ran into Savannah.  An irony is that I also rode the same dome when it was on the Wabash Bluebird.  That train was still in decent shape in 1970.


With regards to shades of Stainless, I know what you are saying.  I've had experience photographing stainless cars and because of the reflective properties, I've had differing results regarding color and shine on the same car.


Marker,


Imho, for your units the Alclad 107 Chrome or the Alclad 105 polished aluminum would be a good route to take.


I tend to lean more now towards the #105. Used over gray, the tonal color is the same as that of the Chrome but its sheen, to me, more closely resembles that of a car that's been very well taken care over the course of a decade or so, vs a unit that is brand new out of the Budd plant.  If you use the Chrome 107, the sheen is more brilliant, but it can still be easily toned down with clear coat.


Alclad's new basecoat color formula's haven't hit the market yet, but in the meantime there are two choices of grays I suggest that you can use on your car's metal surfaces.


Scale Coat 1 New York Central Light Gray  (for a "warm" aged tone)

Scale Coat 1 New York Central Dark Gray  (for a "cool" excellent condition tone)


On my units in the photos above, the sleeper has a warm tone, while the baggage-dorm and diner have cool tones. Since they're plastic I used Scale Coat II, which is geared for plastic, but the same NYC colors.


RE: Your SCL experiences....Excellent! So glad that you experienced the SCL and saw some good action in the pre-Amtrak days. Riding the Silver Star and Silver Meteor then must have been enjoyable. I wish SCL had saved that Doodlebug! Thank you for sharing your prototype experience and confirming that SCL equipment did look decent before Amtrak's arrival.  I do have one model of an RF&P E8 which will run in my model SCL trains.


Have you posted your photos on line?


I've been to Savannah before and wasn't even aware of the history regarding that base. The B-47 was a graceful looking beauty. 

Thanks for the great info.


With regard to posting photos, I didn't store  my slides that well and they are very dirty.  What I have posted took a lot of time to clean with Photoshop.  The other problem is I had a lightning strike less than 10 feet from my house a few years back it blew out a window and took out 3 computers.  I have all my older pictures on a hard drive that was in one of those computers.  I think the drive is OK but I haven't gotten around to recovering the contents.


Here is the photo of the Silver Star that I mentioned.


Savannah-Station

Attachments

Images (1)
  • Savannah-Station

Marker.......


Wow! What a shot! My friends that model southeastern roads would love this golden slice of history. 


I hope I'm not violating any rules but PLEASE join the ACL-SAL-SCL Modeler's group on Yahoo. Your photos and personal experiences would certainly be treasured there! I hope that you'll recover your photos in good condition.  If you do so, when you edit them include your name in one of the corners. I usually to that to my photos with the "GIMP" photo editing software.


May I have your permission to use your photo or any future photos you'd be willing to share? I list the credit and I don't make any money off of photos from others. I use other modeler's photos as reference for metalizing, which I, in turn, then share my info and research openly.

The one picture that may be lost is the train above waiting to leave the station in Miami.


I do have a couple more pictures of what looks like a mail train, or a train with a heavy head end consist.  2 E's, one SCL, one RF&P. 


Antonio - email me, my address in in the member profile section.  I'll give you the permission, etc.  If your email bounces, post it here.  I have another address that will work but I try to keep it for business. Thanks

Guys and Ladies,


One of the reps at Alclad2 mentioned that he's looking for an O-Scale Budd/Pullman Standard fluted streamlined car or shell at a "reasonable price". Undecorated is preferable, but if it's in a factory silver finish that can be paint stripped, that would be workable. 


The intent is to experiment with an Alclad finish.  The particular preference, if possible, is for a fluted baggage or RPO because these units have more "wall area" to exhibit the finish. But other fluted streamliners would still be OK.  The prices the rep has seen are typically in the 3 digit zone for scale 72ft to 85ft long passenger cars in O-scale.  Any leads or tips would be appreciated! I will forward them to Alclad or you can yourself. 


Trains are relatively new for the Alclad crew since the formulas were designed for the Aviation and Auto Groups in mind.  Alclad's owner, originally, tried to appeal to the model railroad market years back, but due to the many disagreements (squabbles) regarding stainless steel's appearance, Alclad's management decided to concentrate on the other two vehicle groups.  It was only after several modelers started experimenting with the metalizers and sent the feedback to Alclad that management agreed to work with model railroaders.


Mike,


Excellent work and results. Would be really neat to see her running a Zephyr on a YouTube video.  Good to see that interest in passenger rail hasn't waned.


BTW: I hope you don't mind my sharing the following.  I submitted an article to MRH regarding an Alclad metalizing project. I let several modelers know that if it were published I'd post the info. It's in the September issue. I was pleasantly surprised as I wasn't certain if it would meet MRH's criteria.

Here is the link.     http://mrhpub.com/2013-09-sep/land/#78

Antonio,


Thank you for all the info on this product and your recommended techniques.  I've been hoarding all the Alclad I can (being in California I'm afraid they'll ban it because it's harmful to fruit flys or some other nonsense) with the intent of doing some of the things you've shared with us.


Please continue to share,


Jay

Post

OGR Publishing, Inc., 1310 Eastside Centre Ct, Ste 6, Mountain Home, AR 72653
800-980-OGRR (6477)
www.ogaugerr.com

×
×
×
×
Link copied to your clipboard.
×
×