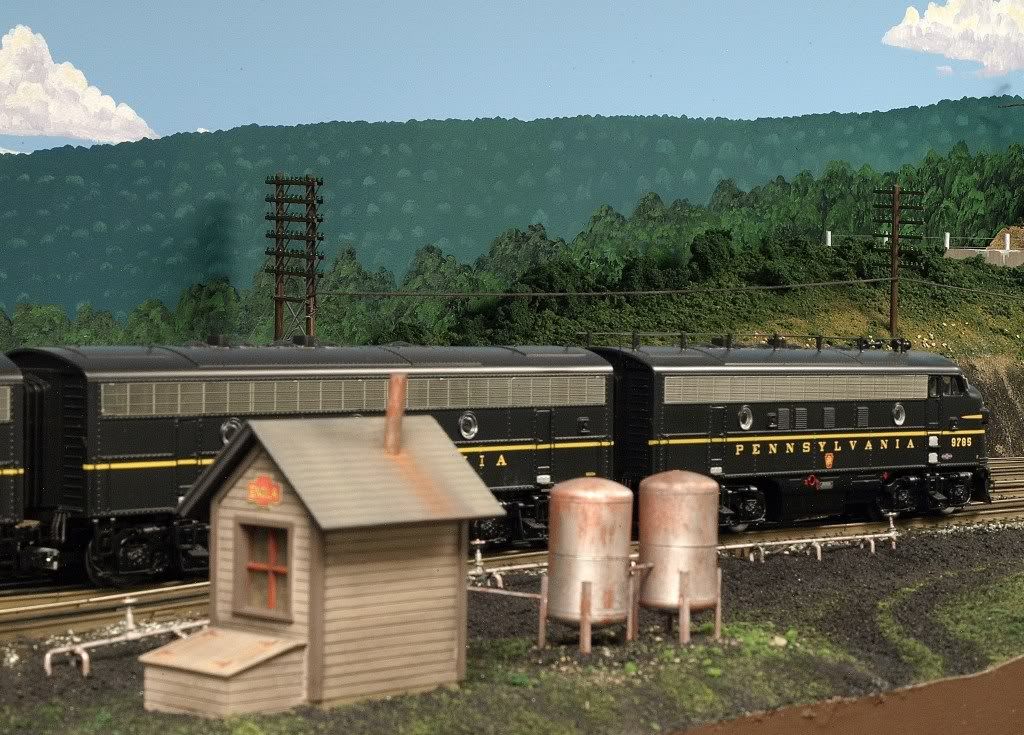
After being away for a couple weeks, I was finally able to get home and spend a few days in a row grinding out some more progress on my layout. These are the last two major background buildings, at least for now I hope. Eventually, I will finish these industrial bluffs with some more foliage and other minor details then move onto the ground level/trackside efforts.


Original Post

Replies sorted oldest to newest

Wow guys, thanks for the kind words! With the poop weather settling in here I should be more productive over the next few months.

Daylight, I play Skyrim on a 360. I'm a big fan of the Elder Scrolls and Fallout games from Bethesda.

Patrick, I participated in the first go-around of the Traveling Boxcar that was started by Greg. Here's my page from 2004:

http://www.trainyard.net/boxca...charbonneu/index.htm
Jeff, I use Scenic Express Super Trees. I spray bomb outside them with cheap flat black (or brown or gray sometimes, whatever's laying around), then dip them in diluted carpenter's wood glue and sprinkle ground foam over them. I'll use some Noch flock on ones closer to the front of the layout. I still need to plant a few more around this area and move a few around but I just spent the past two nights in the workshop getting some other things ready for this section of the layout.

John, I've been driving myself a little nuts lately trying to get photos to look OK as far as color. I have a new Canon SX30 I've been playing with that has a neat custom color adjustment among other featues. I also have a new PC that looks a lot different from my old one and a lot of CFL lamps in the new lighting setup. I've also been playing with Picasa a bit for tweaking and resizing the pictures.

Fab Forrest, I put one on my blog. The new plan is a lot less busy and it has no grades. I found I was never really running all three lines before I quit working on the layout for almost a year before the teardown. Here it is:


Not sure how I screwed up the TT leads, but the main one lines up with the third stall.
Thanks John, but there's no magic going on here. Otherwise, I could make all my screwups disappear. I just found out I need to shore up some of these curves through here after trying to get a shot of of a train rounding the bend.

In any case, I got some trees and poles planted, and installed a Walthers tower and shack along the back end of the curve. Even fooled around with the lighting some more.


Looks great Norm!
How about some info on your painting and weathering techniques on the Walthers signal tower. I repainted the small shanty (seen to the left in your photo) and the speeder shack into PRR colors. What a PIA since the darn things are all glued together. I have yet to do the signal tower, but yours has inspired me. Great work as always!
Neal, no problem. I picked this tower up because I thought it looked a little Pennsyish. I painted this to match my Quality Craft tower using the color scheme suggested in the QC kit drawings/instructions. Basically it's Roof Brown for the trim and Aged White with a bit of Roof Brown mixed in for the main color. I know most guys like to paint PRR buildings in the buff/brown scheme but I like this color scheme a little better.

A long time ago Bob Bartizek suggested putting these built-up buildings in the freezer for a little while to help snap off glued parts. Of course I didn't do that with the tower, I tried using acetone to take the windows out. What a mess! The freezer technique worked great on the shed though. The windows snapped right out with a flat chisel X-Acto blade after being in the freezer for about 15 minutes.

I've been painting my wooden buildings with the rubber cement trick now. I start off by scribing the siding with a dull X-Acto, then painting the base coat Roof Brown or RR Tie Brown. I then drybrush it pretty heavily, much more so than usual. After that, I dab some rubber cement here and there using a toothpick then paint the final color coat(s). As soon as it's dry, I rub off the cement, then do a standard final wash and drybrush.
Norm,

Thanks for the tips. I may try them out when I get around to the tower. Here is a photo of the same Walthers shanty that you repainted. I used the PRR colors as suggested by Bob Bartizek, though left the window mullions in thier orignal color which was close to the color used by Pennsy early on. I snapped out the windows with a hobby knife, though Bob had mentioned his freezing technique to me as well. One of the windows broke, but then provided an unexpected modeling bonus by providing the appearence of a cracked window pane when glued back into place.


Post
×
×
×
×
Link copied to your clipboard.
×
×