Is there a standard modular section size (length, width, height) that makes all modular layouts compatible with each other. Similarly, is there a standard connection between sections that is capable of carrying track power, as well as accessory power, AC, and anything else electrical?
Replies sorted oldest to newest
There is no standard I am aware of. The club I belong to uses tables that are 45" wide by 30" deep. I think that happens to be the same as an LCCA module, but I think our track centers are different. They use Fastrack whereas we use Gargraves.
It seems most clubs use C clamps to hold tables together (the LCCA has a camlock on each end to hold them together). Layout heights (the length of the table legs) seem to vary a bit too. Every modular group I have ever seen though has had leveling screws built into the legs. That seems to be the one constant.
Electrically, each club does its own thing too. Our club uses Molex connectors for the 0 to 18 volts, and there is a 120v receptacle with extension cord wiring going between each table for power. A lot of clubs run the 120v wiring independent of the modules, which is probably a safer way of doing it. Our club goes back to pre-TMCC days, so the module mounted outlets provided power for each member's transformer. Not really necessary these days, and having 20 or 30 5' extension cords tied together probably doesn't give you the best AC power once you get to the end of the line.
J White
J. White,
Thanks for your reply, I am considering building a modular layout for several reasons, and thought I should be on the same page as everyone else for compatibility reasons. Rich
There is no universal 3 rail modular standard along the lines of N-trak, etc...
If you want standards, get in contact/join your local club(s), so you're compatible with the correct standards.
For three-rail, there are two older standards -- the Tinplate Tracker (T-T) standard and the Independent Hi-Railers (IHR) standard. The key difference between the two is that the IHR standard adds a third mainline 4.25" from the front (fascia) line and the rear main, and uses 36" as the rail head height (and obviously the wiring harness). Both standards are adamant about the module ends since those have to meet the standard for height and mainline spacing, but pretty much anything goes in between the ends and I've seen photos of some pretty elaborate module sets.
LCCA and Lionel have established a new standard for FasTrack which I think is a good thing as it also has jigs available for more precise module ends. Prior to this point there hadn't been any manufacturer backing a module standard.
The best bet is to reach out to groups operating in your area. Go to a few shows and see if the operation is something you'd like to do.
As for line power, back in my Tracker days, power was "centralized" to a couple of modules within the loop and the transformers controlled zones within the layout.
Hope this helps.
River City 3 Railer modules are 48x32. This size allows us to cut three tops from one 4x8 sheet of plywood. We initially discussed "compatibility" with other clubs, but to-date there has never been an opportunity. Should we choose to merge our modules with another club, a couple of custom "adapter" modules would be the best solution.
We use Molex connectors with prewired pigtails to interconnect our modules. There is no expectation of compatibility.
For your own module set up I have found that the most efficient use of 4' x 8' plywood produces a complete 32" X 64" module .
This provides 3 1/2'" tall side and cross members for frame with cross members on 16" centers, an under carriage and a full cover decking.
Use either 7 ply 1/2" or Birch/Maple 23/32",
Anderson power poles make excellent end plugs. Available at powerworkx or your
local Ham Radio store.
Check Free-mo for general module standards. Free-mo uses a non oval point to multiple point(s) prototype type of set up.
Check their Yahoo group site for suggested set up track plans and photos.
32" width/depth is ideal for 0 scale.
Fort Pitt High Railers modular layout. Click on the underlined for a slideshow. Most modules are 6ft. X 37 1/2" wide There are 2 ft, 4 ft, and 8 ft modules that can be mixed to make an oval layout. Most are attracted to the (4) curved corners.
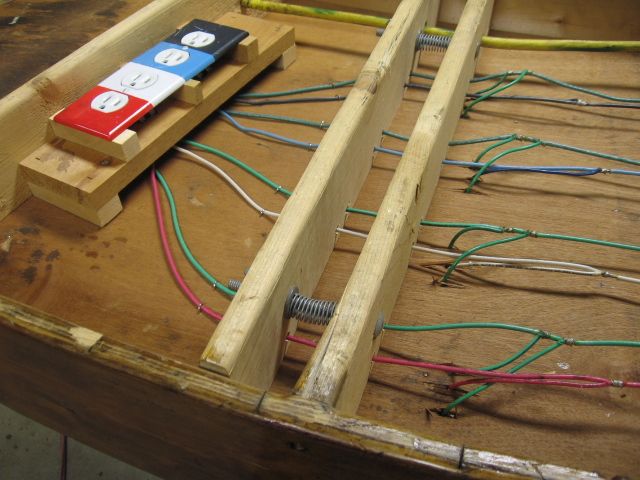
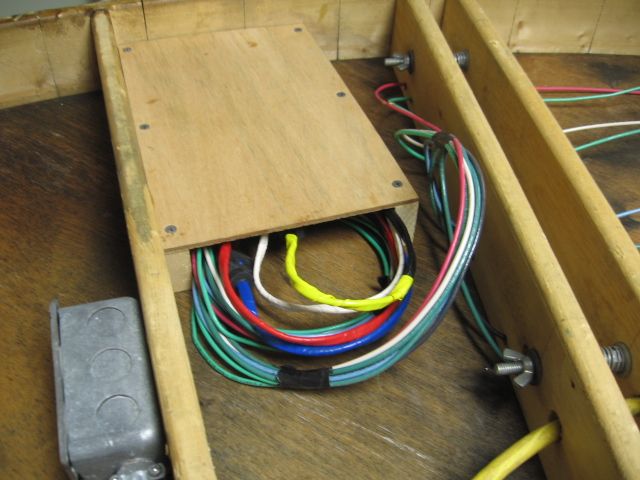
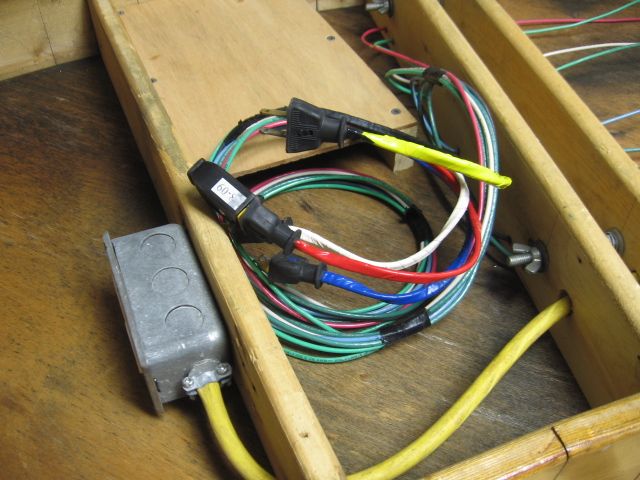
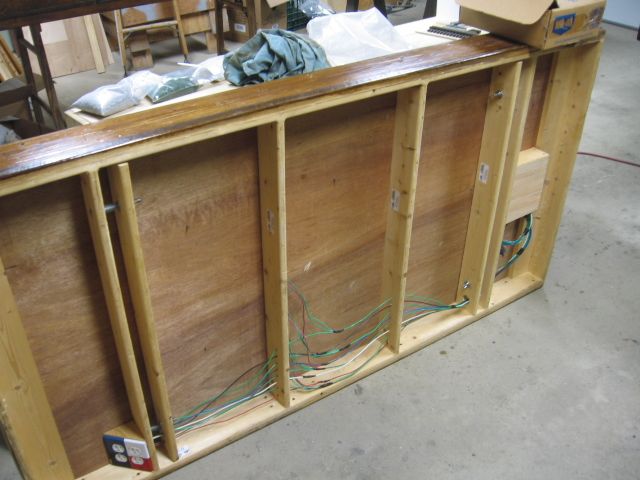
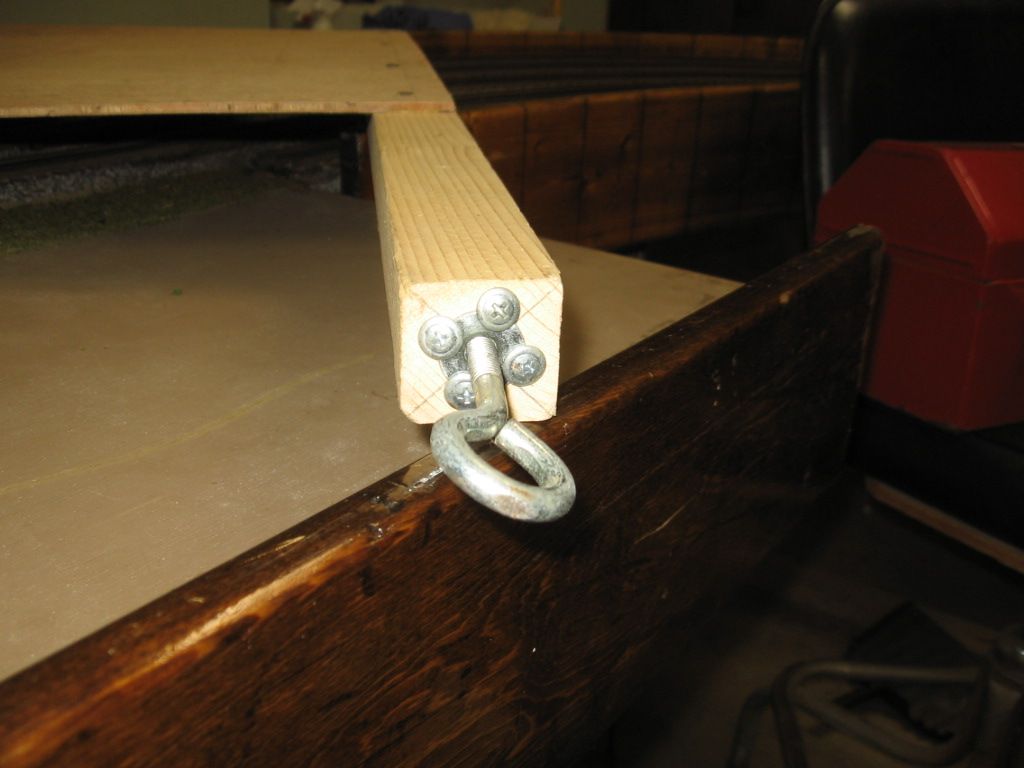
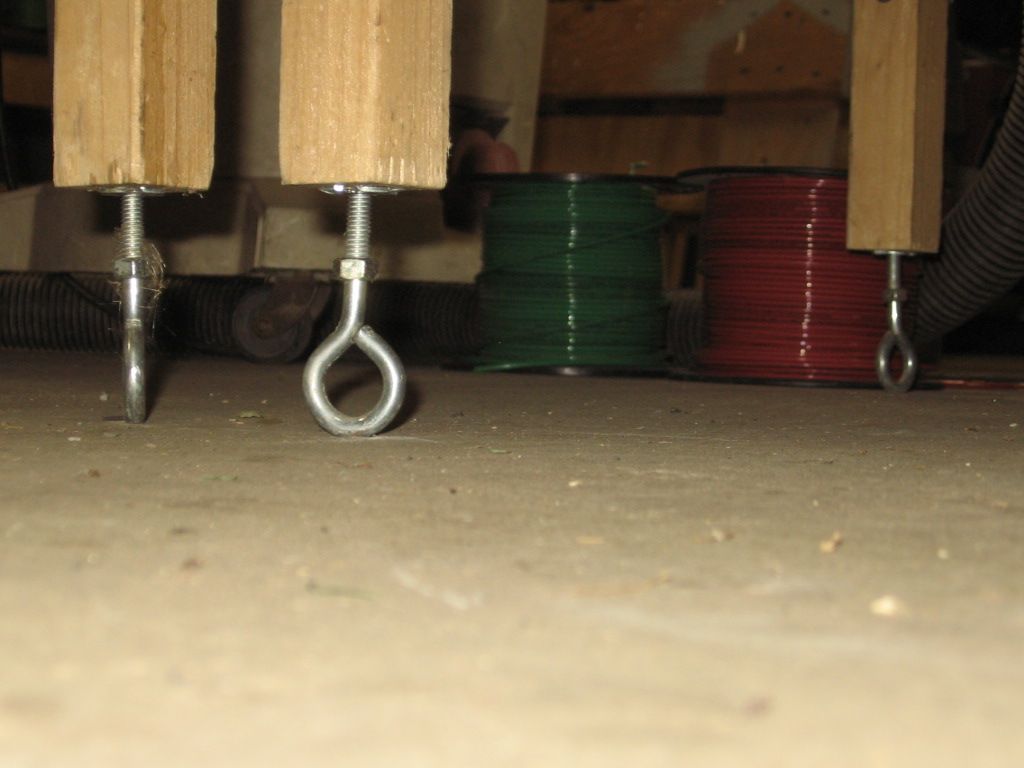
Legs stacked in storage. Legs fit between the clamp boards near either end of the module. Note the carriage bolt/Spring and wing nut assembly. We have done most of the modules with 5/16" bolt assemblies but recently older hands prefer 3/8 bolts and wing nuts. Also note the leg leveling system, done with 5/16" eye bolts.


Actually, at one time, most of the east coast hirail clubs followed the standards laid out on Hirailers Unlimited. (www.hirailers.org) I will caution you that the website has not been updated in quite some time.
Look in the Technical Section for pdfs and general techniques. Much of what is written here is still valid.
The electrical section in particular predates TMCC and DCS. That said, the modules will still function under TMCC and DCS control. Just be aware that additional tweaking is likely to be in order. Electrical connections will be an issue as the original ones specified are no longer made. If you are not planning to interface with another group, that is not an issue. If you are, then see what the groups you plan to work with are using. Of late, Anderson Power poles seem to be the best thing going.
You can also check out the National Capital Trackers website (nattrackers.org). Under News/Info is a section on modular standards. This club's website is active and kept up to date.
Chris
LVHR
Boilermaker, Matt, and Gilly, thanks for your responses, From your replies and others I get it that there no real standards other than what is in use in your geographical areas. Gilly your 32 by 64 makes good sense in so far as the surface is concerned. I have to examine Tom Tee's plan for making the entire section out of a sheet of plywood. Thank you all, Rich
Rich, I'm not on my own computer so words will have to do.
Starting with a 4 x 8 cut into a 48" X 64"
From the 48" x 64" cut a 32" X 64" top deck leaving a 15 7/8" x 64" balance.
From the 15 7/8" x 64" balance slice off two 3 1/2" X 64" side rails leaving 8 5/8" X 64" balance.
From the 8 5/8" X 64" balance slice in length wise in half for two 4 1/4 X 64" sub frames (later photos to explain) All cut results vary to blade thickness.
From the initial 48" x 31 7/8" balance slice five 3 1/2" x 30 1/2"* cross members plus one extra 3 1/2" strip to use for corner glue blocks. At this point I bore and round over 3 or more 1 1/8" wire management holes on two and a quarter inch centers.
* adjust this figure when inserting ends into a 23/32" routed slot.
You now have a 32" X 22 1/4" piece of scrap on which you can fashion other carpentry features or upon which you can build your Z scale rail empire.
I'll be back to my own photo file later.
Tom Tee, Thanks for your reply, and the wealth of information contained in both the reply as well as in the links referenced. I was just pouring over the info and looking at the info contained on Free-Mo.....WOW! Apparently, while you were again posting here I was trying to figure out how best to whack up the sheet of plywood, so I guess you were answering my question before I even asked it.
On a side note, when ever I see an example of you're work without the decking on it I pore over it and marvel at the precision and symmetry. You must have been a cabinet maker before. Excellent work. Thanks again for all of the info, Rich
Rich, thank you for your kind words. Relative background is in air frame, hydroplane construction, and precision flat flooring.
Free-Mo is a great operational standard, but despite efforts by George Losse and others, U.S. O scale Free-Mo didn't catch on. Seems to be growing in H.O. and N scale, though. N-Land Pacific is a local (Southern California Inland Empire Area) N scale Free-Mo group that has done some phenomenal module work. My personal favorite is this model of the UP Santa Ana River Viaduct done by Steve Beals. In O scale, the bridge alone would be 19 feet 8 inches (and yes I have the drawings in case I want one in my back yard).
Attachments
Mike CT, Sorry for the delay in responding, but my days have been a little busy lately.
I have viewed and enjoyed the slide show of the club as well as all of the pictures and info provided either in or through your post.
The 37 1/2 inch width is larger than most, but with the four main lines I guess it is necessary. You are right insofar as people being impressed by the curved corners, you can add me to that list. What is the radius of the outer most curve on those corners. What is the minimum curve on the layout; I'm guessing that would be at the entrance to the turntable area?
Your carraige bolt/spring & wing nut assembly is indeed interesting, do the leg assemblies just get tightened between the clamp boards, or do the carriage bolts go through the leg
tops?
Are the eye bolts used for ease in making height adjustments only, or do they serve another purpose as well? Are the leg holes drilled out very deep to accept the length of the eye bolt?
In any case a very interesting post that I'm sure I will refer to many times over, thank you for posting. Rich
J. White,
Thanks for your reply, I am considering building a modular layout for several reasons, and thought I should be on the same page as everyone else for compatibility reasons. Rich
Hi Rich,
I am curious about the reasons. What's your direction on this project?
LCCA, National Capital Trackers and North Penn O Gaugers post their module specifications on their websites.
That should help you develop yours.
Lehigh line, Thanks for your response, as well as the links that you have provided. Both hirailers.org, and nattrackers.org have a wealth of information on their sites. With the two sites that you provided , as well as links provided by other responders I will have my work cut out for me for some time to come, I will have to keep notes to remember where I found what. You guys really are a great bunch, I just asked a question and received an overload of info; that is a good problem to have! Thank you, Rich
Matt, That is some bridge! It is longer than the size I have set aside for my layout.
Moonman, I have eight grandchildren, seven of them age eleven and under, I thought I would make some modules to set my layout up on, and then as the kids become old enough to have their own layouts I could set them up with starter layouts, and age appropriate trains of their own.
I was asking about a standard because if there was one I would want to utilize it. It does seem however that a standard is a local thing. The other respondents here have provided me with a great deal of information, all full of good ideas, and links to more.
I have looked at your contributions to layout building, and along with AGHR Matt, and another member by the user name Obsidian, too many others to list. You guys really do come up with some good stuff. Rich
Standards definitely tend to vary group-to-group/region-to-region. However, all is not lost if you have a "non-standard" module, because you can always make a pair of "adapter modules" to fit your needs. The only caveat is that if you have a module set with fewer mainlines (like a single or two-track Free-Mo set), you would create a traffic bottleneck, but then that's what true operation is about. Kinda gives me an idea of a module to add to my O scale Free-mo concept modules.
By the way, I'm the custodian of the old TinPlate Tracker specifications. They're located at http://home.earthlink.net/~mcjackson/TTManual.htm if you want to take a look.
Rich,
Thanks for the insight on your present and future use. I suppose you'll have to just choose the module standard that you like.
My vote would be the LCCA modules if you are a Lionel guy. They have a small radius curve piece (036, 048) which lets one build a 60" x 105" with six modules, 4 curves and 2 two straights.
The construction is not as simple as others. But none of the others actually use a small radius corner that would apply to a starter table.
By the way, you could still connect DCS to these modules.
Attachments
Matt, Thanks for the TT manual, and for your responses, I have briefly looked it over, and I will have to spend more time with it to get a real feel for what it is all about.
Moonman, Thank you for the Lionel Fasttrack manual, it is also a good reference for this project.
I guess my first task in this regard is to download all of the reference material into one folder , and as time permits, go in depth with each. Of course they all have their variations in regard to size, weight, maneuverability, cost etc. so choices will be dictated by some ,or all of those factors.
Thanks for responding with a wealth of information, and ideas. Rich
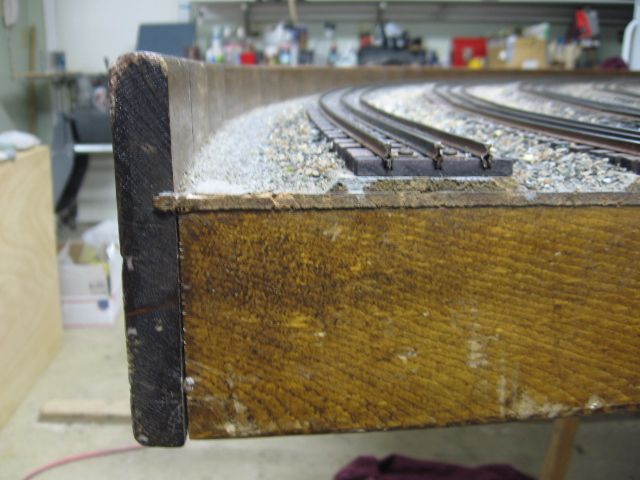
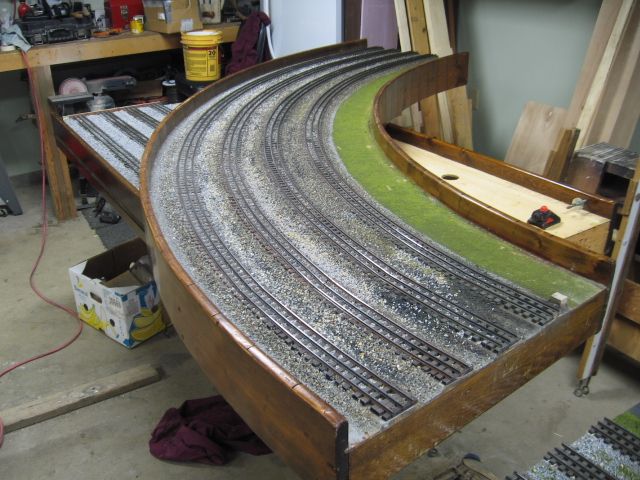
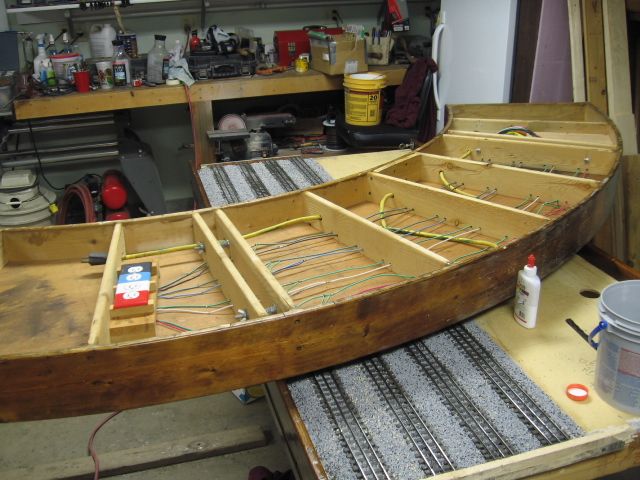
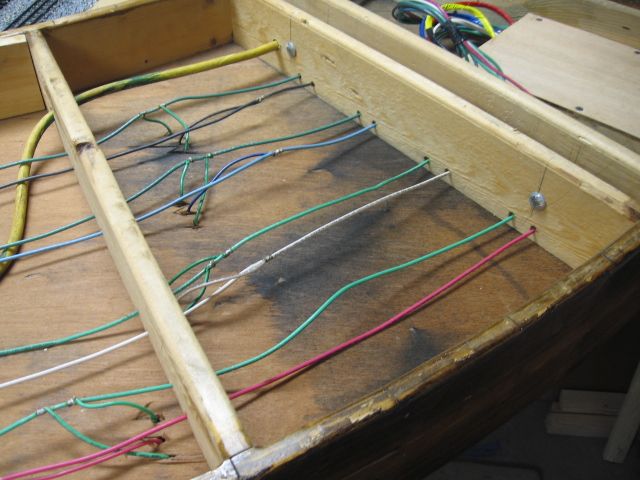
I am a little late to this party but I belong to Lower Susquehanna Valley Modular Railroaders. Out base modules are 2' x 4' with a rail height 36" off the ground. the yard modules are wider and lots of folks, like myself have made 1' x 4' extensions to help support additional scenery such as buildings and streets.
Are standards are based loosely on the original TT manual. We use three tracks, primarily gargraves. Long ago the club use to use bridge track sections between modules but they were determined to be more trouble than the were worth. So now all tracks run directly to the edges of the modules. Wiring for the rails use 4 pin trailer hitch connections. All the ground rails are tied together and the center rail uses the other three pins.
My personal module that I use the most was made so that the legs tucked into the underside of the module. This makes it fairly heavy to lug around (But I never forget the legs!!)
Attachments
Hi John, Very clever using the four pin connectors, and your module looks very solid. Thanks for sharing. Rich
Mike CT, Sorry for the delay in responding, but my days have been a little busy lately.
I have viewed and enjoyed the slide show of the club as well as all of the pictures and info provided either in or through your post.
The 37 1/2 inch width is larger than most, but with the four main lines I guess it is necessary. The flat space is 36"wide. The 1 1/2" accounts for the two raise face boards that allow for back to back and front to front stacking of the modules with out damage to track or small detail. You are right insofar as people being impressed by the curved corners, you can add me to that list. What is the radius of the outer most curve on those corners. The curves were built so that the exterior curved board is a 6 ft. radius. The outside track close to the outside board would be close to O 144 Each radius works in, with the tracks spaced 4 1/4" center to center. Inside curve would be approximately O 120 What is the minimum curve on the layout; I'm guessing that would be at the entrance to the turntable area? Entrance to the turntable is O 72 both curves.
Your carraige bolt/spring & wing nut assembly is indeed interesting, do the leg assemblies just get tightened between the clamp boards, Yes, the top of the legs clamp between the two boards pictured. or do the carriage bolts go through the leg
tops? No.
Are the eye bolts used for ease in making height adjustments only, or do they serve another purpose as well? Leveling only. Are the leg holes drilled out very deep to accept the length of the eye bolt? The holes for the eye bolts are at least 4" deep and were done on a drill press to assure that the holes were straight and centered in the legs.
In any case a very interesting post that I'm sure I will refer to many times over, thank you for posting. Rich
Modules were built with good quality 1"X 3 1/2" sheeting board. exposed edges of the framing was rounded over with a router. Module deck material is 3/16" luan board. All construction members are glued and screwed together.
![]() You are welcome have fun with your modules.
You are welcome have fun with your modules.![]()
Hi John, Very clever using the four pin connectors, and your module looks very solid. Thanks for sharing. Rich
Thanks, I forgot to mention that we use 1/4" strips of wood under the track. This is partially legacy and partially practical. The original modules had foam or cork under the track for noise control. This turned out to be not sturdy enough for portable equipment. The wood strips allowed new modules to meet old ones, also the little bit of raised track makes the ballast look much better.
Rich,
Add this one to your folder and the link to your bookmarks.
Both display with large layouts, the designs are solid.
Attachments
Moonman, Thanks for the guides from both National Capital Trackers, and from Hennig's Trains. I looked them over early this morning but then the day got away from me, ergo the late response. Rich


