For those of you who weather your buildings or trains, what has been your experience using weathering powders, chalks, paints and washes? Which do you prefer - brushed on dry powders or washes? Which is the easiest and most dummy proof, yields the best results and is most forgiving to the mistakes of a beginner? Please share the possible pitfalls of using using powders or liquids? Do you ever use both types of weathering on the same item and why? If you use paint or  washes do you usually brush it on or use an airbrush? If you prefer airbrushing, which model would you recommend for a novice just starting, that you've found the easiest, most foolproof and gives the best results?

Thanks for sharing your weatherning knowledge and expertise.

 
Original Post

Replies sorted oldest to newest

I have had some success with Testors Dull-coat and pastel chalks.I shave the chalk into powder and sprinkle it on and using a paint Brush work it into section where needed. The key is to follow up with light coats of Dull-Coat so as to not wash away the powder. repeat until you have the effect you are looking for. go to a swap meet and pick up some dollar special HO cars or under table O specials and practice. It is affordable.  If you really want to get into this then go airbrush

I have not yet tried an engine.

enjoy

That is a very complicated/involved question, or should I say several questions. There is no right or wrong way to weather items whether structures, rolling stock, or engines.


Just about everything I have weathered used several different methods, each method for a specific task. You will get many different answers to your questions as people have their own methods and reasons why they do what they do.


Easiest and most forgiving in my opion..... powders to start. Cheap, easy, and if you don't like it, just wipe it/wash it off. Remeber though, you will have to spray the project with some sort of flat finsih in order for the powders to "stick". You can't just jump in with a shiny new car, it's needs a surface with some "tooth" to begin the weathering process. You can do a simple fade with some heavily diluted acrylic paint and a wide brush or sponge brush. If you already own an airbrush you can do a lot with that too....but not so forgiving if you don't like it.


Weathering is a lot of trial and error until you find what you like and what works best for you, based on the look you're trying to achieve. Do you want some light weathering or are you doing a complete rust bucket?


Get some cheap cars to practice with...scale don't even matter.


Remember a little goes a loooong way! You can always add more, but it's pretty dificult to remove it once you've done it. Don't ruin a nice model with too much or too heavy glops of paint.


You can click on the link in my signature to se a few of the cars I've weathered. As I stated above, they all used several methods, and took 3-4 hours each. Extreme yes, it doesn't have to be done like that, thats just what I do.

Having seen a comment on buildings in this thread,. thought I would

ask,  I have covered, up the blue plastic on a LCCA. covered bridge, 

dirt colored ,mixed primer paint and water,

I 'm thinking that this  paint will be easy to rub off, what to do now, that paint

is dry, to keep paint on the plastic and not my fingers !!!

Bragdon powders are one of the easiest methods to use.  The do not need to be sealed and get very good results quickly.  Start slow and build up your weathering as to not over do it.  I also use craft paints but they take a lot of practice to get a good result.  once again start with a thinned color and build up to the point that you like it.  the good thing about craft paint is that it comes off easy.  I always seal it with dull coat because it does rub off when items are handled

I use both powders and a wash of alcohol and India ink on buildings.   The india ink works well to ad some detail to the crevices on a building, and darken it up a bit.


In addition I also will lightly dust the building with a flat black paint from a distance, 3 feed or so to give an overall grimy look.


The rustolium camouflage paints work well for this

Good lighting is a must.  As Jim Policastro mention "stop before you think it's enough"  My choice for a beginner is "Grimmy Black"  airbrush.  You are basicly dusting the building or model. Polyscale F414137
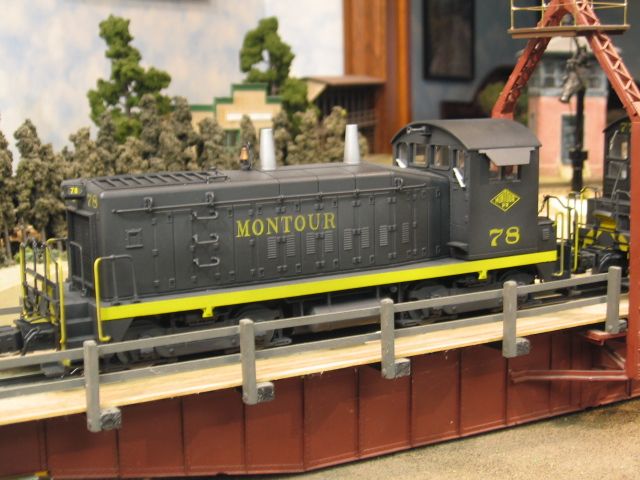
Atlas SW9 dusted roof, hood, and walkways.  Also note that this model was dull coated with Floquil F110015 Flat Finish.

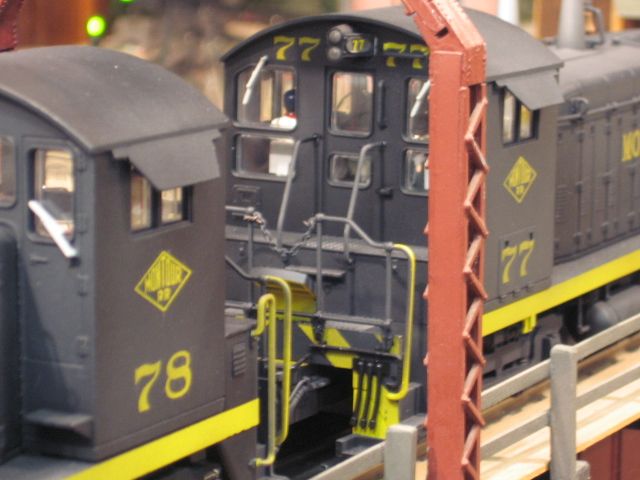
Grimmy black lightly applied to the yellow hand rails.

Before dull coat (flat finish) and application of Grimmy black.  Note that  Decal film tends to be glossy by nature requiring a gloss or satin application to the model before the decals are added, then dull/flat coat the model after decals are installed.

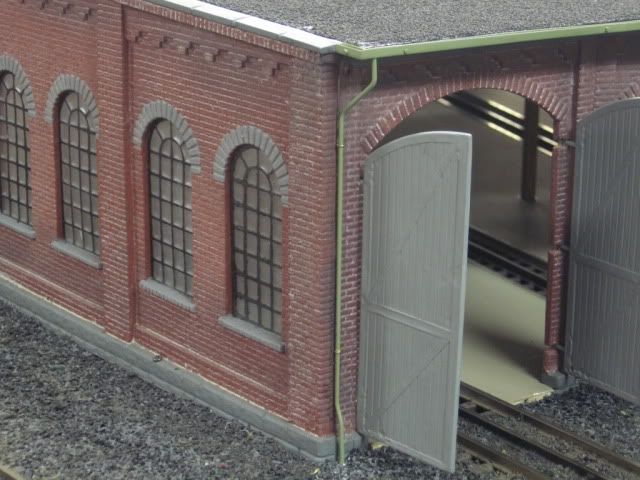
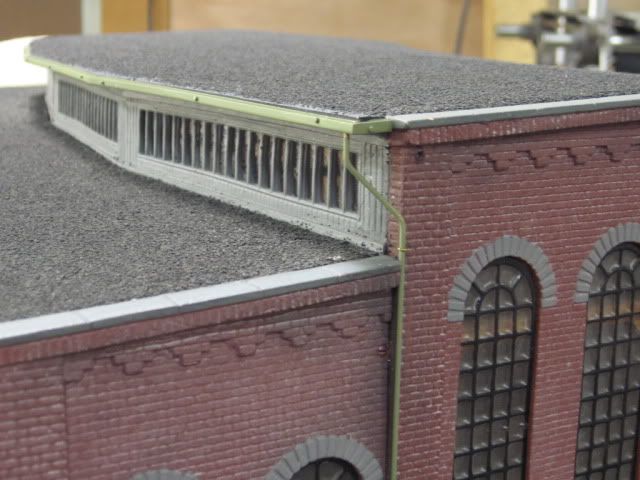
Dusting, and grim added to this Korber 304 Roundhouse model.

Badger air brush.

Last edited by Mike CT

I use an oil-based wash. The first step I do on a building like the one pictured below (MTH row house) is remove all the windows and doors...they snap right out...and I put the plastic window "glass" to the side. I then spray with my airbrush a thin coat of regular household varnish (not the water-based kind) on everything - structure and all the window door inserts. I then let it dry for at least 24 hours...48 in humid weather. The next step is to thin oil based paint - artist's oils, the kind that come in a tube. I thin with artist's turpentine (can get this at the same place as the artist's oils) until the consistency is like milk. I use black for the window frames, door frames, and all trim that is not brick. Then for the brick I use white. For a brick color that is lighter (like the one in the pic below) I use white that is tinted to a light gray...so the wash shows a bit better against the lighter color brick. Paint this wash on all the pieces. No need to let this dry but if you let it sit for a while it won't matter too much. The varnish undercoat is pretty durable and will withstand the next step...which is to wipe. Wipe with a cotton cloth - an old t-shirt cut into patches works great - all the excess oil off the pieces. For the tougher corners in the window and door frames I get in there with a Q-tip. You'll go through a lot of these since the oil is transferred to the cotton in the process.  Once all the excess oil is washed off I then spray all the pieces with flat lacquer - either from my airbrush or straight from a can. The last step is to put the windows and door frames back in along with the clear plastic window "glass". I find this method rather durable and it gives the plastic a nice "non-plastic" look and a bit more realism. I'm sure I could add pastels and other techniques to the mix. I'm currently in the process of (slowly) doing this wash technique to all my structures on my layout. Maybe someday I'll add the chalk/pastels.


MTH Structure 01


MTH Structure 02


MTH Structure 03


-Len


Attachments

Images (3)
  • MTH Structure 01: Unfinished structure
  • MTH Structure 02: Close-up of wash applied, and wiped, from window frames
  • MTH Structure 03: Finished structure
Post

OGR Publishing, Inc., 1310 Eastside Centre Ct, Ste 6, Mountain Home, AR 72653
800-980-OGRR (6477)
www.ogaugerr.com

×
×
×
×
Link copied to your clipboard.
×
×