Is there a tried, true and easy technique for cutting in a switch (Ross #100) where one previously didn’t exist? I have a straight section of track (Gargraves flexible 37”) and I want to add a siding for an industry. The method I’ve used previously was simply cut the track the exact length of the straight section of the switch with a Dremel and lift the section up to provide room so I can insert the switch into the pins. This has proven to be somewhat problematic and I have to believe there’s a better method which is eluding me. Previous problems I've experienced include:

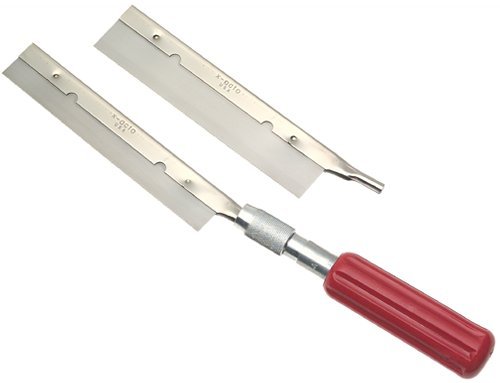
  1. The Dremel doesn’t make an exact 90 degree cut. There’s always a little bit of an angle. Should I use a hand razor saw for a precise cut perpendicular to the track?
  2. I have had to remove all the track screws/spikes for many feet on either side of the switch because the entire area of track has to be lifted up off the roadbed to make room for the track pins.
  3. Which means all the ballast has to be done over.

 There’s gotta be a better way. Any tips?

Original Post

Replies sorted oldest to newest

  1. The Dremel doesn’t make an exact 90 degree cut. There’s always a little bit of an angle. Should I use a hand razor saw for a precise cut perpendicular to the track?

        2. If using a Dremel type tool, you need a larger diameter disc so the shaft is parallel to the tracks."

#1 - uh, you do realize that that same Dremel tool and cutoff wheel is also used afterwards to trim and dress the cut to 90 degrees....? (I would recommend getting a pack of the reinforced cutoff wheels - the thin ones are extremely brittle. I seldom use those, unless I need a very thin cut.)

#2 - good idea, but #1 will also take care of it. I am not sure about the cutoff wheel diameter selection. Don't over-think it. 

#3 - safety glasses!

Gargraves sells blade-type track pins (or you could make your own out of tin or brass strips.)  I guess they are intended for drawbridges, or bridging sections of modular railroads, where pre-ballasted track is inserted from above to bridge the gap between sections of modular benchwork.  In any event, the blade connectors fit into the hollow underside of Gargraves / Ross rails, so the track can be dropped in vertically with only a little extra width. 

The blade connectors aren't the best for conducting electricity.  So you should pre-wire the switch by soldering wires to the underside prior to installation.  figure out where the wires will fall and drill holes, then connect the switch wires in common with your existing wiring.

What you're proposing is very doable.  Measure twice and cut once.  Take the time to get the alignment right and it will turn out great!

I have used the Gargraves Blade Connectors as shown in the attached picture. You use a small hammer, and drive the Blade into the mounted track. Wedge shaped end into rail first, with the bevel oriented such that the long point is a the top of the rail - this allows the blade to keep riding up on the ties. You drive in till about 1/4" is still exposed from the end of the rail. You can then push down the piece of track being installed onto the exposed blade ends.

The blade connectors are very thin so be careful driving them into the rail.

It seems in my foggy memory that Ross switches don't work with the blade connector, so you have to have some length of Gargraves track mated to the Ross switch, then you can use the blade connectors for Gargraves to Gargraves mating. But please, if you want to use the blade connectors with Ross switches, check out the mating situation for yourself.

I use the blade connectors every so often on my layout that I am building - just to mate one end of a piece of Gargraves to another piece of Gargraves - with the thought that if I have to rip up some track, I can start a "bladed" connection. May have to rip up a couple extra pieces, but I can try to avoid bending track trying to start ripping up in a long run of track.

Gargraves Blade Connector


Attachments

Images (1)
  • Gargraves Blade Connector

I use a 4 1/2" right angle grinder with thin cut off disc to make a precise 90 degree cut. I put 3 pins in the straight end of switch and push into existing track without taking track up. On the turn out side and the other straight end I clamp track pins to the side of rails that cant be seen, and solder in place. The pins fit perfect on the web of the rail. Easy to take out just heat the exterior pins.


What I've done is remove the screws from just the one section. Make a rough cut leaving excess on the end you plan to keep. Then remove both pieces. Grind (I use a belt sander) the good piece to the proper length with nice square ends. Put a set of pins in the new joint. Here's the trick: bend the new pins downward, then bend the switch and cut piece up so the new pins mate the two. Then just lower the "draw bridge". BINGO!

Edit: If you are placing the switch in the middle of the section, you'll just repeat the cutting process, and use another set of pins. If you place the switch over an existing joint, then you need to lift both sections.

Last edited by Big_Boy_4005

I assure you, the GarGraves blade connectors do work with Ross track and switches.  You might need to remove a bit of the "stringers" that hold the ties together on Ross track, to allow the blades to nestle into the rail.  (You also might have to slip a couple of extra ties under the cut sections afterward, to make everything look right.) 

Even if you plan to solder things together, the blade connectors will help hold the rails in place.  They don't provide good electrical connections though, which is why I recommend soldering power feed wires to the bottom of the switch.

When I cut track with the Dremel, I use a flex shaft attachment, which allows keeping the disk perpendicular right down to the rail head.  I suspend the Dremel motor from a freestanding hat rack so the flex shaft doesn't twist up under torque.  If you don't have a hat rack, ask a helper to hold it up while you make the cuts.


I agree with RSJB18 on using a multi-tool for cutting track in place.  Just find the finest toothed blade you can.  Or, you can try a right angle grinder.  Marita, Bosch, Porter Cable, etc.  Use the thin cut-off blades.  Admittedly, these tools are larger than most multi-tools, but they make quick work of the job in question.  

Be sure to use a vacuum while cutting the track.  All of that fine metal dust likes to find it's way up into locomotive mechanisms and into Magne-Traction equipped locos in particular.

Add Reply

Post
×
×
×
×
Link copied to your clipboard.
×
×