Hey guys, I'm currently working on restoring/changing numbers on a 2026, and I was having problems with the paint on the firebox. Upon further examination, the rivets we're messed up on the casting. How can I make replacements for it?
Replies sorted oldest to newest
I am pretty sure they sell rivet applications. I believe you glue them on paint over them.
Google Archer rivets. Some are on ebay.
Without any more specific data/picture of the rivets you seek to replicate, may I suggest Tichy Train Group's plastic molded rivets...? (I'm assuming we're talking something strictly cosmetic and not serving in the classic sense of joining a couple of parts together.)
If you're at all handy with small drill bits and a pin vise, they may be just the ticket. A drop of CA will hold them. They're molded in black plastic. Various head sizes available. Our LHS had them in stock when I was there today...IOW, currently available...through Walthers, their retailers, direct, et al. Looks to be a good choice for adding a few random ones. If you need a whole row or more, the Archer suggestion...or Micro-Mark's clone thereof...might be easier/faster?
I once made a handful of rivet head impressions using JB Weld and a toothpick. Had to experiment with the toothpick, technique, and steadying my hand. Freshly mixed JBW so applied can harden to a decent representative 'dot' (rivet). Making several equal sized impressions that way is more difficult, of course...not the least of which problem is the speed at which JBW loses its 'dabbing' qualities as it quickly begins to set. Frankly, now that Tichy has molded rivets, I know they'd be my first choice given the same problem I ran into. But, TEHO.
FWIW...
KD
Archer is currently in the process of shutting down, so that option would require fast moving. San Juan Details has taken over Grandt Line so they are also an option if injection molded rivet details are acceptable, Tichy rivets have worked for me in the past.
before i 3D printed i used Tichy rivets and bolt-heads on Plastruct beams to created connections.
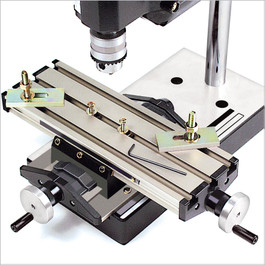
the holes along the beam webs needed to be spaced uniformly so I used a Micro-Mark drilling MicroLux® X-Y Table Attachment
to precisely move the beam to drill the bolt-head holes exactly and spaced evenly.
3D printing is a lot easier.
I had great success (only needed about 10-12) with JB Weld. It took some trial and error with placement and a wipe off here and there, but I got what I was looking for.
@AlanRail posted:before i 3D printed i used Tichy rivets and bolt-heads on Plastruct beams to created connections.
the holes along the beam webs needed to be spaced uniformly so I used a Micro-Mark drilling MicroLux® X-Y Table Attachment
I didn't know I needed that until now.
I have made them with super glue. There are some decal strips you can apply then paint over. Check MicroMark. I think that is where I saw them.
Depending on the head design desired I've used micro nails.
Thank you all for the replies! I'm debating actually finishing the restoration now, since it has the casting defect, and I have a few good ones of the same locomotive, I may strip the paint and take apart the motor to show how they were built, thoughts?


