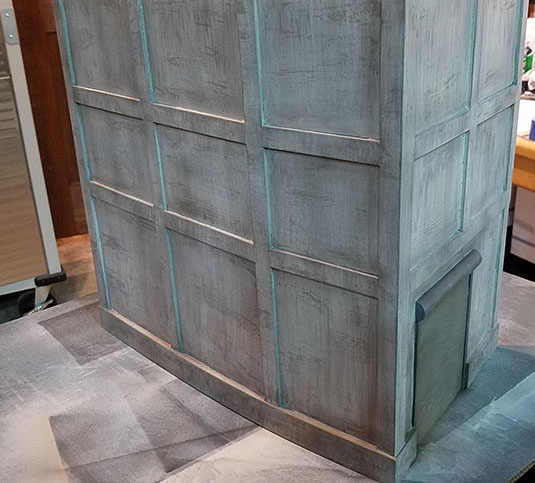
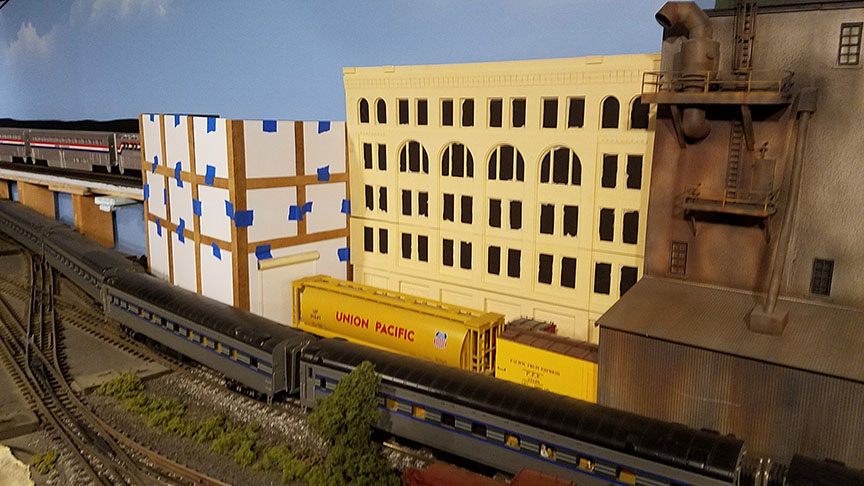
I didn't get to paint my card room kit tonight as I had to take my son to his soccer practice, which last 1.5 hrs. So that I didn't waste time tonight waiting around, I brought a scratch built building I wanted to finish up. So I sent the time waiting tonight working on this building which is a flat and will be part of a much larger plant. This is just a warehouse with track access overhead door. I cut all the styrene panels to fit in between the support vertical and horizontal members. I will glue them onto the foam core tomorrow and begin painting it a concrete color, weather and add some extra details to roof and side walls. Here are a couple shots of it on the layout where it will reside , to give you an idea where it is going . There are a couple shots off the layout to.
 

Last edited by CSX Al
Original Post

Replies sorted oldest to newest

prrhorseshoecurve posted:

Very Nice! I am intrigued on that tan Flat that you have next to the Grain elevator. Is that a Chooch kit?


Yes it is. I have a bunch of these to build and finish. That one is just in place but I still have to assemble and paint it. Mike from Chooch is one of my customers with a pair of turntables.  

CSX Al posted:

I didn't get to paint my card room kit tonight as I had to take my son to his soccer practice, which last 1.5 hrs. So that I didn't waste time tonight waiting around, I brought a scratch built building I wanted to finish up. So I sent the time waiting tonight working on this building which is a flat and will be part of a much larger plant. This is just a warehouse with track access overhead door. I cut all the styrene panels to fit in between the support vertical and horizontal members. I will glue them onto the foam core tomorrow and begin painting it a concrete color, weather and add some extra details to roof and side walls. Here are a couple shots of it on the layout where it will reside , to give you an idea where it is going . There are a couple shots off the layout to.


Looks great Al, it appears you are making good progress on the layout since the last time I was there.

Thank you Eric & Art. I enjoy posting this stuff and it is relaxing working on this stuff at night.

Tonight I got all the styrene panels I cut last night glued in and have worked the wood filler around all the MDF joints. Then I used skim coats scattered on the rest of the support beams and then on the styrene panels. Once all of this has dried I will go back and lightly sand the filler to smooth a little but leave the varying contours of the filler. Once this get painted concrete color it will resemble formed concrete with the slightly imperfect surface. ( I hope  )

http://www.studiozphoto.com/PlantBldg1_6.jpg

http://www.studiozphoto.com/PlantBldg1_6.jpg

Well, all that is left is to put the roof and details on the building. Tonight I got all the painting and weathering done.

Here is a photo after I sanded the wood filler

Next I masked off the door and gave it a base coat of primer

Then I painted the whole building an old concrete color that we use on our turntables.

After that dried I randomly put rubber cement on top of the concrete colorand let dry.

I then masked off door and painted the door a base coat of red oxide primer and when dry did the salt painting trick. You can see the rubber cement on the concrete paint in the photo of the masked off door.

I then covered the door after salt had dried on door in order to spray the final color on the building, an off white color seen here.

Once dry I then rubbed the paint where the rubber cement was applied to concrete color to reveal the paint below. I did this to simulate how paint flakes off concrete building over time.

Final steps were to unmask door and paint it a siler gray color with some grime and some rusty brownish color. once dry I took a stiff brush and brushed away the salt to give rust spots on the door.

Last step was to weather and give the building a watered down black wash and some air brushing with some grimy black. I also while the wash is wet use a hairdryer to speed drying and use another brush to streak the paint on the wall in the direction of gravity

Here is the ending results.


Add Reply

Post
×
×
×
×
Link copied to your clipboard.
×
×