When I built my first layout I ran the wires through hole in the metal eye bolts. I never had any issues of insulation chafing or shorting out in 12 years of use. This time when I run the wires under the new layout should I look for some type of plastic or plastic lined eye bolts when I do the wiring this time? Thank you for any help. Choo Choo Kenny![]()
Replies sorted oldest to newest
Perhaps hook eyes bolts or something where you can add\remove a run if needed. Did that ever happen in 12 years? If not, go with what works.
Depending on the number of wires, which always seems to be more than you expected, there are several different wire managements pictured here.


More wires, wire management upgraded.
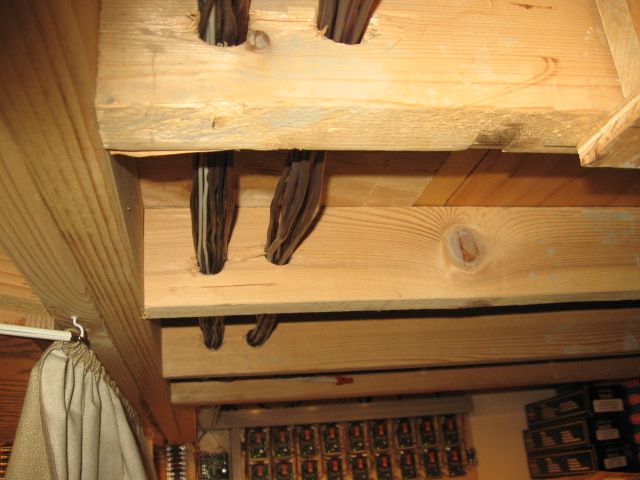
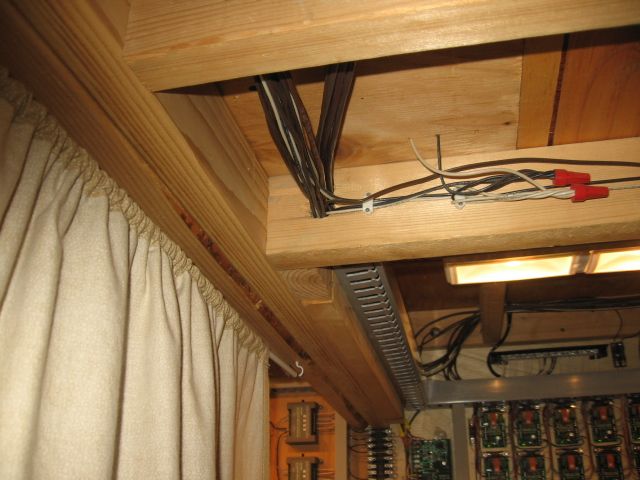
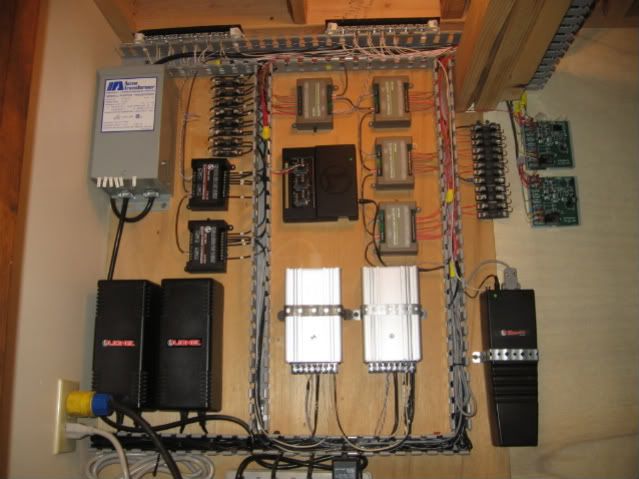

Superb, Mike, just superb.
Your work is the standard to which I strive (but fall short). ![]()
George
Thanks George, J Daddy. ![]()
![]()
![]() Mike
Mike![]()
The thing most don't see is that I grossly under-estimated the intensity of the wiring. I ripped it all apart, installed larger wire tray, and re-did a portion of the final connections the second time, when I added the Atlas 6924 relay boards, for non-de-rail wiring and power routing. Still a fair amount of accessory wiring to complete the layout.
Mike, your wiring is outstanding. Now I need to up my game as I build my new layout...
I still like my method! Greg
I used these PVC conduit clamps. I only put a screw in one side. That way I can move wires in and out easily. I also hung my wire on the front edge of the layout. The most I have to do is get down on one knee to connect the feeder wires with suitcase connectors. This will all eventually be hidden with fascia. However I have been thinking about a hinged design so I can move the fascia to easily access wires if needed. No crawling underneath bench work!
![]()
BTW Kenny... Did your package arrive?
Ron
Attachments
Plastic conduit straps like Gary P and Ron045 posted. I used those and also used some holes drilled in the bench work framing so I didn't have to go under the framework. The one screw method described by Ron045 works well with the conduit straps. Use bigger conduit straps than you think you will ever need. at least one size bigger. If you do happen to need bigger ones, they are easy to change out and don't cost a lot.
eye screws are the only way to go!
CNGW, good luck with that!
CNGW, good luck with that!
Sometimes you don't need luck. Each Christmas, I put up the temp layout. The one in the picts above (topside picts below) ran without a hitch - other than the Realtrax rails that lost connections due to factory flaws- for the 2 month season it was up. Lots of track, DCS worked perfect. I used 2 controllers so guests could run, and we ran 3 or 4 trains at a time. Once I wire nutted it all and tested, I pushed it under the board, put on the red plastic sides, and touched it when I took it all down. All the buildings were lit, all the gates, gatemen and towers lit, and all postwar accessories worked. Note the log, coal, cattle and milk loader. Done it like that many a Christmas.
Luck? Me? I don't believe in luck. Greg
(I can post a movie of the train ride around the layout if you like!) 68 and still like trains.
Attachments
Just to scare the pants off of a few of you, here are a couple of more under the table shots. Note the aux transformers screwed to the legs, and the abundant use of 110V. Even some of the houses are lit w/ 110. Never had a problem after all of these years.....just make sure you know what wire carries what, and work w/ power off.
Oh, and it took me about 14 days from laying the tables out, to finish as you see it in the post above. I left it up for a couple of months, then it all came down and got packed up again until another Christmas. Each year, a different track plan and different table arrangement. Note the sections bolted together and then the whole thing is on wheels.
Ask Walt and a couple of others how much work it is to do a "temp" layout. We don't have time to worry about pretty wiring, as nice as pretty wiring is. Greg
Attachments
Yikes! ![]()
![]()

John:
Where'd you find the one-eared cat?? He looks like I feel when the alarm goes off.. ![]()
To get on topic, I ran across several lengths of 1" PVC pipe at a garage sale for a couple of dollars - thought I'd use the stuff for modeling trackside propane tanks.
Then, I decided to slice off approximately 1" lengths with the band saw. Armed with a hot-glue gun, I could paste up a bunch of those rings under the layout to use for wire runs. The glue is as strong as the wood fibers so they hold up quite well.
Neil
The car was the result of a Google Image search on Yikes!
I have thought of a similar cable holder, but laziness being what it is, I just drill holes in the frame. ![]()
Just to scare the pants off of a few of you, here are a couple of more under the table shots. Note the aux transformers screwed to the legs, and the abundant use of 110V. Even some of the houses are lit w/ 110. Never had a problem after all of these years.....just make sure you know what wire carries what, and work w/ power off.
Therein lies the trick. I used Avery file labels attached to each separate circuit and put more on when the wire runs went through the risers. I used a variety of wire colors, as well, but found I used the labels when necessary to identify a circuit.
Back in the day, I used to have a program called "murphy.com" that I included in the autoexec.bat file of my DOS-based computer. It would print a different Murphy's Law to the screen every day when I started up my computer. I loved it.
Among my favorites was one that pertains to this thread. The picture above reminded me of it.
Murphy's Wiring Conjecture: If a cable has one end, then it has another.
Steven J. Serenska
all my wiring is run to the front of the layout and is hidden by the added fascia board. no more crawling underneath.
I use these. $6.90 for 20 at HD. They hold a lot of wire without threading every time. 2X2 wire channel works well, but is much more expensive.
Gentlemen,
At NASA I tried to get the boss to sub contract all the wiring on the Space Shuttle to Mike CT, but the boss said he used way to much wood however. Great job Mike simply fantastic.
PCRR/Dave
Attachments
The holes. How do you make those holes?? ![]() Dewey, I also love to make saw dust.
Dewey, I also love to make saw dust.![]()
![]() I purchased one of these new, 1975, which is still out there doing work. This one is the newest of (4). These drills come with warnings about injury, and instructions on how to use. The drill is designed with the offset to allow easy use between 16" on center stud/joist spacing. It does work well under a layout.
I purchased one of these new, 1975, which is still out there doing work. This one is the newest of (4). These drills come with warnings about injury, and instructions on how to use. The drill is designed with the offset to allow easy use between 16" on center stud/joist spacing. It does work well under a layout.
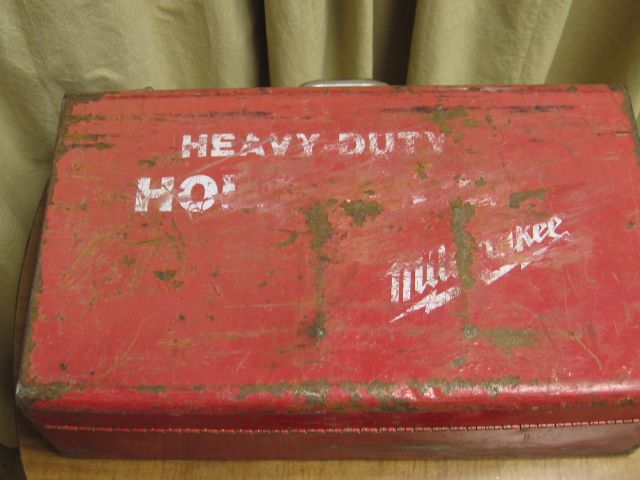
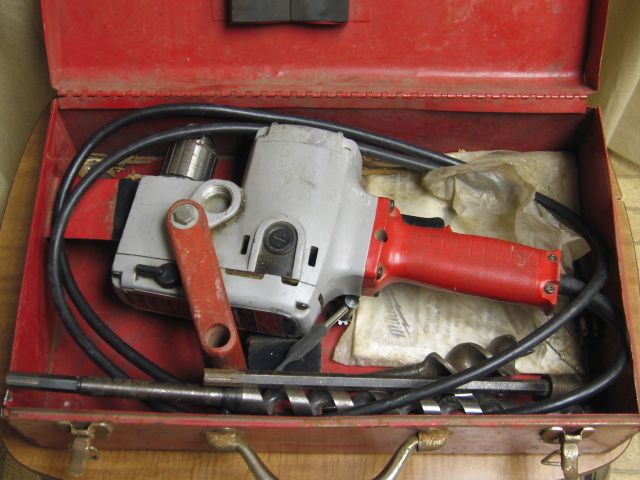
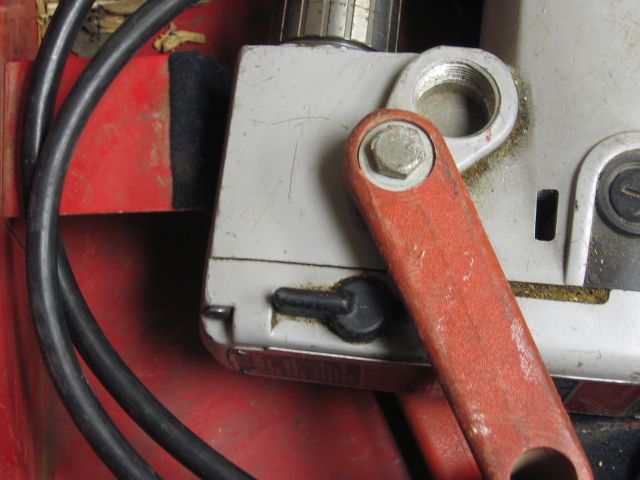
You have a choice of drill speeds, 300 or 1,200 rpm. Note the black mechanical shift lever to the left of the Red D-handle. The electric switch, near the bottom of the pistol grip, allows for forward or reverse. Trigger switch, top of handle, is on/off.
A 1"X 18" Ship auger. A ship auger has no center shaft, which allows for easy removal of cut material from the hole. With a small triangle file, the ship auger can be sharpened for many years of use.
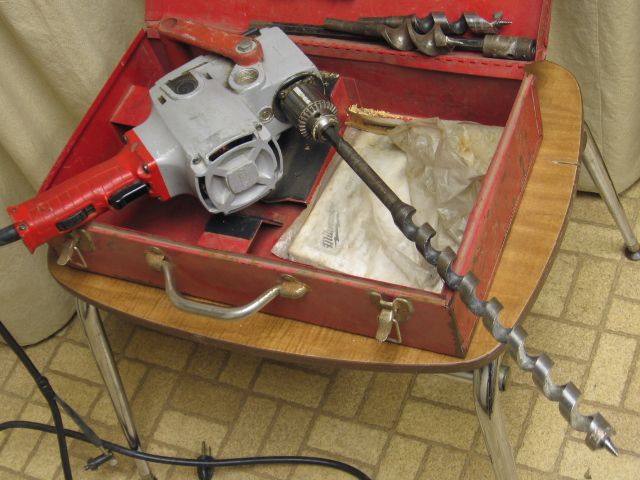
A 1" X 6" ship auger, most used bit. Note the compact design of the drill to fit between joist spaces.
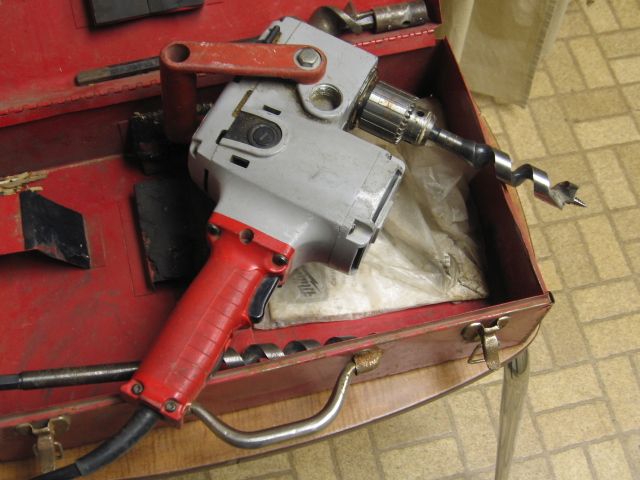
Most work is done with these tools.
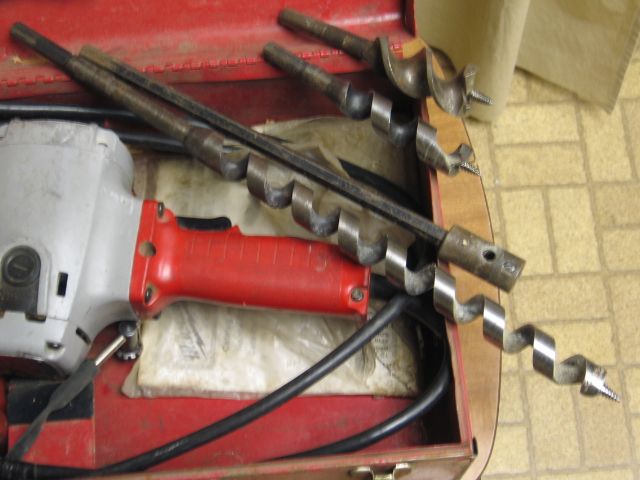
As I mentioned the bits can be sharpened. The augers will cut through nails, but usually require sharpening after cutting nails.
Holes larger than 1 1/4" are done with a hole saw kit, standard pipe sizes through 2". I have a 4 1/2" hole saw, most used for installing dryer and exhaust fan vents.
I needed to install wires over a ceiling to a remote section of my layout. I use the larger bit pictured with the extension to drill these holes. Wires were fished up through an existing insulated wall.
I was working on my friend, Tom B's, layout last Saturday. I used this drill, Milwaukee 1675-1, a lot.
![]() Mike CT
Mike CT![]()
I've had a close quarters drill for years, it's handy in certain situations.
So that's why some of you over build your layouts with all that 2" lumber. It's so you can drill all those holes in it! A properly built and braced 2X2" leg on an L-girder benchwork will support a ton load. (That's with no holes)![]()
Please don't frame my roof John H.![]() .
.
Mike CT. I love your photos of your heavy duty drills. Your photos keep telling me to go back to work. Who knows I feel great just got home from the Heart DR. He dose not want to see me for 6 months. They Called me to cancel the Appointment for the Running leg. Waiting for approval.
Can I say I AM TIRED of doing nothing
My second layout is much neater wiring than the first. I am about to rip up the first now to redo and rewire. I really made a mess of those wires.
Please don't frame my roof John![]() .
.
I think differently about stuff that has to carry a structural load. ![]()
Newer wood structures have engineered beam/floor joists to span longer distances. Apparently no one likes a post in their garage/or game room. These structural parts have instruction, stamped/or pasted on them, as to where you can and can not drill holes. My layout, with 2" X 4" framing, is easy to drill and will support my weight and then some. The Mercer Junction Store layout was framed with 2"X 6".
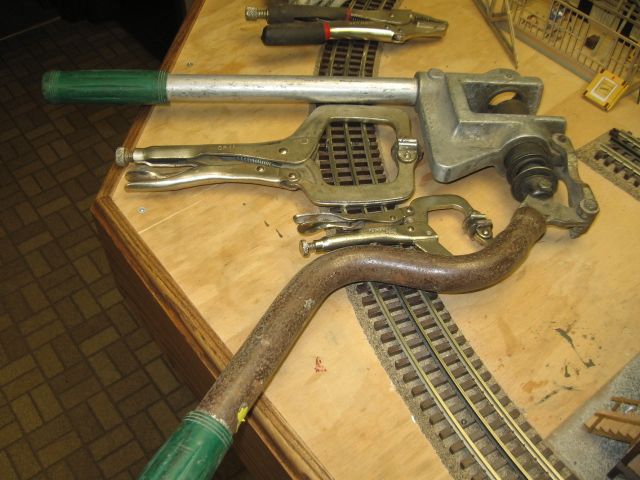
Not a lot of intensity here for metal framing, but it does exist, and there are tools and fastening systems that are used for metal framing. Most used tool is a stud punch. There are plastic bushings that are inserted in the holes to protect wiring.
Greenlee Stud punch.
Thank you to those who sent me emails, I liked the comments...and to those who "liked" my posts. We are a diverse group on here.
Stay warm and take care...life is to short.
Greg
Dewey,
I was just quoting Lynn Westcott's book on L-Girder benchwork. I used 2X4 legs on mine because the price was "just right". The rest is all 1X4 and smaller. You can't believe how solid it is, but that doesn't mean it is better. It is just the way I did it. There is more than one way to hold a train up!


