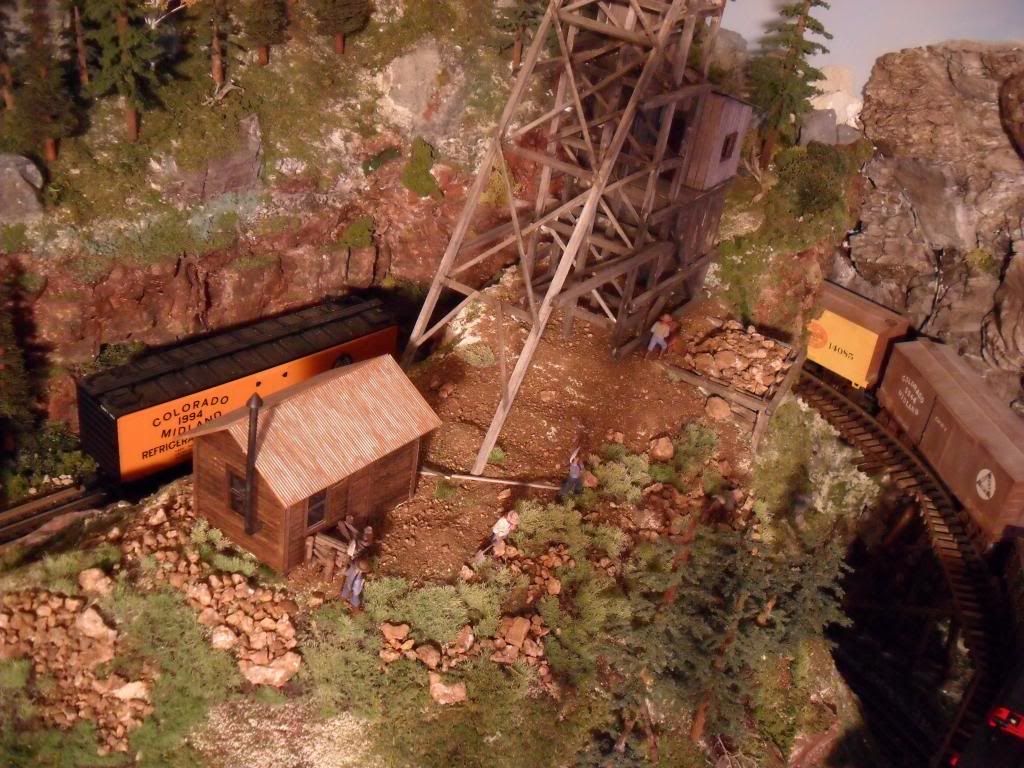
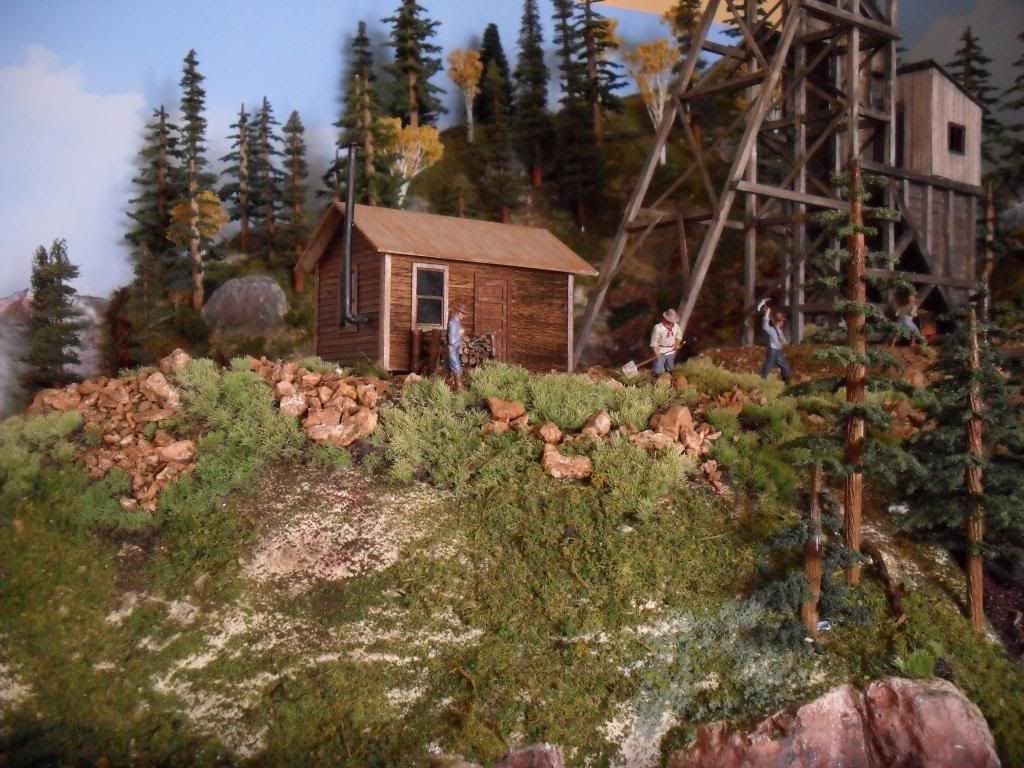
Getting away from painting craftsman structures for a moment, I would like to make a comment about a dirty subject.

Dirt .


BTW, thanks to all of you, once again, for the dozens of great suggestions for all of my scenery questions.

Each of you gets a burger and a beer  .  .  .  


On the subject of ground cover, I have been underwhelmed by what is available on the market.

I wanted a ground cover that looks like the ground.

I went out to the back yard and shoveled several liters of dirt into a bucket.

I baked the dirt at 375 degrees for an hour.

I shook it, and screened it.


The result was the best ground cover I ever saw.

I'm a dirt man from now on.

Oh, did I forget to mention . . . . the ground cover was free of charge.


Original Post

Replies sorted oldest to newest

LOLOLOLOL . . . . . 


The first bake job went well until a small twig caught on fire.

I got to that one fast.

I broke my wife's flour sifter and, after a brief chase at the point of a machete, I made my getaway.


Now I bake at a lower temperature with the number of the fire department nearby.

My wife has a new sifter and the machete is locked up.


Hey . . . .  you want good ground cover or what?


Scrappy the Fast

I love this Forum.

i believe the dirt must be baked to kill anything living.

The folks in Roseville have always insisted on that.

They have enough of a problem with me, without mites and spiders.

In addition, I have allergies.

The baking process dries out the dirt and makes for MUCH easier sifting.

The dirt then practically cleans and sifts itself.

I use the oven to control temperature and time. That way I can use the grill for burgers.

If I ran out of propane, out would come the machete.


You will love your dirt.

Scrappy the brown dirt cowboy.

Scher, do you glue it down or leave it loose?  I've found glueing dirt down (at least with with white glue) turns it into a kind of mud - which when it dries it looks like dried mud, not like dirt.  I did use that to advantage on a past layout to make rutted roads -- and very realistic, dried-mud rutted roads they were, too. 

The dirt has to be dried, it doesn't have to be baked. I dig up a 5 gallon bucket full, put it somewhere where it will dry out. I stir it occasionally, to bring the moist dirt to the top so it can dry. Once it's dry you have nothing to worry about. Nothing on God's green earth will survive without moisture.


Lee, it sounds like you are wetting the dirt too much.

A light spray with wet water (water w/ a few drops of dishwashing detergent) followed by a dribble of dilute white glue will glue down most loose materials without changing the look much.


If that doesn't work, proceed as above, let it dry, then coat with a spray adhesive, and sprinkle a top coat of dry material.

Originally Posted by Drew Madere:
Originally Posted by Vulcan:

I've been using dirt for nearly 20 years and I've never baked it.

I agree with Vulcan, you are going to glue it down

Same; never had any problems if it's going to be glued down. 


If it's not, then that's something different altogether...

"Scher, do you glue it down or leave it loose?  I've found glueing dirt down (at least with with white glue) turns it into a kind of mud - which when it dries it looks like dried mud, not like dirt.  I did use that to advantage on a past layout to make rutted roads -- and very realistic, dried-mud rutted roads they were, too. "


Lee . . . .  My process is quite simple. I brush on a solution of 50/50 yellow glue/water. I just cover the table barely. I then lightly mist with window cleaner to "soften" the water so it is sufficiently absorptive. I then sprinkle the dirt with a spoon so that it not only covers the glue but adds a very thin layer. The water/glue then soaks into the dirt, but only enough to hold it down. You might have to play with the amounts before you are comfortable. The result is a fairly hard shell that does not move. 


Vulcan . . .  You are absolutely right, baking the dirt is not needed for drying unless you have the dirt we do in the yard. It is water soaked. If I let the earth dry by itself in our garage, I would be even older than the reprobate, irascible old curmudgeon I already am.

I do believe that it must be baked to be sure impurities are removed. I have allergies and I need to get the living organisms to be unliving.


Hey, the process works for me. Is it necessary for everyone to do each step? Probably not.


Scrappy

Thanks.  I have lots of free dirt in my backyard, too, so I will definately try exactly what you do.  I will buy my own sifter though ;-)


A couple of years ago I did my SHEEP (a BEEP converted to a Shay-like loco) and a set of scratch built logging cars: I filled them with "logs" I cut from branches from some big bushes we trimmed back in our yard. I baked all of them for two hours at 240 deg - hot and long enough, I though, to kill any bugs/germs/whatever in them, but not nearly hot enough to cause problems.  I think it is a good precaution with any "outside" material.

I have been using real dirt in the form of washed sand for about 20 years now. Sand is available from any sand and gravel plant in varying degrees of fineness. I usually use something a bit coarser than sandbox sand. Locally it's about $5 for an 80 pound bag.  After putting it down with the traditional white glue and wet water mix and letting it dry, i often add Woodland Scenics turf in varying shades of green to some areas (where i want the appearance of vegetation) and in the yard/industrial areas mist i on light amounts of black paint from a rattle can to give the appearance of oil soaked dirt.

jackson

P1000153

P1000159

Attachments

Images (2)
  • P1000153
  • P1000159

I have used both local field dirt and sand from a small creek out at the Farm. Normally I just sift it through an old piece of screen wire over a frame and let it air dry while scattered on plastic or cardboard.

I tried Microwave drying once and got a light and noise show for a few seconds--iron in that dirt and creek sand. Cleaning the filthy Mcrowave ended my use of that process.

Over time I have used the wet water/glue procedure for application of any groundscaping. 


Last edited by Dewey Trogdon

Nice thread Eliot.  The thread has motivated me to want to lay down some more ground cover.  I've still got plenty to do.  I tend to use real earth along with some of the different commerical materials to give varying colors and tectures.  I  agree baking the dirt does make a difference when trying to sift it.  Thanks!


modeltrainsparts - I really like your coal yard. Nice vignette and photo!  Bo 


Visit my website Bo's Trains at http://www.bostrains.com


Perhaps he meant "clean" in the aspect of it being free/rid of extraneous, minute materials that would not make it through the sifter.


Elliott, you mention that you put it down with a spoon, and it probably works well. Have you ever tried the sifter to put in down in areas where you have the room? Seems like it would give a nice even layer. You could then use the spoon to build up areas you wanted higher.


The picts shown of stuff done look great. It appears most have a good idea of how to master the technique.


If only I did not do snow scenes for my scenery ............................


Greg

Originally Posted by laz1957:

Do YUZ GUYZ use an underlayment or just glue it right to the plywood? 

It varies with the situation, but more often than not I end up with a layer of foam insulation below the ground cover.  That way, I can sculpt it subtly and avoid an unrealistic "dead flat" look without having to use a huge huge amounts of dirt (or whatever).  I bridge the transitions and cracks with wide masking tape.

Since I am attempting to model the "coal region", I make a point to pick up a bucket of coal dirt when I visit my parents in PA. Next I bring it home, clean it, sift it to the size I want and then use it on the layout. I apply a 50/50 mixture of wood glue and water and brush it on the sculptamold, fusion fiber or whatever else the underlayment is. Then I sprinkle on the dirt. Once ballasting is finished, I will secure with diluted white glue. This past week I have actually been applying the ground cover to the new section of the layout. 


In the photo below you could see the cardboard and foam underlayment and then the sculptamold on top of it. 

IMG_2154

IMG_2157


IMG_2168

IMG_2169

Last edited by GEF
Originally Posted by Rick946:
Ok guys, I tried the dirt today on my layout. Looks great, but when I try to spray the 50/50 Elmer's/water on top, it sprays in a stream no matter what sprayer I use. Does it need to be mixed thinner or am I just not doing this right? This is my first layout and any input is greatly appreciated.

I dribble it with an eye-dropper.

Spread a very thin coat of glue first and then sprinkle the dirt.

If you want additional layers, mist with Windex. A fine mist from 18" and then

sprinkle more dirt. Then use an eye-dropper as Avanti said but with a 60-40 water to white glue or even 70-30. 


CONFESSION: I don't glue everything. Haven't lost any dirt yet. I use multiple layers with different colors and consistencies.

Post

OGR Publishing, Inc., 1310 Eastside Centre Ct, Ste 6, Mountain Home, AR 72653
800-980-OGRR (6477)
www.ogaugerr.com

×
×
×
×
Link copied to your clipboard.
×
×