Just received my Christmas present by trading with a fellow Forum member for this beautiful JLC Allegheny. It seems to have survived mostly intact being transported by Fed Ex but may have dislodged something in transit. The smoke system doesn't work and the switch is loose and won't 'click' at either end of travel. In looking down the stacks, I see an obstruction covering half of the front stack and completely covering the rear one.


It is with much fear and trepidation that I must remove the cab to check things out. Have not disassembled a steamer of this size before and am asking is there anything to look out for before I begin?

DSC00071

DSC00078

Attachments

Images (2)
  • DSC00071
  • DSC00078
Last edited by c.sam
Original Post

Replies sorted oldest to newest

Seems like you should be able to look down the stacks and only see this Smoke Funnel.  


Also, the smoke switch is only $1.  


Seems like going internal is necessary to realign the funnel and replace the switch.  Boy there are a lot of pieces to these locomotives.  I'm a diesel guy except for my little Berkshire Polar Express.  Be careful in there.  

John is the expert.I have learned a great deal from him and our other top guys.First build an engine cradle.It looks like a small mitrebox covered with plush carpet.It is easy to build.Some guys use a big piece of foam and cut a 3in wide 3 in deep slot in it.Put the engine in it upside down.Dont let it intimidate you just take your time.The guys on here have been able to talk me through it,they can talk you through it.Sounds like you have wires obstructing the stack or a melted "funnel"as I call itThis may seem weird but it also looks like you have wadding down in there.That should be contained in the closed unit itself.Well....Good luck.Nick

Attachments

Images (1)
  • ResizedImage_1387868635019
Last edited by rockstars1989

HI Nick,  thanks for asking but not yet.


I was able to 'manipulate' the switch to the ON position and can hear a very weak pulse when in motion but no smoke. I was able to get some fluid through the front stack ok. The owner said he never used the smoke.


Am not certain what tool I need to pull the 4 screws holding the shell on. They look like an Allen head screw but have a smooth opening - no splines or socket at all.????

Last edited by c.sam
OK all of my big engines have philips screws.You will have to talk to some of the top dawgs about that.Glad to see you enjoying it any way it is a beautiful engine.NickOriginally Posted by c.sam:

HI Nick,  thanks for asking but not yet.


I was able to 'jimmy' the switch to the on position and can hear a very weak pulse when in motion but no smoke. I was able to get some fluid through the front stack ok. The owner said he never used the smoke.


Am not certain what tool I need to pull the 4 screws holding the shell on. They look like an Allen head screw but have a smooth opening - no splines or socket at all.????


Sam;

Merry Christmas to you and your family!~

That obstruction almost looks like a shrink sleeve used for wiring, and I am wondering if it is the boiler marker light wiring that got accidentally pinched when the engine was assembled.

In any case it needs to come apart.

I don't have that engine, but Alleghenys that I have pulled apart have two screws above the front trucks that are challenging to get to.

There should be another set between the trucks, and another set near the back of the frame under the cab.

Maybe post a picture of the underside and folks here can help?

The manual should also show the screw locations.


Rod

Thanks for all the input fellas - greatly appreciated!

Here's the diagram from the manual showing the 4 'screws'.

p 27


Looking at the front two, (finger pointing) it appears that there are just 'holes' with no screws, bolts, etc.

Underneath the rear truck but further back from where they should be are two Allen bolts that look promising. The many Phillip head screws that I've seen on other locomotives are all holding pieces (piping, flanges, etc) and don't seem to be structural.


I am not 'mechanically inclined' and projects like this are intimidating. I've only opened up one steamer previously. There are no Lionel service Stations nearby and the one local MTH Tech that I've used previously doesn't work on 'off-brand' locomotives!


DSC00071 2

DSC00069 2

Attachments

Images (3)
  • p 27
  • DSC00071 2
  • DSC00069 2
Last edited by c.sam

I have this model and have had it apart once a few years ago to get at the smoke unit, which never produced a lot of smoke. I swapped out the wicking for the more modern Lionel stuff, saturated it with JC Megasteam and it showed some improvement.


Page 27 of the manual shows that it has 4 body screws, two at the front in or next to the cylinders and two at the back just in front of the rear wheelset. They should all be Phillips cross-headed screws. You need to be careful taking these out as they are odd sized - not US measurements but they will come out using a standard Phillips screwdriver. There are also two more screws in the middle cylinders but from memory these don't hold the boiler shell on.


I can't see the obstruction you mention in the smoke funnel and it would be really odd if a wire got pinched in there and actually obstructed all smoke output if the smoke unit was giving you any. Looking at the funnel from above is deceptive because the hole down to the smoke unit is slightly offset from the middle but you should easily be able to get a flexible wire or pipe cleaner down into it.


If you are getting puffing there's power to the fan unit but maybe none to the heating element - can you feel any heat from the stack with the puffs? If not it is possible that the resistor heating element wiring is cracked. This model also has an AC regulator to control current to the smoke unit and in my experience these fail on a regular basis. I have to defer to the experts as to whether a failed regulator would mean you would be getting no puffs - I am not sure it provides any power to the fan motor.


If you are reluctant to take it apart try emailing Mike Reagan, who might be able to tell you if the problem is simpler than it looks.


 C Sam, I don't have the Lionel version. I do have the MTH and 3rd rail ones. Both of them I've gone deep inside and upgraded. The third rail was a bit tougher to move around inside of. Both were worth the effort. If you like smoke as much as I do, just be patient, have the engine in a foam cradle and take you time with.

 I'm betting Lionel ones are made well and won't be too hard to do without breaking something. Some guys rush them back together and don't notice they haven't assembled them correctly. I've even seen were screws were left out as they were difficult to align the parts correctly.

 That loco is a work of art and I feel would be worth your efforts and attention. Getting the linkage back together correctly when taken apart, is a job all of it's own! Take pictures!!! 

I'll have to see if I have a set of Allen head drivers somewhere but I don't see any phillips head screws of any substance.  Perhaps writing Mike is the best idea.


All marker lights are working but from what I can tell, the unit is not putting out any heat.


Yes, Joe,  I like smoke and lots of it! Most of our older Lionel steamers were marginal at best but the Legacy K4 I traded for this one smoked very well as does our MR S3 and C&O Berkshire. They both really push it out!

I just hate to start on this and get stumped halfway through and have a mess on my hands.

As a side note this one was made in China.


DSC00140


Certainly will look better with billows of smoke!

Attachments

Images (1)
  • DSC00140
Last edited by c.sam

 I had to step back from my 3rd rail more than once. I had it on the bench and was not in a rush. Fitting a MTH smoke unit inside seemed tedious. Looking back it was not a big deal. I bet if I could do it, you can!

 I would bet there are guys here that have been into this, and could offer help if needed. Of course if you feel that it's out of reach, asking another to do it may save some grief!

http://www.youtube.com/watch?v=8H02b76Arx8

I still have to go back inside and retime the drivers. The smoke unit did not have the correct funnel for it either.

Last edited by Engineer-Joe

I cannot really see these screws very well, and at least one of them does indeed look

"smooth" inside - but that cannot be and have it be a screw, can it?


Could it be the same sort of screw head that is often used by Lionel on their side

rod shoulder screw? If so, do you have the side rod wrench that came with the

loco (for traction tire fiddling and such)?


I don't have any JLC items, but I just looked underneath the boiler of my new Legacy

Pilot GS-6 and saw only Phillips heads - and an unpainted loco makes that easy to see.

---------

BTW, I'm mostly a steam guy, but have often delved into diesels for myself and others,

and, honestly and typically, I have found the steamers, even big ones, to generally

be easier to get apart than those 18-screws-and-still-won't-come-off diesel bodies.

Plunge in - what's the worse that can happen? They're tough. 

Thanks G - let me look into this further from here. I am busy studying for a test next week and don't have a lot of time. The MTH Tech I mentioned earlier said he would help me get the shell of and have a look at it sometime. Several have commented that the stock smoker is mediocre at best so I'm thinking that perhaps adding a MTH smoke unit might be an idea with him. I'd like it to smoke like Joe's above!


I just got this piece and wanted to enjoy it but I want the other fella to have a say in how we handle this repair. Hate to ship it off again and can't budget much $$$ for it without arousing the ire of the CFO!

Last edited by c.sam

 One other trick that G could do, is swap out just the resistors inside the Lionel unit to make it smoke even better than mine. Cheap fix when the board will allow it. Raymond M. did that to one of mine out of an older Atlas diesel that still smokes great. There are other mods right on the Lionel site with a video showing the mods.

 I've got a feeling that someone took the whole unit out of there? do you see it?

Last edited by Engineer-Joe

Sam;

Those Allen head screws do not look OEM to me. They should be Phillips head screws as was said earlier. perhaps the boiler screw holes are partly stripped out and the standard screws won't reach anymore. I would be surprised if they were anything other than #6-32 screws.

There have been many topics related to improving lousy smoke production in early Lionels. Check the Mike Reagan video on the lionel site.

I have greatly improved several by switching to an 18 ohm resistor, including the Mountain that I bought from you a couple of years ago. Not to take issue with what others have said, but I have had no issues with failed triacs using 18 ohm resistors.

If you put the Lionel product number into the parts search on Lionels site, you will find what smoke unit and AC regulator is used, if any. If the reg has failed it will make no smoke. They are easy to change out generally.

I would not give up on the Lionel smoke unit without giving it a good shot.


Rod


Last edited by Rod Stewart

Rod, I put a 16 ohm MTH resistor in one as a test, and the triac temperature shot up to over 90C within a minute of operating.  That's way too hot for me, so I recommend higher value resistors.  The smoke replacing the 27 ohm resistor with the 22 and also opening up the intake hole is more than sufficient for anyone I've done it for.


Obviously, folks are free to ignore my advice, I make money fixing stuff that goes up in smoke.


John,  That is a heavy duty smoke triac, not the small TO-92 package.  Others also have had success.  Considering the half sine wave AC signal it is hard to imagine the problem, especially since that Triac is a 4 or 5 amp rating.  Lionel was hooking up the 27ohm resistor to the LCRU with a TO-92 package triac rated at 1 amp.  G

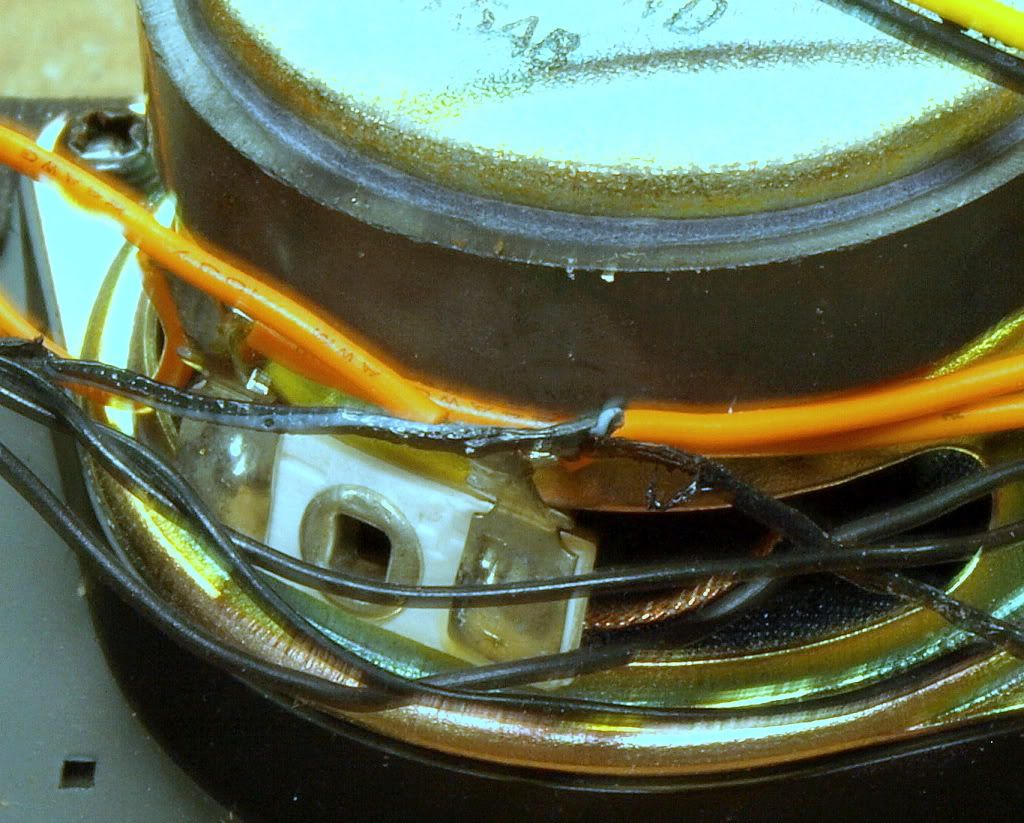
it was a while ago and I don't remember exactly how many, but it was easy to remove. pay attention to the 2 steam pipes that slip into one another on the front set of drivers. other than that it was pretty simple. I made a shield from a plastic soda bottle to surround the flywheel so it couldn't rub the wires anymore and I repositioned the speaker so the terminals were not near the shell. I had to change the smoke regulator also. If you are coming to trainstock we can take care of it for you.

Originally Posted by GGG:

John,  That is a heavy duty smoke triac, not the small TO-92 package.  Others also have had success.  Considering the half sine wave AC signal it is hard to imagine the problem, especially since that Triac is a 4 or 5 amp rating.  Lionel was hooking up the 27ohm resistor to the LCRU with a TO-92 package triac rated at 1 amp.  G

I know what the smoke triac looks like, I've replaced lots of them.


I'm just telling you what I've actually observed.  Also, when you look at the triac's rating, that's with a pretty large heatsink, the rating with no heatsink is not nearly as generous.  Also, it's a 2322B triac rated at 2.5 amps, at least on the first two R2LC's I took out of my parts box.  With the 22 ohm, I get around 50-55C, which is all I'm comfortable running it at.  This is open on the bench, it'll get warmer when it's closed up in the locomotive.


Others are quite free to ignore my advice.


Interesting, apparently they have changed at some point in time.  I looked at a bunch of them I have, all seven have the 2322B triac.  The only one I found with the 2N6071 was a brand new R4LC from ERR that came with a Cruise Commander.


My comment does not change, as the package is identical, and the thermal specifications actually are slightly degraded.  They just seem to have changed the process a bit to allow for a higher peak current.


I'm not going to run this into the ground, I've given my opinion on the loading of the triac, I don't think there's any more I can add.  The change in the part doesn't change my opinion.


Where do you get the comment on the temperature rating?  The temperature rating is based on the part, heatsinked or not.  Obviously, with a proper heatsink, it's able to reach it's full ratings.  Run 4 amps through that for any length of time with no heatsink, and you'll fry it in short order!


Last edited by gunrunnerjohn

The number is 6-38081.


Now for the real skinny - I wrote to Mike Reagan and his reply included these comments:


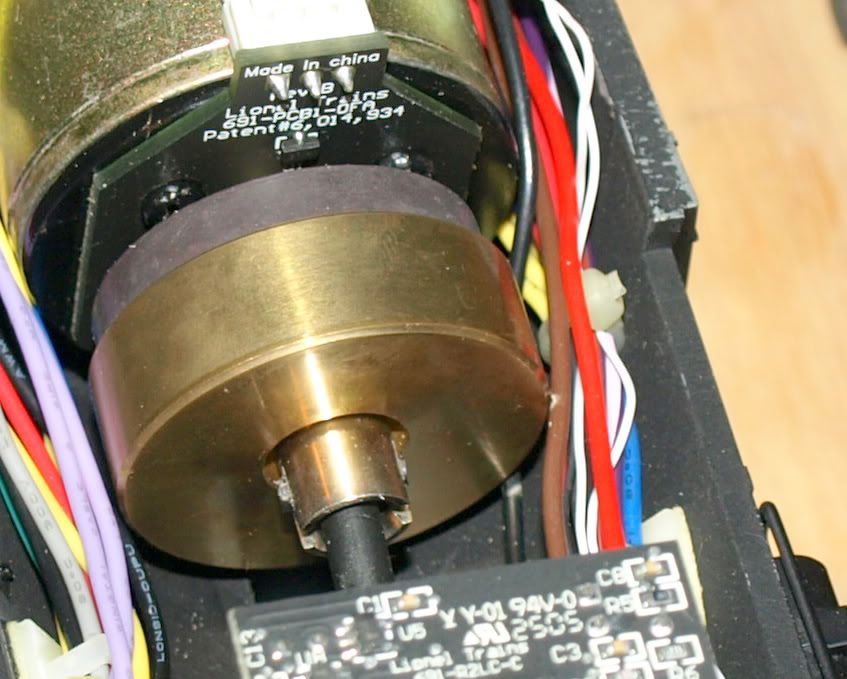
"It is common for the smoke switch to be pushed out, as the trailing truck gets pushed up in the ash pan during shipping and busts the switch. The worst part is these are a real SOB to correct, as the switch is buried under the motor, deep inside the firebox/ashpan area, the motor must be removed to access the switch, which you must remove the motherboard, the bundle of wires, etc. just to get to access the switch area.


Just because you can slide the switch does not mean the switch is intact.


If the guy you got it from never used the smoke unit I would venture to say everything inside is okay, but the broken SPDT switch is the real culprit, not allowing the AC Reg to turn on and operate the element. Change out that switch and the smoke will operate. (The fan motor is always on in this loco, even when the smoke element is turned off. The fan motor only turns on when the cherry switch receives a command to send a chuff sound through the IR tether. ‘

The smoke unit (fan motor portion) is powered with track power (through a constant voltage regulator) and the fan is pulsed using a microprocessor). The element is controlled by the AC regulator to put out a constant 8V to element for consistent smoke."


The owner has graciously offered to pay for RT shipping to Lionel and for the repair. Most appreciated! This is what makes the Forum an invaluable part of our hobby. Thanks to everyone here!

Last edited by c.sam
Originally Posted by gunrunnerjohn:

Interesting, apparently they have changed at some point in time.  I looked at a bunch of them I have, all seven have the 2322B triac.  The only one I found with the 2N6071 was a brand new R4LC from ERR that came with a Cruise Commander.


My comment does not change, as the package is identical, and the thermal specifications actually are slightly degraded.  They just seem to have changed the process a bit to allow for a higher peak current.


I'm not going to run this into the ground, I've given my opinion on the loading of the triac, I don't think there's any more I can add.  The change in the part doesn't change my opinion.


Where do you get the comment on the temperature rating?  The temperature rating is based on the part, heatsinked or not.  Obviously, with a proper heatsink, it's able to reach it's full ratings.  Run 4 amps through that for any length of time with no heatsink, and you'll fry it in short order!


I used the manufacturers technical documentation on the basis for the ratings.  That current is not a peak current.


I am just applying ohms law on worst case.  18V divided by 16 is 1.125A.  In command mode with only half AC wasn't the voltage 9V?  So that is only .56A.  G

Somehow I don't seem to be able to communicate.  The ratings are only with an ideal heatsink, not the bare component.  Also, I relied on actual observations of the component in the target environment.  Based on empirical real world evidence, I stated my opinion.  Stating Ohms Law is like putting your design on the blackboard, those designs don't always prove to be practical in the real world.


Since we clearly aren't making any progress here, let's agree to disagree on this point, this will be my last word.


Ok John Don't get too excited.  Your communicating fine, I do think your wrong on the ratings.  The data sheet doesn't state that, so not sure where your info comes from.  You got 90C it is rated at 110C, no one has gotten failure yet.


I am just basing my thoughts on what I have seen on various manufactures transistors.  The theory is just estimating the triac is running at 25% or less of the rated spec for my triac and about 45% for yours.  That is a pretty good safety factor.


As I remember you only measured temperature not current.  Neither of us has tested this to failure.   Frankly I think the heating element is at more risk than the Triac.   G


C-Sam,


Happy to see you have gotten  resolution. These toys are packed to the brim with lots

of intricate gadgets and your commentary to hold off from attempting the repair yourself 

may save others from the dreaded comment:"now, why did I do that and what am I gonna do now" !!


all in all it's been a great read for a rainy eve.!!

Just as a postscript, I wonder if Mike mentioned anything about the position and/or number of the body shell screws? I have a feeling I took out one of the Allen key fixings you mention and found that it didn't hold the shell on. From memory the screw access at the front was through those holes you can see in the front cylinders.

Thought I would provide some feed back on this unit.  There is evidence that the unit was opened before, as the ACREG had the heat shrink cutoff and then taped back on.


There are only 4 screws to hold the shell on.  2 all the way forward and 2 under the cab.  The 2 all the way forward were missing.


The smoke switch was popped off and the internal metal contact was missing, so the switch would not work if put back together. 


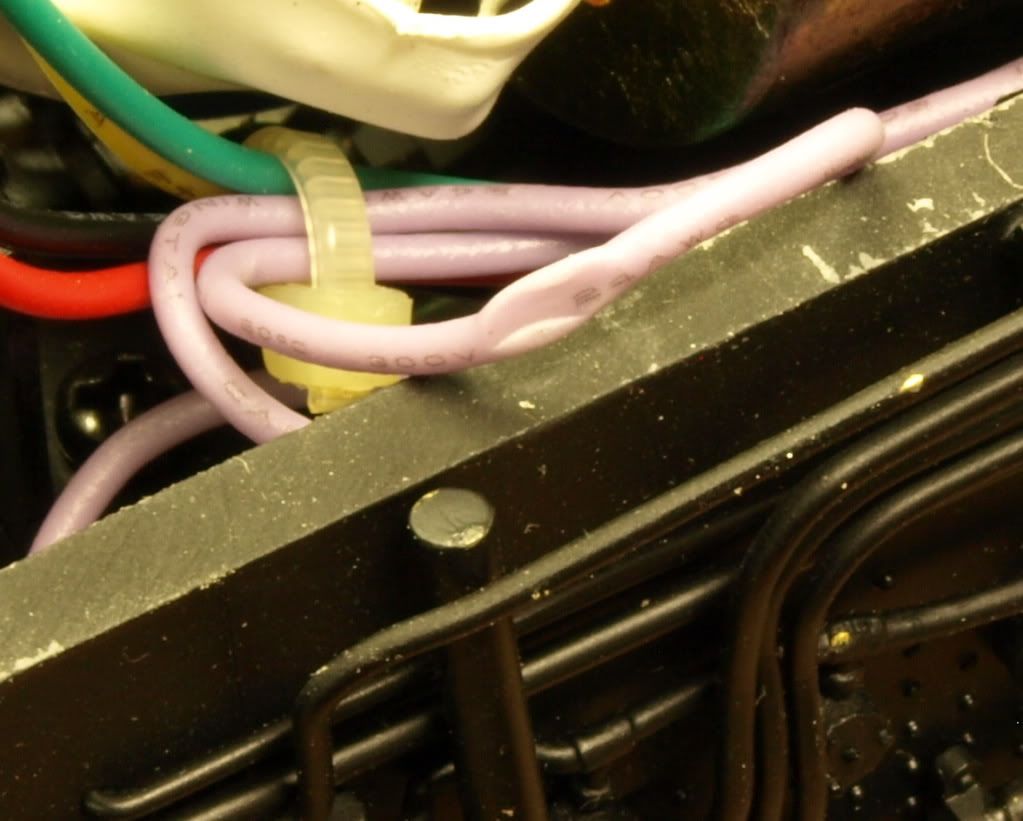
There also were some pinched wires.


As far as the stack obstruction, there actually was one.  The wire harness to the front lights/markers has heat shrink and doesn't have much room in relationship to the smoke unit.  Part of the heat shrink was trapped between the funnel and shell.


This is a smart smoke unit, so it is not modifiable like other units.  It uses a 6 ohm unit.  It was also wired differently then others I have seen.  The AC input went direct to the ACREG so it would always be powered when track power is on.  The Element Hot lead goes to the switch, so the switch turns off power to the heating element only.


The smoke unit also get AC power and Serial data, but no chuff input via the cherry switch like some models do.  So the smart unit must sense serial data chuff and trigger fan that way.  Fan only puffs when in motion and chuffing.


I did remove the element sleeve and repack the wick.  I do believe you can set a H, M, L via the TMCC for this model.  I believe M is the default and locked in for conventional operation. 


It is a nice model, but does have a lot of fragile detail parts.   G

Post
×
×
×
×
Link copied to your clipboard.
×
×