What do you do to manage warping when building wood models? I’m interested in hearing from those model builders who still enjoy constructing with wood, and as such have developed a general method for containing or eliminating woods tendency to warp when exposed to various glues, paints, and potions etc.


Bob

Original Post

Replies sorted oldest to newest

Bob,


Good internal bracing is probably the best way to avoid warping of wood or cardstock sheet material. Also, when the laminating of layers of sheet material is necessary, I use a solvent-based contact cement instead of water-based products.


When finishing a wood structure, I also try to avoid wetting the surfaces too much with water-based products. IMO light washes of alcohol-based stains and inks create a wood effect better than water-based paints.


If I am simulating a metal surface, I use a wood sealer and apply paint with light spray applications.


Jim

As Jim stated - interior bracing. Use one quarter inch square wood bracing running perpendicular to the bendable seam of the wood. If your wood has horizontal siding, run your bracing vertically. Use wood glue and clamp it securely and let it set up.


Also, prime your surfaces - on both sides. Using thin wood materials, the best solution is actually Wal-Mart "Color Place" Equipment Gray primer. It's $0.99 per can and an incredible bargain - considering the cans are full size. When you use primer on wood, it has a tendency to want to contract as it drys. As it contracts, it pulls the wood inward at the ends. By spraying both sides, you get this contraction affect to work against itself by trying to contract from both sides.


three words all of which have been said and you'll be fine. 

brace, brace, brace. 

prime,prime, prime. 

ok, that is six words. 


i also use color place primer. its advantage is not only that it is cheaper butit is a very fine spray withlittle pigment so it does not cover details. 


one other thought is to weight down your walls with books or any heavy material after the pieces are dry to the touch which is usually after a few minutes. if you leave them overnight all your walls will be flat. 


wood is a great material to work with and very forgiving. 


jerrman


While somewhat inconvenient at times. Best to paint both sides of the material. I even have some instructions that talk about painting the edges of material sheets.   Though once painted using glues and adhesives is different.


The worst error, three major models ago, was installing all the peal and stick paper shingles, then spray painting the roof with acrylic oxide red.  Really looked good until the next morning, the paper shingles shrunk opening a white seam where the two pieces of shingle met.  I pre-paint the shingles before installing at this point, though it tends to loose some of the stick.


The learning curve tends to indicate that using minimal amounts of paint is a good thing.


A very good foundation/model base, probably not part of the kit is a must.   

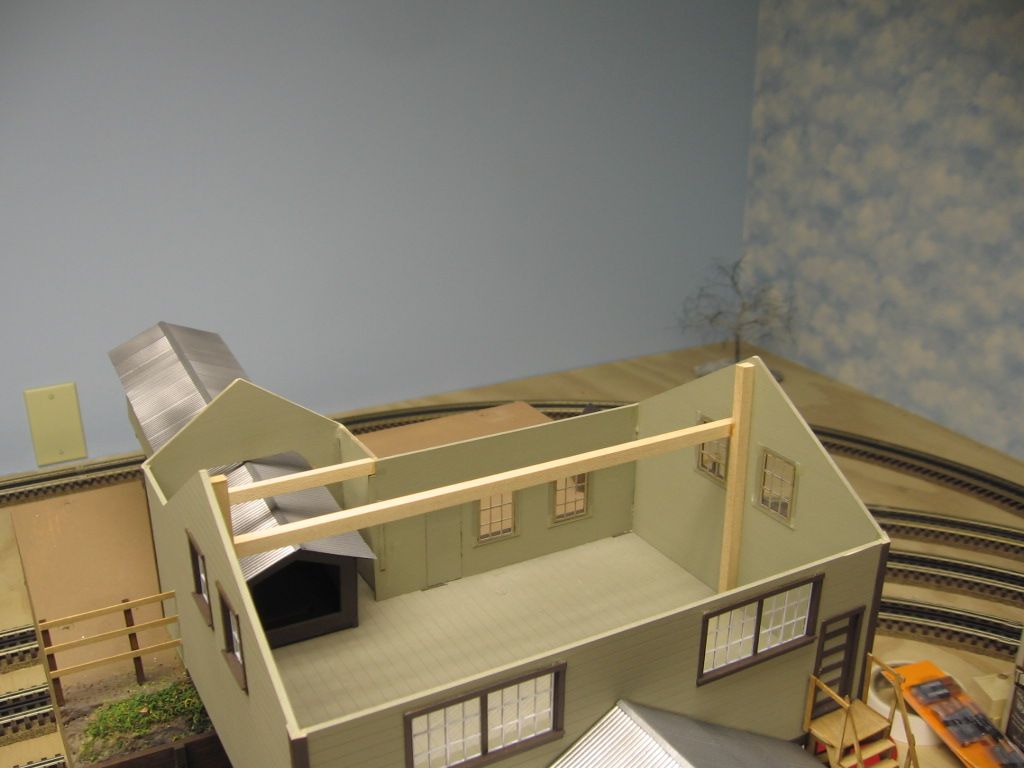
Some added detail of bracing and painting wood structures.

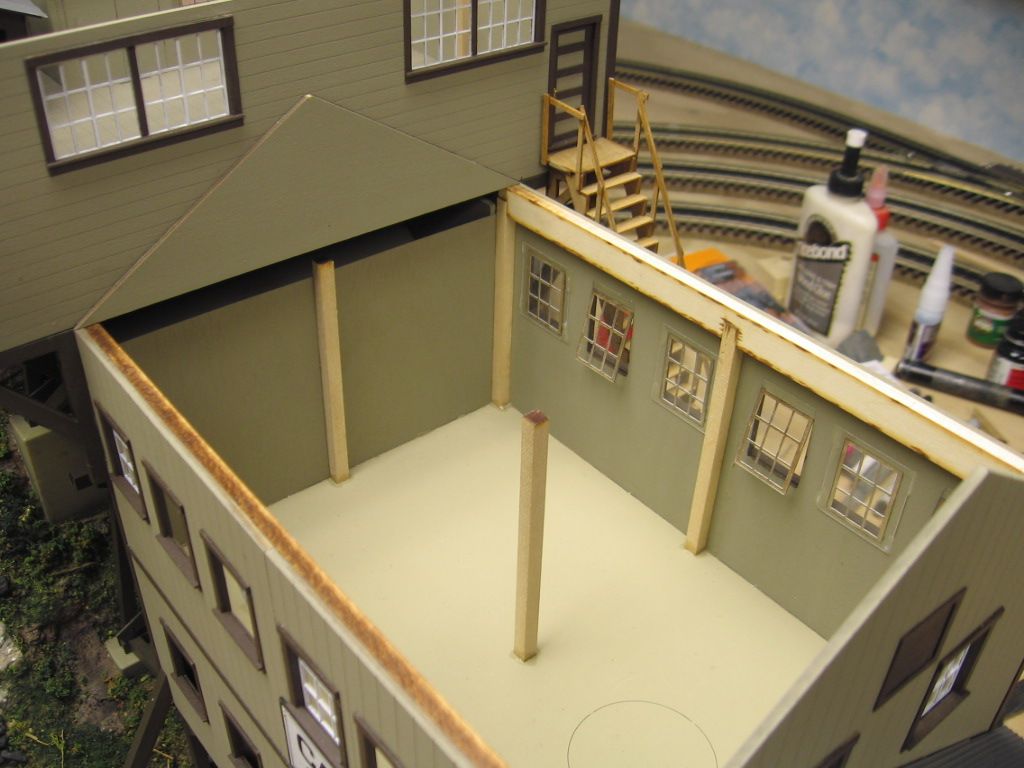
Additional bracing added. End walls, especially if they have windows, tend to bow out.  Note that the interior is completely painted. Assembly, once painted may require more agressive adhesives.


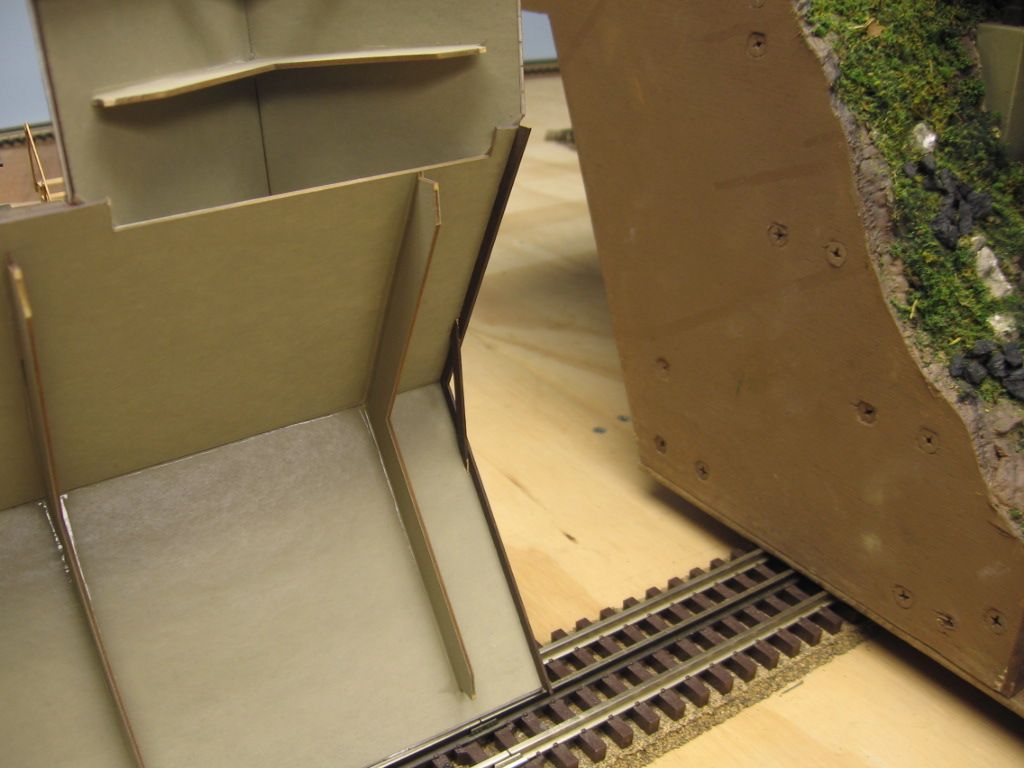
Part of the structure, note the corners. The large horzontal stuctural beams are part of this kit. They extend the width of the second story house and are screwed to the landscape part of the structure. I was really pleased with this design. The whole structure, landscape and all, are one solid piece.


End peaks tend to bow out. It would have been nice if the post was longer.


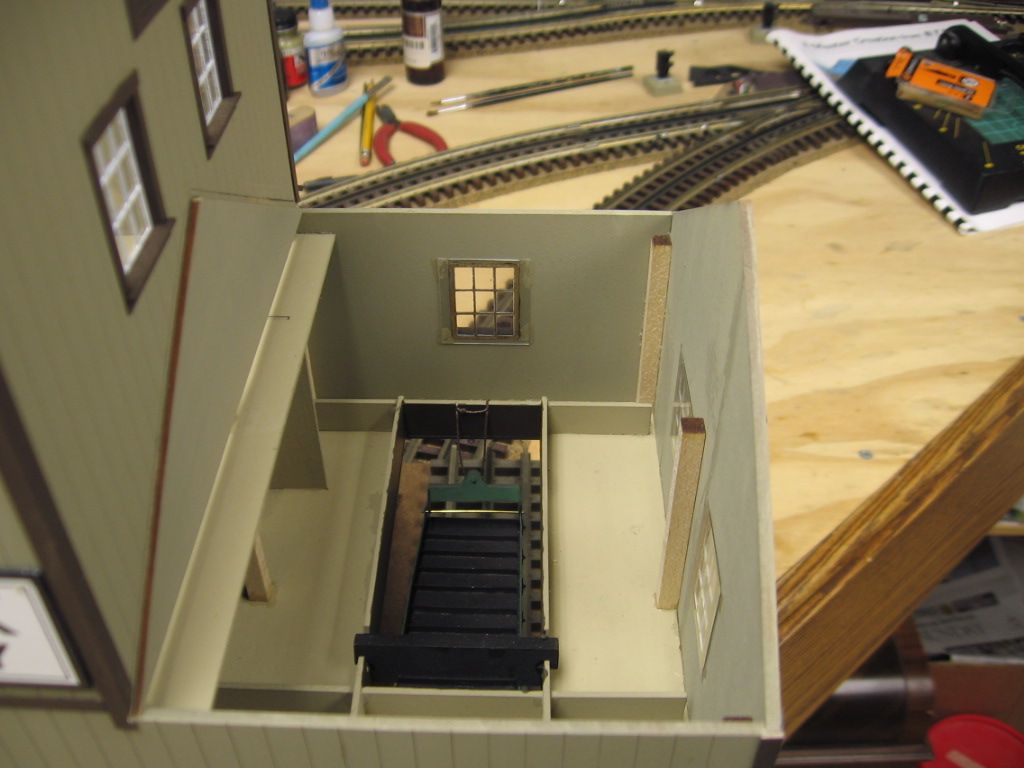
Paint on the inside of the roof panels


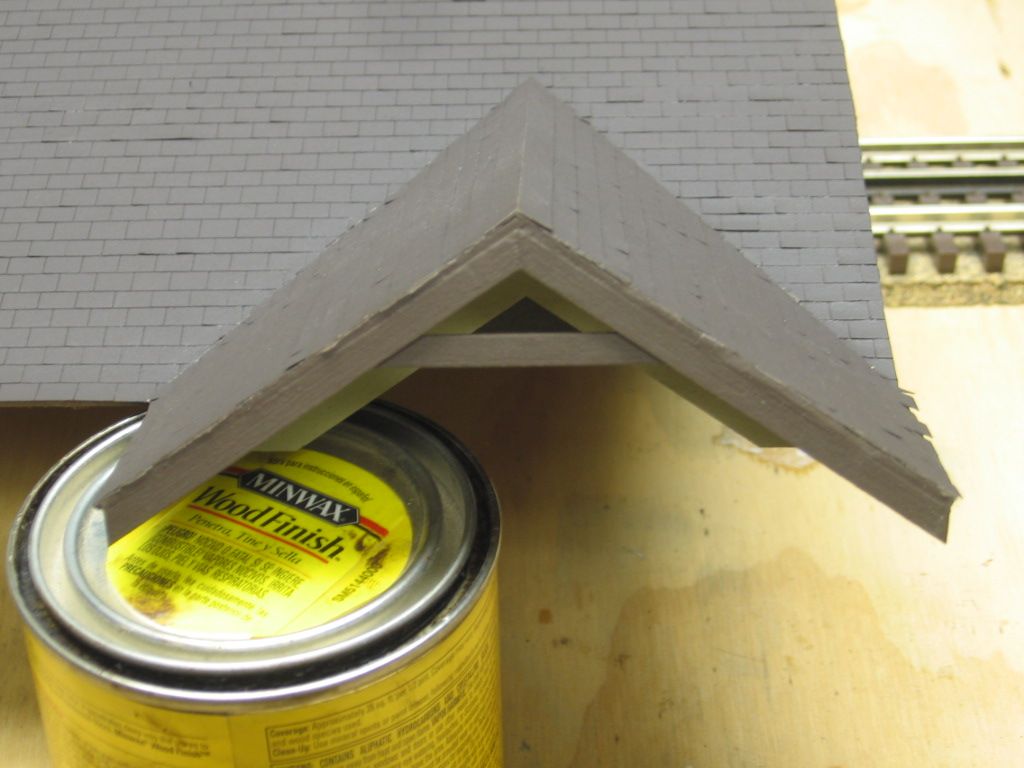
Note the brown edge, facia board and triangle brace. Adding this helps to stiffin the structure. Roof edges tend to curl.


This added facia board and angle brace keep the roof edges from curling.


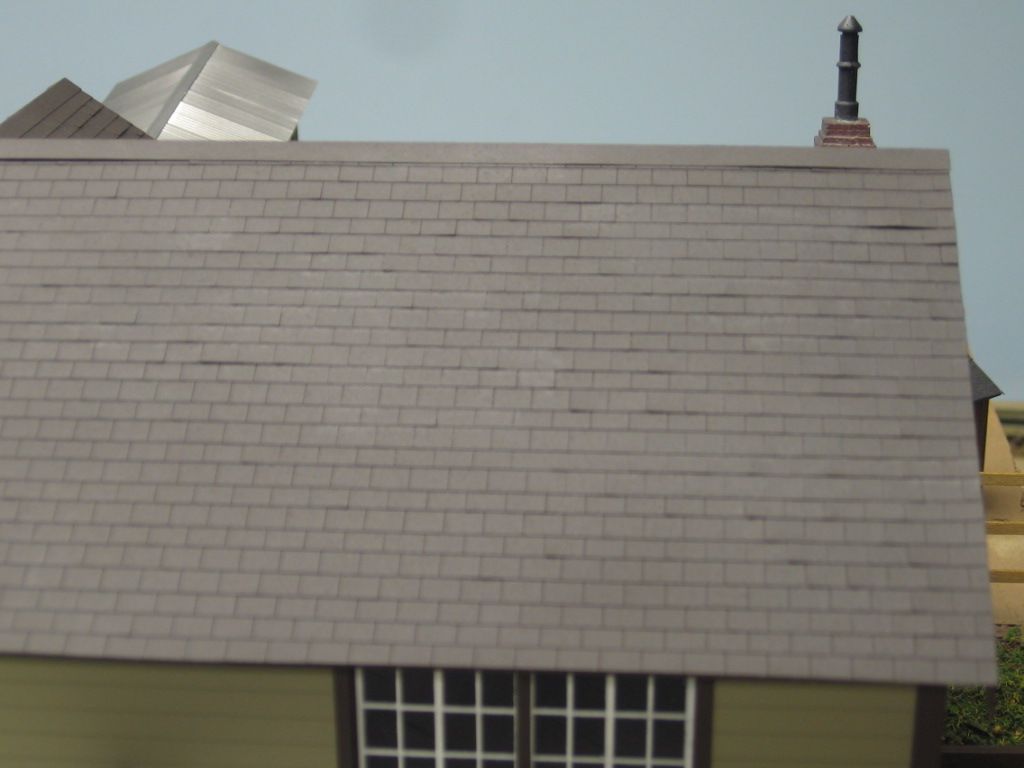
These shingles were a problem. Too much paint, limited self stick. I spent some time with white glue over the assembly to get the shingles to stick better, then lightly re-sprayed with more paint.


always a good idea to use a sealer on the inside of your wood structure. Most folks paint the outside in some way but overlook the inside. Moisture gets into the wood from the back side and the next thing you know it's warped . Never a good idea to leave bare wood to it's own. It needs to be sealed in some way weather you brace it or not.

David

I always use internal bracing on wood buildings.


I also use one of two different priming methods on wood structures:


One method is to apply a mix of denatured alcohol and india ink to both sides of sheetwood, trim, and any wood used for bracing.


A second method is to use penetrating wood stain straight from the can, again applied to both sides.


Either of these will stabilize sheetwood. I never use raw wood in a structure.


Priming before glueing is important. These priming methods provide a subtle, aged underlay that is a good base for dry brushing. Priming before glueing helps hide any excess glue... 


Jan

Very good feedback guys! A few questions and comments as a follow-up.


Lee Willis…I like Liquid Nail, non-water based, which I often squeeze small amounts out of a tube and use as glue, applying with a brush. I had never thought about this method. What’s the drying time like, and since I use a more common yellow carpenters glue, I wonder are you able to make really small applications of the L/N’s such as would be typical of a delicate assembly?


Mike CT…a very good foundation/model base, probably not part of the kit is a must. I too am a believer in sturdy foundation!


Jerrman…one other thought is to weight down your walls with books or any heavy material after the pieces are dry to the touch, which is usually after a few minutes. If you leave them overnight all your walls will be flat. I’m also a longtime user of weight blocks to aid in modeling.


dkdkrd…The ColorPlace paint/primer from Wal-Mart recommended above is what I use, too.  If you put this on a wood structure before painting...and be sure it's thoroughly dry! It will help inhibit moisture absorption to the wood of any acrylic topcoat. Good product tip there, can I ask does this spray coat hamper subsequent gluing?


Jim Policastro…Also, when the laminating of layers of sheet material is necessary, I use a solvent-based contact cement instead of water-based products. Do you find this contact cement at all awkward to use since it is usually unforgiving if one has a misalignment?


Thanks to everyone who took time to respond. I appreciate it.


Bob

flanger:

One more recommendation - if you use any kind of a staining technique whether alcohol or water let the wood dry under a weight between some paper towels. The weight will keep the warping to a minimum.

If you are using wood siding that is real thin you can make a sandwhich with some  40-80 mil thick plastic in between two pieces of the siding. This is more expensive route but makes a more secure wall and helps with minimizing warping.

Joe

Originally Posted by Model Structures:

flanger:

One more recommendation - if you use any kind of a staining technique whether alcohol or water let the wood dry under a weight between some paper towels. The weight will keep the warping to a minimum.

If you are using wood siding that is real thin you can make a sandwhich with some  40-80 mil thick plastic in between two pieces of the siding. This is more expensive route but makes a more secure wall and helps with minimizing warping.

Joe


Yes Joe, I am a long time user of heavy steel blocks in all shapes and sizes in my model building. Weight on A/I treated included. I wouldn't be without them. My buddy is a machinist and my collection of steel blocks is nearly my favorite tool.


Thanks


Bob

Originally Posted by HiramO:

You know, I routinely prime wood walls with Minwax stain both sides, then air dry. I did a batch of walls today. I never get warping, as in none, ever, zero.


Having said that, I then brace my walls...LOL  Note, I stain my bracing stripwood as well. I just don't want bright raw wood in my interiors.


Jan


Jan...how well does this stained wood accept adhesive? I my case I prefer yellow carpenters glue or white occasionally plus the ever handly ACC for gluing oddities.


Thanks


Bob

Originally Posted by flanger:

Hi Martin...I thought for sure the stains would seal the wood and prevent absorbtion of the adhesive for thorough bonding. Not so apparently, thanks for that bit of info.


Bob

The flat car kits that I use for clinics, etc at one time contained pre-stained deck boards that the participants used to build during the hands-on clinic.  Worked just fine for many years, and only discontinued of late since I did not feel like staining 1000 deck boards. 


One of my own cars gives no signs of weakness in assembly now for ~9 years.  And, I know I've dropped a few w/o the decking popping off. 

I find ***o white glue, yellow carpenters glue, and ACC all work fine on the stained wood sections.


The stain seems to penetrate the wood (on thin sections it comes through the other side) and seals individual fibers rather than sealing the surface.


Years ago I weighted stained sheets while they dried, but I find it's not necessary. If I prop up the sheets so air gets at both sides they dry thoroughly in 24 hours. If I put a weight on a sheet which is flat on waxed paper, the surface against the waxed paper simply doesn't dry...


Jan

Post
×
×
×
×
Link copied to your clipboard.
×
×