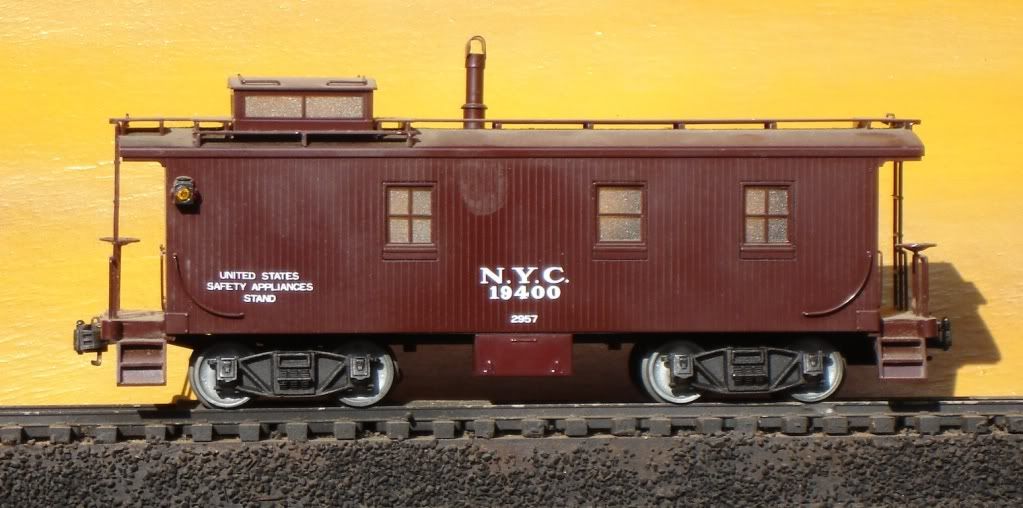
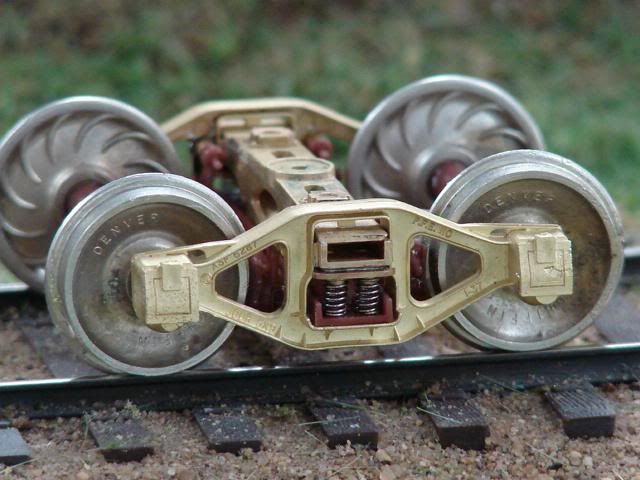
There's a few scale NYC caboose's to chose from. I always thought the Williams had the nicest detail as far as more scale like details such as handrails, ladder and grab irons. It's drawbacks are the window glazing, incorrect trucks and long wheelbase. Also with any caboose. T

rying to adapt Kadee's. These are somewhat easily found. Expect to pay around $70.00 dollars for one. Mine will be eventually lettered for the Boston & Albany. These were often decaled over. The roadnames that never had them can sometimes be a bargain.

 You are pretty much going to strip the entire chassis. Trucks and wiring. They did come with a smoke unit. If you want to remove it. Grasp the smoke unit with your fingers and insert a phillips head screwdriver through the stack to aid in holding it. It just unscrews. To remove the marker lamps if you want to go with lighted ones.

A little heat from a soldering iron and they pull right out. The window glazing involves bending some tabs and sliding them out. The lettering was removed with nail polish remover.


 You will need a few items.


 From shapeways.com.  2410059 Atlas truck bolster


 66035 Atlas friction bearing caboose trucks


 Plastruct 90202 3/16 square ABS square tubing


 K&S 8246 brass strip. .064x1/2


 Marker lights from Tomar. (Optional)


image


 A set of numbered drill bits, small taps and some hardware wI'll be needed.


 Start with your brass stock. Use the Kadee lid and mark holes at both ends.


image


 I drilled and tapped the hole for a 2/56 screw. Screw the coupler to the brass strip and square it up. Then drill and tap the second hole.


image


 What was once the mount for the truck. Will now be used to mount your newly made bracket. Lay the bracket down and mark and center the hole. It should be a 3mm screw. Drill it for a snug fit. Do one end then the other. Don't cut anything yet. Just set it aside.


image


 Next we will mount the truck bolsters from Shapeways. They fit the frame very well. Clamp in place and square it up. Make sure it is centered. You can slip some paper on the sides if needed. The square end of the bolster should be tight against the factory truck mount. This will center the trucks at just a couple inches shy of 20ft which the prototype had. I secure the truck mount with some no. 2 sheet metal screws.


image


 Now line up your brass stock to the mounting hole. You want to cut it slightly long unless your really good at this. Carefully file back the brass till it fits tightly up against the square end of the new truck mount. If done right it should hold it square. Screw the brass piece to the original truck mount. If it has a little bit of play. A drop of super glue on final assembly should hold it square. I had to slightly enlarge the Shapeways truck mount to except the factory Atlas screw I was using. The trucks can now be mounted. I bent the center rollre tab up and added a plastruct square tube to guide the wires.


image


 Initial tests looks like I will have to add just one Micromark shim. Make sure your frame is still level from the drilling. Now onto the body. First off. It will have to be notched in 4 spots. The screws mounting the truck bolsters will hit the car body.


image


 If you are opting for the Tomar lights. You will be looking at a square hole where the original was removed. The 3/16 Plastruct is to big for the hole. Sand all 4 sides so that you need pressure to insert it.


image


 Trim it to fit. Leave it about 1/2 inch long. Scure it with CA and drill a hole for the wires to pass through. There is a hole to get you started and it should be still centered after sanding. I drilled the hole to mount the Tomar lights with a no. 26 bit. Start a little small and work your up. Drill it just deep enough to accept the light and it should require a little twisting motion to get it in place. You shouldn't need any glue to keep it in place.


image


image


 Final pic for now is how it looks mocked up. I'll have to paint and letter it as well as reglaze the windows. The basics are here for a nice looking NYC caboose.


image

Attachments

Images (11)
  • image
  • image
  • image
  • image
  • image
  • image
  • image
  • image
  • image
  • image
  • image
Last edited by Dave_C
Original Post

Replies sorted oldest to newest

Looking good Dave. I have one of these on my to do list. In addition to the changes you made I was able to get an underbody kit from Mullet River before he left the scene. Harold Russell did a an article on the 19000 cabooses in Model Railroader about ten years ago complete with drawings. I will try and find the issue. MR may still have some back issues.


Pete

Last edited by Norton

 Norm, I did a Lionel version a while ago. Used True Color NYC Brown and Clover House dry transfers. I've been using Scalecoat 1 of late. May see what they offer as far as freight car Browns or Reds. I've just had better results using the solvent based paints. Depending on what day the photo was taken and how the sun was shining it's tough even looking at color photos to match the color of these. Some photos they look more like a pinkish red. Weathering tends to tone down the Brown color

 This is the Lionel version. I believe the Williams has a lot finer detail And the new Atlas trucks look great. I used Atlas' roller bearing trucks on this one just to get lights. I'll switch these out with the new friction bearing ones.


image


 Mario, the bolsters worked great. I did another one a while back using parts off a broken die cast frame. Your option and the new Atlas trucks make this an easy project. I just picked up another one a few weeks ago.

Attachments

Images (1)
  • image

Dave, the trucks that came on your B&A Lionel caboose are actually the correct ones for the 19000 cabooses. They should be T section bettendorfs. Ironically Lionel used the correct trucks in the correct location on their less expensive plastic 19000. It also has the  correct truss rod frame. Their diecast pre war remakes have the trucks in the wrong location like your Williams brass caboose. I never understood why Lionel remade the semi scale 2957 instead of the 717 which was the most accurate 3 rail version of 19000 made to date.


Pete

Originally Posted by Norm Charbonneau:

I used San Juan T-section Bettendorfs on my Mullet kit. The Lionel ones are very bulky looking.


That B&A caboose looks awesome! Thanks for the tip on the paint you're using...

I agree Norm. I have San Juan trucks for my Williams project but for my die cast MTH and Lionel cabeese, the plastic caboose T sections are good enough. 


Real Deal

NYC_19000


MTH Diecast with Lionel T section bettenforfs.


MTH_19000


Lionel Diecast with Lionel T sections replacing their pre war style trucks of unknown prototype.

P&E_19000


Pete

Attachments

Images (3)
  • NYC_19000
  • MTH_19000
  • P&E_19000
Last edited by Norton

Project is pretty much complete. Just need a circuit board for the marker lights. I ended up using True Color, NYC Freight Car Red. I sprayed the roof with Grime. The walkway got weathered with a light gray. I painted the smokestack aluminum. The walkway is not overly detailed. Running a sharp pencil down the grooves made it look more like individual boards. The lettering is from Clover House. I took the easy way out on the numbering. 1234 is a correct number for the B&A.  I weathered it with chalks and a dusting of grime. Then sealed everything with a few coats of flat. A fun project and you will end up with a good looking caboose. 

 I used the stock smokestack. I left the stock Williams washer on the inside of the shell in place. The stack will rest on this. I couldn't come up with a nut that would fit that thread. I ended up running a no. 8 32 tap up the stack. It will cut a very shallow thread. I added a thick plastic washer and then secured it with a screw. You can leave the stock Sueth smoke unit in place. If you have an interest in smoke. I'm sure you could come up with something. The stock stack is user friendly for filling and you will never melt a brass roof.

 I found a number of pictures of B&A caboose's. Some had an odd truck. Very similar to what MTH has on it's CA-1's. 

image

Attachments

Images (1)
  • image

Add Reply

Post
×
×
×
×
Link copied to your clipboard.
×
×