
That picture is very cool! Are they still in business? I mean, Bullard and VTL's was like facial tissue and Kleenex.

Very nice!
Spent the day setting up some more prints in the computer. I been asked by a vendor to produce my three prime movers in HO scale that he can sell on line. I hadn't developed an HO version of the Baldwin. I can print all the parts for the HO versions on one load. I redesigned how the Baldwin prints so the heads are part of the block and thus the pushrod tubes are attached on both ends, and then made the induction/exhaust/turbo system as one print. If it prints that way, it will be very cool. I'm also testing a new resin mix. Siraya Tech makes a resin called "Tenacious" that is very impact resistant and imparts flexibility. I've mixed it about 30/70% with my standard resin to see if it will not be so delicate on finely made details. It requires more exposure time and that lengthens print time.
I printed a tiny bench grinder and it's hanging in the machine in the drainage position, but I didn't take it off and don't know if it's a good one.
Then I spent the rest of the day painting the last machines and the appliances.
The turret lathe is done as is the drill press. Painting really makes them pop.

That crazy drill press handle actually looks okay even though it's probably 50% larger than true scale. Some details DO have to be oversized to work in our miniature world.

I attempted to take a picture using the iPhone selfie camera from floor level inside the machine shop. It sort of works. I might be better to take the picture using a mirror and then reverse the image in post-processing. You can't focus the camera easily this way so it's a bit soft. But that is just about a scale eye level shot.

I then started the appliance painting ritual. I mixed up a pretty good approximation of Harvest Gold, but my Avocado is a bit too dark. I may leave it alone since it will be indoors and seen from 3 feet so it may have to be a bit more vibrant. The wall ovens were coated with A-K Interactice "real metal" which is a cream in a tube that you polish. The results were iffy. The other "stainless" appliances are air brushed Tamiya Chrome. I had to redo the door handles on one of the fridges since they didn't fully print. For the wall oven windows I cut pieces of electrical tape. I have other stove windows to do and I'm going to continue using that technique. The handles are brass held with Bondic. The other fridge handles printed really well. And they're separate from the main body.

Here're what is done so far. Still have to detail knobs, kick plates and other details.

More work on Monday. Have a nice weekend. My son and family are coming in on Wednesday night so there will be chores next week that will keep me out of the basement.
He just took delivery of a new Audi all electric SUV. So now my son and son in law both drive electrics. My son in law's Tesla 3 is over a year old. Car has basically 8 moving parts in the drive train. It has no routine maintenance. Brakes are rarely used since the regenerative braking is so effective. My daughter calculated that the cost for a full 300 mile range charge is about $4.00. Once there is a full compliment of easily accessed charging stations that can charge in a half hour or less, electrics are going to become more common. My son in law has told me that he will never buy another internal combustion car again. Several of his friends are also going electric. I'm really hoping that my next car will be electric. Ford's coming out with a slick crossover called the Mustang next year that will be competitive with the lower priced Teslas. Tesla is selling a ton of cars. It will reach a tipping point and it's not going to take 10 years. Imagine, there will come a time when even Jiffy Lubes, transmission and muffler repair facilities will be as obsolete as the corner service station that actually does service and not sell fast food. Electric cars will destroy jobs! Every big technological change does that. Tesla doesn't even need dealerships. The cars are basically a computer, a battery and some electric motors, no more complicated than a RC car.
Attachments
Images (5)


Myles, the machine tools look fantastic. Appliances are really shaping up.
Myles, the shop tools and appliances really look great when painted! You have really done great with the learning curve!
I’m glad you will spend time with your family. Three years with the Tesla, they should know the good and bad. It sounds all good, once there are charging stations in abundance! The Audi should be a nice one too. A friend posted an article about a pickup truck Tesla is working on. Pretty wild looking to an old guy with old car style tastes. I think it is all good.
Have a great weekend and Thanksgiving week!!
Myles, your work is Simply amazing and your thread, “Continuing Saga”, says it all. Thank you for your pictures and answers to the many questions presented here on your thread. Keep up the great work and it’s always a pleasure to read your comments. Happy thanksgiving and Happy Railroading. Your Tennessee friend.
Thank you all! I'll probably be posting one more time before the holiday, but if I don't everyone have a safe, happy and very satisfying Thanksgiving.
Thank you, Myles. Hope you and your family have a great Thanksgiving.
Thanksgiving was fun and having the family together was special. I hope all y'all had a nice holiday too. First of all,

The plane is gone! The chairman of the Bowman Field Heritage Foundation came and picked it today. It's going into storage at the hangar until time to install on the memorial. I will be present for the installation and have been asked to speak about the reconstruction at the re-dedication of the memorial next year at the Centennial. I removed the old backdrop paper and put some fresh new in its place. And I got my check! The have more things for me to do going forward, but I don't know what they are. They were very happy with the plane's rebirth.
Onto the Appliance Store:
Finished the detail painting on all the different show pieces, got the flooring printed and started doing the rest of the interior work. Here's a sample of how they look wit the detail work done. They'll show up well in the building.

I fabricated the mid-wall out of 1/8" foam core. I put some backing supports on the walls in preparation for gluing in the wall. The wall's a little bit short leaving a space in the ceiling and that's where the wiring will pass through to the back room and then out of the building. Remember: this was a complete building that I bought so the second floor was already install and I have to work around that. The building was a resin kit and there is some warp in the walls.

I painted the walls with "parchment" craft paint and hope it will hold the decals. If it doesn't I will put a gloss coat on it.

I will decal them before gluing the wall in place so I have better access. I also have that neat "Zenith" electroluminescent Miller Engineering sign that will go in before it's all buttoned up. I've had that sign for years waiting for this project to commence.
When I upgraded my MAC to OS Catalina, my Windows emulation stopped working. I no longer have access to my CorelDraw. I am using VM Fusion ver. 8.5 for my emulation, but need to upgrade to ver. 11.5 ($50), and wasn't ready to spring for the upgrade. I'm thinking about upgrading the whole deal to the new MacBook Pro 2020 and if I do, will not have to emulate by VM Fusion, but will do it through BootCamp, a facility already on the MAC. Therefore, I'm not looking to invest in upgrades just at this time. Why am I telling you all this?
I'm telling you because I needed to make flooring for the Appliance Store and was going to use CorelDraw to assemble the JPGs to do the job. I also have a photo editor on the MAC called GIMP, but for some reason, GIMP is no longer able to open files on my MAC saying it "Doesn't have permission". My daughter in law is a MAC genius and told me what to do, but it didn't work.
So I took plan C. Plan C had me using SketchUp to create the flooring. I was able to get a nice parquet design off the Podium Warehouse (a SketchUp extension), and using the top down, 2D display created the whole floor. I was then able to export this as a 2D graphic and then printed it out on photo paper. I coated it with a fixer to protect the ink. It was a good workaround and I'll be doing it again.

While this was going on I was printing another Wheel Lathe for sale. I have a buyer who wants the wheel lathe, the radial drill and the horizontal band saw. I ran into a problem printing the wheel lathe base. The base raft was separating from the build platen. It separated and failed three times. I caught it each time early in the print so I didn't waste too much resin. I have changed my resin formulation to include about 25% Siraya Tenacious which is a resilient resin to counteract the brittleness of the standard resins. It requires longer exposure times. I also changed the FEP teflon film which was in use since June and produced a lot of parts. Whatever happened, either changing the exposure times for the base raft or changing out the FEP, it worked. I got a wonderful print of the base plate and the rest of the lathe is now on the printer.

Attachments
Images (6)


Miles,
Nice appliances!
What are you thoughts concerning the 25% Siraya Tenacious? Are the results noticeably more robust?
Thanks Pete!
Jury's still out on tenacious. I'm still adjusting parameters. It does impart flexibility, but that doesn't mean things don't break. I had printed the headstock end of the wheel lathe last week with the new formula. I was showing it to my son over the weekend and dropped it on the concrete shop floor and the faceplate fractured off. It broke reminiscent of how it broke when it was straight regular resin, so I'm obviously not mixing that much Tenacious to make it completely non-brittle. But the base plate was definitely more resilient than the first one that I had made using straight standard. I also revised the position in the machine and that gave me less supports which also made it a cleaner print. So… I'll let you know.
I set the print up more vertical to reduce the raft size since I was having such trouble with separation. But I also changed the amount of raft layers and upped their exposure time to 80 seconds from 60. The new raft was perfect! I think it was more than the angle since I started a print before the parameter change at this steep angle and just ran it for a few minutes until the raft began forming without any supports and it was already separating. One of the guys on Elegoo's Facebook page says he uses 70 seconds for the raft with this mix and it works well. The raft needs to be pretty rigid for the whole deal to work.

Attachments
Images (1)

The appliances look as if you shrunk full size ones with a magic wand!! I like the parquet floor if that is the right term for it.
The airplane is in the hangar! How fitting!!!
Excellent work. I am sure working around the way the purchased appliance store was built offers new challenges.
Happy Thanksgiving all. Myles, the appliances look fantastic. Love the floor. Congratulations on the completion of the plane.
Thanks guys!
Between wrestling with 3D printing and going out doing errands, I did get some appliance store done… and some was pretty fun.
I painted the TVs and wanted something of interest in them. I downloaded some screen shots of I Love Lucy and Gunsmoke and after using SketchUp again as a graphics program since I still can't get to my CorelDraw. I measured the openings in the printed TVs and used it to create some rectangles in SketchUp which I blew up 100 times so it was easier to manipulate. I imported the JPGs/PNGs into SketchUp and placed them within these scaled rectangles. I then did a cropped screen capture of both images. I edited them in MAC Preview to make them the exact size I measured with the caliper. They were already correctly proportioned since I used scaled rectangles in SketchUp.
I imported the scaled images into a 5 X 7" page in OS Pages and then printed them out on white background inkject decal paper. It seems more complicated to write about it than to create it. After painting the TVs and putting a coat of gloss clear on the screen area, I carefully trimmed and placed the decals on the screens. It's amazing you can actually see what's going on. Picture were taken before the decal setting solution was fully cured.


I started setting up for the Miller Engineering Zenith sign. I has a three-way switch that controls the sign (off, steady and blinking) and it needed a hole in the building to control it. I drilled some corner holes and used a 1/16" carbide router to open it up. The circuit board has double-side foam tape to hold it to the wall. It also has a battery box with three AAA cells. Another reason why the building must be removable from it's base.

The sign is mounted on clear acetate and is just about the same width as the main windows (lucky!), but the wire runs downward. I turned it facing upwards and secured it with black electrical tape. I ran the tape up to the upper window so it too will be blacked out. I will then run the wire along the ceiling which won't be easy to see and run into the back room which will have all the lighting equipment. I think I'll use contact cement dots to hold it in place. I tested it with the batteries and it worked great.
I needed to build a small wall for the wall ovens. It was a simple styrene fab job. Picture shows raw deal, no paint or any trim.

I coated the painted walls with clear gloss so they'll accept decals better. I'm also going to make some more "Appliance" graphics. I have to name the store and put some "6 years same as cash" or some other type of retail signage that will go on the walls. I don't want to block any more windows. The Zenith sign is already taking away one of them.
My patron has now upped his order for my machine tools to include the saw, radial drill, lathe and wheel lathe, and today he added the Vertical Turret lathe and the gantry machinery. So far I've finished the saw and the wheel lathe is almost done. The last pieces are on the machine now. I made an assembly mistake. The chuck cleats on the right side are installed backwards and I can't remove them. CA holds this resin like crazy.

And one more thing. To keep my Microsol decal setting solutions from spilling in their very narrow and tall bottles I clamp them in my wood working vice. They don't spill!

Attachments
Images (6)


They all look great! I like your decal solutions holder improvisation!!!
Myles, I like what’s on the tv! The appliances and tools are coming out great.
Andy
Looking good, Myles. I have experience with the Miller signs. Miller sells a converter that will convert a range of AC or DC voltages to the 4.5v dc needed for the signs. The converter will power 6 signs. I have also bought cheap buck converters on EBay to convert dc to dc and adjusted it to 4.5v. This way I leave the sign switch on and set the mode switch once. The sign is then turned on using the accessory power for the layout like my other street and building lights.
Thanks an idea, especially now that I find that the previous builder of this structure, Frank Miller, was nice enough to make the roof removable. I just found that out today when I picked it up by the chimney and the roof came off. Now I can wire all the lighting from above which makes it much easier.
I got the decals on the wall and also designed some more retail writing such as, the name of this business is Loopie Louie's Appliance Emporium. Years ago there was "Crazy Eddie's" in North Jersey. He was a big deal before he went to jail for some kind of fraud. I wanted to capture that mystique.
Here's what I produced. Unfortunately, my wall space was more limited than I realized so I was able to get the "10 years same as cash" up, but didn't have room for the "if you can't find…" lines. The small logo is now on the center front window, and the big one on the back wall. And I finally got CorelDraw working again. My VM Fusion emulator wasn't starting Windows in my MAC after I upgraded to MAC OS Catalina. Problem? I had version 8.5 and it required version 11.5. As an upgrade it was $55. Today I got a note that it was an Cyber Monday extension sale and it was $45. I bit the bullet. Not only does Coreldraw run, but it finally runs like it should. I had terrible latency problems for about the first 10 minutes after starting it up. I would click on a menu selection and a minute would go by before the machine responded. It got faster the longer I ran it. Now it runs as it should on start up. Should have upgraded a while ago.

I finished the enclosure for the wall ovens and got the mid-wall built with its appliances attached. I added a "stainless" surround to clean up the wall oven mounts. Overkill!, very hard to see any of this crap when it's in the building and on the layout.

I test fit the mid-wall into the building for a photo-op. When finally installed, the wall will coincide with the floor. I like how they're reflecting on the shiny floor.

Year's ago I bought some cool white LEDs specifically to light this building so it would resemble florescent. I was able to find them, and the little holders for them and then drill the cardboard ceiling for the five LEDs that should light it up pretty well. They're pretty bright.
I didn't have to put the circuit board for the Zenith sign in the back room now that I have access to the entire second floor, but I've already put that hole in the wall. I may get a power supply for that sign based on Pat's suggestion. I don't like replacing batteries. Would five volts work? I have a load of 5VDC ac adapters. I suppose I could try it. Maybe I'll write to Miller Engineering and ask them.
I painted the ceiling white in prep for the lighting. Notice the only other three logos I could get on the wall spaces. The fridges reach up pretty high and the ceiling height is a bit low. The HOTPOINT sign sits above the wall over enclosure. You can see the Loopie Louie sign on the front window. The Zenith sign goes on the window on the left. Or… maybe I'll put it on the side window since I don't want to block viewing the interior too much. This building was a resin kit and all those little spots on the wall are pin holes. Three coats of paint didn't fill them, but most are behind refrigerators.

I also final got the wheel lathe finished for a customer. I'm getting failures on every other print and it's beginning to bug me. A failure requires emptying the vat through a strainer back into the bottle, then cleaning out anything stuck to the bottom and then some teflon lube and a refill. Failures are annoying. The new resin mix is more forgiving as evidenced by the groove in the face of the base plate being very sound. In the previous one, there were pieces fracturing off. I still can't keep the levers and hand wheel extensions from breaking off during all the handling to clean up the supports. I just replace them with brass and keep moving ahead. A couple of layers of Bondic makes terrific knobs on the end of handles.

So have a nice weekend and I'll see y'all on Monday.
Attachments
Images (5)


Happy Monday!
Spent most of the truncated day (Daughter's out of town and I have dog walking and grandson pickup duties) cleaning up some machine tool prints for a client. I also intended to do the lighting wiring, but couldn't get to it. I did decide to add a graphics wall on the uninteresting side and painted a big, white rectangle there to accept the graphics. Here's the wall. I'll touch up the mortar tomorrow after it's fully dried. It's white craft paint.

Here's the graphic.

It's sized to fit the space. I will cut the decals apart and apply them in groups as it's not easy to get a 3 X 5" solid decal to settle down.
Here's the lathe and saw that was printed. As usual I destroyed the lathe's hand wheels and had to add them back. In this instance I printed the base, bed/headstock, carriage and tailstock as separate pieces to get better control. It worked well for the base and main body, but was actually worse for the small assemblies. The saw blade itself didn't hold up so I replaced it with a piece of photo-etch fret.

The problem is supports. When the carriage and tailstock were attached to the lathe, supports were only needed for the appendages (levers and hand wheels), but when separated supports had to hold up the entire part. The first carriage print when combined with the other three failed. Since I had to only print one part, I decided to experiment and print seven of them all at different orientations to evaluate which version had the best fidelity AND was the easiest to clean up. All of them were very difficult. In some cases there was so many supports on the front face (where all the controls are) almost making a good clean up impossible. The one I used had the least damage to the front face. Next time, I'll print it with the carriage attached. The tailstock was less problematic, but it too should be printed with the bed.
The base actually was a failed print in that the supports kind of gave up near the end, but still resulted in a good part. The part had enough strength to keep printing to the end and I used it. You can see all the supports are a wreck on the left side, but the base is actually formed pretty well.

Attachments
Images (4)


Happy Wednesday!
While I wanted to do the maximum amount of work on the Appliance Store, in reality I actually got the minimum done.
I resized the graphic so it properly fit the wall and then cut apart the decals to make them easier to handle. I just finished putting the last on a few minutes ago, so when I took this picture, the decal setting solutions (microsol and microset) hadn't fully done their thing. When it's dry tomorrow I'll seal and flatten the decals with Dull Coat. There's a bit of truth in advertising being shown here. Tomorrow I promise to get more Appliance Store work done.

I found out from Miller Engineering that I can use a 5 VDC AC adapter to power the Zenith sign. Therefore, I'm going to plug the hole for the off-on switch. I can put the electric meter there. I will be running to sets of power leads into the building, 5 & 12 VDC. My main DC power supplies are all 12 volt.
Most of the time today besides letting out my daughter's dog and picking grandson up at school was spent cleaning up several 3D print jobs for different customers.
My recent print failures using the regular and tenacious resin mixture might be due to not exposing each layer long enough to properly cure the tenacious resin. The regular Elegoo ABS-Like Resin cures at 8 seconds per layer while tenacious cures at 15 seconds per layer. Since I was only using 20% of the Tenacious in the mix I mistakenly set the exposure at 12 seconds per layer, splitting the difference. Apparently, that's not how this stuff works. You have to set the exposure for the slowest curing resin regardless of ratio.
My print of the HO Mini-Baldwin was interesting. The engine block along with all the tiny details printed perfectly, as did the front end and generator. The fact that those fuel lines printed blew my mind.

The entire induction system had some problems with a mid-support giving up the ghost and leaving the center open and some of the turbo not printing. When the support failed it took a lot with it. I also noticed that fine details were being melded together instead of cleanly separate printed areas. By increasing exposure I'm hoping that the curing will be more positive and give better definition. I did not have this problem using the Elegoo resin alone.

I went back to the slicer and added more exposure time and set up two of these prints; one with the turbo up and one down, plus I elevated the part more. Both prints were successful. The turbo-up version had better definition of the turbo inlet, but a more complicated support layout making cleanup more difficult. The turbo-down version had a much better support scheme and the main difficult area is the turbo face. Here are the two versions.


I trial fit one of them onto the engine. It nestled right it. The parts are really small and the clean up is really challenging. Cleaning the support remains can actually destroy the detail the the printer has created. One way to handle the munged up turbo face would be to make an air cleaner for it. When printing such small details the support attachment points are bigger than the details below them and when you remove the support nub, you wipe out the detail laying below. The dealer who wants to market these HO jewels would like me to make three of each for some inventory. And I'm going to start designing an ALCO V-type Four-Stroke Diesel Primer mover, so that's 12 engines to be printed, packed and shipped. I may have to rethink this...

I've put the finishing touches on the Engine House article, but I'm concerned that it's way too long for a single part article. Hopefully, I can talk them into letting it run to more issues.
Attachments
Images (6)


Trainman2001 posted:I found out from Miller Engineering that I can use a 5 VDC AC adapter to power the Zenith sign. Therefore, I'm going to plug the hole for the off-on switch. I can put the electric meter there. I will be running to sets of power leads into the building, 5 & 12 VDC. My main DC power supplies are all 12 volt.
One thing to consider for the 5VDC power is the inexpensive little buck converters that are readily available on eBay and Amazon. An example:
https://www.amazon.com/gp/prod...01?ie=UTF8&psc=1
They are adjustable over a wide range of voltages and should very easily convert your standard 12VDC to whatever you need. They are very handy. You could hide one inside the building and just feed the 12V inside.
And that is exactly why I spend the time to write this journal… I never knew such a thing existed and now, not only do I know, I just bought a 6-pack of them. It is exactly what the doctor ordered. Thanks Avanti!
I mention those block converters in my post above. We use them all the time at my train Club. I usually take a little dab of nail polish and put it on the screw after I've adjusted the voltage. I don't know whether that's necessary but it prevents the screw from moving with the vibrations on the Train table. You can always readjust by just cracking the seal with a screwdriver. We run our lights from 12 volts DC also.
I'm posting on a Saturday, but all the work was done on Friday...
The Buck Convertors came today, six for $7.12 plus tax, no shipping since I'm a Prime member on Amazon. Amazing! a little over a buck a piece. I'll install them on Monday.
This will be a post covering two topics: Appliance Store and 3D Printing. I got the lighting installed in the store (except of powering the Zenith sign…Buck Convertors needed). After spending a good hour wiring up all the LEDs in series I find that instead of Cool White, I was using the Cool White FLASHING LEDs that I bought for the refinery flare tower. Bummer! I had to pull them all out and start over. There are five here, but one must be out of frame. I use shrink tubing just on one lead at each LED which is sufficient isolation for safety.

This time with Warm White LEDs also soldered in series. This time I made my work easier by wiring them all up out of the building, unlike the first time, and then installed them as a complete circuit. Then I added the CL2N3 driver chip to the +input lead. Everything worked! Then I created the outside light using a Scale University white metal commercial lamp shade and a bright, surface mount LED.

I do these using magnet wire and pot the LED into the shade with Bondic UV Filler. I first enlarge the shade's mounting hole to accept the 1/16" aluminum tubing stem. I epoxied the tube in place and used CA to glue the stem into a hole drilled in the ceiling over the front door. The ceiling in this building is cardboard.
I thought I could put the porch light in parallel with the LED ceiling lights, but find that CL2N3s don't like feeding parallel circuits. The ceiling lights didn't light and the porch light did. I don't know what the mechanism at work here is since I also experienced a similar anomaly when powering up the LED ceiling lights in the engine house while trying also to power one of the outside lights. Perhaps, one of my more electronically gifted readers could lend some input here. I had to install its own CL2N3 driver and parallel both of them at the front end of the circuit. Both light perfectly now. The driver chips are $0.29 each so putting two in a circuit is not a problem.
Here's the warm white interior lighting at work. The black blotch on the front window is the non-operational Zenith sign. I think there's sufficient lighting in the interior.

I'm blocking out the 2nd floor windows so no light leaks out showing all that wiring. I just put some black construction paper around the room. I'm using a Euro-style junction block to bring in power mains to the building. I still have these left over from building the layout in Germany 20 years ago. I cut the battery box off the Zenith power board in anticipation of wiring in the Buck Convertor. I'm excited about that. (doesn't take much to get me excited these days). I also dressed up the interior window frames since they're now visible from various angles and will be illuminated. I used pieces of white Duct Tape instead of attempting to mask and paint inside.

By the end of next week, I think the Appliance Store will be complete. I still have to make the base board. I was going to add a chain link fence, but there's really less room that I thought so I'm leaving it open to the street. I did finally make a Bar Mills Pavement Elevator that will go somewhere on this site since they would need to store inventory in the basement. Instead of CA, I used the RSU and soldered it together. It's a much better way to work with Photo-etched, if you can do it.
Now onto 3D Printing. I'm working to create the five machines for a customer. And I've been having a spate of failures. I printed the radial drill and thought the failure was pulling away of supports. I posted my problem on the Elegoo Mars Facebook site and was told that my LCD screen is failing. And sure enough, the holes through the model were in places where NO supports ever existed. These screens have a fairly short life span and mine has reached its. Both the UV light and any uneven pressure on the screen can cause a breakdown. I then did a small test and sure enough there are non-transparent spots forming on the screen. Any non-transmitting section will print as a hole that will reoccur right up through the model.


I printed another vertical turret lathe and the same thing happened. The hole, like the radial drill's was right up through the faceplate in a place that I couldn't repair even if I wanted to. The missing corner on the radial drill's work surface intersected a few of the t-slots which I couldn't remake. It's a shame because it was a beautiful print except for those holes. Small holes I can repair with Bondic or epoxy filler, but when they destroy complicated portions, the part is scrap!
I'm researching a new screen. They're not too expensive ($30-50) and replacing them on the Mars is easy. I'm going to get two of them to have one in stock. Screen life is estimated at 400 hours. Considering this machine has been running almost every day since June, I suspect I am easily at that usage. The LCD failure may explain why all of a sudden I was having so many failures, after I had been printing part after part without failure. I'm right now printing 3 Gantry Hoists. I've oriented them in three ways and hope that one will be in a spot without the black out areas. We'll see. I can complete the order by giving the person the two machines that I printed for myself and when the LCD is fixed, I can print some more.
Attachments
Images (6)


The lit interior looks great! I can see the signs on the back wall very well. The light fixtures are nice looking.
I still can’t get over the great detail on the 3D printed items!!!
Trainman2001, thanks for taking the time to share with the forum your progress. I know stopping to take images, edit, and post is time taken away from building.
Thanks again.
Charlie
TRAINMAN2001 I really admire your work, top notch!
Myles, LEDs are constant current devices. They operate at about 25ma. The CL2N3 LED driver is a constant current device that supplies a constant 25ma at a range of voltages. Current is a measurement of electron flow througo the wire. Think of it like water through a pipe. A serial circuit will flow with a constant 25mv throughout. If you add a parallel circuit, (a tee in the pipe) the current divides and the diodes no longer get the 25ma they require. Voltage is electrical potential and is measured across the circuit. In parallel circuits, voltage is constant and current divides. I'm series circuits, current is constant and voltage divides. I hope that makes sense.
Well written, Pat! I used to be able to give decent electronics explanations, but after 43 years in power and telecommunications I didn’t use that theory much. If you don’t use it, you lose it. LOL
Thanks Pat. I did know about the series/parallel question, but your explanation was good. What I didn't understand is why just one branch would light. I could image that if the amperage would divide equally by each branch then both would be below threshold. But that, apparently, is not how it happens. It seems to favor the single LED branch and leaves the multi-LED branch dark.
I hooked up one of the Buck board using alligator clips on the primary 12 VDC side and adjusted the output to a perfect 4.5 VDC on the output. It worked the Zenith sign nicely. It's great to have these components so it doesn't matter what my DC input voltage is. I can now customize the output to suit the need. Each of the AC adaptors in my scrap box seems to be a different output voltage. Now it doesn't really matter. I can't believe that you have an entire functioning device for a tad over $1.00.
Of the three hoist prints, two had holes right through the motor or gear box that were too big to easily repair, but one had manageable holes and I was able to fill them with Bondic. Tomorrow I'll refinish them to hide the repair. I'm giving the customer the two machines from my shop. I'm going to try and repair the holed ones for my use. Amazon is out of bona fide Elegoo Mars replacement LCD screens and don't have a restock date. I don't want to keep a customer waiting, and I can re-print my own machines at my own pace.
Short session. I had to get rid of 9 florescent shop lights because of replacing them with new LED fixtures. I was told that Habitat for Humanity would take them at their recycle store. I loaded up the Acura with all them in the back seat. When I got there I was asked "what kind of bulbs?" "T-12s" I respond. "Nope! Don't take them!" So plan B was to take them to the electronic disposal center near downtown Louisville. I get to the gate house and was told that they only take the bulbs, but not the fixtures. So I unloaded all the bulbs from the fixtures and still have a back seat full of obsolete florescent fixtures. I now have to take them to another "Hazardous Waste Disposal Center" near the airport. They're not making it easy. They want you to properly dispose of this stuff, but really...
So I had about an hour in the shop. Spent most of the time cleaning up the hoist print that I did. It was a difficult cleanup, but I think I made an acceptable part. I now have to engineer how to pack all these semi-delicate objects so they get to New Jersey in one piece. I'm thinking of doing it like how Lladro ships their delicate porcelain figurines. They support them in a cardboard cradle that doesn't let any delicate aspect touch anything. It's literally a project unto itself.
For the rest of the time I wired up the Buck module and powered the entire lighting system. Here's a video.
https://www.youtube.com/watch?...;feature=em-comments
This is a still pic of the Zenith sign in the "on" position.

You'll notice something… the room lights dim a bit when the sign flashes on. Getting back to Pat's series/parallel discussion, clearly, I'm getting a current drop when the new load goes on in the parallel feed system. I'm using a small AC Adapater (12 VDC/.5amp = 6 watts) and it may not have enough headroom. This is my test power supply. I have another new LED power pack (12 VDC/30 watt = 2.5 amp) and it should be able to feed it without the drop off. The feed comes in and is split between a line going to the input side of the Buck modules and the input into the two CL2N3 that drive the LED lighting. But maybe I'm wrong. Help me here.
With the lighting all done, I'm going to paint the foundation stone, build the base plate and finish adding all the appliances and get it on the layout.
I sent all the files to Railroad Model Craftsman for the engine house article so now I have to finish up all the landscaping. Tomorrow or Wednesday I need to get to JoAnne Fabrics and get some more bridal tulle for the chain link fencing, and that will be done too.
Attachments
Images (1)

Half an amp is pretty stingy. I am pretty sure the bigger bigger power supply will solve your problem. The only other possibilities are too-small wires or a bad solder joint. IIRC those buck converters can handle 3 amps each.
Yes it is difficult to properly dispose of these things. My son-in-law and I took two TVs to a recycling center, and it cost me over $100 to get them to take them. We delivered as well. It makes you think about burying this stuff in the back yard! LOL
I do see the interior dim a bit when Zenith flashes on. At fist I didn’t notice, then I wasn’t sure if it was just contrast to the bright Zenith light. Should you make two completely separate circuits??
I'm pretty sure the soldering is not bad. It's one of the best things I do. I think it's a power supply that's not up to the job. I'll hook up the big one and see what's what. I don't know how much current the sign draws. I'm going to add the new power supply to the town anyway since there's more buildings and lights that will eventually go in.
And yes, it makes you want to bury the stuff. Any fixture with a T-12 bulb is obsolete and is no longer legal.
I tried out the larger LED power supply and everything was terrific for about a second. The cord was too short and pulled the entire building off the table crashing to the concrete. The building wasn't damaged too badly and was an easy fix, but the ceiling lights stopped working. I spent a half hour (or more) attempting to trouble shoot what happened. At first I thought one of the LEDs in series was damaged, but they're fine. I then thought that the CL2N3 driver chip got whacked so I substituted it with another, but still nothing. Then I used my old .5 amp test power and it lit. I pulled all the LEDs out of the building to isolate the circuit and took them into the layout room. I ran them with the same power running the engine house. They all lit (along with all the engine house lights) and these are being powered by the same version of the LED power supply. BTW: that hit the floor too. I checked its voltage a couple of times and it was 12 volts. But then I found that when I tied into three of the LED string they lit brightly. When I added the fourth they were dim, and when I added the fifth they didn't light. If they could light with the 12 volt .5 amp, but couldn't all light with a 12 volt 3.5 amp supply I'm thinking the supply is damaged and just bought another. I'll keep you posted. No pictures today since there's nothing to really show.
And I found out where to dump the florescent fixtures. There was another waste recycling center closer to home that we hit on the way back from picking my grandson up at school. They even unloaded the car for me. You can dump the fixtures there, but not the bulbs. Those I had to leave at the Meriwether Ave electronic waste center. A two-step, annoying process. My car is now empty. Oh… and one more thing… chemical waste like all the stuff coming of the 3D printer goes to a third place; that one near the airport. At least Louisville's a big enough city to have places to put all this stuff.
I am glad You got rid of the stuff. Yes that is a problem if you don’t live near a larger city like Louisville. We got rid of the TVs about a half hour away. They take chemicals too. But I haven’t seen fluorescent lights on the list. You probably have to drive an hour plus to somewhere in Pittsburgh. If we lived out in very rural areas, who knows.
At my train club, we bought a 16 amp 12VDC industrial power supply to power all our accessory lighting. It was pretty cheap on EBay. If I remember correctly, it cost around $20.
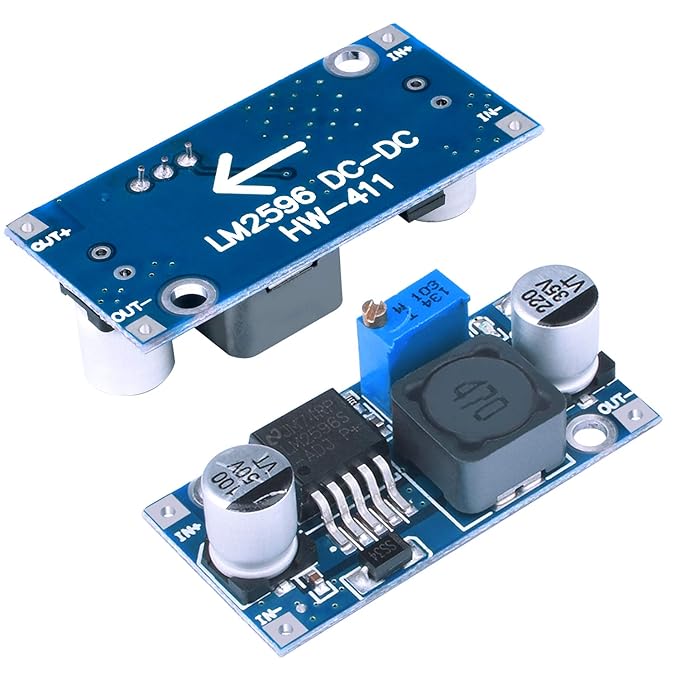
Is this kind of what you're talking about. I think it's time that I consolidate my potpourri of ac adaptors into a single robust power system.

Attachments
Images (1)

Yes, we bought something similar to that. It wasn't quite as powerful as that one though. That one should be more than powerful enough to run accessorys for your whole layout.
It’s a great idea! So better than a dozen bricks plugged in multiple outlets.
Add Reply
Sign In To Reply
