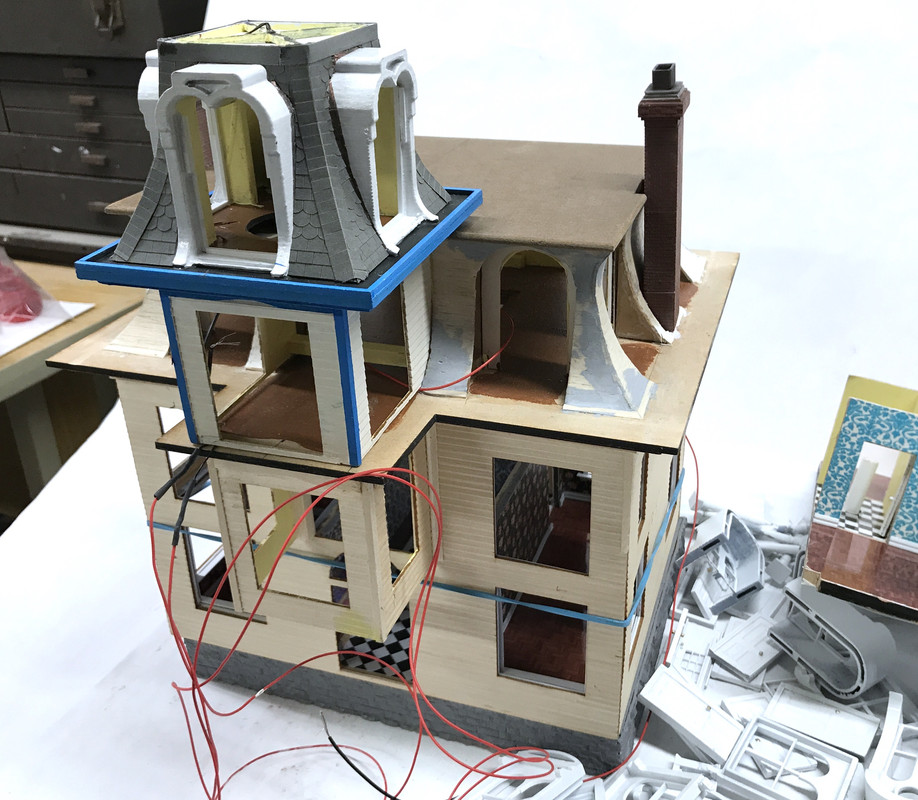
Now for today's work.
First of all Hanukkah Harry came early. I had a nice shipment from MicroMark today taking advantage of their holiday free shipping offer. You had to order over $100.00 so I did. One of things I bought was a small powered cutoff saw made for model-sized stock. It didn't have a depth stop so I spent part of today's session building a base and a positionable depth stop. Here's what I got.
I bought their lower-priced model-maker's chop saw. It was on sale for $50, which was significantly lower than any of these I saw on Amazon. Apparently, it's a Chinese commodity machine that lots of re-sellers are putting their logos on. I also bought a clear shield for the Dremel. Unfortunately, it only fits the main motor and not the Flexi-shaft handpiece. I bought additional cut-off wheels for ferrous and non-ferrous materials. And I finally am replacing my traditional #11 blade holders with the (made in USA) Excel ergonomic handles. Lastly I bought some #11 sized saw blades, which as you'll see already paid for themselves.

The saw, as you'll notice, does not have a depth stop for repetitive cuts. Same problem as I had with the Chopper. This time I went a little more low tech. Instead of attempting to drill the housing and build-in the depth stop assembly, I mounted the depth stop below the saw so it has a dual purpose: provide a sold base for the saw AND be a positionable depth stop.
The base consists of some pre-finished lumber left over from the layout build and a chunk of ply.

I screwed the saw the side pieces and made a stop block out of a chunk of 2 X 4 drilled and tapped for a 3/8-16 piece of threaded rod.
I shaped the block with my big chop saw and a hand saw to rip it to width. I drilled it with a 5/16" tap drill and then, still keeping the work piece in the drill vise, used the drill press itself to hold the tap and drive it into the 1" thick pine block. I've done this before since it keeps the tap dead square with the drilled hole. The tap wasn't quite long enough to tap the entire depth, but almost. So I took the same threaded rod and ground a notch with the bench grinder so it would tap the remaining little bit. It worked.

I screwed the block to the sliding part, and tried out the saw. My first assembly had the stop misaligned on the Y axis so I unscrewed the saw and moved it about 1/4" rearward. The saw cuts perfectly square, which neither the Chopper with its razor blade or a plastic miter box since the slots wear and get slightly out of square. Notice, to captivate the slide I use a quickly clamp on the back. Fine adjustment is done with the threaded rod.

After closer inspection, my stop was also off a little bit on the Z-axis. So I cut a spacer and installed the stop with that.

The saw is light duty. There is a much more sophisticated one by Proxxon, but it was 4X more expensive and my work load will be light. This one will do fine. It has positive stops for 90 and 45 degrees and anything between them without stops.
Now onto the House...
I was able to raise the roof, and hold it with a wood block, and got inside and make some relief cuts to clear those re-positioned wires. If I would have originally run them down the back to join the 2nd floor ceiling wires, the partitions wouldn't have some into play. But I didn't and had to do some crazy rework. I tend to not think in 3D and didn't think about just what those repositioned wires would now be interfering with. The wiring had a lot of my attention and I kept waking up in the morning thinking about how all those various leads were getting to the basement. The attic ceiling's were particularly vexing and now I know why. I had them routed poorly.
Here's where I enlisted those #11 saw blades to cut away the attic partition through the 3/4" opening I was able to make in the roof. I took this picture through that gap. That's a very tough aircraft ply and would have been awful to try and cut with the blade. The saw cuts on "pull".

With the relief cuts the roof just about fit. I used servo tape strips to attach the roof to the Mansard walls. The fit wasn't so hot, but it's holding. Servo tape holds like crazy.
So with that, the roof is actually done.
I started installing furnishing and the interior doors in preparation for attaching the main walls. I'm using drops of Gel CA to hold everything down. It works pretty well for this app. I started with the doors (held with Canopy Glue) and then the dining room and finished with the living room. And of course I forgot to lay the living room carpeting before installing the furnishings. And that Gel CA doesn't let go, so there was no removing the furniture to lay the carpet. I compromised and used the carpet at the doorway.

And the living room.. The doors really help with the illusion.

I put the grandfather clock in the foyer and also got some bedroom furniture (and carpeting) in place which I didn't photograph. Tomorrow I'll start working on the exterior painting and prepping all the windows for installation. I still have to paint the repaired porch columns, finish the balcony, paint and install the porch lattice screens and build the chain suspension of the porch swing. But, we're getting near the end.
Oh... and the site needs to be created! So we're not that close to the end...


