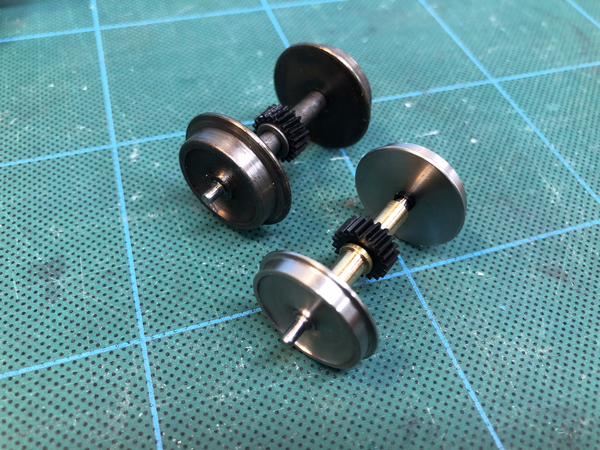
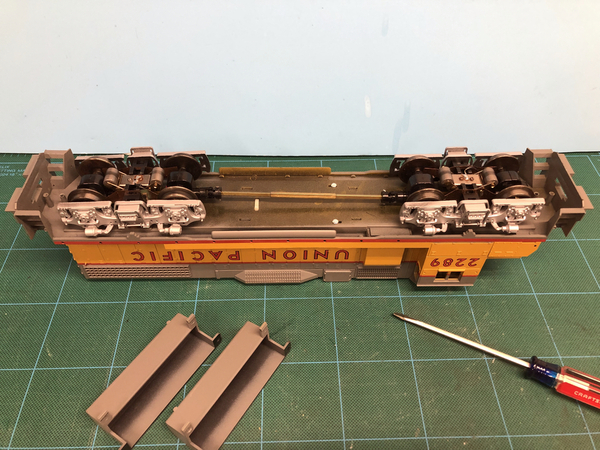
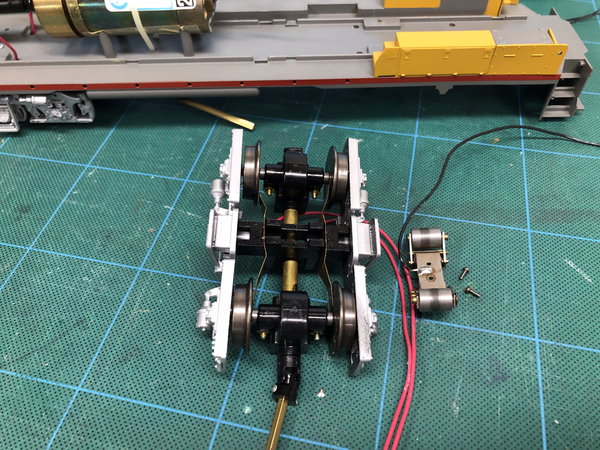
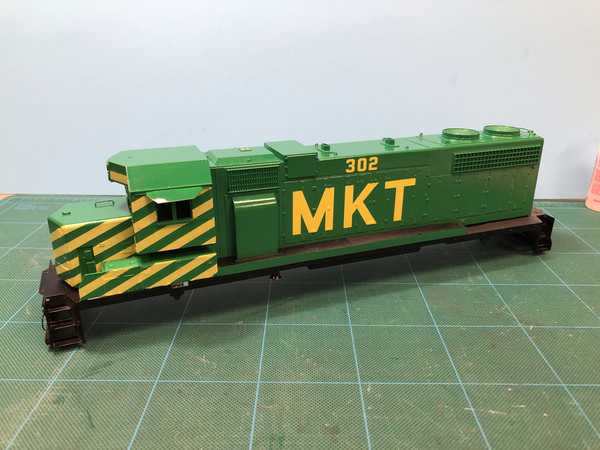
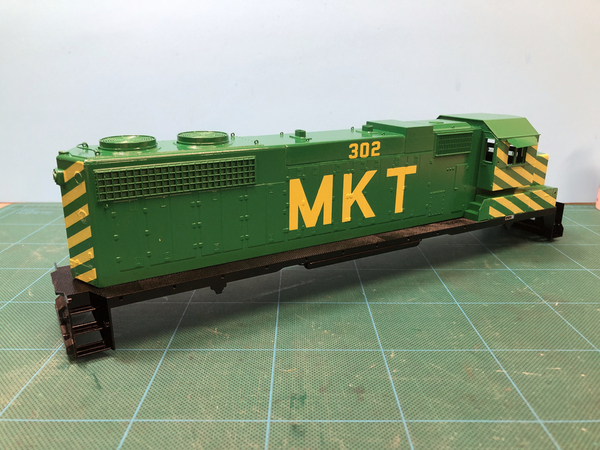
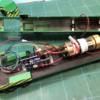
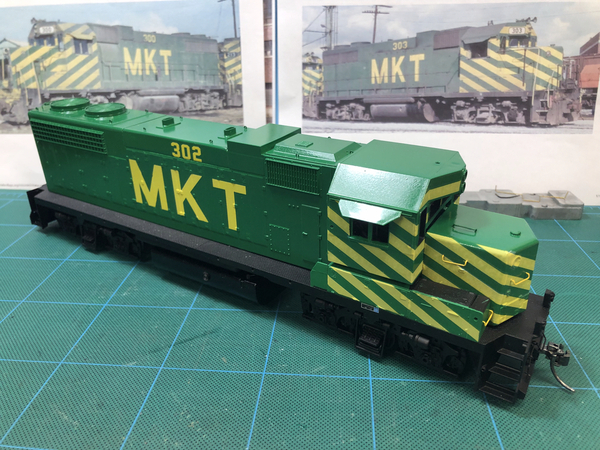
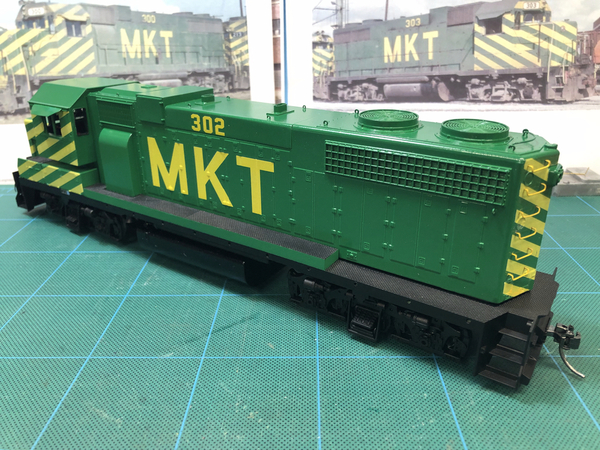
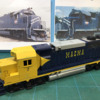
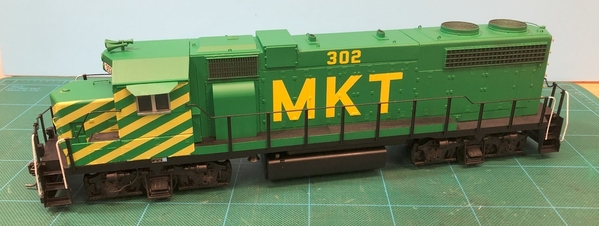
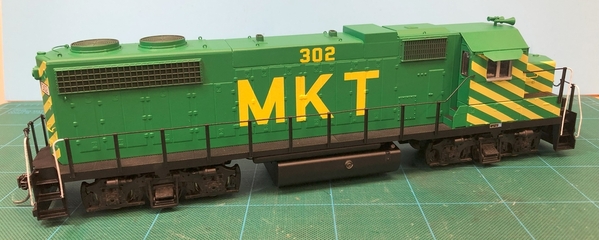
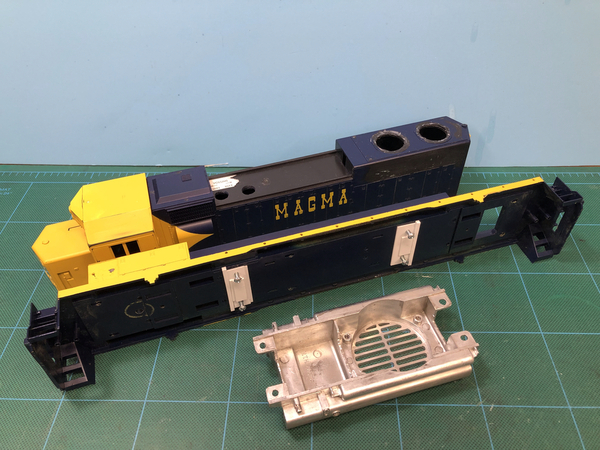
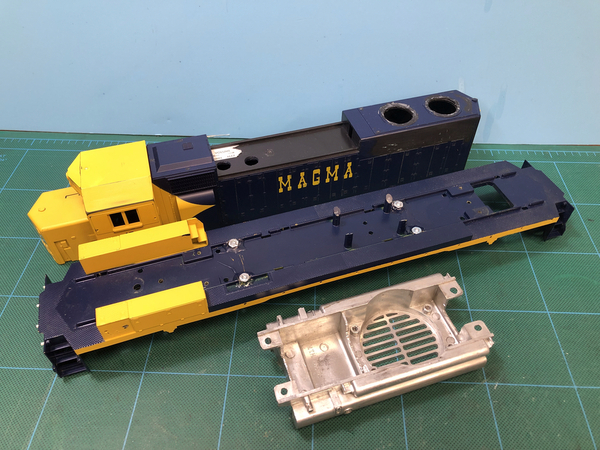
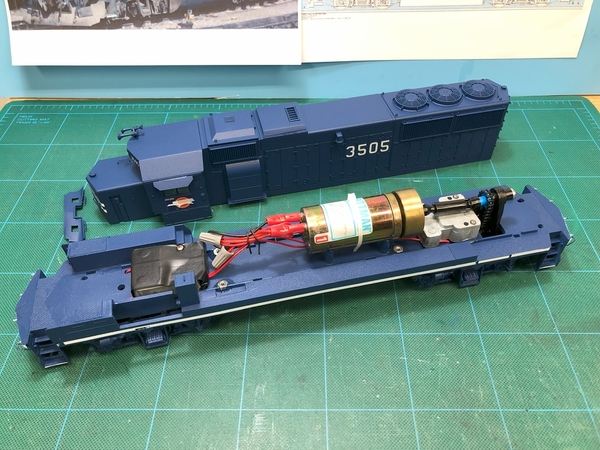
Hey Katy fans!  Here's a Weaver GP38-2 project with some mods to better represent MKT 302, an early GP38.  All pictures in this post are by me.  The donor unit is a 3 rail Union Pacific model that was converted to 2 rail using NWSL 2504-6 geared axles.  Converting to 2R was easy.  After disassembly, I removed the 3 rail AC board and center rail pick-ups with the black wire leads.  Two of the pick-up wires needed to be resoldered and I marked the leads of one side with black marker.  I also removed the light bulbs and diodes from the motor leads as those will be controlled by a decoder.  I think I spent more time removing the masking tape residue that Weaver used in place of electrical tape.  Here's a pic of the 3 rail and new NWSL axles:

IMG_4719

After replacing the axles, a quick test with a 9 volt battery revealed problems with the drive train.  A broken upper sprocket gear was found and replaced on the tower drive with a new one from P&D Hobby.  With basic DC running restored, a Loksound 5 L decoder loaded with a GP38 sound file and Tang Band 1925S speaker were temporarily wired in for testing on my office loop.  I don't have DCC yet, however, the sound and basic DC features work well.

Stripping the paint - After several hours of soaking in 91% isopropyl alcohol with no progress, I decided to try Easy Off Heavy Duty oven cleaner in the yellow can.  That worked great and didn't craze or damage any of the parts.  By the way, I had a can of the Easy Off Fume Free oven cleaner in the blue can, so I tried that first with no luck.

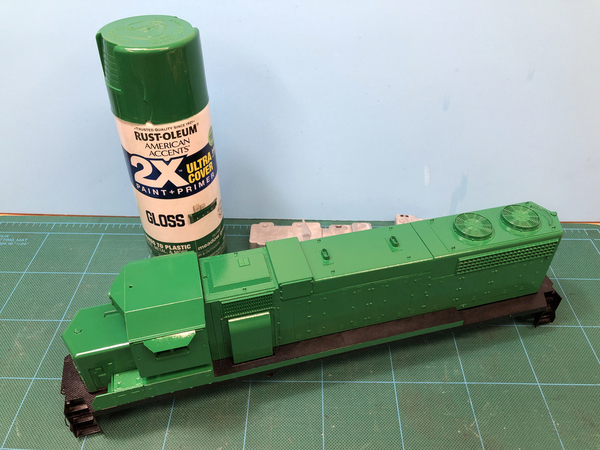
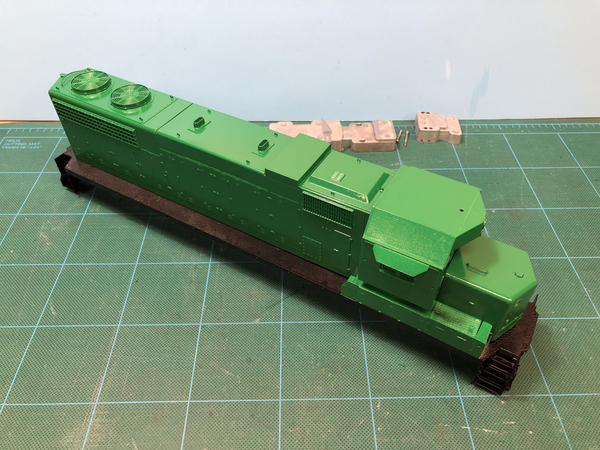
Based on prototype pics, I decided that John Deere green is a bit too yellow and went with this Rust-Oleum Gloss Meadow Green over a coat of Tamiya Fine White Primer:

IMG_4726

Shell modifications include shaving the molded grab irons and lift ring details and converting to non-dynamic brake.  I also added a box to the right front walkway with a grab iron to match the prototype.  I'll need to fix the gap shown in the photo below and touch up the battery box as my masking job wasn't as good as I thought:

IMG_4725

Decals went on last night!  If you look up "tedious" in the dictionary, one definition is "adding stripe decals to an MKT locomotive cab".  I'll try to post those pics later today.

Happy modeling!

~Tim

Attachments

Images (3)
  • IMG_4725
  • IMG_4719
  • IMG_4726
Last edited by Tim Mc
Original Post

Replies sorted oldest to newest

Thanks for the comments!  Hey Bill, in the past I was concerned about using oven cleaner, but there are a few threads on here that had positive results so I gave it a try.

I wanted to add a few pics and tips I've picked up while working on these older Weaver models for others.  Here's a pic before I stripped it.  There was no weight in the tank.  With the tank out of the way, the screws that hold the body to the sill can be removed:

IMG_4701

After removing the body and cab, you can remove the weights, disconnect the drive shaft from the tower drive and remove the screws holding the trucks.  Snip the zip tie to remove the motor.

IMG_4703

For conversion to 2 rail, remove the center rail pick-ups:

IMG_4704

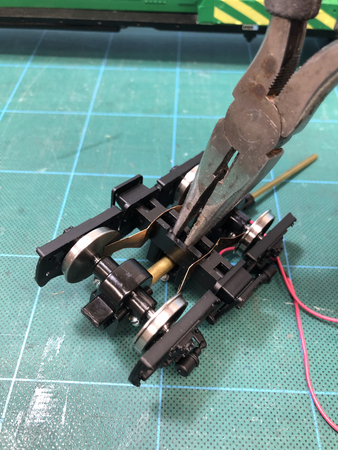
I think I learned this next tip from Strummer.  To remove the side frames, use a pair of needle nose pliers to pry them out from the center.  I've launched a few across the room, but no breaks so far:

IMG_4730

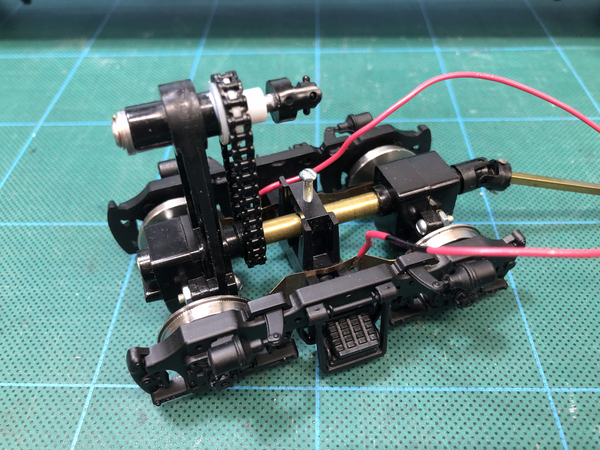
Here's a view of the tower drive.  The upper white gear was split, causing it to jerk and stall.  A new gear was pressed on using a 1/4" deep well socket.  Luckily I bought two gears because I broke the first one.  I also added the white plastic washer behind the gear to take out free play.  Also, Micro Mark sells other sprocket gear sizes and acetal resin chain to change the speed:  https://www.micromark.com/Mini...e-Sprockets-1-8-Bore

IMG_4731

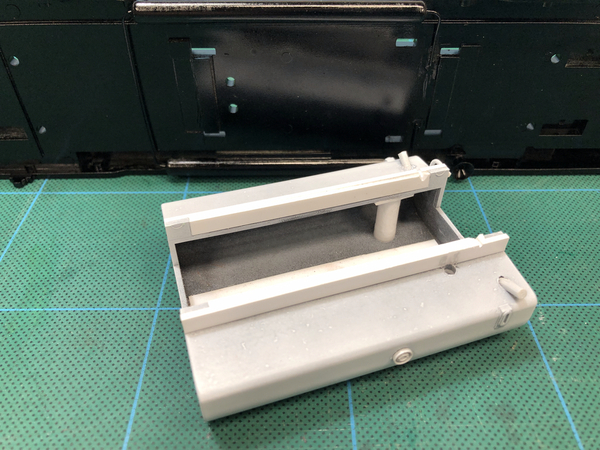
I don't like how Weaver designed the fuel tank mounts, so I came up with a better way (in my opinion).  I added locating tabs made of strip styrene to the bottom of the sill, drilled holes and added bolsters in the tank so it can be mounted using the two center body screws.  Note that the screw holes on the body are slightly staggered.  2-56 x 3/4" are used to fasten the fuel tank through the sill and into the two center mounting holes in the body.  I added shafts made from 1/4" styrene tubing so that the screws would be guided to the mounting holes and not get lost in the fuel tank. 

IMG_4732

IMG_4734

The new mounting allows the removal of the screws and tabs on the ends of the tank for a more prototypical appearance.  I'm thinking about installing the speaker in the tank.  If so, I'll likely drill a bunch of holes to let the sound flow.  I'll have to check clearances since the drive shaft will be running through the tank.

By the way, thanks to jonnyspeed for his comments on another thread to combine ESU Loksound 5 L decoder and the Tang Band TI-1925S speaker.  It sounded great during my test run.

Attachments

Images (7)
  • IMG_4730
  • IMG_4701
  • IMG_4704
  • IMG_4703
  • IMG_4731
  • IMG_4732
  • IMG_4734

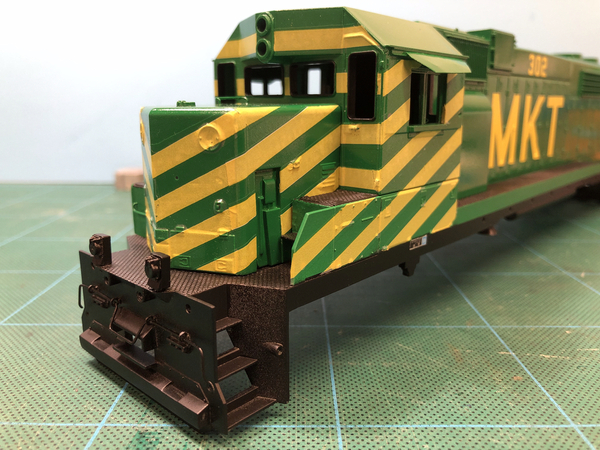
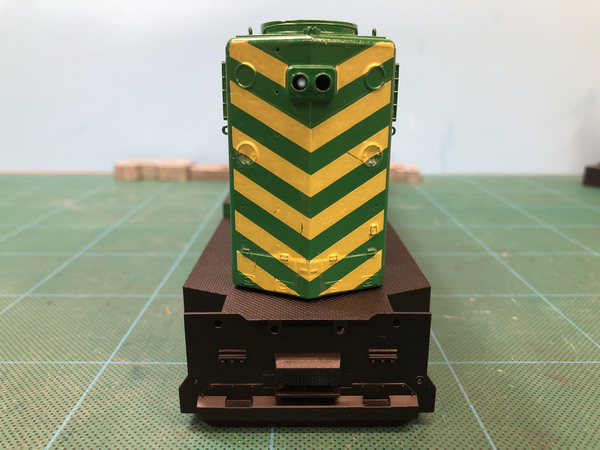
Here are a few pics of the decal job.  The MKT decals are from Circus City Decals, and the 3/16" yellow stripes are from K4 Decals.  K4 also has 30 degree 3/16" diagonal barricade stripes in yellow which I used for the hood and cab ends.  Precision Scale brass eye bolts #48279 were used (.040 core), although in future projects I'll go with #48278 (.030 core).  The grab iron on the short and long hood tops were added before painting.  The others will be added on top of the decals and painted by hand.

IMG_4727

IMG_4728

It's funny how you notice errors after you post a photo.  Let's call it "good enough".  Maybe some dull coat and weathering will help.    Here you can see the two MU stands MKT had on a lot of their locos.  MU stands are Precision Scale #56111 and mounted with a short piece of brass wire and CA glue.  The Weaver number boards were sanded off the cab as they are not the correct size and smaller than the rear boards (something I wish I had done to my other Weaver GP38/GP38-2s).  I also removed the footboards, shaved the molded decoupling lever detail and installed a brass one mounted with brass eye bolts.  Also, it pays to research your model and the timeframe it's modeled.  When MKT 302 was repainted from red into green, it had striping extended onto the cab roof, however, a picture from 1983 shows that the stripes were removed from the cab roof.  So...I had to remove stripes from the cab roof as I'm modeling this in the early to mid 1980s.

IMG_4738

K4's chevrons made it easy, although I wish they were a bit more opaque, and wider to extend slightly around the end of the hood and cab.  I tried adding an extension, but the overlap on the decals was too obvious.  Still, K4's chevrons made it a lot easier than trying to build them from striping.  I'll need to touch up some breaks in the decals with yellow paint before sealing with flat coat.  I'm waiting for white number board decals with black EMD gothic numbers from K4 that will match the MKT number boards perfectly.  I tried some number boards printed on white decal paper, but not happy with them.  I've only sealed the sill with flat coat since I'm waiting to complete the decals.  With the sill completed I can get started on installing the drive train and figure out how I want to mount the decoder and speaker in the meantime.

IMG_4739

Yep, the rear pilot looks bare.  I planned to add a rear decoupling lever, but ran out of eye bolts.

Have a good weekend everyone!

Tim

Attachments

Images (4)
  • IMG_4727
  • IMG_4728
  • IMG_4738
  • IMG_4739

Another product that works well is Super Clean (gallon jug from Advance Auto). It ate weaver paint off overnight with no plastic damage and minimal scrubbing (just the grilles and fans).
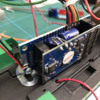
I'm curious how you mounted the decoder and the speaker inside the body, got a pic with the hood off?

I put a blunami in one with a 3d printed shelf above the drive, but ended up with a small speaker in the roof of the shell, without a better place to put it.  

A 1925s module isnt super small, so I'm curious to see where it fits....

IMG_0189

Attachments

Images (1)
  • IMG_0189
Last edited by Boilermaker1

Wow - great job cramming that decoder in there!  I'm going to try to mount the speaker above the drive tower, similar to how this one is located:  https://www.bendtheirons.com/P...ct-Details.html?1001

The brass frame in the link above looks nice, but a bit above my budget.

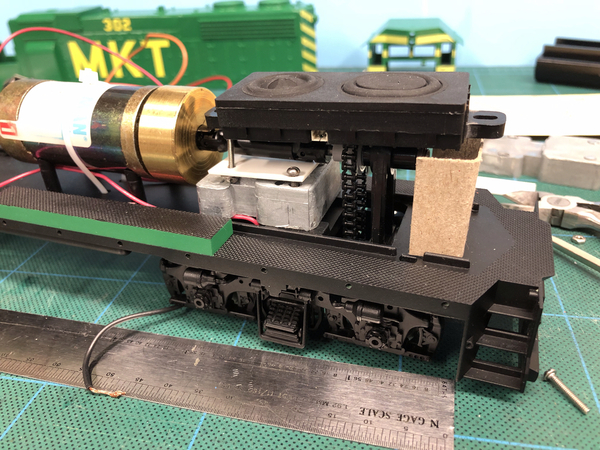
I was mocking up a few speaker mounting options tonight.  Possibly a front mount tied into the screws that hold the rear weight to the body with posts to extend above the drive shaft (white styrene piece below), and a rear mount made out of thin steel or aluminum bent into a channel with tabs for attaching to the sill and speaker (cardstock below).

IMG_4742

I'm thinking of mounting the decoder on its edge using L brackets screwed to the center of the sill.  To save space, I may cut down or remove the front weight, placing weight under the cab and in the fuel tank instead.

Attachments

Images (1)
  • IMG_4742
Last edited by Tim Mc

Hey Ricky, I usually use shortened Atlas O GP15 non-db covers (p/n 30045), but didn't have any on hand so I cut off the fan, filled with styrene and 3M spot putty filler.  The DB grille details pull off, but the mounting holes needed to be filled and the top edge rounded to match the profile of the rest of the long hood. 

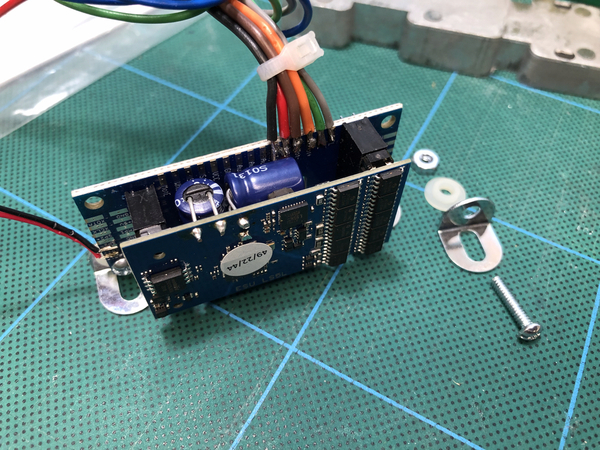
Here's tonight's progress.  I mounted the decoder using small angle brackets I found at Lowe's.  I also picked up some 4-40 screws.  Here's the decoder with the brackets before drilling and mounting to the sill.

IMG_4744

Here's a pic showing the 4-40 screw, bracket, plastic stand-off washer and nut.  I shortened the screws using the screw cutter on a wire stripper.

IMG_4745

I mounted the Tang Band TS-1925S speaker in the radiator section of the shell.  Two 1/4" square styrene strips were glued to the shell, then pilot holes carefully drilled for 4-40 screws shortened to 1/4".  Here you can also see the connector, a male JST 1.25mm micro connector plugs into the speaker (not visible), and I soldered in a pair of leads with a female connector for connecting to the decoder. 

IMG_4746

Here's a pic of it showing most of the connections completed.  The loose blue, green and gray leads are for front and rear lights.  I'll wire those up after completing the decals on the cab and hood.

IMG_4748

I gave it a test run tonight and glad to report that everything works.  The speaker sounds great.  I'll cut down the front weight and mount it under the cab and plan on adding weight to the fuel tank. 

Take care!

Tim

Attachments

Images (4)
  • IMG_4744
  • IMG_4745
  • IMG_4746
  • IMG_4748

Last night I added Kadee 743 couplers on both ends.  Tonight I added and painted the hand grabs.  I also soldered in the front and rear lights, warm white LEDs from Evan Designs.  I tested the decoder with a 9V battery to make sure the lights worked.

  IMG_4763

IMG_4765

Waiting on number board decals, then I can give this one some light weathering.

Attachments

Images (2)
  • IMG_4763
  • IMG_4765

Here's a sneak peek of my next project:

IMG_4767

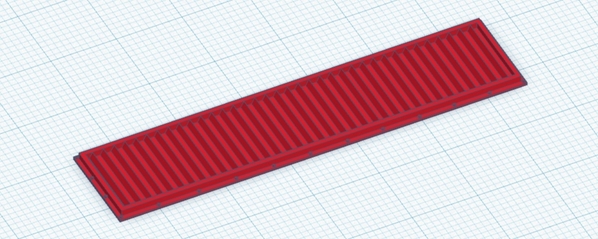
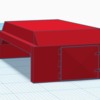
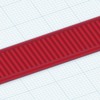
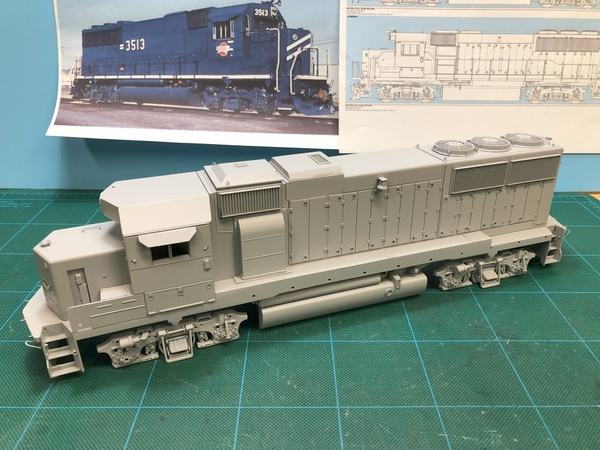
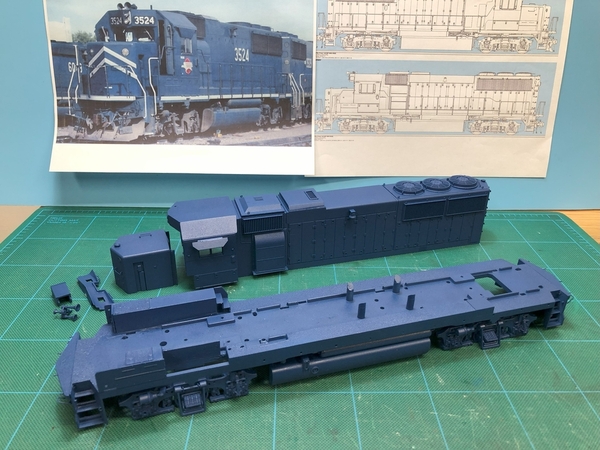
The pictures in the back give it away:  It's a late Missouri Pacific Phase 2c GP38-2, road number 2158-2237, and 2290-2234.  Unit will have front anti-climber, Q-fans and a 3600 gal. fuel tank.  Unfortunately the corrugated radiator grilles are no longer available from Des Plaines Hobbies, so I made the radiator grilles and angled air filter box using Tinkercad, then uploading to Shapeways.  I also ordered some MP spark arrestors on Shapeways since someone had already done those.  For $16 it will save me a lot of fab time.  Fuel tank is from an Atlas GP40.  Non-dynamic brake hatch, bell and bell mount is from an Atlas GP15-1.  Radiator fans are also mocked up and are from an Atlas GP60.

  Shapeways GP38-2 Corrugated Radiator Grille

Shapeways GP38-2 Angled Air Filter Box

We'll see how the parts show up.

Happy modeling!

Tim

P.S.  I have two projects pending - the MP GP38-2 above and a late Frisco GP38-2.  Some of the parts arrived today. 

Attachments

Images (4)
  • IMG_4767
  • Shapeways GP38-2 Angled Air Filter Box
  • Shapeways GP38-2 Corrugated Radiator Grille
  • Shapeways GP38-2 Angled Air Filter Box
Last edited by Tim Mc

The number board decals arrived, so I was able to finish it up over the weekend.  I also found some 9/16" ball bearings that were glued into the sides of the fuel tank along with a large flat washer for weight.  Here are couple of pics after spraying flat clear coat, final assembly, some weathering and painting the hand rails.  I'll likely swap out the horn with a brass one.


IMG_4803IMG_4804

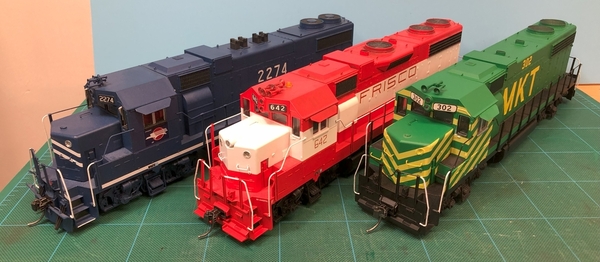
MKT 302 with MoPac GP38-2 & Frisco GP38AC models. 

IMG_4809

Happy modeling!

Tim

Attachments

Images (3)
  • IMG_4803
  • IMG_4804
  • IMG_4809

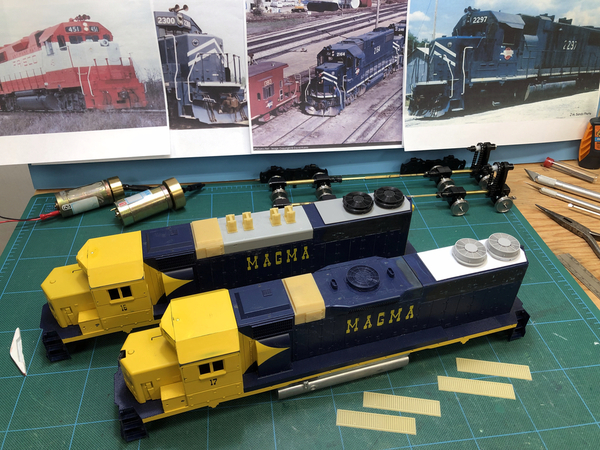
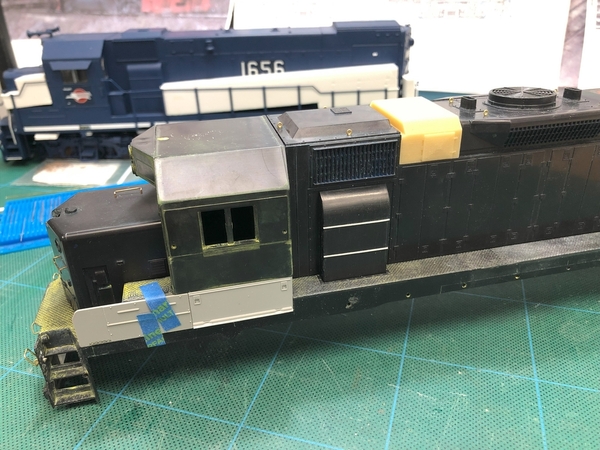
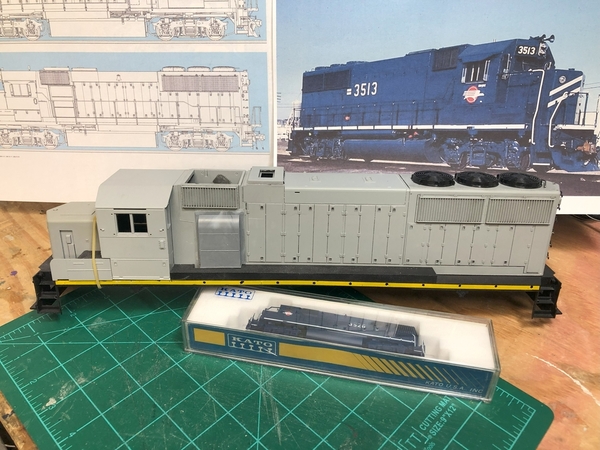
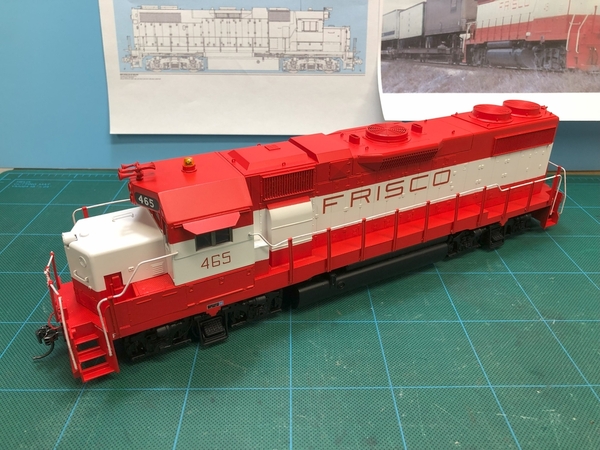
I thought I'd just add onto this MKT GP38 thread for my latest project:  A pair of GP38-2s, one in Missouri Pacific and one in Frisco.  The Mopac model will be based on a Phase 2c GP38-2, probably road number 2325.  It will have a front anti-climber, angled air filter box, Q-fans, liberated exhaust with MP's spark arrestors, corrugated radiator grilles, and a 3600 gallon fuel tank.  It will be non-DB like all of MP's GP38-2s.  The Frisco model will be based on SLSF 465, a later Phase 1c with dynamic brakes that has an angled air filter box, corrugated radiator grilles, and a 3600 gallon fuel tank.

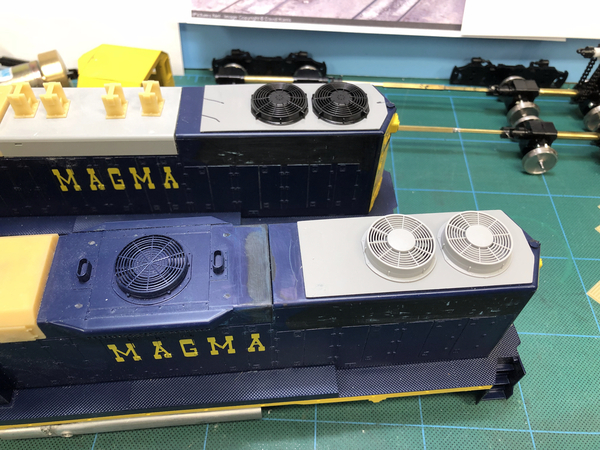
A few things to note in the photo below.  Starting in the upper left of the cutting pad are the Pitman motors.  I bought a broken 3R Weaver FA2 for its motor and gearboxes, but the FA2 motor didn't have a flywheel, so I added a Northwest Short Lines #416-6:  Flywheel for 5/32"-4.0mm Shaft x 38mm OD x 13mm L, brass.  It's the slightly larger flywheel of the two.  On the upper right corner of the cutting pad are the drive mechanisms, both upgraded with 2 rail NWSL #2504-6:  Geared Wheelset, O, 40"/145, 1/8" x 1.810" Shouldered Axle, Weaver RS3, FA, GP38 Upgrade.  On the FA2 drive, I replaced a split upper tower gear, which required a few more links on the drive chain as the FA2 drive gear is smaller.  3/32" and 1/8" brass box tubing were used to build a drive shaft and match the GP38-2 set up.  The angled cab filter boxes and corrugated radiator grilles I made in Tinkercad came in from Shapeways, along with some Mopac spark arrestors that another modeler already made in O scale.  Good stuff.  Pics of the parts are shown earlier in this thread.  I've fitted the air filter boxes on both models, fitted the non-DB cover on the Mopac unit (from an Atlas GP15-1), and removed the batten strip on the rear of the dynamic brake cover for the Frisco model.

IMG_4853

Last night I cut holes for the fans.  Q-fans from an Atlas GP60 for the Mopac model, and fans from an Atlas GP40 for the Frisco Geep.

IMG_4855

Here's a pic showing how the Atlas (MTH) GP40 fuel tank mounts to the Weaver GP38-2 frames using 4-40 hardware.  I added styrene strips to position the fuel tanks, and glued the nuts on the top using 2-part epoxy.

IMG_4786

IMG_4787

It's cold here, about 1° F, so it may be a while until I strip the paint.  Until then...

Happy modeling!

Tim

Attachments

Images (4)
  • IMG_4853
  • IMG_4855
  • IMG_4786
  • IMG_4787

Some progress on what will be Frisco GP38-2 #465.  A fellow modeler has been mentoring me and had the correct cab parts.  The cab base has been cut out and replaced.  I've ordered EMD cab latches to add a latch in the middle (Precision Scale 5618, plastic).  Replaced the dynamic brake fan grille with one that doesn't have the diffuser.  I added a few lift rings and also added ribs to the blower duct.IMG_4931

Attachments

Images (1)
  • IMG_4931

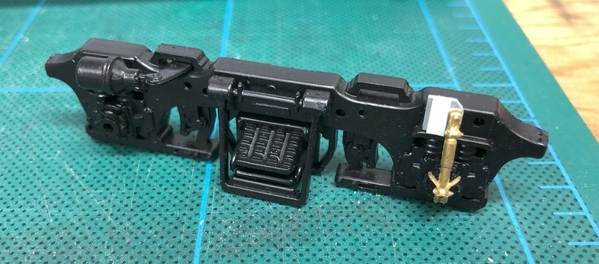
Here's a shot of one of two Mopac GP38-2s under construction.  It also got the correct left side cab base, lift rings and blower duct ribs.  It also has an 88" nose from an Atlas GP15-1 (will need to remove the toilet hatch).  The Weaver Blomberg trucks were modified to better resemble Blomberg M trucks.  I'm still pondering the shock absorber, but have Precision Scale #56160 EMD HTC shock absorbers on the way to see if they can be used or modified.

IMG_4932

Attachments

Images (1)
  • IMG_4932
Last edited by Tim Mc

Good evening!  I finally got SLSF 465 painted and assembled.  Mods were made to update this to a later "Phase 1c" GP38-2 and include a working Gyralight in the nose, correct left cab base/ toolbox, extended DB hatch, correct radiator and DB fans, corrugated radiator grilles, angled air filter cabinet, lift rings, wire grabs, blower duct ribs and 3600 gallon fuel tank. 

This one got a Blunami 4408 decoder, which I think I like better than the Loksound 5 L.  I'm still evaluating, but so far like the screw terminals and single board design of the Blunami versus the tiny solder pads and 2-piece design of the Loksound 5 L.  Of course the wireless operation on straight DC is fun too.

IMG_5227

Attachments

Images (1)
  • IMG_5227

With Frisco 465 now running on the office loop, the Mopac GP50 is up next.  Here it is in primer after modifying an Atlas GP60 shell to fit on a Weaver GP38-2 frame with the updated left cab base/toolbox, and PSC #56105 blower duct.  The exhaust silencer is scratch-built with a GP60 exhaust grille.

IMG_5229

Happy modeling!

Tim

Attachments

Images (1)
  • IMG_5229
Last edited by Tim Mc

Tim,
Everything is looking good!  I almost prefer the models in primer since the details pop better.  In fact I always like to see the models before paint as well, because all of the modifications are readily apparent then.

I know the list of work done on the gp50 is a longer than the three things you listed.  How did the snubbers on the trucks turn out? 

By the way, you might want to spin that fuel tank around 180º.

Jim

Thanks for the compliments!  Hey Jim,  Good to hear from you.  I also like to spray primer when I think it's close as it's easier to see what still needs work.  For the truck snubbers, I wound up using some styrene and PSC #56160 instead of the Atlas GP60 details.  Here's a closeup before primer.  It's not 100% like the GP50 - I think you mentioned they used a different spring, but will be close enough for now.  I may add a brass wire air lines to the brake cylinders.

IMG_4934

Good catch on the fuel tank.    I jumped the gun spraying it as it still needs some Dremel work to accommodate the driveshaft.

Oh, also wanted to let you know that pinning the plastic PSC end stanchions with a piece of brass wire into the anti-climber really helps keep them in place over mounting with CA alone.  I didn't mount them for the photo as I don't want to enlarge any of the holes until the final mounting.

Best regards,

Tim

Attachments

Images (1)
  • IMG_4934
Last edited by Tim Mc

Quick update.  Decals added and sealed with flat clear.  The custom decals are from Bill Brillinger of Precision Design.  He had made some Mopac decals in HO for a member of the Missouri Pacific Historical Society (i.e. accurate), and enlarged them for O scale.  He added some EMD builders plates, other detail decals, and included "3505" for the front number boards.  The number board backgrounds are from Shellscale O105, which has early square EMD numbers I'll use on a couple of future models.  FYI, Mopac GP50s didn't have chevrons or number boards on the rear end.  3mm warm white LED lights with a resistor package from Evan Designs were added to the front and rear.

The updated 2R drive train was assembled to the sill and ran smoothly on a test track with a 9V battery.  The Pittman motor is from a Weaver RS3, which didn't have a flywheel, so I used NWSL flywheel 416-6 for 5/32"-4.0mm Shaft x 38mm OD x 13mm L, brass.  The 4-40 nuts are glued to the sill with 2-part epoxy for mounting the Atlas (MTH) GP40 fuel tank.

A Soundtraxx Blunami 4408 decoder is on the way.  In the meantime I'll pick up some flat aluminum paint for the class lights and windshield wipers from an Atlas GP60.  The Atlas GP60 shell didn't have class lights on the rear, so I added Precision Scale #5641 plastic housings and some styrene rod for lenses.

IMG_5268

Happy Memorial Day!

Tim

Attachments

Images (1)
  • IMG_5268

Add Reply

Post

OGR Publishing, Inc., 1310 Eastside Centre Ct, Ste 6, Mountain Home, AR 72653
800-980-OGRR (6477)
www.ogaugerr.com

×
×
×
×
Link copied to your clipboard.
×
×