
I've seen wires run under the table through the 2 x 4's where a whole bunch go through one hole, and I've seen where some people run only one or two wires through the hole.
Anybody have thoughts as so what is the better way to go ?
Corvettte (Paul)
|
|
I've seen wires run under the table through the 2 x 4's where a whole bunch go through one hole, and I've seen where some people run only one or two wires through the hole.
Anybody have thoughts as so what is the better way to go ?
Corvettte (Paul)
Replies sorted oldest to newest
I honestly don't think it matters. I think it all depends on how well you keep them labeled and organized and how you try to keep them in groups. Being from the local union I was always taught to keep every thing labled and organized since I mainly did Fire Alarm systems. So on my layout I'm sure I'll be picky when I start running the wires this spring.
Dear cngw - -
I assume you are telling me I should emulate what I see you've done ?
I laughed pretty hard when I saw that wiring.
Corvettte
I think the key is color coding or labeling wire runs which enables easy trouble-shooting and tracing. Typically one can find about 9 different colors of stranded copper in wire gauges ranging from #12 to #22.

Hi Paul
Been a while but back on line again.
I no longer drill holes thru the 2xs. Someone on the forum suggested using PVC conduit clamps. They come in several sizes 3/4", 1". 11/2" etc. I only use 1 screw to attach to the underside of the 1xs or 2xs as this allows me to pull down on the clamp and drop in the wire. Easy to use and to make future adjustments
Good luck
I screw plastic pipe clamps to the bottom of the vertical 1X4 (one screw and the pipe clamp laying open on the other end) and just lay the wire in them as I run it. That way I don't have to string it thru a bunch of holes. I use mostly red and black wire, but label the final place it goes and the place where it starts. And if I pull on it lightly, I can easily trace it along it's route.
"...what is the better way to go?"
http://www.nextwarehouse.com/item/?309727_g10e
No need to re-invent the wheel. We professionals use drive rings. They can be hammered in, and removed, with a simple claw hammer. They do not require any drilling. They pivot to allow the insertion and removal of wires easily. You don't need to use tie-wraps with them. When they are filled up, you add another parallel run. They come in several sizes, for main trunks and branch lines. Tracing a particular wire is easy. You just physically trace it from the entrance ring to the exit ring. You can buy them at most electrical suppliers or on-line.
I used cup hooks to do a quick run of wires. It made it easy to just lay the wires in there, and move them around if you make changes later. If you want to be neat or make the wiring permanent, use a ty-rap to attach the finished bundle to the cup hook. Cup hooks are easy to screw into pine boards.
I use a 1" auger bit. One of the auger bits is 14" long, with a Milwaukee. 1/2" Hole Hawg Drill. I had several at one time, one in each truck. The first one was purchased 1975, the brushes have been changed and a new bearing added, several switches and cords but it still operates. (It will remove some wood, Tim) ![]()


The 1" holes allow for several wires. Use caution, best to pull most of the wires through the holes at one time. Pulling a wire in a hole, where wires are already installed can damage the plastic sheath/insulation. Eventually I had to drill the second set of holes.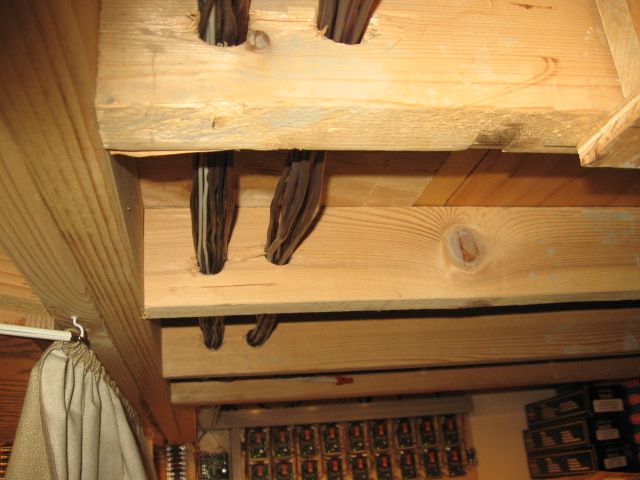
The holes leading to the cable tray had to be doubled and then elongated. The cable tray size was doubled.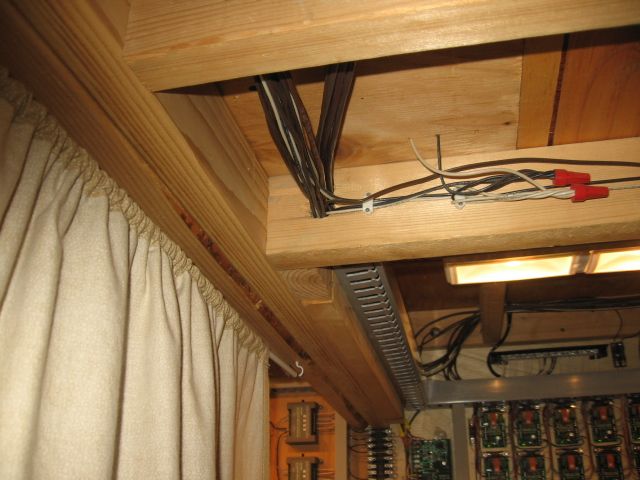
More tray. The wiring from the remote section of the layout to the appropriate section of the control center.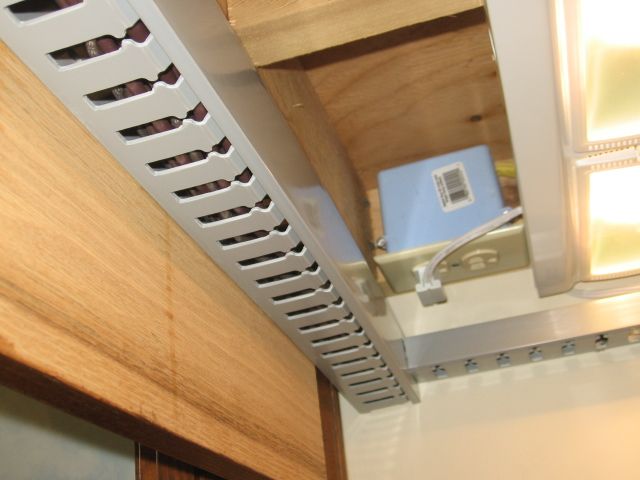
Tray connections and additional 120 volt wiring, (yellow wire), for lighting under the table for the control center.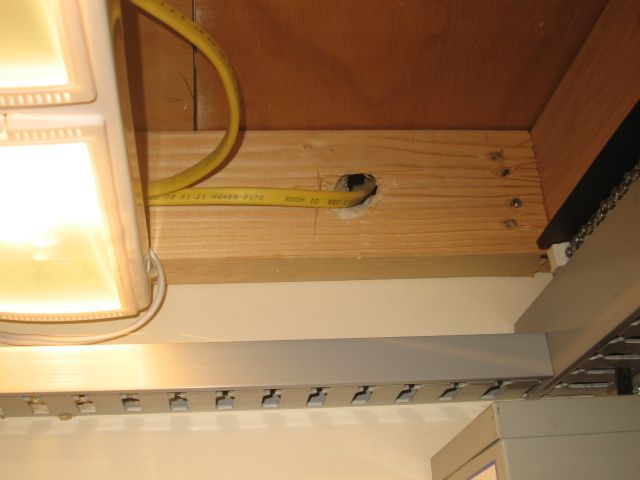
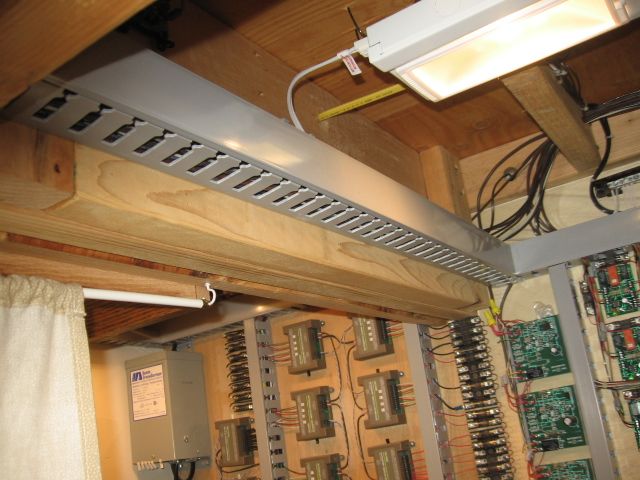
1 1/4" holes to the wall cavity, then above ceiling to the power control center.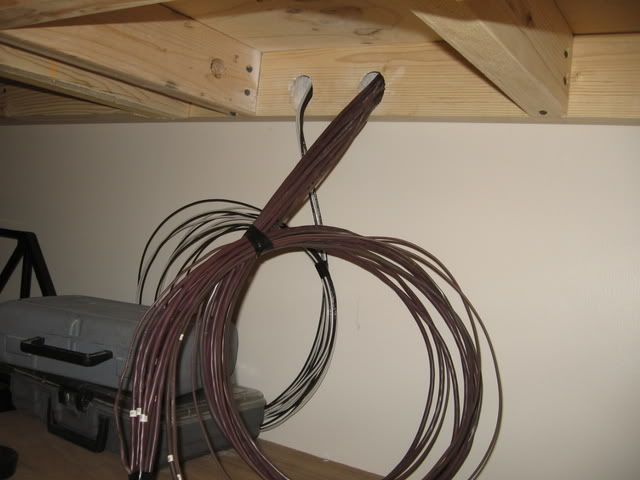
With years of experience, I still under-estimated the amount of wiring required. Some of the cable tray was replaced with tray twice the size. (Who knew!!)![]()
![]()
Wires eventually get to this area to be terminated. (Power/Control center)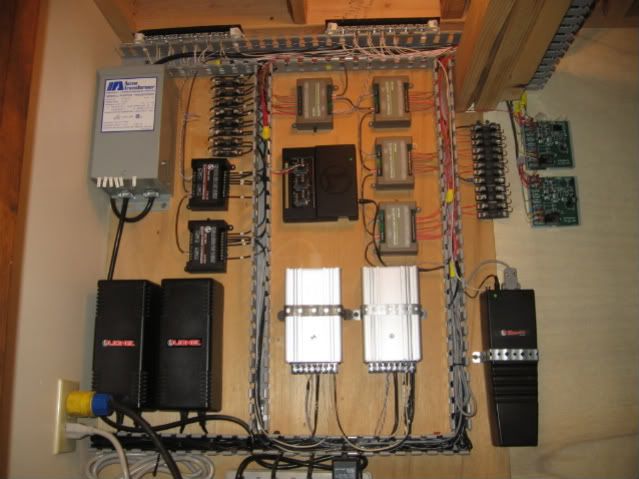
All under the table.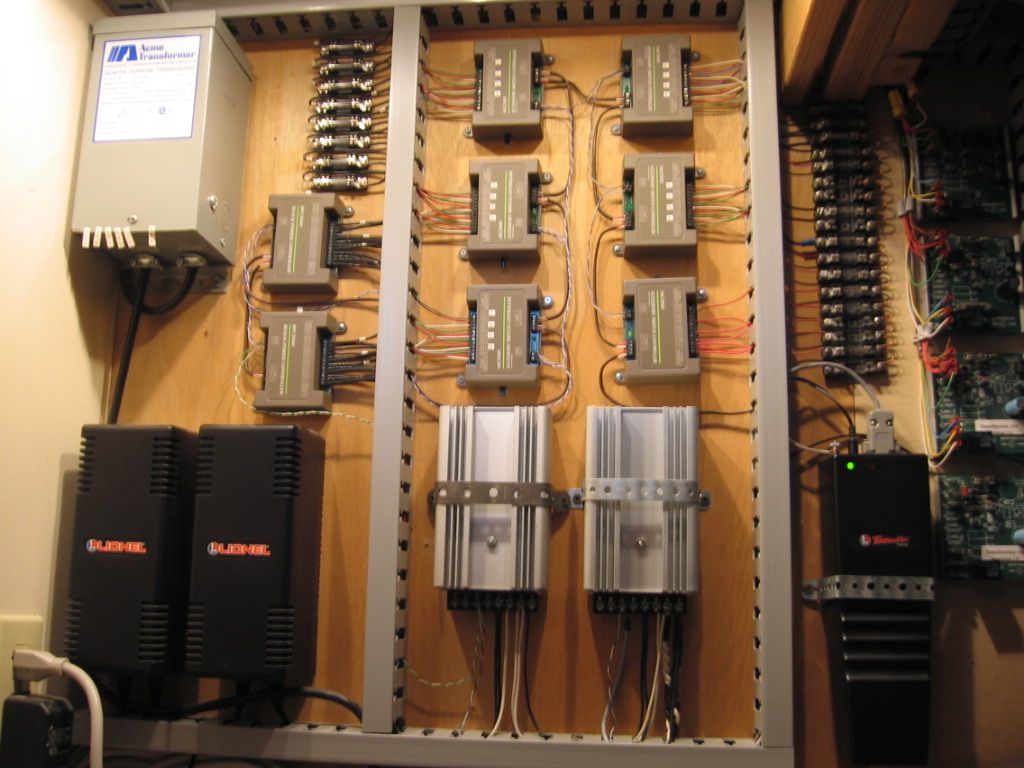
The control center has grown to the right. Atlas 6924 relay boards.

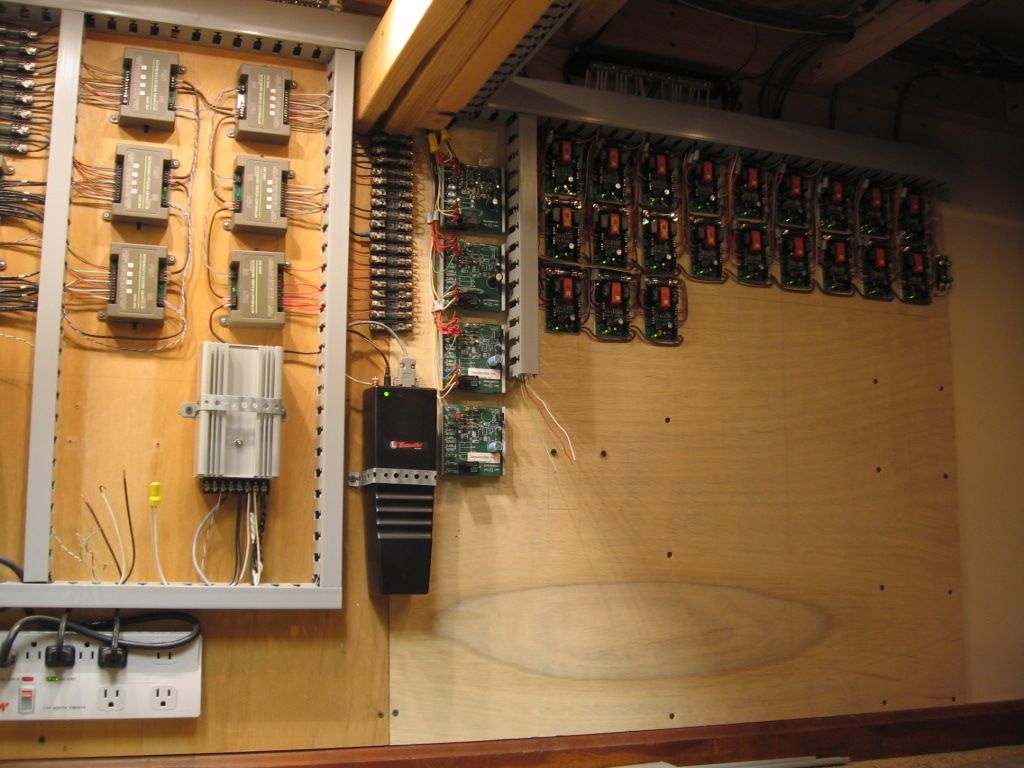
Color-coding, labeling, and neatly organizing your wiring is important. Not because it looks better, but because you can find things quickly. Do it right the first time and you won't spend hours tracing 1 wire in a bundle of 30.
A wiring diagram is also an essential. You should write down where every wire goes because you will not remember it 3 weeks from now.
Drilling holes for wire runs works OK. I prefer cable trays, wire wraps, and cable ties with screw holes. Identification tags on your wires are also important.
One thing you might consider is dual-conductor (Red/Black) wire for your track power. That's a lot easier than running 2 individual wires.
George
Thanks everyone for the input.
Just curious - for those fellows that don't drill holes in the 2x4's, I assume you are running the wires under the 2x4's. Doesn't that leave you open for accidently bumping against them, or pushing a box under the table that just fits under the 2x4 and breaking a wire ?
After looking at Mike CT's pictures of his wiring, I know who I will be emulating. That's a man after my own heart. Neat, precise, and ordering.
In fact, Mike, if you don't mind, when I get to the wiring, I hope I will be able to contact you for advise.
Corvettte (Paul)
Paul:
Thank you
![]() Mike
Mike![]()
The underside of Mike CT's layout is better than the topside of most layouts!
Hi graz,
I got a laugh when you posted that.
I wouldn't go so far as to say "most layouts". Let's just say "just under most layouts".
Corvettte (Paul)
Label everything; wish I'd taken my own advise now. Also, I lean toward with red & black then there's no question which wire goes where.
Hi mrmuggs,
You're absolutely right. I bought a couple of those roller wheels with peel off numbers and letters to put over both ends of each wire.
Yes, Red and Black for power and return is a must. I also bought about 9 more colors to more easily identify what type of items they are going to.
Corvettte (Paul)
Holes in the grid boards, 1x4s or whatever, make great wire looms keeping wires from damage.
Rather than a hole, you can notch the bottom of the boards, put a strip of plastic cut from a gallon jug across it with a screw on each side.
Wires are up and protected from Shove-under damage, but can be pulled down to follow or splice into if needed.
And YES! Label the wires, not just at both ends but about every 6 feet.
I use the metal u shaped clamps that are used to hold conduit to a wall. They come in all sizes and leave enough room for future wires.
all my wiring comes to the front of my layout. no more crawling underneath. also use suitcase connectors. Bob
Hi Bob,
I don't understand "all my wiring comes to the front of my layout". You mean you have figured out how to wire turnouts, signals, lights, working accessories, etc., without getting under the table to wire them up ? Please tell me how to do that !
Corvettte (Paul)
Layout wiring scheme. All wiring is color coded and labelled with tags to identify the signal shown on my wiring diagrams.
For DCS wiring to track I use #18 shielded twin conductor cable. The wires are color-coded.
Red = center.
Black = outer rail.
Cables to track are wired direct.


For turnout control I use 4 conductor cable. The wires are color coded.
red and blue for straight or curve position control
black for common
yellow for 18 vac (AUX power to turnout)
Cables to turnouts use quick disconnect connectors.

For wiring to accessories I use twin color coded wiring.
Colors: blue and white


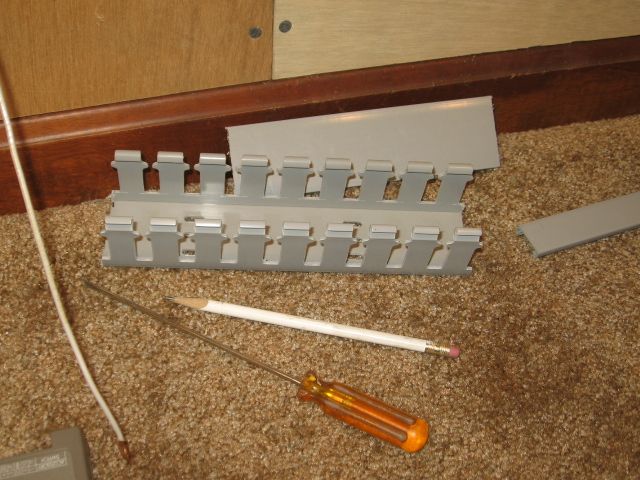
Under the table wiring management system
Here is the system I use for under the table wiring.
I use a combination of "Velcro" tie wraps and adjustable cable clamps to organize wiring under the table. The tie wraps are completely adjustable and moveable whenever necessary. The cable clamps are also adjustable so that as new cables are added the clamp is adjusted to suit.
VELCRO REUSABLE CABLE TIES

ADJUSTABLE CABLE CLAMP


Access to this requires an OGR Forum Supporting Membership

")
")
")
")
