Back in 1983 I got to talk to a Kadee rep at a national train show, and asked him about the O scale couplers. At the time I had quite a few of the "old" Atlas O cars from that time, and wondered about converting them to Kadees on a three rail layout. If you remember back in the seventies-eighties Atlas made O snap-track (2 rail) with a 24" radius curve. He said they used the Atlas track and cars to test their O couplers out on, so it should be good down to O-48.
BTW with the truck mounted dummy couplers the old Atlas cars could do pretty much any curve, I remember in the early seventies watching 50' gondola cars zipping around my O-27 curves with no problem!
The process is pretty simple for K-Line 21" cars:
The process is simply:
1. Cut off 3R coupler with Tin Snips.
2. Drill holes for new coupler.
3. Add shims as required. The usual 2 seemed to do it.
4. Add couplers.
5. Run train.
No 027 curves for these guys!
The process is simply:
1. Cut off 3R coupler with Tin Snips.
2. Drill holes for new coupler.
3. Add shims as required. The usual 2 seemed to do it.
4. Add couplers.
5. Run train.
No 027 curves for these guys!
So are there any Atlas cars that DON'T need shims to adjust the KD height? I'm waiting for some Micro Mark shims, but I've got a slew of KDs and I wouldn't mind getting started if I knew the couplers would sit right minus shims...
Brian
Brian
The PS2 high side grain hoppers can be done without shims. The Micromark shims are convenient, and I often use them, but if you're itching to go, you can make your own shims out of sheet styrene or even card stock. Use the Kadee box top as a template.
RM
RM
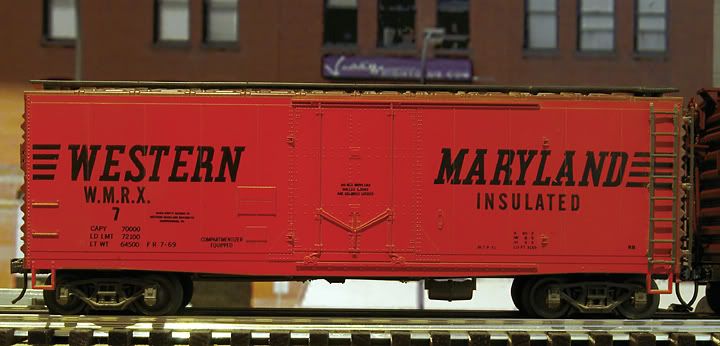
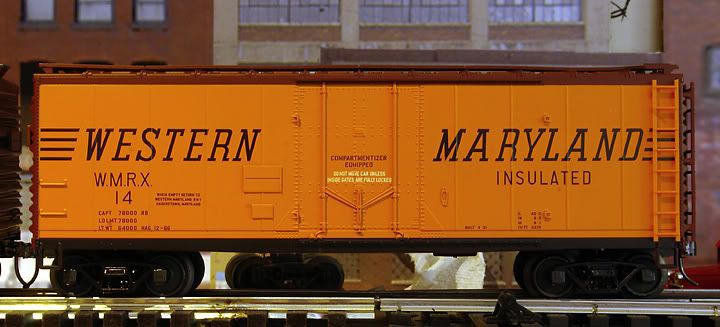
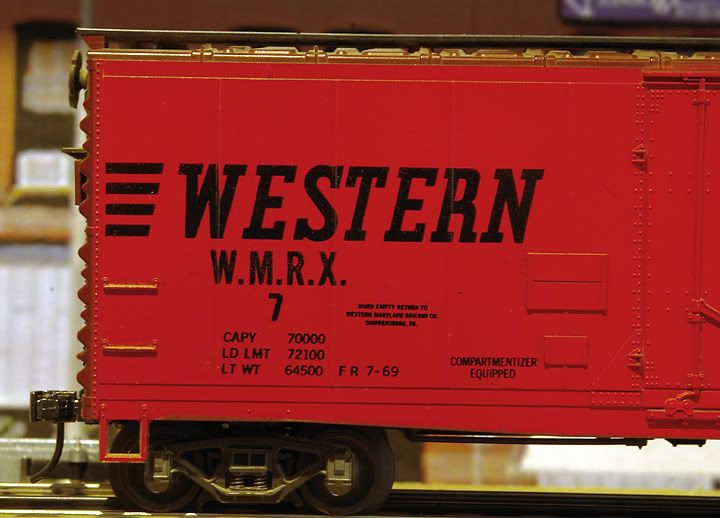
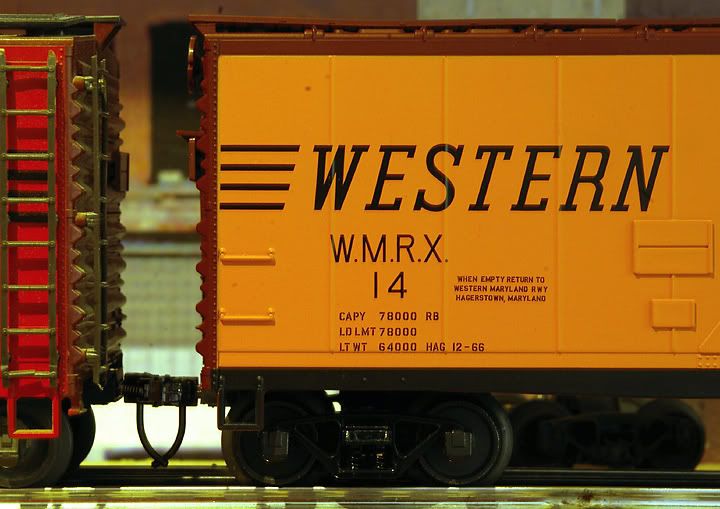
Put Kadee couplers on some old Atlas cars from the 70's. Here's a WM insulated boxcar next to it's Trainman counterpart. Interesting notes on details. The air reservoir is lower on the older version, which looks nice and it rides 1 shim lower than the new version.
These are quick because the trucks snap into place and you simply pry them loose and break the coupler pocket off by hand. Holes are there for the coupler too. Done.
Great thread!
I have used the side by side on two brass models that matched the 805 Kadee boxes exactly.
I will probably print the pictures off and store them in a note book for future reference. Even I can learn something new occasionally!
GREAT work!
I have used the side by side on two brass models that matched the 805 Kadee boxes exactly.
I will probably print the pictures off and store them in a note book for future reference. Even I can learn something new occasionally!
GREAT work!
Pete,
Great job!! Have you or any one else tried to do the same Lionel or MTH locomotives. I love the look of scale Hi Rail equipment, but I am floored by the spacing between cars and engines. I have part of my layout built, and it allows me to run just about anything as I have 096 as a min radius.
Regards,
Lou
I know the rascal has converted everything from Lionel cars and engines to MTH, Atlas and 3rd Rail. Many were posted on the forum as a step by step, but all are lost to history. This seems to be the only one left.
http://ogaugerr.infopop.cc/eve...21021474/m/710102374
quote:Originally posted by FlyBoy:
I am floored by the spacing between cars and engines.
With 096 curves, you'll have no problem at all retrofitting high rail engines with Kadees. The excessive space between units is on the list of things I hate right along with oversized couplers, floating pilots, gaps and short hand rails.
MTH Dash 9 retrofitted with a fixed pilot and Kadees:
The space between units is much better, now:
RM
quote:Originally posted by Lackawanna1223:
I'm waiting for some Micro Mark shims, but I've got a slew of KDs and I wouldn't mind getting started Brian
You can go to your local auto parts store and buy a $5 roll of gasket paper to make your own shims. This paper is the exact same paper that micro-mark uses. It comes in several thicknesses and a roll will make several hundred shims. The only difference would be that micro-marks shims are lazer cut and these would be cut with scissors. Thomas
This thread got me to finally start converting. Having come from HO I can't stand the having to (maybe) couple at warp speed. So far, as some said here, the Weaver cars are by far the easiest. The Atlas I'm finding vary all over. I've got one, maybe more, that has a pair of holes way off to the side of the Kadee box. Nothing a drill won't solve. Working my way up to the Lionel and MTH which look far more complex. So far the only real problem has been the batch of volume discount #805 couplers I got that don't have any springs on the knuckles and maybe one spare in the package. NOT happy about that at all. Checked all the local shops to no avail and ordered springs from TrainZ today.
Just replaced Atlas scale couplers on a GP-60 with Kadees to my suprise holes lined up using 2mm by 10 screws longer length for factory shim under coupler box. In the past I have always drilled and tapped for 2-56 screws, check out Micro Fasteners, Lebanon,NJ every thing you need in metric and US screws very inexpensive and fast shipping.
Although I model 2 rail, I've converted quite a few pieces of 3 rail rolling stock to 2 rail fine scale.
Here's the Atlas AEM7
The pilot packing piece was made from styrene, as was the blanking piece to fill the original coupling opening.
I made my own kadee coupling height gauge from timber and an old kadee 805.
The trip pins can be bent up slightly with two pairs of fine nose pliers if they're found to be catching any part of the track.
I also make my own packing shims for the 805's from styrene sheet.
Was lucky with this conversion as replacement wheelsets were available direct from Atlas, leaving just the pick-ups to be manufactured.
The engine has a micro-slide switch that changes power pick-up from the overhead wire or the two rail.
When running from the catenary the track power is used for the lights at a constant voltage.
Altogether, a most satisfactory conversion for under $25.
Chris.
Great looking AEM7. I've been meaning to get mine done with scale couplers. That particular Atlas offering is an honorary two rail locomotive to start with all it's great detailing.
That's some awesome trackwork.
quote:Originally posted by rustyrail o scale:quote:Originally posted by Lackawanna1223:
I'm waiting for some Micro Mark shims, but I've got a slew of KDs and I wouldn't mind getting started Brian
You can go to your local auto parts store and buy a $5 roll of gasket paper to make your own shims. This paper is the exact same paper that micro-mark uses. It comes in several thicknesses and a roll will make several hundred shims. The only difference would be that micro-marks shims are lazer cut and these would be cut with scissors. Thomas
I bought some gasket paper today and it is making life so much easier. I had about 9 Atlas cars in 2-rail which got converted to Kadees with my homemade shims.
Here are some of my homemade shims:
they are 1/32 inch thick, so an Atlas car usually needs 1 to get the Kadee at correct height.
Do kadees work with the three rail uncoupler tracks?
I noticed you mentioned the Lionel is too hard to convert. I am new at this
but would like to see you do a conversion of a Lionel to Kadee.
Sam Orr
but would like to see you do a conversion of a Lionel to Kadee.
Sam Orr
quote:Originally posted by Rich Montague:quote:The majority of my cars are 40' and I am using Atlas 45 curves. I have also read where the coupler can be attached to the trucks but prefer to have them body mounted.
Its possible to modify the coupler shank and the box if necessary to get some more lateral movement. With such modifications, this car will negotiate 072 (36 inch radius curves).
By the way, this is a very good thread. Do we dare post a link over on the three rail forum?
Hi Rich, In the picture of this Atlas 89 footer, what number Kadee coupler are you using? On the prototype size cars, the coupler look's like it has a long shank and a short draft gear box. I suppose this is because of the extreme length of the trailers they carry and their overhang. I'm in the process of lowering my car using Athearn trucks and NWSL 33" wheelsets. The Kadee web site use to have dimentioned drawings for their couplers, but I can't find any for the 800 series. Any info you have will be greatly appreciated. BASEMENTBILL
quote:Originally posted by Trevize:
I use these shims
Pete to date I haven't had a single truck come apart. While it is certainly possible that it can come apart with those screws out, I've never had an occurrence. With the high end atlas cars I'm buying there's a lot more that would break under rough handling anyway :-).
And... sure you've seen it before...
Why I like kadee couplers video
Apparently, Micromark no longer carries the Kadee shims based on the page that pops up when clicking on the link above. Might have to find something else or make your own shims.
I have been using Evergreen styrene strips as shims. Depending on the installation, some cars take a .500" wide X .100" thick shim, and others require a .500" wide X .125" thick shim. Simply cut off a piece as long as the Kadee coupler box assembly. The Evergreen styrene is MUCH less expensive than those "ready made shims" anyway.
quote:Originally posted by Larry Neal:quote:Originally posted by Trevize:
I use these shims
Pete to date I haven't had a single truck come apart. While it is certainly possible that it can come apart with those screws out, I've never had an occurrence. With the high end atlas cars I'm buying there's a lot more that would break under rough handling anyway :-).
And... sure you've seen it before...
Why I like kadee couplers video
Apparently, Micromark no longer carries the Kadee shims based on the page that pops up when clicking on the link above. Might have to find something else or make your own shims.
The package of 60 shims is still available, I just ordered some and received a promotional discount. I think that Micromark stopped producing the package of 40 shims. Here is the link:
http://www.micromark.com/Searc...e+shims+(pkg.+of+60)
Nice post!
Good pictures!
Good pictures!
I've started to converting my rolling stock to Kadee.
A few modifications to others here. So far I haven't used to many shims. I've converted AtlasO and Weaver cars to date. Only a Weaver Caboose needed shims. Instead of using 2 X 1/2 wood screws I've been using 2 X 3/8 where no shims have been required and with Philips heads not slotted purchased from Micro Fasteners. The 3/8 length seems to work best for the gondolas and flat cars where I don't want a screw to pop up through the floor.
The issue I'm having now is with my new MTH rolling stock with the new couplers MTH is using. There so much to remove to get clearance for the Kadee box it doesn't seem worth it. May have to purchase trucks with out all the parts.
Any Ideas?
quote:There so much to remove to get clearance for the Kadee box it doesn't seem worth it. May have to purchase trucks with out all the parts.
You are correct; just remove all that stuff from the truck. Besides, MTH doesn't offer 3-Rail trucks without the big claw anyway.
I'll have to do some cutting as well.
So the question is, is this enough, or is this just another step down the road toward the hard stuff- i.e. 2 rail? Because there is still that third rail.
quote:Originally posted by Will:
So the question is, is this enough, or is this just another step down the road toward the hard stuff- i.e. 2 rail? Because there is still that third rail.
WHAT?!?!?! After all, this IS the 3RS forum, we have no qualms about the 3rd rail
I recently took some new Atlas caboose trucks apart to remove the claw coupler, it was not an easy task, much like what needs to be done to a Lionel truck.
Having a Kadee mounting pad is a start, but a big problem is the underframes and bolsters causing the cars to ride so high (for 3-rail wheel clearance) that sometimes it requires a large amount of shim to get the Kadees to the correct height.
I'm currently redoing a MTH caboose because I found I can flip the metal floor and lower the riding height of the car plus reducing the amount of shim. I noticed this on my other rolling stock, don't know why I didn't notice the caboose (may have been my first conversion and didn't know any better).
quote:I found I can flip the metal floor and lower the riding height of the car plus reducing the amount of shim.
Sounds interesting, which MTH caboose and what exactly do you mean?
marker,
Unfortunately I failed to write down the item number(s) of the cabeese when I bought them (I may have the sales slip though and will look later).
I have 3 MTH cabeese that I repainted/re-lettered for Seaboard Air line. 2 of them have metal floors that have a dimple where the trucks mount (the 3rd cab, a CA-1, doesn't have the same type floor). The one I flipped the metal floor on bears little resemblance to the original, I made new "plywood" sides for it so I could relocate the windows.
I simply turned it over on one of them, cut off the small bent-up sides (where the plastic battery box and brake gear are located) with a Dremel disk and reassembled the cab. I actually had to add a washer/spacer so the wheels wouldn't hit as the truck rotates.
I haven't done it yet to the 2nd cab and there's still a good 1/8" clearance between the wheels and the underframe.
The metal floor plate has large tabs at each end, I cut them off straight across so I could easily install mounting pads for the Kadees.
I'll post pix in a bit.
Here's my 3 MTH "Seaboard" cabeese:
The one on the right was a CA-1 cab, it has a plastic "wood" floor:
The one on the left is the cab I replaced the sides on and flipped the metal floor:
If you look real good you can see the dimple on the floor is inward not outward:
You can see the shiny washers I used between the truck and metal floor.
if you look real close at where the end of the plastic underframe is you can see the cut I made to the bent-up side lip.
The 3rd cab hasn't had the floor flipped yet:
If you look closely you can see the dimple on the outside, just past the end of the Kadee box.
Here's another photo, you can see where I cut off the claw coupler:
Also, the one with the flipped plate has a red oxide/rust Kadee box on it, you can just see the end of the metal plate where I Dremeled it off.
The one with the black Kadee box still has the metal "tab" on it (not Dremeled off yet). The shim and Kadee boxes are super glued to the metal "tab". I plan on flipping this one soon.
Hope you can see what I'm talking about!
Pete,
I've done about 20 Atlas cars and was wondering how you can throw this one key part of the coupler away?
in
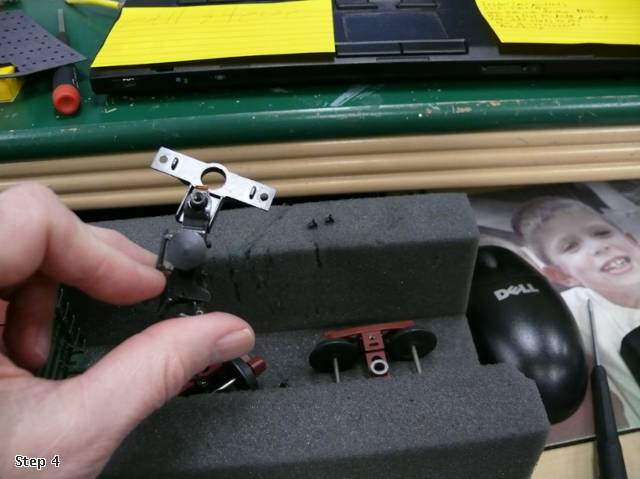
I can't see how your trucks are staying together without this piece as this is the backbone to the Atlas truck. What I have been doing is removing the coupler at the screw and either cutting the end off or taking to vise grips and tearing off the end. then re-installing it.
Gary,
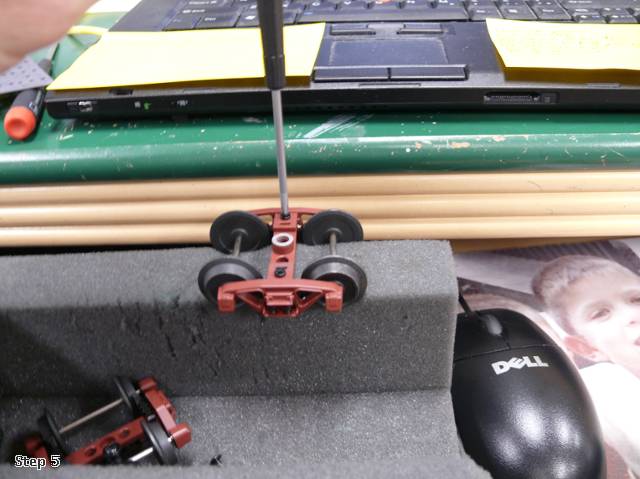
That specific piece you are holding in the photo, really doesn't keep the whole truck together. What holds the truck together are the two flat head machine screws, which you removed to get THAT piece out. Simply put those two flat head screws back in place if you don't want to re-install that lobster claw holding piece.
Ok, and what are you screwing into? Nothing except the plastic brake detail underneath(and I don't think they are long enough to even do that). The only thing holding the truck together are the springs.
I'll post pics of what I'm talking about after the upgrade but please check it out for your self.
Gary,
If you refer to the photo you posted, above, look at the red painted truck to the right in that photo. You can plainly see the threaded hole that one of those flat head machine screws threads into.
and what is it holding together when you install the screw. Really take one of your trucks off one of your cars and look at it closely. Try flexing the two sides and tell me what happens?
Putting these two screw back in is doing nothing without the top piece with it.
The screw is not holding the bottom bar which held in place by the springs on each side.
Putting these two screw back in is doing nothing without the top piece with it.
The screw is not holding the bottom bar which held in place by the springs on each side.
I guess Pete is just going to have to explain it to us?
Boy I hope this is the last time I have to use photobucket.
This is the way I do them.
As you can see without the cross bar and screws installed, the screw itself is not holding anything together.
Ok this is what I do: I remove the coupler
Clamp on with vise grips and bend.
You can either install as is or grind it smooth
re-install cross bar and put on your rolling stock.
If you don't do this and you press down on the car as these trucks have spring action, the sides might go flying or it may never happen. Anyway I would recommend this for the Atlas trucks
I'm not trying to prove anybody wrong just trying to help out the team.
Gary
Thank you for this insight. I ran into this today and came to the same solution you did. I hope Pete K still lets us in on his Lionel truck secret.I don't see any way around cutting/grinding/snipping etc. Thanks again for the pics.
Ray Marion
Thank you for this insight. I ran into this today and came to the same solution you did. I hope Pete K still lets us in on his Lionel truck secret.I don't see any way around cutting/grinding/snipping etc. Thanks again for the pics.
Ray Marion
quote:Originally posted by Ray Marion:
Gary
Thank you for this insight. I ran into this today and came to the same solution you did. I hope Pete K still lets us in on his Lionel truck secret.I don't see any way around cutting/grinding/snipping etc. Thanks again for the pics.
Ray Marion
Ray,
Concerning the Lionel truck "secret sic.", the problem occures when Kadee #805 couplers & boxes are used, because all that clap-trap steel stuff on the Lionel truck interferes with the rear of the Kadee box, when the truck rotates. When the "short box" Kadee couplers (#806 I think) are used, you do NOT have to cut all that crap off the Lionel truck.
Since I have long been using the Kadee #805 couplers (I purchase them in bulk), I have also had to use the Dremel to cut all that crap off the few Lionel cars/trucks I have up-graded, just as Laidoffsick has shown, above.