Hope nobody minds me resurrecting this thread. Still trying to get my head around the options available to me on my combined 2-rail/3R layout, looking at the problem specifically from a control standpoint.

The Blunami decoders are basically just Tsunami 2 decoders with Bluetooth capability? Can a three rail locomotive, running on 3R track, equipped with the Blunami (or for that matter the Tsunami 2), run on DC power if the decoder is properly installed?

I now have two 3R steamers, a 3rd Rail Pennsy E6 4-4-2, and the aforementioned (in my earlier post) 3R Weaver Royal Hudson. Is the Blunami (or Tsunami) not a viable option if I want the smoke units to work?


Any help would be hugely appreciated, thanks!


Jeff C

I think it is an NMRA standard that all decoders have the capability to run straight DC.

Also, all decoders have optional output connections/functions that can be used to operate any other electrical/electronic devices.    The important point is to make sure the function connection has sufficient Amperage/current rating for the device you want to install.    The decoder function rating is always listing on the device documentation.

In the case of blunami, your best answer will come directly from Soundtraxx.    You can contact them and ask about your add-on device.

As Jim said, you can run off DC on the rails, two or three. You can power a smoke unit but you have to add a relay to one of the function outputs to handle the higher current. At this time you can not synchronize puff with chuff sounds. To get 4 puffs per rev you can add a switch to power the fan but sound and smoke won’t occur at the same time except by luck.

I would ask how many three rail engines do you have, just the two mentioned or more and do you plan to purchase more? If those are the only two you might consider trying to convert them to two rail. Both should have removable wheelsets  and easier to convert than say a typical Lionel or MTH steam engine.

Pete

Last edited by Norton

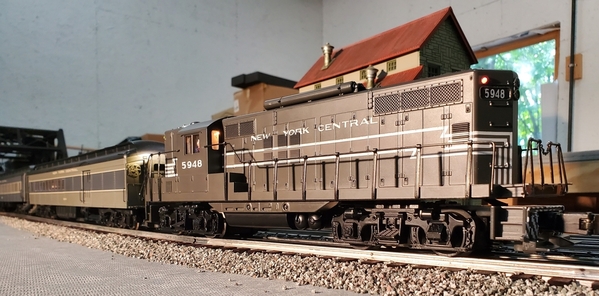
I have two steamers, the 3rd Rail 4-4-2 E6, and the Weaver Royal Hudson. In diesels, I have the MTH DL-109/DL-110 2 unit set, and the solitary Atlas B&M unpowered F3B, which was supposed to be a 2-rail loco but is actually 3R.

So not a lot, but still enough to involve time, money, and effort.

My idea at the moment, based on very limited testing (I’ve had very little train time lately due to my music schedule) is to bite things off in small chunks—leaving the steam engines as 3R for now as they visually look great—and going ahead with the three rail/ 2-rail track plan. With my hand laid 3R track it will be easy to pull the center rail later if I want, and it follows that if I have success now installing decoders in the two steamers it should be within my abilities later to modify them to work (as far as the electronics are concerned) for 2-rail.

I’m already planning on converting that B&M F3B to 2-rail, to match my 2-rail A unit. The DL-109/110 pair needs some pilot work and other cosmetics to look right, so it will be a while before I have to make a decision as to whether I want to convert it to 2-rail.

What is the state of the art in electronics for synchronizing chuffs with smoke for 3R steam locos such as mine?

Jeff C

Attachments

Images (1)
  • 27C9CE12-22D4-493A-94C6-7BA00527E28B
Last edited by leikec
@leikec posted:

I have two steamers, the 3rd Rail 4-4-2 E6, and the Weaver Royal Hudson. In diesels, I have the MTH DL-109/DL-110 2 unit set, and the solitary Atlas B&M unpowered F3B, which was supposed to be a 2-rail loco but is actually.

What is the state of the art in electronics for synchronizing chuffs with smoke for 3R steam locos such as mine?

Jeff C

Not sure about state of the art but Blunami is out. There are other DCC boards that do have a capability to synchronize puff and chuff. You might be able to use those along with a Bluerail board to achieve that. Others more familiar with DCC than I am might be able to help here.

Three rail essentially uses two methods to do this. Tach readers on motor flywheels used by Legacy, DCS, and GRJ’s chuff generator. The other is driven directly by the drivers either by an axle cam or optical detector and lines on the driver itself used on TMCC engines.

Pete

Last edited by Norton
@Norton posted:

You might be able to use those along with a Bluerail board to achieve that. Others more familiar with DCC than I am might be able to help here

Pete

And.... BlueRail runs on AC or DC.  So if the OP used BlueRail board, his favorite sound decoder with chuff sync, then he could run on three rail AC powdered track with no worries of DC.  He would still use the Blunami app for control.

Ron.

@Ron045 posted:

And.... BlueRail runs on AC or DC.  So if the OP used BlueRail board, his favorite sound decoder with chuff sync, then he could run on three rail AC powdered track with no worries of DC.  He would still use the Blunami app for control.

Ron.

Ron, can you suggest a 4 amp or greater DCC decoder that has an input for an external chuff switch? This would be the route I would go for steam upgrades. I am assuming a Bluerail board just converts bluetooth signals to DCC code that any DCC decoder would respond to.

Pete

@Norton posted:

Ron, can you suggest a 4 amp or greater DCC decoder that has an input for an external chuff switch? This would be the route I would go for steam upgrades. I am assuming a Bluerail board just converts bluetooth signals to DCC code that any DCC decoder would respond to.

Pete

Pete,

I'm not well versed enough in the DCC world to answer the chuff question.  I just know BlueRail provides the power and control.  They advertise that you can use your favorite DCC sound decoder.

I did convert a steam engine to RailPro that connects and utilizes the MTH tac reader for chuff sync.  But that's not DCC and can not utilize AC track power either.  The op would be back to using DC power again.

Ron

I have personally used three widely-available high-power (5A) DCC decoders that provide a) synchronized chuffs that control a smoke unit fan and b) provide load-dependent smoke unit heating:

  1. TCS WOW501-Steam
  2. LokSound 5XL
  3. Zimo Large Decoders (e.g., MX699): I have not tried the newer Zimo MS990 series


I have used all of these in my Dead Rail installs coupled with my Airwire-compatible ProMiniAir Receivers (available on eBay) that supply amplified DCC (up to 13A with NO cooling) to these decoders. These decoders should work with any Dead Rail receiver that produces sufficiently powerful DCC output. I love smoke units and have installed them in all of my 90+ installs, some of which are shown on my website OScaleDeadRail.com.

Last edited by DarrellR
@BobbyDing posted:

3 Rail Williams 4-6-0 running on 16VAC track voltage (Lionel 1033). Chuffing smoke is via GRJ's Chuff Generator and Super Chuffer back feeding into a WOW501 Steam DCC card. In this video the loco has a BluerailDCC 5A card supplying the DCC. I've since had to remove the BluerailDCC card and am now running from straight DCC on the track.


Looks like it runs very well and smoke is synchronized. Did it run as well with the BluerailDCC board? Also where do you get Bluerail DCC? Their website just transfers me to Tam Valley and Tam Valley doesn’t show that board. I assume a 2 amp board is sufficient if I want to use someone else’s DCC board as you did.


Pete

@Norton posted:

Looks like it runs very well and smoke is synchronized. Did it run as well with the BluerailDCC board? Also where do you get Bluerail DCC? Their website just transfers me to Tam Valley and Tam Valley doesn’t show that board. I assume a 2 amp board is sufficient if I want to use someone else’s DCC board as you did.


Pete

NOTE:  Cross promoting is not allowed to other sites or member for sale posts thus this part of the post was removed.

Last edited by OGR CEO-PUBLISHER

Ron, if you are using a 5 amp DCC board, do you have to use a 5 amp BluerailDCC board or will a 2 amp board work. I guess the real question does required DCC decoder board like the Soundtraxx 4400 amperage come from the Bluerail board or can DC be supplied from some other source like a battery or DC buck board directly to the Soundtraxx board?

Pete

@Norton, the BluerallDCC card is in use during the video. It's what allowed me to run on 16VAC (the WOW card does not). Both the BluerailDCC and the WOW cards are the 5A versions. The 2A boards would work depending on how much it's dragging of course. I went 5A because it was my first time attempting any loco upgrade. Better too much than too little. I have longer videos on my youtube account where I try different whistles, etc. I have to say that the BluerailDCC cards by Tam Valley are excellent. They just work. I was hoping to install them in all my steam locos.  Unfortunately I've had to remove them instead due to delivery issues. If you choose to use the same combo of cards I used (BluerailDCC / WOW501 card) I may be able to save you some time filling you in on the few querks I needed to work around with this particular board combo. Also, just know that in the end this loco cost me as much as a low end LC+2.0 loco after adding the cost of the loco, both cards, Super chuffer, MTH smoke unit, etc... On the plus side, it was fun to build, nobody else offers this loco with command and if anything ever goes wrong with it I can fix it myself. In fact I'm thinking about installing an MTH tether, as my home made job looks terrible (it was my first attempt after all).

@Ron045, I emailed you last week at the email addess in your info regarding the cards you're selling. Since I did not get a response I assumed they were sold.

Updated: After seeing the newest catalog. I've changed "this loco cost me as much as a low end Legacy loco" to "this loco cost me as much as a LC+2.0 loco". 😱  Seems it won't be too long before I can change that to just "a LC loco".

Last edited by BobbyDing

Bobby, thanks for the clarification. I agree having to use a Bluerail card plus a DCC board with chuff in makes it not cost effective vs other types of Command upgrades. Still  it offers user flexibility that is not available with TMCC/Legacy and marginally with DCS.

I think its a great option for someone just getting started plus it allows concurrent operation with other Command systems on AC power. No way I can convert over completely at this point though.

Pete

I’m looking at doing my first locomotive set, a powered Atlas 3R F3a/unpowered F3b pair, using the Blunami running off battery power. There should be plenty of room between the two engines to fit everything, considering that the F3b is unpowered.

Any suggestions on an appropriately sized battery pack to allow a reasonable amount of run time before charging? Would a 4 cell 18650 pack work?

I still feel like I have a ton of learning to do regarding this, but I am so very appreciative of the wisdom and great advice gained from all of you! Thank you so much!

Jeff C

@leikec posted:

I’m looking at doing my first locomotive set, a powered Atlas 3R F3a/unpowered F3b pair, using the Blunami running off battery power. There should be plenty of room between the two engines to fit everything, considering that the F3b is unpowered.

Any suggestions on an appropriately sized battery pack to allow a reasonable amount of run time before charging? Would a 4 cell 18650 pack work?

I still feel like I have a ton of learning to do regarding this, but I am so very appreciative of the wisdom and great advice gained from all of you! Thank you so much!

Jeff C

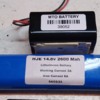
Jeff.  I don't know what the Atlas configuration looks like, but I did MTH F7's and did not need the B unit for battery.  Everything fit in the A unit.  LiIon 14.8v 3000mah with a Smart Charger should work nicely in either of these configurations.  Remember to ensure it has a protection circuit for over charge/discharge. 

I like MTO batteries.  XML's appear to work the same at a discount price.  I have recently tried HJE batts and have no complaints there either.

IMG_20230718_211606425

Attachments

Images (3)
  • IMG_20230718_211606425
  • mceclip0
  • mceclip1

Got my electrocoupler interface installed and working.  It's essentially a single-transistor (per coupler) current booster, powered from the DC>DC converter/regulator output and drawing only a few mA from the Blunami FX3 & FX4 outputs.  Here are pix showing it (small purple board) mounted at the rear end of my Blu Shark.  Mounting atop the rear weight isn't the most convenient location, but I didn't plan for the board when I mounted the components between the motors - and wasn't in the mood to re-do all of that.

20230816_121718[1]20230816_121745[1]

As you can see from the picture, it's a retro trip to '70s-'80s technology, as nearly all parts in my inventory come from that era and I have zero SMT skills.  A SMT version of this board would be quite smaller, but it's not very big, as it is.  2-pin JST connectors on the left side are rear electrocoupler, power, and front electrocoupler.  3-pin JST connector on the right side is FX3/4 input connection.

The rear electrocoupler will be mounted in the "B" unit (along with marker and backup lights), once I get the tether (4-pin) mounting location at the rear of the A unit defined better.

Attachments

Images (2)
  • 20230816_121718[1]
  • 20230816_121745[1]

My second Blunami conversion is now finished, the Blu Geep.  It's an MTH passenger GP-9 from the mid-1990s.  Fitting the circuit boards into this locomotive was far more challenging than it was for the Baldwin Shark, due to the narrow hood.  I ended up layering the cards and components.  Here's the completed locomotive guts.

Blu Geep Final

The FWB rectifier is mounted underneath the converter/regulator board, adjacent to the left-hand motor.  The Blunami card is mounted to the right of the former board, with the electrocoupler interface mounted atop the Blunami card.

As in the Blu Shark, 2mm bi-color marker LEDs were added and the headlamps were replaced with high-intensity 3mm LEDs, at both ends.  Here 'tis in "forward" mode (the NYC ran these long hood forward), with green markers:

Blu Geep Fwd

And in reverse, with red markers:

Blu Geep Rev

I left the cab lighting alone, but moved the engineer figure to the opposite side of the cab to comport with NYC operating practice.

A complete write-up is included as the final Appendix to my AC interfacing guide document, found here: https://ogrforum.com/...c/177398551947214218

Attachments

Images (3)
  • Blu Geep Final
  • Blu Geep Fwd
  • Blu Geep Rev

If I understand your question correctly, yes, you must be careful when you rewire for series operation of the motors. It’s best to temporarily wire them in series and test to ensure all wheels are rotating in the same direction. Don’t assume the colors of the motor wires will guarantee proper operation. Ask me how I know!

@MoogGuy posted:

Hi Karl (and Co.)- when wiring the 2 motors in series... are each of the motor terminals essentially equivalent, meaning no polarization?

Thanks.

Mike

Clip leads are your friend!  Check the motor rotation directions before soldering anything!  A DC power supply (or HO/N power pack) is a handy thing to have, but you could also just rig a FWB rectifier between your conventional transformer and the motors, for polarity checking purposes.

Add Reply

Post
×
×
×
×
Link copied to your clipboard.
×
×