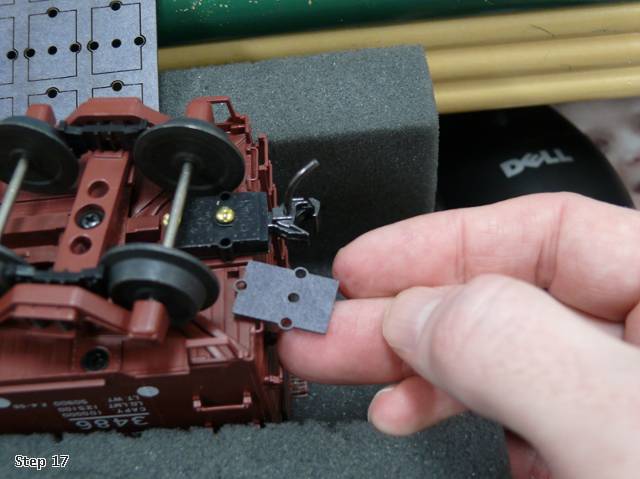
For fun, picked up a pair of these couplers. I will convert one end of two cars and run those cars in service just to see how they perform.  That said, what will be the easiest cars to convert.  That is, as I have mostly MTH cars what should I be looking at on the car truckss that will make the choice easy?  I have alot of fine tools and screwdrivers and magnifying lamp, so set there.  Just being a novice I want the first conversion to be as painless as possible rather than ending in frustration and giving up the idea of converting most of the cars.


Any websites that show step by step?


Original Post

Replies sorted oldest to newest

 "what will be the easiest cars to convert."


    A car that has a Kadee mounting pad molded on would be the easier to start with. Weaver cars have pads that Kadees will screw right onto. The older Atlas cars had pads that were close but a tight fit to get both screws in. The older MTH stuff I had didn't have any built on pads so took more experience to do an installation. I'm not sure if newer MTH is easier because I haven't bought any for years.The basic steps are unscrew the 3 rail truck mounted couplers and turn the trucks so the coupler mounting tabs are facing inboard to get clearance for the body mounted coupler box.( turning the tabs inboard instead of cutting them off gives the option to re-install the 3 rail truck mounted coupler if desired or if the car is to be sold) On cars without a body mount pad the bottom must be leveled at the correct height above the rails to allow the coupler to be screwed on at Kadees working height. This might require gluing on a layer or layers of styrene sheet material to the coupler pad area, or it might require grinding or filing off a bit of car bottom material. It depends on the body height of the individual car. The goal is to get the couplers on all cars mounted to a common height. The package of Kadees has some basic installation  instructions and specifies the desired mounting height. If you can post photos of the bottom of the specific car you want to convert someone can probably tell you how they did a similar one? ..........DaveB

Sam, 1st get the Kadee height gauge.


I've had a couple of the new MTH cars where the height was perfect, simply mount the couplers in place.  Weaver also seems to be an easy conversion.


Whichever brand just have some shim material handy, 1/32, 1/16, even 1/8" thick plastic is good.  Make sure the wheels turn as far as you need them once the coupler is in place.  I had to use some of the short Kadees on a couple of cars and engines, the rear of the box is shorter and the spring is in front of the post instead of behind the post (after seeing one this will make sense).


Watch out for the edges of the car body, sometimes they hang lower than the floor and the shim might need to be stepped so the box sits flat and still mounts against the end face of the car.  I've had to use 1/32 and 1/16 shims then a slightly thicker shim on top to achieve this.

 I started the same way years ago. Used the dreaded Atlas adjustacouplers that came with their rolling stock for a time. Liked the look and how easily they coupled together. Now everything is converted to Kadee's.

 Weaver should be the easiest. One screw removes the truck and the 3 rail coupler separates from it. Mounting pad in place and pre drilled. All the work is in getting it shimmed and to the correct height. There is no standard procedure for any Weaver car. The 2 rail models are perfect right out of the box. The trouble is when you remove the 3 rail coupler. The truck will screw right back on the frame. Car will ride nice and low. The problem is the larger 3 rail wheel flanges hit the underside of the car. Every car is a little different as far as underbody details. The truck has to be shimmed with washers, or I've even used an old plastic coupler and cut the mount off the end rather than a stack of washers. Regardless the trucks must be able to pivot. The idea is to keep the ride height low and put in just enough washers to let the truck pivot freely. However high you have raised the truck with washers. The same thickness has to be used to shim the coupler lower to be at the proper height. Every Weaver car seems to vary in this regard. 

 Follow Laidoffsick's video and Atlas cars go pretty quickly. If you are experimenting only. Find 2 cars that the trucks can be flipped over on so that you don't have to cut off the coupler mounts. In case you want to go back.

 MTH cars aren't bad to do. Disassembling the truck, more like cutting apart the truck is a pain and there's no turning back once you do.

 If you are just doing 2 cars as an experiment. I wouldn't worry to much on being the proper height. As long as you get the 2 cars the same. Order the height gauge though. I think you'll be pleased and won't be going back.

Well MTH unfortunately are NOT the easiest. You have to take the whole car apart just to get the trucks off. Then cut, break or snap pieces off to get the 3R claw off.

I would really suggest watching my videos.... I cover all the basics and get into some detail on specific car conversions and locomotives.
Originally Posted by Laidoffsick:
Well MTH unfortunately are NOT the easiest. You have to take the whole car apart just to get the trucks off. Then cut, break or snap pieces off to get the 3R claw off.

I would really suggest watching my videos.... I cover all the basics and get into some detail on specific car conversions and locomotives.

Hi Doug,

Yep just finished watching your tutorials.  Excellently done step by step.  That said, I decided that I will just throw the Kadee pair into my for sale box and sell them at the next train show.  Way more trouble to convert cars than I thought, so I will just stick with the claw couplers. If there were a local who has done these, I would watch and learn hands on, like I learned scenery from someone who showed me step by step until I could do it alone.  But here in Iowa there are zilch O clubs and modelers (everyone is HO or N it seems ).


I'll stick to electronics.  WAY easier to do for me.  But different strokes for different folks as they say.


But thanks again for the tutorials.  Helped me avoid frustration which I come by very easily.

Last edited by rrman
Originally Posted by Laidoffsick:

Sorry to hear that Sam, my videos were meant to encourage people, not discourage them from doing Kadees.

I looked at all the cars I have out now (Lionel, MTH, Weaver, K-Line, and several ???).  None have mounting pads I could see, except two MTH cars had what looked like C shaped "spade lugs" on reverse end of coupler assembly.  Every other truck looked like would be alot of work to retrofit Kadees.  And of course locos weren't even looked at.


Too bad there wasn't a niche market where Kadee made "plug & play" O gauge trucks.  Expensive yes, but for me would be simply unscrew old, screw in new and done.  Or someone who specialized in these conversions.


But at least I avoided starting something I couldn't finish, and thats OK with me.

Sad to see such discouragement. I did my first conversion a month or so back. Once started, the reviled "lobster claw" stock couplers became just totally unacceptable to me. In a word, they look just ridiculous!


I was very confused at first as to what I needed in the way of Kadee numbers and screw sizes. Confused . . . but determined and unconcerned with resale values.


All of my cars have been converted. All sixty or so of them, including passenger cars. Yes, MTH cars are more work. Eric Sigel has a video of the diassambly and reassembly of an MTH truck. More power to him. I tried just one and then bought a Dremel tool. MTH trucks are no longer a problem!


So, you make a choice . . .

If you want to revert to stock couplers for resale . . . I just wouldn't do the conversion!

If you want scale couplers . . . hang the resale issue!

Originally Posted by Mike CT:

There is a very good thread,  3 Rail scale forum, four pages.  Click on the underlined phrase to link.


Very good info for Atlas cars with ready made pad holes.  Unfortunately that thread is locked for some dumb reason.  SO can't ask beginner questions.  Like whats this KD delay feature?  There was a diagram on page 4 with what looks like 10 different KD couplers short/long shanks,  short/long box, coupler above the shank, coupler below the shank. Confusing choices (all my hobby shop had was #805, take it or leave it, (but others could be ordered at 10 bags one type minimum). 


Another poster stated the new MTH have the KD mounting pads on trucks, whats do they look like?  Several of my cars cars have steel bottoms so do you super glue the coupler boxes onto the floor bottom?


Newbie question, questions. 

Originally Posted by rrman:
Originally Posted by Mike CT:

There is a very good thread,  3 Rail scale forum, four pages.  Click on the underlined phrase to link.


Very good info for Atlas cars with ready made pad holes.  Unfortunately that thread is locked for some dumb reason.  SO can't ask beginner questions.  Like whats this KD delay feature?


Have you visited  the Kadee website? I thought they provided such information, but can't remember.


  There was a diagram on page 4 with what looks like 10 different KD couplers short/long shanks,  short/long box, coupler above the shank, coupler below the shank. Confusing choices (all my hobby shop had was #805, take it or leave it, (but others could be ordered at 10 bags one type minimum). 


I have used only #805 couplers for more than 15 years now, and have excellent results.


Another poster stated the new MTH have the KD mounting pads on trucks, whats do they look like? 


No. MTH has Kadee mounting pads, with the appropriate shim, on the FRAME of the freight car, i.e. NOT on the truck. The later MTH freight cars are set-up for body mounted Kadee couplers, thus one must remove the "claw" from the MTH truck assembly (since the truck is die cat, I simply break off the appropriate claw mounting arms).


Several of my cars cars have steel bottoms so do you super glue the coupler boxes onto the floor bottom?


No! With a metal underframe, it is always best to drill and tap 2-56 threaded holes for mounting the Kadee gear box assembly. I have only used glue, actually epoxy J-B Kuik weld, on one or two cars that I had planned to run only on the rear of a long train, i.e. just forward of the caboose.


Newbie question, questions. 


As a scratch passenger car builder the underset and overset couplers are a godsend! They solve the car body, and truck height difficulties that invariably appear on final assembly of a model. Especially when your combining multiple suppliers parts to get what your prototype requires.  Now if they would just produce  a type H tightlock all would be well in the universe. Used the Ho kadees as a kid and the O now not a complaint even pulling 19 heavy homemade cars behind my BP 20's

Sam I also have videos in my YouTube Channel that show you what the delayed uncoupling action is, how it works, and how to install the magnets in the track. I can switch cars on that layout completely hands free, even with a 3R coupler on the engine.


Just my personal opinion, I don't like the under set/over set shank couplers. They look funny, real couplers don't look like that. Part of the reason for switching to scale couplers is "looks"... so I will fix the height of the car to use the center set 740 or 805 coupler.   


There are many different Kadees, but I only use the 740 now. Once in awhile I need the extended shank coupler, like the 89' autoracks, 86' box cars, and sometimes on passenger cars. Everything else, engines included.... 740.


I pretty much cover every aspect of Kadee couplers in my videos. I know it's boring sometimes, but it's easier to understand by seeing it done vs someone trying to explain it in words.

Last edited by Former Member

I have a MTH bobber caboose (Rio Grande) that has the Kadee mounts on the body. If I get a chance I'll try and get a picture of it. I converted one end to Kadee so I could use it with some wooden kit cars that I'm building. The original coupler attaches to the body, so it's completely reversable and amazingly simple to do. Took about 10 minutes and didn't require any shims. Now I have a caboose to run until I get the one I want built.

I was intimidated too at first, but once I bought the tools and some of the styrene pads, it was pretty easy.  And so what if you screw up the first car or two.  Not life or death.  The hardest part for me is keeping the springs at bay.  Be careful with those as they are springy!  Projects like this open up a whole new world. 

I have two Atlas wood sheathed box cars that are highly detailed.  Anyway one had a what I thought was clever Adjust a coupler.  I read the directions.  Unscrew and replace one truck part, slide in the assembled coupler shank, adjust to 17 mm height and done.


Unfortunately only one car has this the other is factory sealed and did not have this so maybe car was before adjust a coupler era, or else KD sued Atlas for infringing.  I didn't see anything on atlas site but maybe they are there but I wasn't looking in right place.


So might not be KD or exactly prototypical, but it would work for me.  I think I will convert  a set and put one truck on one end of each Atlas cars and run them and see how they work.  Of course they are the only Atlas I have so will be rather limited.  Better than nuttun!!

Originally Posted by rrman:

I have two Atlas wood sheathed box cars that are highly detailed.  Anyway one had a what I thought was clever Adjust a coupler.  I read the directions.  Unscrew and replace one truck part, slide in the assembled coupler shank, adjust to 17 mm height and done.


Unfortunately only one car has this the other is factory sealed and did not have this so maybe car was before adjust a coupler era, or else KD sued Atlas for infringing.  I didn't see anything on atlas site but maybe they are there but I wasn't looking in right place.


So might not be KD or exactly prototypical, but it would work for me.  I think I will convert  a set and put one truck on one end of each Atlas cars and run them and see how they work.  Of course they are the only Atlas I have so will be rather limited.  Better than nuttun!!

Concerning those Atlas "Adjust-A-Coupler", to be blunt; they are crap! More than half of all the ones I had on Atlas freight cars, have failed, i.e. the knuckle broke right off. Atlas redesigned their 2-Rail scale coupler, and thus dropped those "Adjust-A-Coupler" products.


Just my opinion but, I would suggest you discard those "Adjust-A-Coupler" things, and body mount Kadee #805 couplers on all your cars. 

Hot Water, thanks for info.  Found the delay feature on KD website.  Neat way to do yard work without always needing to use the hand uncoupler tool.  Of course in my case I just like to run trains round and round and never fussed with switching cars in yard, I just rearrange cars in train and run trains.


Laidoffsick, like that caboose and those KDs certainly make things look so very prototypical .  Just wish all manufactures had standardized on mounting so you could just simply replace claws with KDs like the Atlas Adjust a coupler . One big advantage of KDs I see is gentle coupling, not the ramming speed needed to get claws to couple.

Originally Posted by Laidoffsick:
Like Hot Water said.... throw those adjust a couplers in the trash. If you go to the effort of changing couplers, do it once, use Kadees, and you're done. They couple up smooth, won't pull apart when running long trains, and can be switched hands free if you so choose.

Now I have not looked real close at the adjust a coupler components inside the still sealed little plastic bag.  I could see the coupler was assembled inside the box but not mounted to the drawbar shank.  Could a KD 805 be substituted for the poor Atlas breakable coupler, realizing heights might not be correct?

Originally Posted by rrman:
Originally Posted by Laidoffsick:
Like Hot Water said.... throw those adjust a couplers in the trash. If you go to the effort of changing couplers, do it once, use Kadees, and you're done. They couple up smooth, won't pull apart when running long trains, and can be switched hands free if you so choose.

Now I have not looked real close at the adjust a coupler components inside the still sealed little plastic bag.  I could see the coupler was assembled inside the box but not mounted to the drawbar shank.  Could a KD 805 be substituted for the poor Atlas breakable coupler, realizing heights might not be correct?

No, because the Kedee coupler gear box is designed to be body mounted. That Adjust-A-Coupler from Atlas also had threaded holes in the rear for mounting on the bracket that attaches to the truck assembly. 


Believe me when I say, THROW THAT WHOLE THING IN THE TRASH!

Originally Posted by Laidoffsick:

The caboose is one of the tougher conversions, next to a tank car I think. This is a K-Line Classic that got some upgrades, including 740 couplers.


IMG_0087

Just a slight derailment from the thread but this picture is incredible! The weathering is just right on both the track and caboose. Awesome job Laidoffsick!

From a YouTube video I discovered where those elusive mounting pads were located.  I have five MTH box cars, three MTH coal cars, one MTH tank car on layout (others stored and unexamined).  All the box cars do not have any screws to open them to remove truck screws.  As it appears car is all glued together, I did not want to pry between sides and bottom chassis with an Xacto flat blade.  Watching how the truck was modified I would be hesitant to try to remove the claw in place and risk snapping the chassis plastic.


Two coal cars and the tank car had screws, so assume this would gain access to remove the trucks to remove the claw.


However I noticed empirical observation that on O42 curves, the car wheel flanges almost cover the KD mounting pad holes on the MTH body, thus the 805 KD box being bigger would, I believe, cause flange to rub and wear against the box.  Not sure if an 806 would fix this problem.

Probably not a good plan to proceed at this point.  Too many problems with no guidance.


May post to want section to see if some modeler who has done hundreds of KDs wants to earn some money modifying all my cars.  I wisely throw in the towel.

Sam don't throw in the towel yet. It's like riding a bike. Start with an easy car. Weaver would be a good start. As for curves, you will need to run 054 and higher. 50ft cars will need at a minimum of 060 and that's pushing it. Laid off sicks videos were a great help for me and he will answer your questions. Once you start using Kadees you won't go back to claws.

Originally Posted by suzukovich:

Sam don't throw in the towel yet. It's like riding a bike. Start with an easy car. Weaver would be a good start. As for curves, you will need to run 054 and higher. 50ft cars will need at a minimum of 060 and that's pushing it. Laid off sicks videos were a great help for me and he will answer your questions. Once you start using Kadees you won't go back to claws.

Well almost all my layout curves except O72 turnouts are O-42s, so that pretty much clinches it, which explains why I observed the flanges were over the pad holes with O-42 curves. Unless I want to design a new layout with O-72 or greater curves, only way would be a seven foot square table shoved into room corner, with a O-72 circle of track to host KD cars. The train room is already a tight squeeze as is. 


Would have been nice to know minimum radius-es up front (didn't ask the right question at start of thread, I guess) before I got this idea.  So obviously truck claws are the norm, unless some one comes up with KDs on replacement trucks  (and that ain't gonna happen in my lifetime or I am a master machinist with a room full of metal working tools and machines to create KD truck adapters)

 "As for curves, you will need to run 054 and higher. 50ft cars will need at a minimum of 060 and that's pushing it."


   Actually Kadees have a lot of side play will handle quite sharp curves, I've run them on O-31 curves with 3 rail wheelsets.  Scale wheels are harder to get around tight curves and probably need a minimum of 24 inch radius( 96 feet prototype, or a bit of cushion above the Harlem Transfer's 90 foot minimum) ........DaveB 

daveb has a point. There are tricks that you can use to run sharper curves. I run scale so 031 will not work for me. You can increase the play by cutting the rear part of the draft box and this will allow for more play. A lot of it all depends on what you run. Like I said it like riding a bike. The more you mess with it the more you learn. The only way you will know what works is to experiment. It is definitely worth trying. Buy a couple of cheap weavers. With the weavers you don't have to cut the claw couplars off. The truck and couplars are two separate parts. The weavers also have predrilled holes for the kadees.

You can also get more swing out of a Kadee by shaving the sides of the metal draft box out with a Dremel or razor saw. Cosmetically it's problematic, plus you have to do all of the cars in the train. With the plastic boxes, you can just cut a slit on the sides and they'll flex. I'm following the old school rule and not running Kadees on sharp curves.


If you multiply the bolster-to-bolster distance by 3, that typically gives the minimum radius a standard freight car can handle with Kadees. Cars with excessive end overhang or shock-control couplers are the exception. Multiply by 4 and you get the ideal minimum.


There are some exceptions -- i.e. long cars with extra swing on the couplers.

 "Cars with excessive end overhang or shock-control couplers are the exception."


    Hi Matt,  Yeah I wouldn't try to run longer modern cars on extremely sharp radius curves. The prototype ran 40 foot cars around 90 foot radius in crowded industrial areas so the older cars look pretty realistic on the tight curves in appropriate scenery. As the real cars got longer most of this tight industrial track was abandoned due to changes in the industrial locations, plants moved south or over seas and the tight tracks were not needed or if the plant was still in business it likely revised it's track to handle longer cars. Running 3 rail wheel sets gives a model a significant advantage over a real car so 3 rail cars should be able to run on tighter curves than 90 foot. O-42 is about 80 feet centerline radius I think which sounds about right for a minimum target.I don't recall having to trim my Kadee boxes on 40  foot cars on my trolley layout.....DaveB

Add Reply

Post

OGR Publishing, Inc., 1310 Eastside Centre Ct, Ste 6, Mountain Home, AR 72653
800-980-OGRR (6477)
www.ogaugerr.com

×
×
×
×
Link copied to your clipboard.
×
×