In this project I am going to convert the Lionchief Plus Mikado which is traditional or 'semi-scale" sized, to a more closely scale model.  As delivered, it is a 85%-90% size model of the ATSF 3129 class(the 3129 has 60 inch drivers and a 16 foot driver wheelbase, the LC+ Mikado has a 1:48 scale 14 foot wheelbase with scale 54" drivers, etc.).   In my conversions, my major goal (beyond having fun doing the project) is to get a locomotive that will "mix well" alongside scale steamers.  My traditional size locos won't, at least to my eye -- I'll show photos below, later.  


Background:  I had three LC+ steamers.  I converted two (Photo 1) to more scale size models I previous posted, although not step by step like here.   The third was an LC+ Mikado .  But back around Christmas, I gave it and about thirty feet of Fastrack and etc., to a family we know with four kids and not a lot of money.  Their dad and I had fun with the two older boys painting it in Carolina Hurricane colors and putting some decals we got at a sports store on it.   Frankly it looked hideous to me, but they loved it.  


The idea with my LC+ conversions is, if I can, to find some locomotive with the same or similar wheel arrangement (e.g., a Mikado in this case) but that was about 10% smaller and convert the LC+ loco to a scale model of that.  For example, at 1:48 scale the LC+ Mikado has a driver wheelbase of 14" and 54" wheels and an overall wheelbase just under 32 feet - most Mikados had wheelbases around 16", drivers of about 60" and wheelbases near 34-36 feet.  But several early Mikado classes did match the LC+ Mikado's dimensions: the Virginian MA class (Baldwin, 1907) is a near perfect match in ever way, and several UP classes as well as Mikados of other smaller western RRs are close.


Photo 1: Previous work: LC+ Pacific, with taller, larger cab, various equipment added for a more 'industrial look, and other changes, including a new, larger 8-axle tender, to give it a scale look and nearly identical dimensions to any of several early ATSF Pacific types.  LC+ Hudson, with one axle removed, is nearly the exact dimensions of several ATSF Prairie classes.  I picked 1856 because the sand dones match well, and I have a photo of it that I could follow.   LC+ tender has been converted to an almost exact scale model of the "small" ATSF standard tender as converted to oil in the 1940s.  


DSCN1639


 My gold standard for "does it mix with scale locos?" is to put a loco around Lionel's scale Atlantic.  Here is the Mikado back to back with that loco.  Now, when completed, this LC+ Mikado will be a model of a small Mikado, so it it should (and will) look smaller than the Atlantic, which is a really big Atlantic.  But one thing that is not "small" on a small loco is the cab.  Compare the cabs.  The Mikado lacks about 1/4 inch (a scale foot) of cab headroom.  Usually, if you put a scale headroom cab on a traditional or semi-scale loco, it will look much more scale size, even if you leave the rest of the loco alone.  

DSCN1599

 I do nearly all my conversions and repainting, etc., without every taking the body off the loco: just leave well enough alone.  It runs fine, so i won't distrub its innards.  To do this work I put the entire loco in a plastic freezer bag except for the cab, which iwas exposed, then taped (masking tape, so filings etc could not get in unwanted places.  Ten minutes with a band saw and bench sander resulted in what you see below.


DSCN1604


Note the cab is also a bit too narrow . . . 

DSCN1606

I made side panels for the new cab out of 1/10 inch styrene, they are a scale foot higher, and foot longer, than the stock cab.  I then attached them with epoxy and screws.

DSCN1613


Next I filled in the profile of the roof with styrene pieces epoxied on, and extended the rear cab floor, etc.

DSCN1627


To make a curve piece of styrene for the roof, I took three layers of thing (.04) styrene, applied glue between them, them taped them around a spray can of paint while the cement hardened.  

DSCN1631


I trimmed the piece a bit and glued it on the roof of the cab, then taped it.  It will sit overnight at least to really harden, before the next step.

Not how well it not matches the height and width of a typical scale cab.   

DSCN1633


I will post more as I work on it more . . . 

Attachments

Images (8)
  • DSCN1639
  • DSCN1599
  • DSCN1604
  • DSCN1606
  • DSCN1613
  • DSCN1627
  • DSCN1631
  • DSCN1633
Last edited by Lee Willis
Original Post

Replies sorted oldest to newest

Thanks, gunrunnerjohn.  This is a fun project and I am looking forward to completing it; I need another LC+ steamer to run, alongside my Big Boys - strike that - big boys!


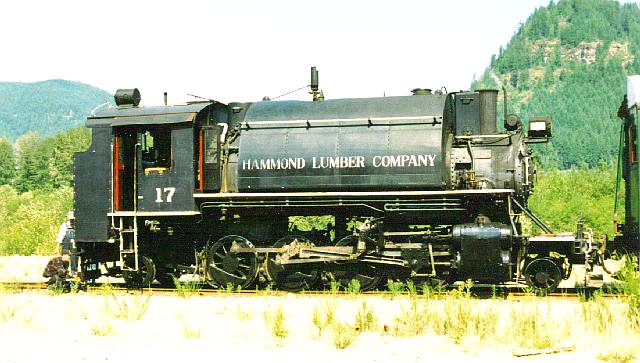
BTW way, you might find this interesting - I posted this on the real trains forum.  In researching all the small Mikados for those with 1" or less driver wheelbase, I found quite a few.  The shortest Mikado I have found so far is Wisconsin Lumber and Trading Co.'s Class 7, built by Baldwin: only an 11 1/2 foot wheelbase with 42 inch drivers, and only a 27 foot overall wheelbase.  That was one really small loco!   I don't know what it looks like but in might have been a tank engine, like the one below, which isn't much bigger. I may have to get another Mikado LC+ and make it into a tank engine.  I had not thought of that . . . 

Originally Posted by CentralFan1976:

Lee,


You have inspired me...  After looking on the Lionel website, I see that they have some locomotives that have separate cabs, so I was thinking of following your capable footsteps and trying this:


Lionel Mikado Jr - 2-8-0 Conversion Rev 1


This is way down on the list, but its on there!


Thanks!

-Mario

Centralfan1976, I think you can do it, but you will probably have the motor taking up the entire cab.  Look closely at the picture on page 82 of the latest Lionel catalog: the motor is in the same position in all the LC+ steamers.  I think you can do it, but the back of the motor will probably come all the way to the back of the new cab.  


Post pics when you do it, it would be a fun project. 

Progress today.  Basic cab is done.  Did the tender (posted another thread).  

DSCN1663


On 72" curves, with the longer cab, I have 1 mm clearance.  This is deliberate.  I used the bigger cab to also close up the gap.  If I ever want to run on 54-60", I will grind down the corners on the front of the platform projected from the front of the tender.  I really like the tight look here. This is going to be a good-looking little engine.DSCN1662

Attachments

Images (2)
  • DSCN1663
  • DSCN1662

IT IS DONE.  With the bigger cab now, it looks like 1:48 and as you will see, "mixes" well with scale locos and rolling stock.  


Ultimately I completed it purely on the basis of aesthetics: fitting and adding what appealed most to my eye.  Its not exactly any class, but still, very representative of several classes of very small Mikados Baldwin built in the 1907-1920 timeframe.  


I actually made a feed water tank and some pumps and machinery and a bunch of additional pipes, etc., as well as awnings and extended sills for the windows, etc., to fit add to give it more detail and an "industrial look" to it.  These are all eye-candy details I added to other LC steamers, etc., that are "converted to scale."  But somehow that did not work here - all that added equipment spoiled its look.  Anyway, I took all that off and added very little, keeping it simple - part of its appeal, I think: this is just a well-cared for, older, simple little Mikado . . . 


I finished the cab windows, and added some tiny details like this pipe lower down on the cab side (no, I have no idea what that pipe is or does: it just looked to my eye like I needed a "detail" there to look right.  The big dome also just looks right to me, and the taller wider stack, and a grating at the front (orange thing).


DSCN1672I then wrapped everything that I would not repaint.

DSCN1685One thing I always do is warm the rattle can in hot water for about three minutes.  Seems to help.

DSCN1677

Here it is after priming, still wet and glossy.  

DSCN1687


Then flat black.  I neolubed the drivers and rods, too.  Here is it with the Atlantic.  I got the look I wanted.  It looks like what I wanted it to look like, a scale model of a very small Mikado.

DSCN1690


Realize that Atlantic, although a big Atlantic, is still a small loco.  Here is my small MLikado next to a real locomotive, a big Mohawk - this is the recent Legacy NYC Mohawk, relabeled ATSF.  Again, the bigger cab and slightly bigger diameter/taller stack signal to the eye this Mikado is 1:48 scale, but just a small loco.  Perfect.

DSCN1699


Here it is in the livery of my fictional Canon City, Blanca, and Glen Canyon Railroad.  It is a very good looked loco now, that will mix with my scale locos and scale rolling stock. 


DSCN1692

DSCN1693

DSCN1694


And of course, being Lionchief Plus, it is a superb runner.  It also has really good smoke and pretty good sound.  Note in particularly how it looks like it fits now with scale reefers.


Attachments

Images (10)
  • DSCN1672
  • DSCN1685
  • DSCN1677
  • DSCN1687
  • DSCN1690
  • DSCN1699
  • DSCN1692
  • DSCN1693
  • DSCN1694
  • DSCN1699
Videos (1)
DSCN1695

Lee the pipe you added to the side of the cab is what I would call a catwalk extension. It would be used by the fireman to get to the catwalk from the cab or from the catwalk to the cab without getting on the ground. The bad news is you forgot the handrail which would go just above the window awning. In 1 to 1 scale it would be about 3/4" in dia. You can see it the picture I added with the plate (your pipe) is just below the cab.

Attachments

Images (1)
  • SMT 1225 May 08 5

Thanks, guys.  The changes I've made to all my LC+ steamers are similar, and strange as it may been at first, seeing as how they are all like this: a taller, wider cab, a taller wider stack, bigger domes, etc., they make a big difference in getting an "undisturbing look" to the loco, so it blends in well with scale rolling stock and locos.  


I love the Lionchief Plus system because it is simple - no fussing with ground planes, programming units, etc., just adjust the knob to the speed you want and go: and yet I can set three locos to run at exactly the same speed, spacing their trains around my main loop so I have then about 40 feet apart and they are nicely spread out, and they stay that way. 

Add Reply

Post
×
×
×
×
Link copied to your clipboard.
×
×