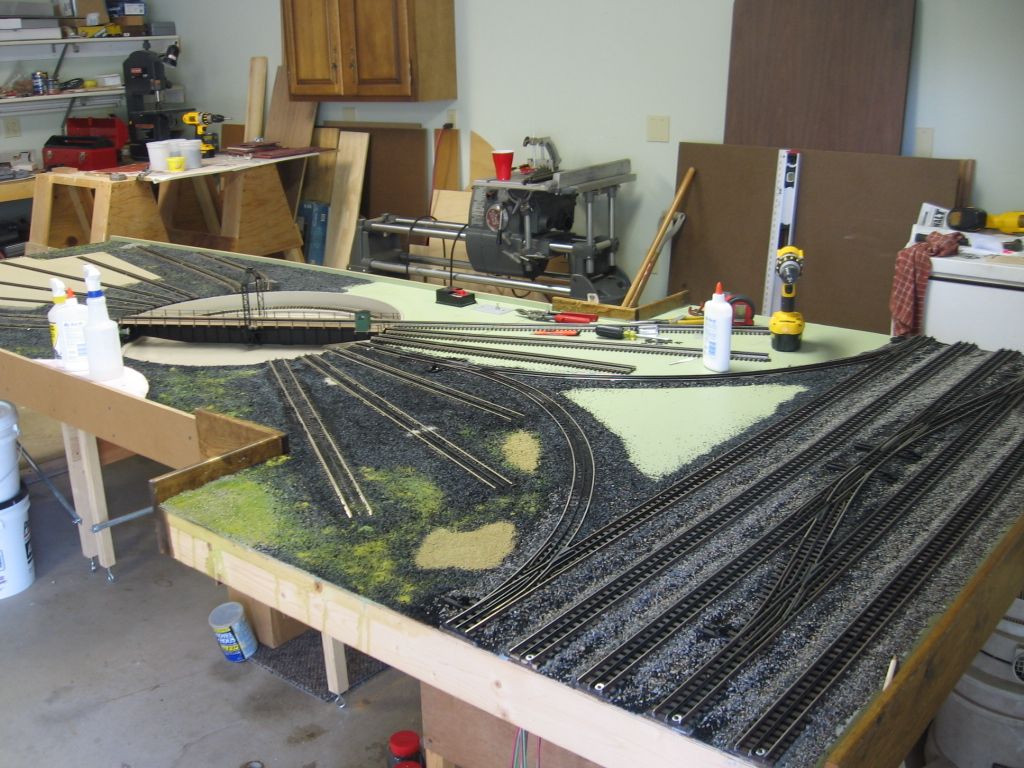
I'm sure this topic has been worked to death, but I figured I'd ask anyway and folks would direct me to other posts. I have lots of Ross track, so old and some brand new, that I want to paint rail brown. I bought a paint roller thingy at York some years ago, but never used it yet. I also bought the rail brown water-based paint from the same vendor. I have an airbrush and thought about using that too, but was looking forward to having to mask literally hundreds of feet of rail tops. Lastly, I'm considering buying the Floquil rail paint pens.


So... what's the consensus? What's the best way to paint lots of rail without making a mess?

Original Post

Replies sorted oldest to newest

So... the consensus is... no consensus. Brush, spray, paint pens each have on vote. I think I'll try all three and use the one that works best. I'm also thinking about cheating in only painting the front of the rail that facing the audience on those tracks running along the back. No one will ever be able to look forward from that view point. The track on the front portion should be painted on all sides since it can be viewed from the inside of the layout.


3-d Latest Design

Benchwork Done

Attachments

Images (2)
  • 3-d Latest Design
  • Benchwork Done

I have all Gargraves/Ross on my layout.  Haven't painted it yet, but I will.  And, when I do I'm going to first try the technique that has worked for me in building HO and N scale layouts.


Airbrush.  No masking.  First spray the sides of the rails with rail brown color...Floquil has this, but any combo of reds/browns will look good.  Spray the rails at a LOW angle...i.e.,near horizontal to track.  (A hand-held piece of cardboard on the opposite side of the track as you move along will keep overspray from scenery, walls, etc.)


After spraying the rails, while the paint is yet 'wet', wipe the tops of the rails with a clean rag, paper towel,...whatever.


After the rails are dry, switch your airbrush to a grayish-brown aged tie color.  This might involve more than one color in more than one pass to achieve the effect you like, but that comes from trial/error/observation/preference.)  Now spray the tops of the ties with this color holding the gun as nearly vertical to the track as possible.  The idea is that the rail tops provide some 'shielding' of the rail sides, so that there is little paint overspray/adhesion to the rail sides to alter its brown color.  Again, while this paint is yet 'wet' wipe the rail tops as before.


I only became a believer of this simple technique after trying it myself on HO and N scale track.  It really works!  If you want to experiment, get some old track pieces and practice.    BTW, this is not my own technique...it's been published many times in layout building articles in several magazines and help books before. 


So, as for masking....it's just not worth any effort in painting the track, IMHO.  On the other hand, if you've already painted the track and now want to do some adjacent scenery work...paint/plaster/etc....it's a good, worthwhile idea to quicly mask the track area...rails/ties/ballast...to keep that looking good. 


FWIW, always...


KD


I like that idea too, and since I'm planning on painting the track before laying it, I can alter the tracks position in relation to the air brush. I don't want to paint the black center rail so I've thought about using the plastic clip on spines that come with those cheap plastic proposal folders. I have a box of them in the office. Just snap the spine onto the center rail and paint away. When done, pop it off. I also like the idea of weathering the ties with a gray/brown color.

 I painted a good portion of my layout with ballasted track. I used an airbrush. I basically shot rail brown at the sides of the rails followed by a mist of grimy black from above. It toned down the ballast as well.

 A cloth soaked in non flammable Brakekleen wrapped around a wooden block removed the paint from the railheads. I've recently been painting sections at the spraybooth and it goes quite fast. You may not want to mask the black center rail. The whole idea is to kill the shine. I find by spraying the center rail somewhat brown or Weathered Black it tends to blend into the ties a little better. You seem to focus on the 2 shiny railheads.


 I've been experimenting of late with using Atlas rail joiners on the ROSS outside rails. They have to be trimmed shorter to fit. Not an easy fit over the ROSS rail and you have to bevel the inside edges as to not to pick at some wheelsets. A nice detail feature as it hides the joints. Just not sure if it's worth all the bother for something no one will probably ever notice.

Originally Posted by Trainman2001:

 I'm planning on painting the track before laying it, I can alter the tracks position in relation to the air brush.

Just be sure that where the rail joiners and wires contact the rail, there is no paint! 


It's one of the advantages of painting after laying the track.  If you scrape away paint to make these electrical connections, then you'll have to touch it up with paint afterwards...and that might not have as good a blended appearance.


The other reason to do so is that in painting each piece of track separately you run the risk of having different pieces having slightly different colorations.  Then the piece-to-piece variation might be a disappointment after being laid, depending on the lighting, etc..  Just a thought, word of caution...


FWIW.


KD

After I wrote my response about painting the rails separately, I immediately thought about how to protect the rail joint pins area and didn't come up with a solution, leaving me to believe that painting rails with everything in place including ballast. Furthermore, ballast gets rusty too. It's never as pristine under the rails as it would be if the rails were weathered, but the ballast underneath perfectly fresh, unless of course, the roadbed was just reballasted... Answer: I think I'll install the rain, the ballast and then paint. It will mean crawling around more, but I could delegate it to the grandson who loves the airbrush and needs more practice. It would be much better to practice on my rail instead of a $150 plastic model.

Please don't make the mistake of painting your rails rust color! That will make the rail stand out like a big sore thumb. The rails should blend in with the ties and plates. Go look at a real mainline and see for yourself how everything blends in and does not stand out like far too photos in OGR with the "red streaks" ruining an otherwise beautiful scene.

If it is still available I used Polyscale (acrylic) Railroad tie Brown.  Remodel project where I installed a couple of Ross 3 way switches. The rail on this module had been painted before, there may even be Roof brown mixed on the module and there is Grimmy black sprayed on the switch motors.  Different paint colors are via several different projects.  All better than bare rail IMO   Ross switches Gargraves track.  


Using Railroad tie brown, seems to work well with the overspray on the ties. Clean up with lacquer thinner, rags, and scotchbrite scrubbing pads. 

Mike CT

Last edited by Mike CT

I agree. That's pretty much the look I'm going for. How did you apply the brown? It's okay if the brown gets on the ballast since ballast gets a rust bath all the time.


While I can see the benefit of coloring the rails after they're laid down with the ballast, I'm not looking forward to doing this on the elevated track in the back. Before I lay any track, I'm going to paint all the exposed wood some nice earth color. It will also help keep those oriented strands in their place. It will make it easier to see the line work for rail positioning. 


I bought a laser level at Harbor Freight to project straight lines for the long tangent runs. I was thinking about using a chalk line, but a friend convinced me that the laser would be better. It could be the best 20 bucks I've ever spent. You have to use it in a darkened room, but I'm just going to project the lines and make marks on the OSB, then I can turn the lights back on.

Air brush application. Concentrate on painting the rail sides and let the paint fall accordingly.  Clean the top of the rail with a scothbrite pad.  As the pad fills with paint use a new one. If you have a problem with too much brown on the ballast or ties go back and do a light dusting with Grimmy black. As a remodel project, ballast and rails were removed and re-installed. I tried to use the old ballast.  Collected it, added a small amount of new ballast and re-applied with white glue. The railroad tie brown paint and grimmy black helps blend the patch job.  Not so much on this module, but on others that were upgraded I used a small amount of dark green ballast as a blend.

Collected  loose ballast from the module

This picture shows how much ballast was removed/re-installed.

Module before the three way switches were added. The four existing Ross switches were used as part of the remodel.  One remained in it's original position.

Ballast is Brummy, a rubber ballast.

Best wishes on your project

 Mike CT      

Last edited by Mike CT

Very nice! Are those all Ross 11º switches? Will you be painting the guard rails on the new three-ways? Whose 44 tonner is that? Whose ballast are you using? Questions, questions...


I'm going to buy some cheap latex paint tomorrow and prime all the benchwork in some earth tone before I do any track laying. It will help stabilize the splintering of the OSB. It will make it easier to see the alignment marks I draw on the surface also. I'm getting really excited about laying track.

I lay all the track, wire it, test it, and then airbrush it. I mix my own color with Floquil Rail Brown, RR Tie Brown, Rust, and a little grimy black. Not greenish, and not to rusty looking. Wipe the rail head with a rag soaked in laquer thinner and then ballast. You can really control the paint flow and where it goes by airbrushing.


I use a mixture of Brennan's Better Ballast and Woodland Scenics Grey Blend Coarse for the mainlines, and meduim for sidings and industry tracks.


IMG_0756


Switch and ballast

Attachments

Images (2)
  • IMG_0756
  • Switch and ballast

This has been a very useful post... I hadn't thought about using different ballast grades for mainline and siding tracks. Also I'm going to have to stick to water-based paints since the basement doesn't vent fumes too well other than being sucked into the HVAC system and then alerting you-know-who that I'm spraying solvent-based paints. With water-based you can clean up with alcohol instead of lacquer thinner. I'm still thinking about spraying with ballast in place...I'm going to photograph some trackage in the L'ville area and make my decision based on what I see.

Originally Posted by Trainman2001:

I'm also thinking about cheating in only painting the front of the rail that facing the audience on those tracks running along the back.

If you ever plan to photograph or video your railroad from the cab perspective, consider painting both sides of the rails - the camera angle will pick up the "unseen" shiny rails.

Originally Posted by Trainman2001:

Very nice! Are those all Ross 11º switches? (100 and 101 switches) Yes but they don't match exactly with the 204 three way, listed as a #4, which I assume is designed to match the 200/201 switches. We owned the 100/101's and made them work.   Will you be painting the guard rails on the new three-ways? Yes, note the picture already posted.  There is so much horizontal metal surface they appear to be not painted.  Whose 44 tonner is that? Rich Yoder, that has an Electric Railroad TMCC upgrade. Whose ballast are you using? A Brummy's rubber ballast, see the picture sample listed above. Switch motors and relays are DZ. All is controlled via a Lionel SC-2  Switch controller.   The video shows the 44 tonner and switches controlled by the remote hand-held cab 1 control. There are pushbuttons installed as part of the

Y-module project.  Click on the link to access a picture file.  Questions, questions...


I'm going to buy some cheap latex paint tomorrow and prime all the benchwork in some earth tone before I do any track laying. Yes, we use a grey latex. Benjamin Moore Flat Finish Base N215 3 B  MIX (BK) 6.5 oz (BR) 2.75 oz (OY) 13 oz/ Quart can. The attempt was more of a medium earth brown. I took a part/piece of the module that had been painted previously to the paint store and had them match existing color.   Brummy ballast was mixed with the attempt to match existing.   Rail painting and overspray blends the ballast patch jobs.  It will help stabilize the splintering of the OSB. It will make it easier to see the alignment marks I draw on the surface also. I'm getting really excited about laying track.

Best wishes on your project. I apologize for the slow response.

Mike CT


Not a problem. Which brings to another question (another thread perhaps?). Ballast...


You're using rubber. I'm in the process of planning on the ballast purchase. Rubber, stone, etc. What are the pros and cons? If the readers think so, I will post this as another thread since it will probably get a lot of responses.


I got a price from Brennan and an approximate amount... a lot! Since the purchase has not been made, I can go in any direction.

Originally Posted by Trainman2001:

Not a problem. Which brings to another question (another thread perhaps?). Ballast...


You're using rubber. Material choice is yours, though in most cases they are expensive. I had done a simple grade detail around a few buildings where I used a lot of wood fill material and floor leveling compounds to bring the diorama close to grade before using the expensive stuff. Click on the underlined phrase to access a slideshow. Unfortunately the slideshow is backwards, but it is a very good example of how inexpensive material can be used to limit the expensive ballast and final cover materials.  Brown cover paint is the Benjamin Moore mix listed above.   I'm in the process of planning on the ballast purchase. Rubber, stone, etc. What are the pros and cons? If the readers think so, I will post this as another thread since it will probably get a lot of responses.


I got a price from Brennan and an approximate amount... a lot! Since the purchase has not been made, I can go in any direction.


Last edited by Mike CT
Originally Posted by AlanRail:

I have done limited ballasting and no rail or tie painting. I like what is shown above, but is that the best we can hope for with the switch machines? Yes,  The next step up as you suggested is undertable switch motor machines.


I think I now know why some go with Tortoises under the table machines instead. 


I have lots of Brennan ballast so no rubber for me.  I wasn't part of the rubber ballast decision, It may have something to do with keeping the modules as light as possible. The remodel project is 2 or 3 years old and has held up well.  Patching and re-gluing ballast is maintenance incurred as the modules are moved, used, and stored. 

Mike CT


The Z switch machines don't bother me. I personally am not a fan of working under the platform. It is hard to work over my head because my bifocals are now upside down, plus I like using magnification for close work and underneath the layout, this is not easy. I also like the ability to manually change a switch if that need arises.


I think with properly painted and ballasted track, the switch machines shouldn't be too noticeable.

I started "laying" track today. I'm just locating the track correctly so I can mark its position and then glue down the Flexibed roadbed. I'm using two diagrams: one has the actual track dimensions on it with the lengths of cut pieces of straight track and the computed length of cut curves, and the other shows where the insulated blocks go and where the feeder tracks will have to be.


RR Track software gives cut curves in degrees when you print out the layout showing track labels. I went back and captured the actual track lengths using the PROPERTIES detail box. I wrote these on the drawing. For the most part things are coming out as they should, but there are some areas, especially around the bridges on the left end, where the track configuration on the drawing is not fitting on the OSB as it should. I'm using field measurements to correct this.


Here's a progress shot. I'm about 25% done. The high-line is in and it definitely shows a dip on the up slope that I'm going to get out by putting some upward pressure on the riser below the dip and, if necessary, shimming the roadbed in that area. Even though the total slope is less than 2º, a dip can increase the slope at that point and also cause traction problems if some of the drivers bridge the dip and you don't have as many wheels in contact with the rail. 


Track Laying 1


This will be the last work until after the holidays. We're heading back East to be with family and old friends.


So here's wishing everyone at the OGRR Forum a very Merry Christmas and Happy, Healthy and Prosperous New Year. Have fun with all your trains!

Attachments

Images (1)
  • Track Laying 1
Post
×
×
×
×
Link copied to your clipboard.
×
×