quote:
Originally posted by bob2:
quote:
The extrusion has no window cut outs? Do you need to provide that yourself? If so how?


I have found an end mill to be the only viable way to cut windows, unless you have a special punch setup. You can hand-file if you want, but your psychiatrist bill will be much bigger than the cost of a small mill.


What is an end mill? Just curious.
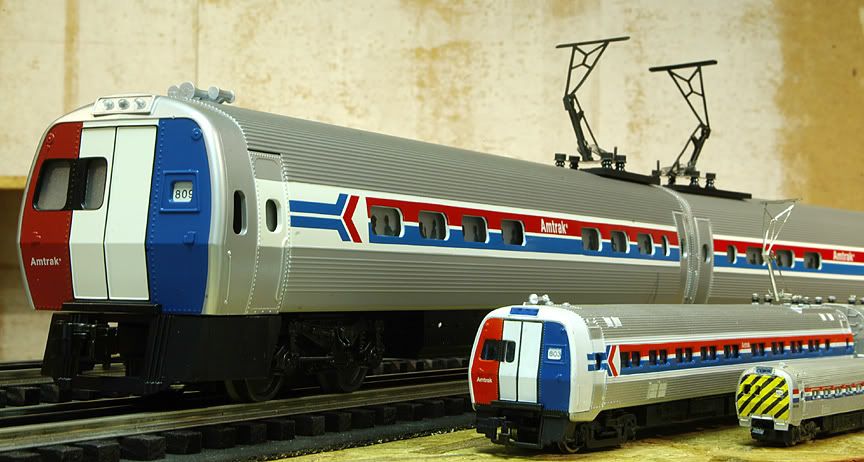
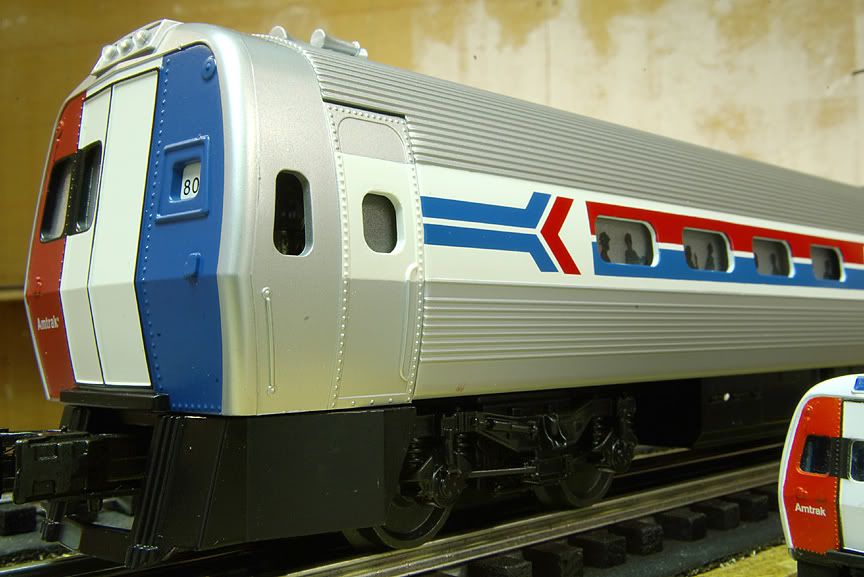
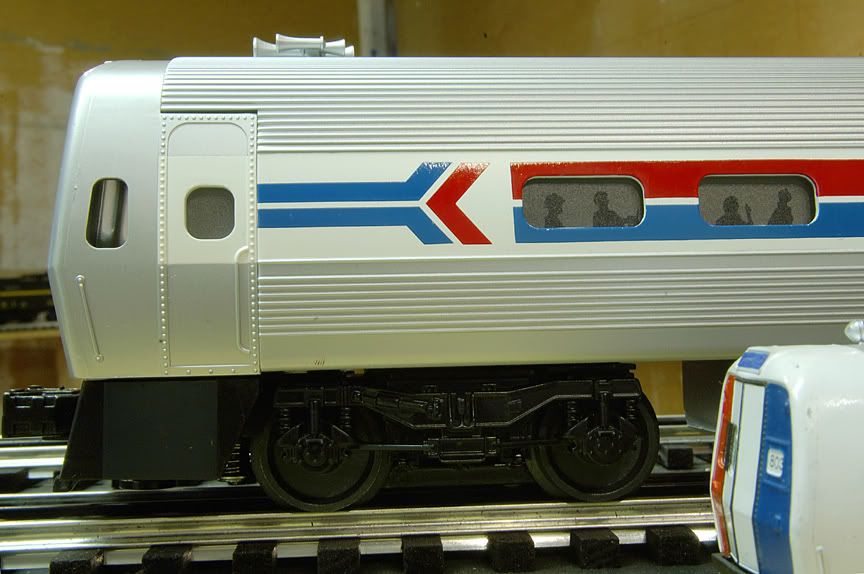
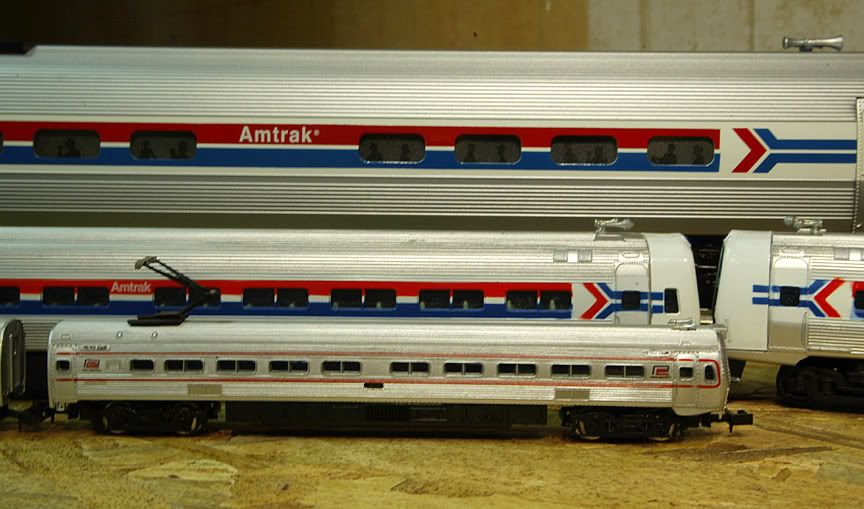
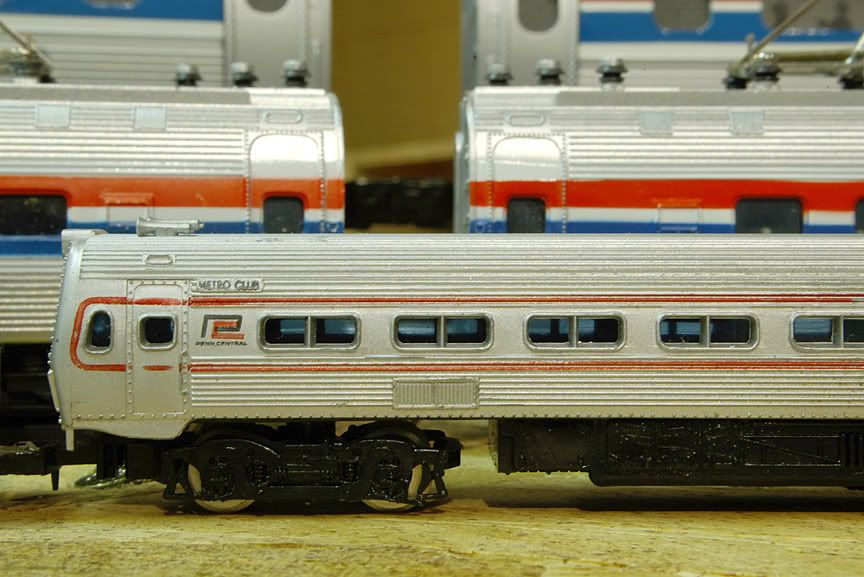
If you want Williams parts, you can find the Metroliner sets fairly reasonably priced. I think I only paid $150 for mine used. Here is a photo of mine from my pre-focus days of O gauge railroading.


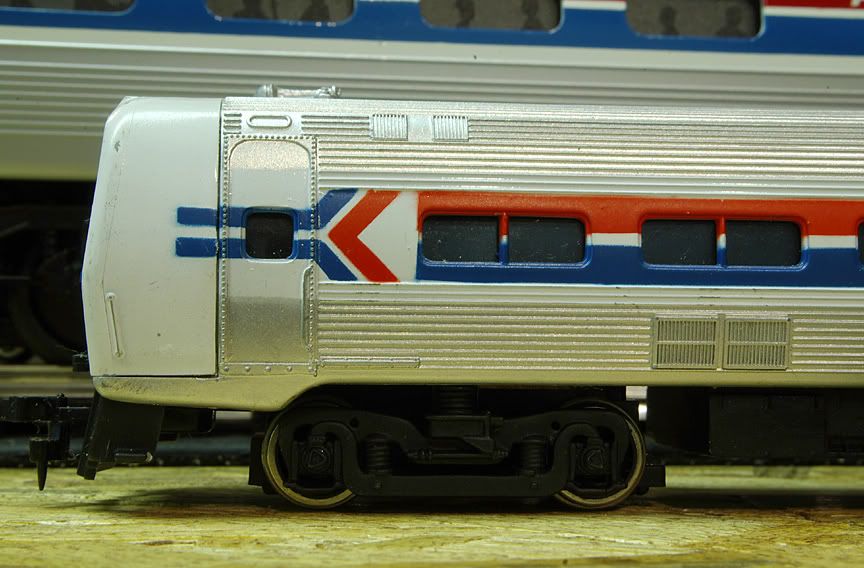
And Bachmann's more accurate version from the 70's in HO:


Note that the HO version is more accurate on the scale of the end. Williams compressed the end to be more visually in line with the shorter car.
[QUOTE]Originally posted by PRRTrainguy:
Parts arrived


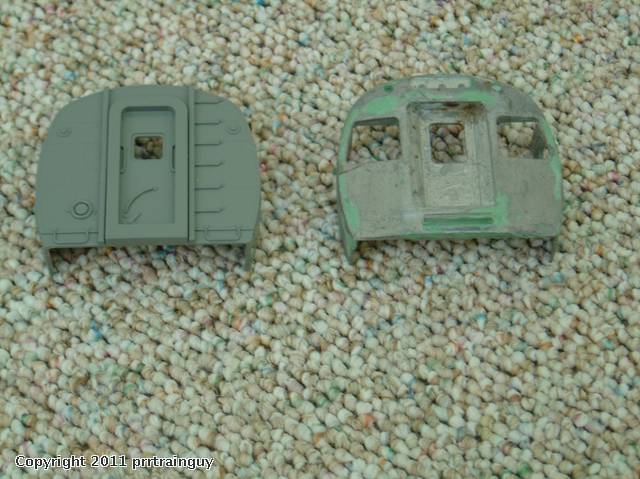
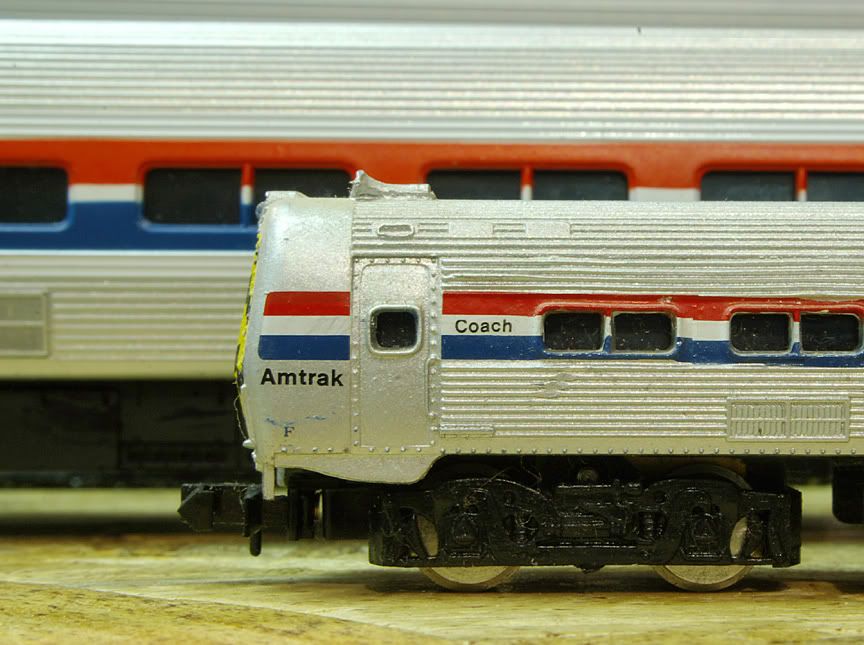
Shell is scale length, non engineer end is plastic and very nice. The operator end is rough and has too many windows and doors are not correct.


QUOTE]

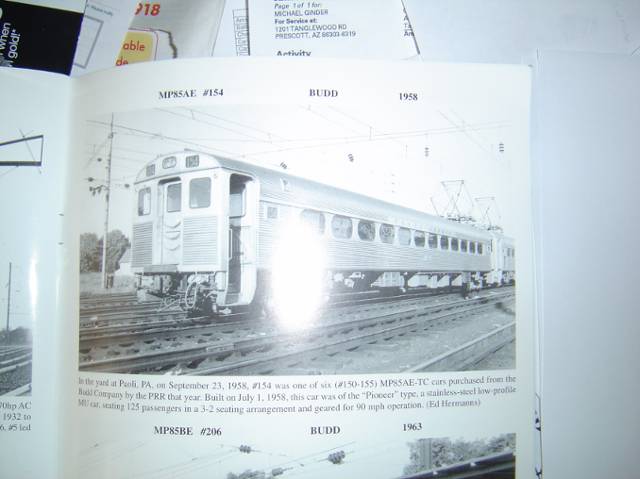
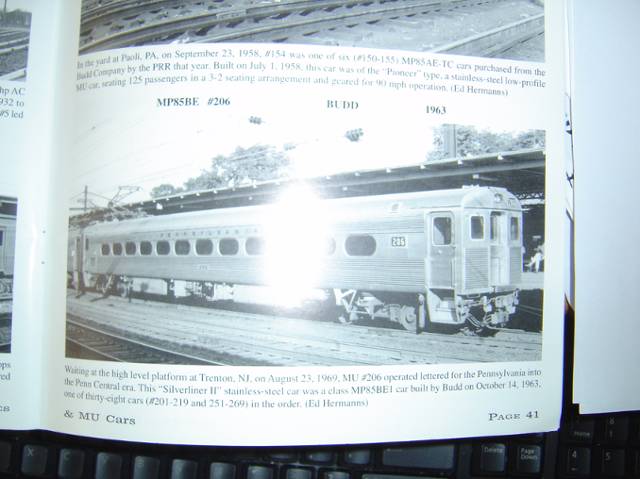
With further research, found these pictures in Pennsylvania Electric Locomotives & MU cars by Leijestrand & Sweetland.


Both are close but have flat sides whereas this end has convexity as per Amtrack coaches. But end is probably origional model for this end.
quote:
Originally posted by prrhorseshoecurve:
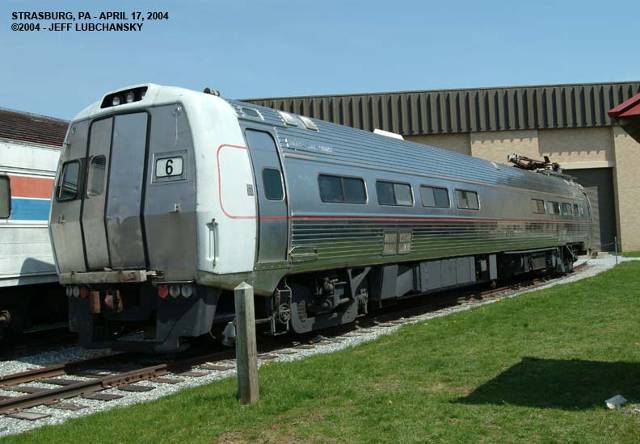
PRRtrainguy, you do realize you are trying to compare two different MU electric models. the Photo at the PRR rr museum of Pa is of a Genuine PRR Metroliner. your book photos are of Silverliner I's from Budd, to distinctively uniqe models.


I probably did not make it clear, I am comparing the metal end which was clearly pointed out as non metroliner.

With these two pictures, I was trying to point out though non metroliner it also is not completely prototypical even for these cars due to sides being convex and origional cars had flat sides.
I would love to see a scale Metroliner and a Silver liner in PRR markings, I seen them everyday when they ran from 30th street station.
I remember MTH doing a railking version but cancelled it from lack of orders. I thought the painting/drawing made it look horrible that is one reason I did not order it.
I believe both versions would only look good in a true scale version including the different models.

I am a little hesitant in buying a resin casting of them, I worked with resins many time and have yet to find one that would be hardy enough to stand up to three rail running, they are also very easy to warp from heat. I know beggars can't be choosey but I thinks I would pass on the resin one.MHO
John
I have been in contact with Ed Duddy. Hopefully next weekend he will be able to supply me with Falvey's and some sorely needed catenary parts.

I almost by accident found a set of Williams Metroliners and purchased them. I have been trying to mold a engineers end, and have frustrated myself more than succeeded. Have casted and tried to make duplicates with minimal success. There must be a better answer, just have to find it.

Will post pix of Falveys when I receive them.

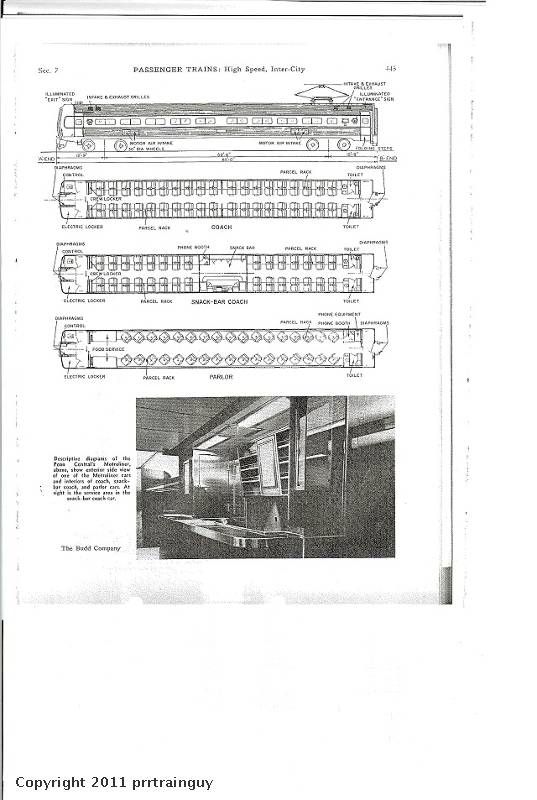
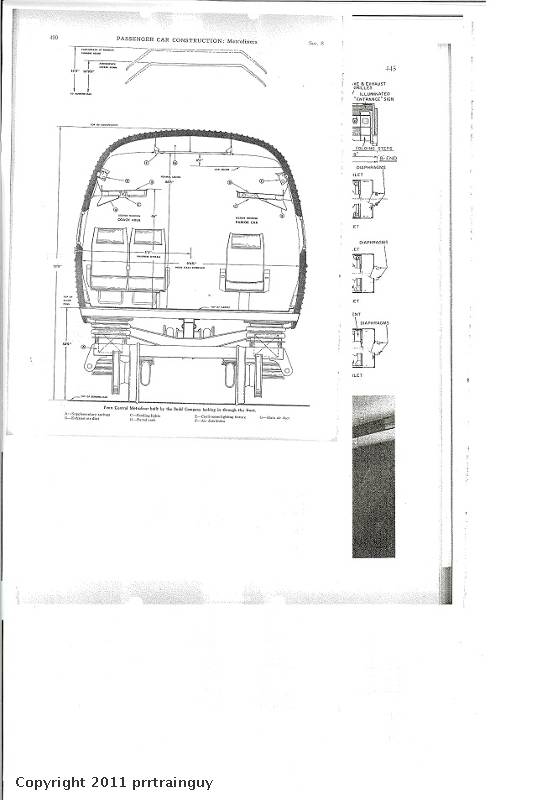
Trying to obtain side view drawings has been a total waste and loss.

Keep plugging away.

mikeg

Oh for a spell checker on forum!
RR Museum of Pa. has changed policy. Last time I published photos from them, it was permissible with mention of them in the caption. Now it seems they want $25 for each time a photo is published, and it is not clear whether that is $25 for each time it appears in a magazine, or for each time the magazine copy rolls off the press. It would be nice if they did not care about internet publishing, but I think I would check.

Harold Vollrath still allows free publication - what a nice guy, and a fellow hobbyist.
quote:
Originally posted by bob2:
RR Museum of Pa. has changed policy. Last time I published photos from them, it was permissible with mention of them in the caption. Now it seems they want $25 for each time a photo is published, and it is not clear whether that is $25 for each time it appears in a magazine, or for each time the magazine copy rolls off the press. It would be nice if they did not care about internet publishing, but I think I would check.

Harold Vollrath still allows free publication - what a nice guy, and a fellow hobbyist.


Nick Zmijewski is the one who sent drawings, no pictures. Am very appreciative, since every other avenue has been fruitless.

Scans are from 1970 Car Builders Cyclopedia.
If your scans are .PDF files, you may be able to capture them this way:

Using the 'snapshot' tool (version 8 or higher of Acrobat Reader), draw a marquee around the intended object to copy to the clipboard. Then open a new file in an imaging editing program such as PhotoShop. In most cases the new file will be the same size as what's copied to the clipboard (I know it is in PhotoShop), then paste the image into the new file, edit-resize as needed and save as a .JPG.

The snaphot tool captures at 72dpi, so enlarge the original if you want to then reduce size while increasing resolution, i.e: 300% enlargement to get 300 dpi resolution.
quote:
Originally posted by PRR Man:
If your scans are .PDF files, you may be able to capture them this way:

Using the 'snapshot' tool (version 8 or higher of Acrobat Reader), draw a marquee around the intended object to copy to the clipboard. Then open a new file in an imaging editing program such as PhotoShop. In most cases the new file will be the same size as what's copied to the clipboard (I know it is in PhotoShop), then paste the image into the new file, edit-resize as needed and save as a .JPG.

The snaphot tool captures at 72dpi, so enlarge the original if you want to then reduce size while increasing resolution, i.e: 300% enlargement to get 300 dpi resolution.


I do not have Photoshop and have "Access snapshot viewer", both Adobe and copied to Word do not open.

I have good resolution in Word version and can copy but "post a reply" does not allow me to paste. Does anyone know how to paste to "post a reply"?


mikeg
it doesn't have to be PhotoShop.
MS Paint, Photo Elements, or any image program should allow you to paste a copied image, which can then be saved as a .JPG, .TIF, or .BMP

'Paint' is an accessory that comes with versions of the Windows OS, beginning with Win97.

this Forum's image posting function does not, I believe, allow for Word .DOC or .DOCX files, as they are not image files, but 'documents'.
the simple way to add an image to a post is to create an album in the photo album section. once that's completed open the album, click 'detach image' right click on the URL up top in the pop-up image to copy it, then go to your post, click the image icon and paste the URL into the dialog line. your photo should now be inserted into your post.
Just a reminder that while the snacks and parlors had single arm pans, the full coaches had Stemmann [ I think I spelled that correctly, maybe one M ] pans that were 'diamond shaped but with a single arm on each side'. The original Jersey Arrows [ PC 100 class ] had em too. I don't know of an 0 ga source.

Also, a small but very visible detail: the cars with "The Fastest Phone in the East" [ the snacks and parlors ] had the white phone aerials on top.

Best regards, SZ

PS Due to catenary wave considerations, the cars on the NEC were operated in back to back pairs, with the trailing pan raised; there was a hard wire [ eg, bolted connections ] link between the two pans.
The shells are on their way to be milled.

Order is 4 coaches, 2 snack bar coaches, one parlor car.

Pantographs are in transit, does anyone know if each car had a pair or single pantograph. Williams has one but that is not the same as proof positive.

Remaining problem is operator end, have not succeeded in replicating them without major bubbles. Will try new mold and direction and hopefully success.

With details on interior can order seats from PSC


mikeg

How much were the Duddy pantographs, and when you recieve yours, any chance you could evaluate how much work it would be to adapt them to the Williams cars?

with regards to the molding attempts, are you cloning cab ends from an existing piece, or did you scratchbuild a pattern? If you're attempting to clone the Williams cab end, I think those may be wider than scale, since originally the Williams Metroliners were designed to accommodate Lionel Pullmor diesel trucks.

When you mentioned bubbles, are they occurring in the mold (I'm assuming silicone-rubber molds), or in the pieces you cast from it?

---PCJ

Last edited by RailRide
quote:
Originally posted by RailRide:
How much were the Duddy pantographs, and when you recieve yours, any chance you could evaluate how much work it would be to adapt them to the Williams cars?

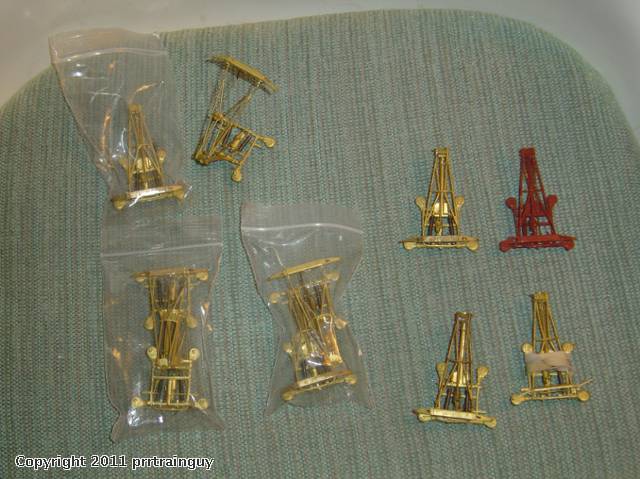
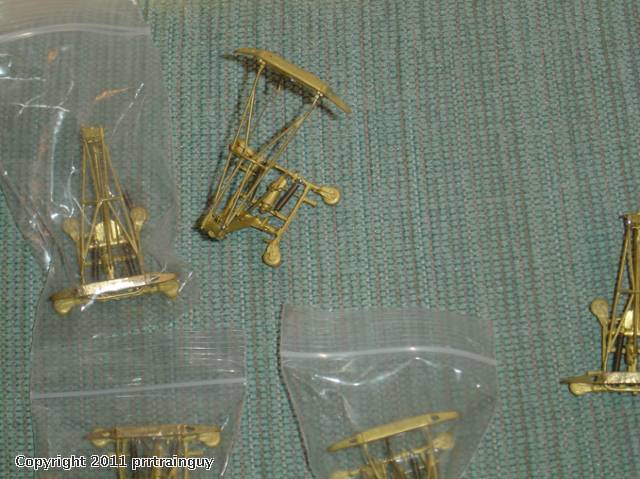
I finally received the Falvey pantographs 5 sets. That is all ED had


They are very impressive and I will find usage for all 5 pairs. I suspect health issues and minimal stock, are problems, everything else was gone that I wanted, but I will try later and see if things are better.

with regards to the molding attempts, are you cloning cab ends from an existing piece, or did you scratchbuild a pattern? If you're attempting to clone the Williams cab end, I think those may be wider than scale, since otiginally the Williams Metroliners were designed to accomodate Lionel Pullmor diesel trucks.

When you mentioned bubbles, are they occurring in the mold (I'm assuming silicone-rubber molds), or in the pieces you cast from it?

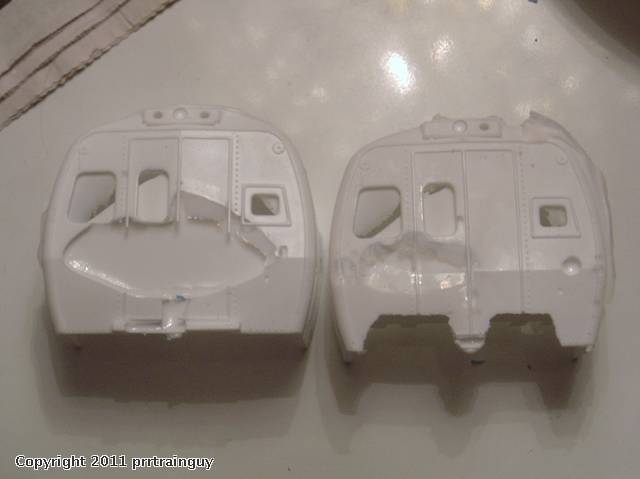
The end I had received is most likely from Williams. The shells that are scale length, match the ends and appear similar to scale drawings. The end is bulky in shape, end and three sides. It is thin and light weight. I ordered more mold material and will try casting it standing and glued to one wall. When I tried modeling earlier I ended up with bubbles first inside then on outside of casting.


As you can see outside leaves much to be desired. I am hoping by casting in different direction I may have success.

I have contacted WBB parts and "not available try again in few months". This end right now is probably last major stumbling block. My aren't we optomistic.

Keep working and plugging along

mikeg
---PCJ
I am going to use the PRR trucks from GGD. How they compare to Atlas I do not know but if not completely correct they are close enough for me.

As a minor addendum, you know you are really getting to be a PIA when you notice Congo trucks on web site when magnified are SP Daylight trucks. Contacted Scott and assurances that the Congo will have PRR trucks.
I would second Richards comments. In O, the Atlas Horizon car trucks would be the closest. The Bachmann ones in HO are the most accurate outside of brass Metroliners I have seen and the first several years had beautiful sprung Faively pantographs. The trucks are also very close to the late production RDC trucks and similar to the ones found under the Atlas Horizon cars. The GSC trucks used under the Congo cars were not the came.
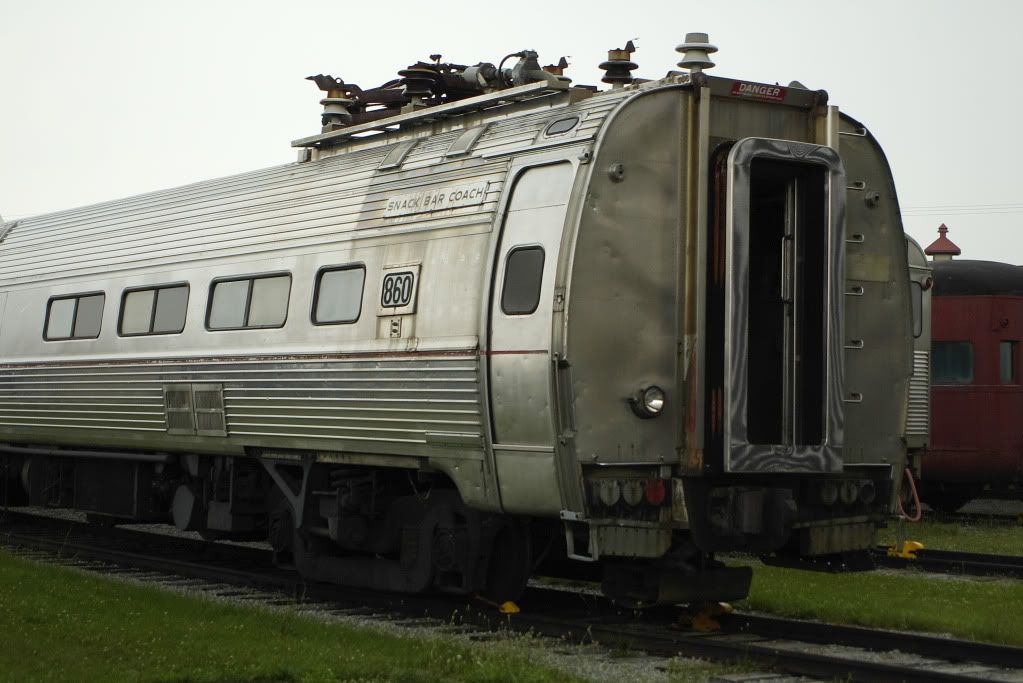
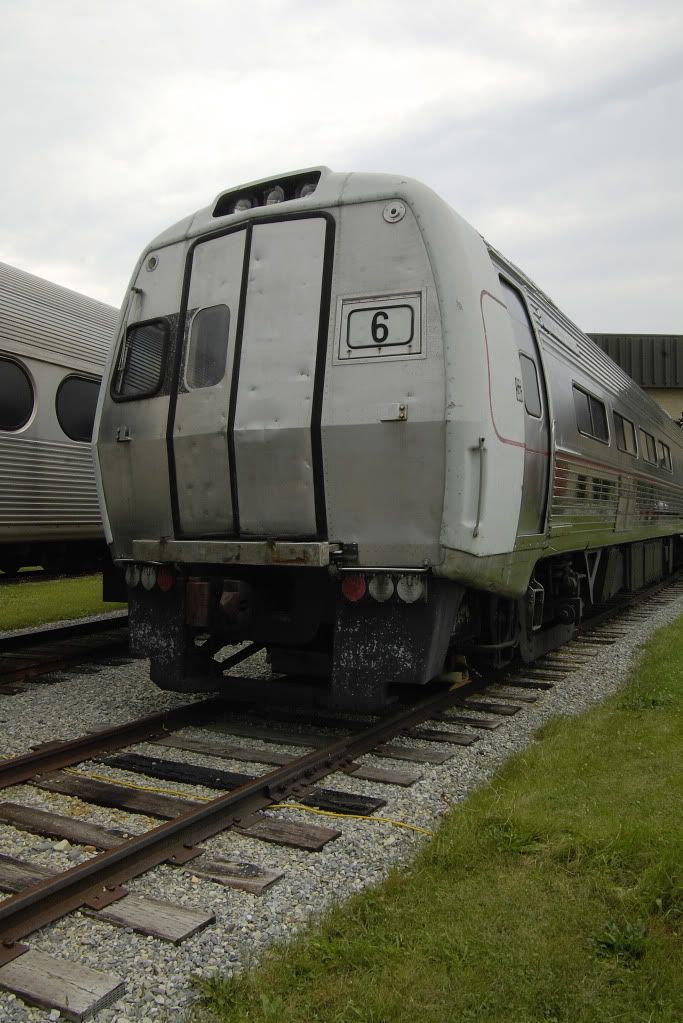
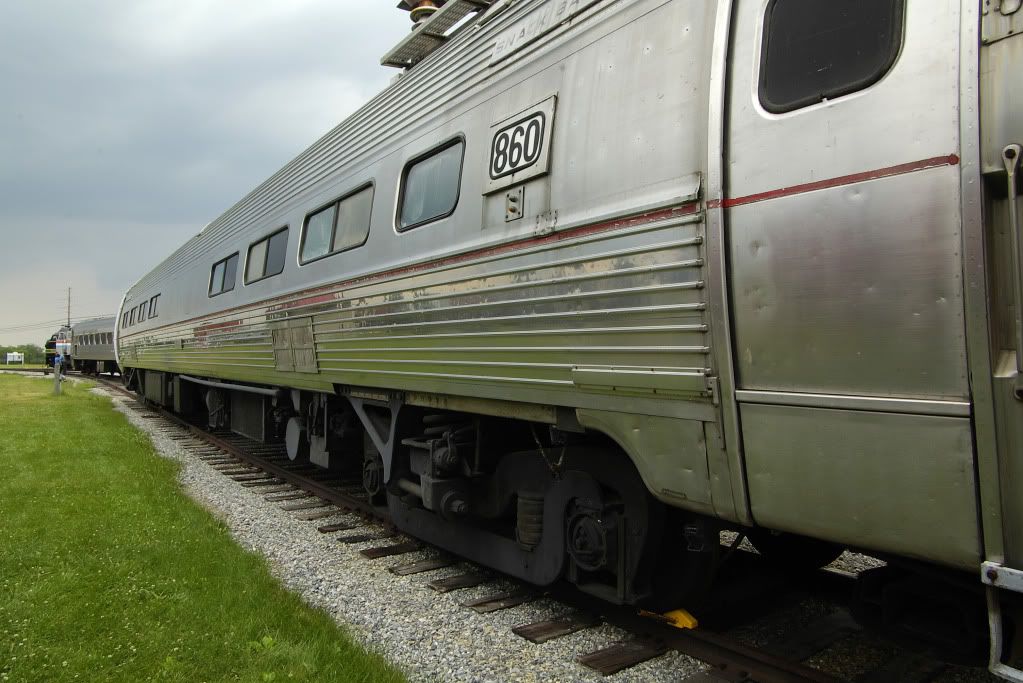
After all this, I forgot I have photos I took of the last intact Metroliner car in PA. Still in it's PRR / PC striping, it is the rare cafe car. I got the front with the gap in the pilot that would make a claw coupler fan proud, detail of the truck side frames and the rear, which so many photographers forget to document. Great set of cars. Too bad they didn't run as good as they looked for their era.


quote:
Originally posted by GG1 4877:
...
Too bad they didn't run as good as they looked for their era.
...


What was the issue? A couple of NRHS friends of mine and I rode them round trip from New Carroltown to Baltimore one day in the early '70s while out railfanning and I thought they were quite amazing. They could accelerate to 125 MPH in about a minute and rode great at that speed. We got to stand next to the operator the whole trip. Was one of the good days for me.

Richard
The biggest issue was their reliability. Typical government specification had the requirement of 160mph when modified Silverliners were doing 156 already in the mid 60's. Budd and the PRR rushed these into production without a whole lot of testing and it took most of 67 and 68 to get them into regular service.

They ran fairly well until just before the mid 70's and then went into the rebuild program. GG1's pulling Amfleet held the Metroliner schedules until they returned to service in 77 or so. By the early 80's the Metroliner cars were working the Philly the Harrisburg service and AEM7's with Amfleet cars were pulling Metroliner trains.

I saw the Metroliner cars twice as a child. The first time was at Metropark, NJ on a trip to DC circa 1977. We were riding an E60 pulled "local". The second time was outside of Paradise, PA in the early 80's after the rebuild.

These cars were certainly fast and ahead of their time, but ultimately the reliability lead to their demise. Too bad, these still look modern and sleek today.
quote:
Originally posted by GG1 4877:
I am thinking the reversing headlight is one. Still looking for the other. I like challenges.


Installation of MU and HEP connections on the ends appears to be the other.


Yes, the MU cables [ no "HEP", since each car self contained ] in lieu of the electrical connections underneath an S-W coupler, were what immmediately struck me. And 'struck' was one, if not the, reason for the change: hitting a deer, say, at 110 mph did not do those pin connections a lot of good, resulting in interwire shorts or grounds.

I think the 'reverse' hdlt was always there, from memory. The other change might be the coupler, but it's hard to tell -- and anyway they usually ran with adapter knuckles mtd on the end cabs anyway, at least in the early days. Also, I thought the secondary suspension was an air bag rather than a coil spring, but perhaps my memory failed me again...

Best rgds, SZ
quote:
Originally posted by PRRTrainguy:


As you can see outside leaves much to be desired. I am hoping by casting in different direction I may have success.

I have contacted WBB parts and "not available try again in few months". This end right now is probably last major stumbling block. My aren't we optomistic.

Keep working and plugging along

mikeg


Wow, nasty. What material are you using for the mold itself, and from which direction is the resin being poured in from?

I'm thinking the best way to clone this part is with a two-piece mold, one for the inner face, and another forming the outside. nest one inside the other by stacking the molds, then pour the resin between them:


---PCJ
I used MictoMark mold materials with less than desirable results, partly because I had never done anything like this before And the unusual shape, namely end and three sides.

I ran out of material and have ordered more and will try in different configuration.

Williams replied this time, namely not going to happen. No more ends in parts.

I did notice the Lionel end of car model had a very good model of Metroliner end and contacted parts and received a strange reply, namely

"Here in the service department we don't sell any finished goods. There are several dealer who will break sets up. Check with C.P. Trains out of Crownpoint IN, and then there is Hobbyspeed.com. They might be able to assist you."

I will try contacting dealers as suggested but honestly doubt any dealer will dissasemble a product and sell me a part of a car.

The reason for pursuing this part if it fits is I will not have to figure out how to fill in extra window.

Stranger and stranger.


FWIW the video you posted did help markedly in explaining some of ways to CORRECTLY make a 2 part mold. Thank you

Contacted CPTrains and they expressed wonder that parts at Lionel referrs questions to them since they are not even a service center. Strange

Anyone have any idea how to get a straight answer from Lionel for a straight question. If not perhaps buying complete car is only answer, If so who has it

mikeg
In looking at the sample end castings, it seems as though air pockets got trapped inside the mold.

This is a problem even with one part, flat molds sometimes, let alone two part molds.

It could be also that the resin is setting up too fast in the mold, becoming thicker and not allowing entrapped air to rise out of it.

Somehow, relief holes need to be put into the mold to let any the air trapped inside escape during the pour.

Any rods or whiskers on the casting from those relief holes can be cut off and smoothed down later.

Ed Bommer
Thank you for help RailRide and Ed, I really appreciate it and as soon as I can actually cast an end that looks decent I will post it.

On three rail O Gauge trains under Budd Metroliner topic, I have posted pix of newly milled, not really scale, 85 ft Metroliner shells, namely parlor, snack coach and coach.

Eventually will be able to apply Ed Duddy's Falveys to them.

mikeg
I should have also linked you to a company whose products I have used, Alumilite.

One of their tutorials applies particularly well to your application: Making a Slot Car mold (which also links to the procedure for casting a slot car body from the resulting mold). There's also a tutorial on Squish Molding, and Molding a Taillight.

In the second tutorial, the vent holes that allow excess resin to rise out of the upper mold half (which would be the carbody-facing side of the casting in your case) as it's pressed into the lower could be the rear-ward extensions that the chassis screws go through.

By the way, do you have hi-res versions of the HoD pantograph photos? (particularly slightly overhead side views and closeups of the arm assemblies) If Duddy doesn't have anymore, I may need photo references to scratchbuild my own, most likely from brass rod/tubing/sheet. My email is in my profile.

---PCJ

Add Reply

Post

OGR Publishing, Inc., 1310 Eastside Centre Ct, Ste 6, Mountain Home, AR 72653
800-980-OGRR (6477)
www.ogaugerr.com

×
×
×
×
Link copied to your clipboard.
×
×