I am really unhappy with my work station as of the past year.  I am P48 guy, therefore I end up rebuilding  in one way or another all my equipment.  Can you guys show me what your areas look like so maybe I can get some better ideas as far as layout goes etc?  I would like room for a flat screen monitor for reference and online access, and a nice open space for building.


Thanks as always!

Original Post

Replies sorted oldest to newest

Be interesting to see what others are working with.  I don't have pics of my old workbench, but it was about 8' long on top of old cabinets and a cheap countertop, which actually wasn't half bad.  I think I would use a more durable top next time, possibly having a sheet metal shop make one from stainless or something.  On the left was my computer area, and I usually used an old laptop for work area use.  I had this on an old power supply that was meant for under the old tube style monitors.  Basically it took up about 14" by 16", and had power outlets on the back and switches on the front, controlling the individual outlets on the back.  Pretty nice to be able to control one outlet at a time, or kill all when I was done for the day.  Something like what I have linked to below is about all I've found now.  I think for my next workshop though I'd use an old computer with a wall mounted swivel mount for the monitor.  It would leave worktop space and I could adjust it if I was working on something else in the shop.  Overall, not a bad garage workshop.


http://www.amazon.com/TLP76MSG...words=ultra+ult31570

Going one further. I believe alot of us buy more than what will fit on the layout, i have many dozens of cars still in the boxes and wonder if and how you keep your reserve fleet other than stacked in a closet. And how do you keep many of your cars on the layout between use dust free. I am laying pieces of newspaper over cars on the layout.

here is what Im working with.   I am mainly looking to see how you guys might store stuff, easy to find/reach. I plan on redoing the upper cabinets.  Making built in's with MUCH better lighting that is the same as what I use on my layout. I built all the lower cabinets and I wish I would have just finished the entire room with cabinets back then!

IMG_6773

IMG_6774

IMG_6772

Attachments

Images (3)
  • IMG_6773
  • IMG_6774
  • IMG_6772

Patrick

The workbench and area is important to keep one motivated on projects.  Adequate lighting which is overall room lighting as well as individual lamps on the work surface are very helpful.   Overhead lighting casts too many shadows for my tastes.   The color temperature of the light sources are important if you do any weathering or painting in this area.   Full spectrum lights are 5000K and approximate outdoor lighting.  This source will create some problems with digital cameras as it tends to saturate colors easily.   LED or CFL are good sources.   Standard light bulbs are 2700K and do shift colors but generate excellent shadows for really small work.  CFL is flat and doesn't any definition on texture. 

My main work table set came from an office supply store and is a normal desk height.  The back shelf unit is very useful for keeping small tools and parts out fo the way.   It also tends to collect half compeleted projects and "ideas". 

A comfortable chair helps.   The tan table was from Costco and is handy to roll out drawings and documentation.  

My work area is "C" shaped and it allow me to get at a lot of things without getting out of the chair.   My data files are to the left.


The mill, lathe and spray booth is out in the layout room.  


Hope that this helps give you an idea or two.


Gene D


spt detail 027

spt detail 025

spt detail 026

Attachments

Images (3)
  • spt detail 027
  • spt detail 025
  • spt detail 026


Here's my work area  being finished.  I'm in the final stages of finishing my basement for a layout and have this 14' x 14' room reserved for a work area.  I agree with Gene D's suggestions on a nice work bench and adequate lighting.  I put 6 20-amp and 2 220V outlets in the work area.  The alcove in the back is under the fireplace and will make a nice area for a book shelf on top and storage cabinet below.


The photos that have been posted here are helping me with ideas on building storage areas for tools, unassembled kits, works-in-progress and other stuff.  I'm still sketching track plans.  Some of the plans have a peninsula in the work area but it will be high enough to have plenty of storage beneath.    


WorkArea 001

Attachments

Images (1)
  • WorkArea 001

Phill wrote: "Going one further. I believe alot of us buy more than what will fit on the layout, i have many dozens of cars still in the boxes and wonder if and how you keep your reserve fleet other than stacked in a closet."


I use plastic bins designed for under bed storage they can be stacked,sorted by car type and have covers. Purchased at Target mostly.

For cars without boxes I line them with felt from Hobby Lobby with polyester sizing under

the felt.  I took a several year break from the Hobby and they stored the trains fine.

Proto 48 Patrick:  Not sure how much space you have, and I am assuming you are contemplating an entire revamp?  If so, here is my 2 cents.  Move everything to the center of the floor - create a large island, high enough to stand at.  Have a cut out where you can sit on a barstool if you want to sit and paint, etc.  Cabinets would be under the large 'island.  Run test track down middle of bench area.  Perhaps off set the island from room center, and place shelves one wall - floor to ceiling.  That way you can have display at the top (like what you have now) and parts, projects on open shelves closer to middle/bottom.  Use clear boxes (like from Target) so you can see what is in them.  Mark stuff with labels so you know where to find stuff.  If you give me room dimension I can sketch out something along the lines of what I mean. 

Patrick,

I would make several comments on what you have. First, I would add more focused lighting along the lines that Gene suggested. Second, you are a big fellow and looking at your bench there seems to be no place for your knees. Either they are against the cabinet doors and you are leaning way over, or you are sitting sideways. You need a benchtop hanging over so you can face it head-on. Since you already have everything constructed, I would suggest adding a second top surface over the present one. It can either hang over permanently or slide out when you want to use it. 

I have both on my bench. In the area of cabinet doors the top is flush and I must stand to work there. Other areas are indented to provide knee space. I much prefer those locations.

Ben B

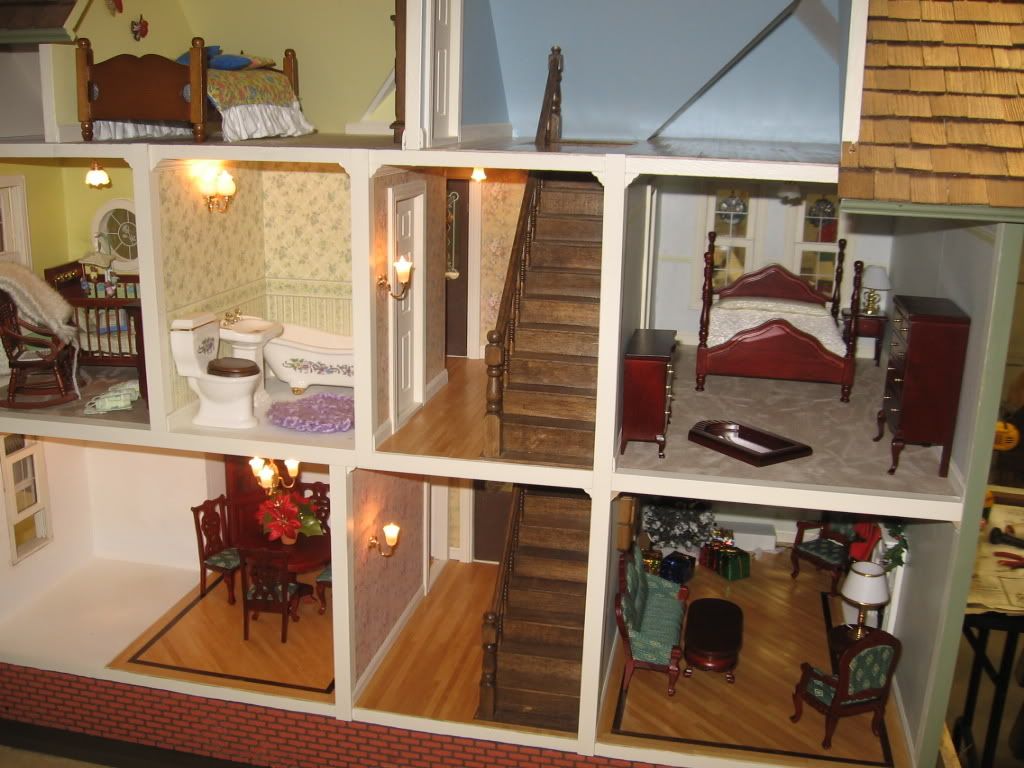
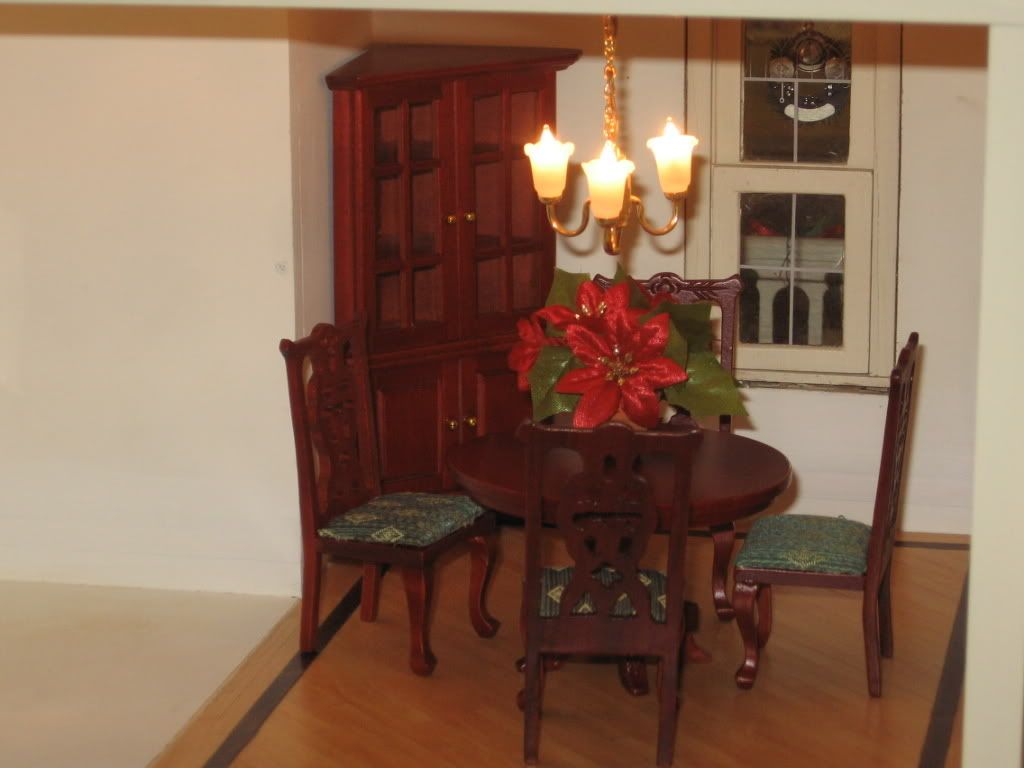
Mike CT:  That is a very nice dollhouse you have  in your work area.  Did you build and finish or did your wife.  Someone did good looking work.  I built several dollhouses for my mother many years ago and I believe she enjoyed the moving and redecorating the dollhouse more that any thing else she owned.  If it is for a daughter, you are giving her a start in another great hobby.


Happy railroading (and other hobbies)

Don

Originally Posted by Ben Brown:

Patrick,

I would make several comments on what you have. First, I would add more focused lighting along the lines that Gene suggested. Second, you are a big fellow and looking at your bench there seems to be no place for your knees. Either they are against the cabinet doors and you are leaning way over, or you are sitting sideways. You need a benchtop hanging over so you can face it head-on. Since you already have everything constructed, I would suggest adding a second top surface over the present one. It can either hang over permanently or slide out when you want to use it. 

I have both on my bench. In the area of cabinet doors the top is flush and I must stand to work there. Other areas are indented to provide knee space. I much prefer those locations.

Ben B

Thanks Ben,

    I do have a little nook I can sit with my legs under the tabletop, its where the trash bin is now (for now).   I think I will remove all the cabinets above the work surface and build new ones that are a little higher so I can put much better lighting underneath.  I was going to do this all this weekend but I think it will be more of a cold weather/stay inside type of job for later this year.


I do like yours and Genes work space. 

Thanks everyone for the ideas/help

Thinking about it today....

  I think in the center of the long side, below the small basement window, Im gonna cut out 36" of the lower cabinets and remove the shelves above the top and put a Monitor there.  That way I have a larger leg area and can sit close to my monitor counting alllll those rivets! 

Huh, what do you guys think?

in the midst of a move so my old workroom is dismantled, but my new one will not be that different, as the old one worked well. the things I liked we're a) as long a workbench as possible as during projects it got pretty crowded b) importantly, a large piece of glass on which I worked ( great because it was easy to clean, easy to cut on, didn't really take glue or paint and if it did, I could scrape it with a razor blade) and c) both overhead and task lighting. I also had one opposite with wood shelves behind me on which all paints, glues and spray cans were stored. I had a rolling desk type chair and would just roll between the workspace and the tools/paints. brushes I tended to keep near the glass surface in old yogurt containers. for details, I had plastic shoe boxes, all labelled, and those inexpensive plastic containers with drawers (also with labels). 


the most important thing for me was not to waste time looking for what I needed. worked pretty well overall. 


jerrman

I apologize for this off topic response. Work space allows for a little more than model train work.  
Originally Posted by DGJONES:

Mike CT:  That is a very nice dollhouse you have  in your work area.  Did you build and finish or did your wife.  Someone did good looking work.  I built several dollhouses for my mother many years ago and I believe she enjoyed the moving and redecorating the dollhouse more that any thing else she owned.  If it is for a daughter, you are giving her a start in another great hobby. The doll house was a kit (pretty well engineered) purchased for the first granddaughter, Felicity, (10 years in November). It went to my daughter's house and then back here for assembly. It has been remodeled and is yet to be finished. I believe the company that produced the kit has since gone out of business.  I'm not sure what the politics are, as to why it is here and not with Felicity near Philly.  I remember that a lot of the trim material was sub-standard, and replaced via warranty.  The granddaughters always seem to find it fascinating.  I spent some time lighting the house.  


Happy railroading (and other hobbies)

Don


Last edited by Mike CT
Post
×
×
×
×
Link copied to your clipboard.
×
×