Evolution of my "temporary" O27 layouts

Sub-plot: use of easements with O27 curves for better appearance and operation

I have just built a 36"x 138" table for an O27 table-top tinplate layout. This is in a friend's house where I often visit, so it is a secondary layout for me. I am kicking around ideas for different track plans and wondered if someone else might want to throw in some great ideas which I maybe haven't considered. Or maybe someone can use my ideas! 

Here are my planning guidelines:   

Flat table-top layout with conventional O27 track; back and ends of layout are against walls

Continuous running for one or two trains

up to three pairs of 1122 switches and a pair of manual O27 switches (I don't want this to get too complicated)

Dual reversing tracks preferred

Some disconnected "fiddle tracks" are acceptable

I have O27, O34, and O54 curves in O27 profile track and I like to use easements as much as possible

Minimum cutting of track pieces. I have some Marx 11.2" long straights besides the usual O27 pieces.

Construction is not permanent; I like the idea of being able to change tracks around if I want

I might want a separate circuit with no switches for old "fat wheel" trains  


And here are some of my ideas so far: 


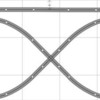
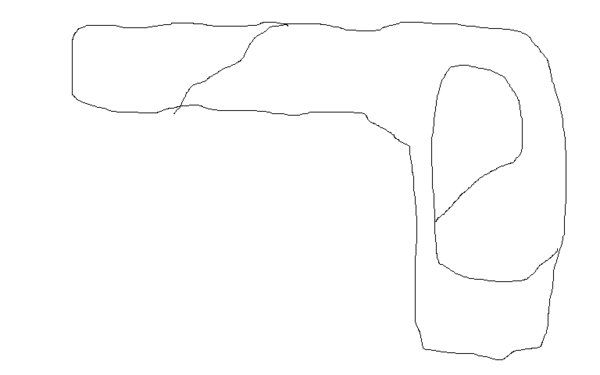
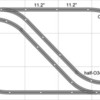
O27-loop-to-loop-32x138


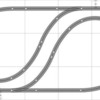
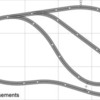
O27-LOOP-TO-LOOPS-A


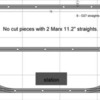
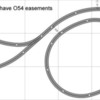
Oval-and-loops-32x138d


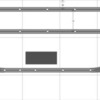
Oval-and-loops-32x138g5

Attachments

Images (4)
  • O27-loop-to-loop-32x138
  • O27-LOOP-TO-LOOPS-A
  • Oval-and-loops-32x138d
  • Oval-and-loops-32x138g5
Last edited by Ace
Original Post

Replies sorted oldest to newest

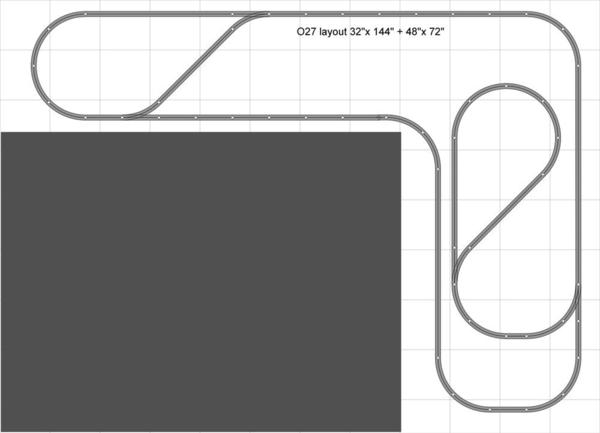
Bill, I highly recommend the AnyRail software, which is fairly easy to learn. I just picked up on it a few months ago from a recommendation on a forum. The free version is good for up to 50 pieces of track, which is adequate for the mostly smaller plans that I like to do. There are some tricks to working around the 50-piece limit, mainly by using straight "filler" pieces which you can stretch to any length. I worked up this approximation of your plan in just a few minutes!


Bills O27 plan

Attachments

Images (1)
  • Bills O27 plan

Bill, with your AnyRail plan I just inserted a rectangle to blank out part of the grid. You can specify the size of the rectangle and just drag it into position.


I have my first track down on the table today, so far just a starter oval with compound curves (O54-O34-O27) and a wind-up train. I bought an old army blanket for a dollar and put that down first as a table cover. Olive drab is just right! Photos coming ...

I don't know if you're thinking possibility of more than one level but... it really more than doubles the fun and amount of space available.  One train crossing above another is really cool.  Like a lighted passenger going through a trestle bridge above a freight.


As far as laying out the track, I'm old fashioned.  Draw something up on paper, then start laying down, trying to visualize different patterns, and pick something you like.

That reminds me of the way I did it when I was a kid in the 50's.

"...specify the size of the rectangle and just drag it into position."

I don't know why, but when I read the directions I just couldn't follow them. I'm pretty sure that the gray matter between my ears had nothing to do with it. ;-)


And yes, woojr, I'm planning an elevated tier for my passenger train made from MTH Realtrax. But I ain't good at visualization either! I'll cut some 2x4 into little trestles and arrange it according to how much track I have; ingenious, huh? This is the plan I came up with but it contains too many flaws for it to work.

Attachments

Files (1)

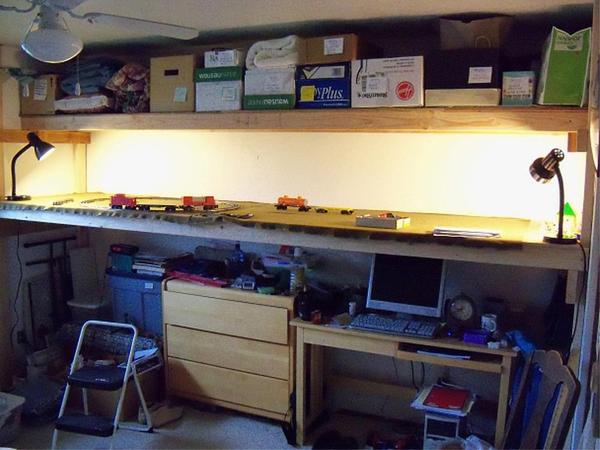
Photo shows how I have built this layout table in no space at all! It fits over existing furniture, and it includes a long storage shelf above. Under $50 for lumber, a few pieces salvaged from materials on hand. There are no attachments into the walls; it is all suppported on simple 2x4 framework at the ends and the whole structure is wedged between the end walls. The train shelf is 52" high and the upper storage shelf is about 74" elevation.  


2012-2426-train-table-3x11

It has taken me a while to figure out some of the details of the AnyRail software. For the most part I find it easy to use and with very convenient features. The latest update provides an easier way to rotate pieces.       


To add a rectangle with AnyRail:

Click "Insert" tab

next to "add rectangle", input the dimensions desired.

Click on "add rectangle", then click where you want to put it.

Or, click and drag from "add rectangle".

Then the rectangle can be dragged around, or use arrow keys for positioning it.          


The filler tracks turn brown when stretched out long, unless you go to "settings" and uncheck "alert on flex too long". It took me a while to discover that. To keep a filler piece straight when you stretch it, hold "Shift".          


I have a bunch of old Marx O34 curves which are often useful with other O27 track. They aren't in the AnyRail track library but you can make your own by right-clicking on a filler track, select "curve flex...", specify "45 degrees" and "16.5 radius". Copy and paste them to easily make more. When dragging them, be careful not to click on the little X's which are used to reshape custom curves.          


An upper level is a good possibility which I will consider after I assemble more track on the base level ...  

Attachments

Images (1)
  • 2012-2426-train-table-3x11
Last edited by Ace

I built a loop-to-loop setup to try out because I like the easy random-routing effect with non-derailing switches. I used O54 easements leading into most of the O27 curves. This plan shows how two loop-to-loop circuits can fit into the space, but I actually built only one of the circuits for trial.  


Loop-to-loop-7

I found that I really dislike the look of trains lurching from straight track directly into an O27 switch curve. The next plan shows a different arrangement with O54 easements into every O27 curve, including the switch curves (except for diverging into spurs). And it's all with standard O27 track pieces, no cutting required. I will build this or similar arrangement next. 

Loop-to-loop-9d

Attachments

Images (2)
  • Loop-to-loop-7
  • Loop-to-loop-9d
Last edited by Ace

An up-and-over with a 270-degree turn and a 5-inch climb comes out to over 6% grade. I'm building flat for now for the sake of simple construction and easier cruising. Also considering this variation to include a separate small oval ...  

Loop-to-loop-8b

O54 easements on ALL O27 curves, except diverging into the spurs.

All standard O27 track sections, with O27 and O54 curves.

Attachments

Images (1)
  • Loop-to-loop-8b

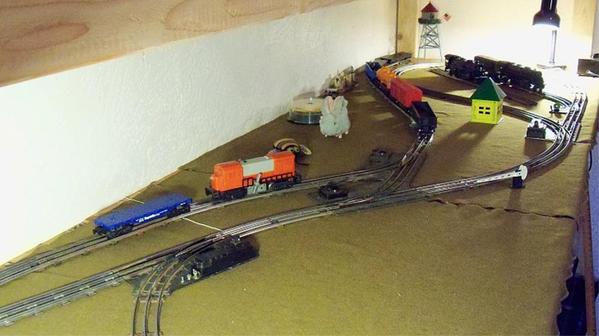
This is what I have just built. I like it pretty well because all of the O27 curves and switches have O54 easements at each end, excepting only the switches to the spur tracks. That way the trains flow into the sharp O27 curves much more smoothly. The two switches for the 'mainline' loops are 1122 non-derailing switches modified for fixed voltage supply. The long spurs provide ample storage tracks.


I'm thinking I may add an elevated oval with O27-O34-O54 compound curves. This is a temporary layout and eventually I will want to rearrange it into a different track plan. It's a fun diversion from "serious" model railroading !


Loop-to-loop-8k

2012-2434-O27 layout

I cut an old army blanket for a table cover. Simple and cheap, it reduces noise, helps hold the track in place and it's the right color for a scenery base!

Attachments

Images (2)
  • Loop-to-loop-8k
  • 2012-2434-O27 layout
Last edited by Ace

Ace, just came across this post, and I must tell you that I really like the use of easements with these layouts. I used them extensively on my HO layout, with both handlaid rail and turnouts as well as commercial Shinohara flex, using the John Armstrong calculations. When I built my Hi-Rail layout about 4 years ago as an around the walls setup above the HO, it was a whole different ballgame, but I knew that going in. Does your methodology for easement construction translate when using Atlas O or similar track. I wonder if you could expand on that a little. Thanks


Bob Di Stefano


Bob, to be more accurate I should call these "compromise easements" because I'm using sectional track pieces with different fixed curve radii. But it gives a substantial improvement over joining a minimum radius curve directly to straight track.


I'm not personally familiar with Atlas O track but I see that they have a good selection of different curve radii. Any wider radius curve between straight track and a tight radius curve will give some easement effect. On my larger O-gauge layout I use O72 easements for O54 curves; in other words, I don't join the O54 curves directly to straight track. And it doesn't widen the overall diameter of a curve very much. The easement section only needs to be about a carlength long to be effective, usually just one section of track.


If you want to try this with a different brand of track, the best thing is to experiment to find what looks good with a train running through it. It may be a trick to minimize cutting of pieces to fit, depending on the track plan you are trying to build. The plan that I built, shown above, didn't require any cutting.


In HO I did easements mostly by eye with flextrack, just so they made smoothly flowing curves that looked good. With N gauge I sometimes used sections of 19" radius as "compromise easements" for 9.75" and 11" radius sectional track.


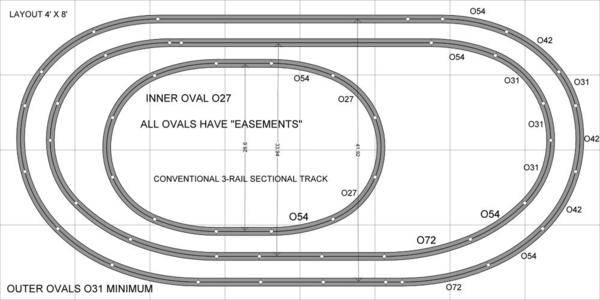
Following is an example of simple ovals with easements using O-gauge sectional track, and the fixed radii juggled to make reasonably concentric curves.


ovals three tracks-4x8

Attachments

Images (1)
  • ovals three tracks-4x8

Fred, I don't usually connect O27 and standard-O track. In that previous image, the inner circle is O27 track and the two outer ovals are standard-O with O31 minimum curves. If you click on it for a larger image, you should be able to read the info.


Old Marx O34 curves and Marx "long straights" can be really useful with O27 track. It took me a while to find a good cheap bundle of Lionel O54 curves in O27 profile track. I like to have a variety of sections to make compound curves and "compromise easements", and to minimize having to cut pieces to fit.


The old conventional 3-rail track is somewhat flexible and you can often "fudge" connections without causing kinks, even though you can't always make the connections close when drawn with track planning software.


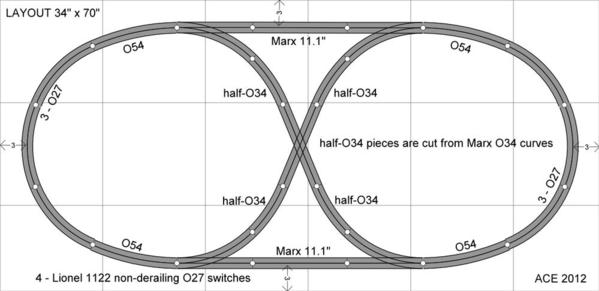
Here is an example of using Marx track pieces with Lionel O27. I cut two O34 curves in half to make four O34 half-curves. With a couple 11.2" Marx long straights, this configuration with easements can be made with otherwise standard pieces of O27 track.


Easements-A-34x70

Attachments

Images (1)
  • Easements-A-34x70
Last edited by Ace
Ace, I missed the note in the lower left. I was reading on my iPhone. Makes sense now. Since thread was primarily O27 and Marx, I missed the transition to different easements for both 0-27 and O. Do you ever use 042 with o27 and the Marx 0-34? I figure 0-72/0-54/0-42/0-34/0-27 would make a nice easement I have a rail bender with a bunch of templates so I can smooth out the transitions. I only use 0-31 straights on my fastrack loop for trestle bridges. I really do not like ballasted bridges.

Fred,

O42 comes in 30-degree sections (12 to a circle) while most of the other sections are 8 or 16 to a circle. That makes it trickier to combine different radii for a typical 90-degree or 180-degree curve arc, unless you cut pieces. I have found few pieces of O42, it seems harder to find secondhand. I have occasionally used a few pieces of O42 for fitting special arrangements. I like to stockpile whatever I can find when the price is right, then eventually I may find a use for it.


I'm interested to know about your rail bender. I had been contemplating trying to custom bend track before I managed to find different radii.

Ace,

After pondering for awhile last night while helping my kid do his math homework, I decided to do some myself.

I got up early this morning to test my hypothesis.


If you think about curves as turnout angles instead of sections of a circle, it starts making a lot of sense.


o-27 turnout is 45deg.

0-42 turnout is 30 deg.

o-54 turnout is 22.5 deg.


 The 12 sections per circle is not an issue because it is not a measure of length but a fraction of the circumference. So is the 8 and 16. And once you start mixing it is no longer relevant.


While playing with sections of 0-27 , 0-42, and 0-54. (Still waiting for my e-bay o-34.)

I realised that as long as they are used in pairs the 0-42 is no trickier than the others.


But what was really cool is when I realized that using all three, it makes an almost perfect parabolic easment which is as protoypical as you can get with unmodified sectional 0-27.


About 36" diam by 22" depth.


IMG_3913

IMG_3914

IMG_3912

Attachments

Images (3)
  • IMG_3913
  • IMG_3914
  • IMG_3912

Ace,


 Regarding the rail bender.

I got mine from Richard Reichard.

I think he may have mentioned it in this forum that he was going to York.

I can also send you his email or if you Google his name with you can find an article he wrote describing his switch making technique. and sometimes his ordering list.


It is made of different round profile dies with bearings depending on the track you are using.

Based on concept of three roller sheet metal roller/former.


Nicely made and well worth the $50.00.

You might be able to modify a hand held plier type tubing former / bender because they use aluminum dies but I like to support my fellow hobbyists and I could not make if for less money even if I had a metal lathe.


I also prefer rolling to bending because it is more smother curve. 

With a helper adjusting the roller as you bend. Might take a little practice

It is possible to make compound curves.

One note: It does require dismanteling and rea assembling the track.


He also gives you a full set of templates for O27, O31 & Standard gauge, Super-O and AF-S track with dimensions for making:


Manual includes templates for: O27 profile -  O27, O50, O58, O66 & O74
                                                      O31 profile - O31, O64, O75 & O86

         Super-O profile - O36, O48, O60 & O72

         Standard Gauge -  O42, O57, O72 & O87

         AF-S profile - S38, S46, S54, S62, S70 & S78

Very detailed instructions with lots of tips.


I also got a set of manuals to make custom turnouts without the curve for yards 15 Degree , double cross overs, wyes and a four way yard switch (similar to Ross 4 way) all using off the shelf 0-27 pieces. Also 0-42/054 curved switches.


Again I want to thank you for the easment discussion because it opened up a lot of new possibilites that i was not even aware off or thinking about.


FMH


Ace,

  I really like your small track designs.  I only set up during the holidays and want to try a new layout this year.  First, let me say that I probably have too many trains and buildings for the area that I have but, I've made it work.  My table area is simple 8' X 8' with another 4' X 8' board tied into the side. So, essentially, I have a 16' run down the backside.  If you can see, I have an outside loop with two trains running on the same loop.  The inside loop (within the town) is seperate. Then, my figure eight with tunnel (Rudolph Train) is also.  All the track is MTH.


     I "MAY" try to add some board area by cutting a 4'X8' board diagonally to the L' shape area.


    Do you have any suggestions or ideas that I could get max run area with what you see and what I have????..... If I don't use the figure eight tunnel, that would be fine.  I could keep it elevated with MTH trusses the entire time.  Again, I only set up during the Christmas season and then take it all down...LOL.


Thanks,

Smitty


001

002

003

Attachments

Images (3)
  • 001
  • 002
  • 003
Originally Posted by Smitty22:
Ace,

... Do you have any suggestions or ideas that I could get max run area with what you see and what I have????......


001


Four trains on three separate circuits ... it looks great, I wouldn't want to tell you how to rearrange it, that's very ambitious for a seasonal layout ! You can always try something different next season !

Originally Posted by Ffffreddd:

Ace,

... The 12 sections per circle is not an issue because it is not a measure of length but a fraction of the circumference. So is the 8 and 16. And once you start mixing it is no longer relevant.


While playing with sections of 0-27 , 0-42, and 0-54. (Still waiting for my e-bay o-34.)

I realised that as long as they are used in pairs the 0-42 is no trickier than the others...  

IMG_3912

Fred, Thanks for your interest and the photos and rail bender info. 


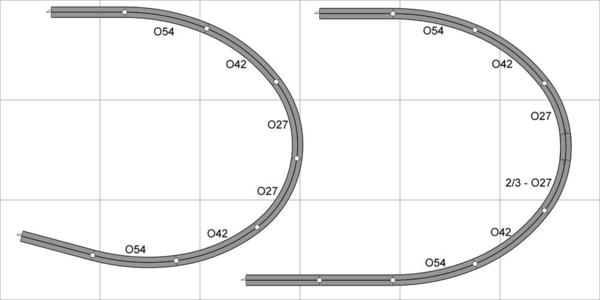
In your photo above I see that you have arranged your half-circle curve with

O54 + O42 + O27 + O27 + O42 + O54.

And it makes a pretty good curve.   However - where you said:

"The 12 sections per circle is not an issue because it is not a measure of length but a fraction of the circumference. So is the 8 and 16. And once you start mixing it is no longer relevant."


These are the track sections in your photo and their intended degrees of curve:

O54 + O42 + O27 + O27 + O42 + O54

22.5 + 30  + 45   + 45   + 30   +  22.5 = 195 degrees.


So it's a bit more than 180 for a half circle, although the pieces can be "fudged" to fit and it looks pretty good. But I can see that the joints aren't entirely square in that photo. This is what I meant about O42 being harder to integrate with O27 and O54, or O31-O54-O72. Still, it's better than straight track joining directly to an O27 or O31 curve.


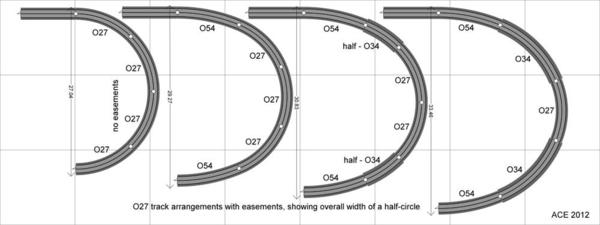
What I might have done to get the easement effect with more perfect track geometry:


O54 + O27 + O27 + O27 + O54          29" width

O54 + half-O34 + O27 + O27 + half-O34 + O54     31" width

O54 + O34 + O27 + O34 + O54           33.5" width


widths of 180 curves with easements


These are some of the other combinations I have used (or drawn) to create an even 180 degrees for a half circle:


O54+027+O27+O27+054

O54+034+O27+O34+054

O54+O31+O31+O31+O54

O72+O54+O31+O31+O54+O72

O72+O54+O42+O42+half-O31+O42+O54  (O42 used in a group of three)

Attachments

Images (1)
  • widths of 180 curves with easements
Last edited by Ace
Ace, I understand what you are trying to say but I disagree in that a parabolic curve does not need to add up to 180 degrees to be correct because as I said previously that fractions of a circle are only relevant to the circumference of a definitive circle of constant radius or diameter for that matter. A 30 degree arc or curve or 1/12 of a circle at a diameter of approx 42 inches is not the equivalent of a 30 degree or 1/12 of an approx 27" circle. Adding the angles of the turnouts which is essentially the angle from the tangent that the turnout makes if a straight is added for different diameter curves/arcs is not the same as adding those fractional degrees on the same diameter circle. That is why I said that when adding mixed radii arcs that the fraction of the circumference is irrelevant. Not an apples to apples linear equation. And on a true parabola, every point will have a tangent with a different angle if measured at the same distance away from each point. Sectional track will always be an approximation. And the more pieces of small and different radii the better the approximation it will be. But I am in agreement that there are several ways to get an easement that is less harsh than trying to transition directly into an o-27 corner. And I am in no way opposed to or intimidated to throw a drywall square across the ends to mark and do a little trimming if needed. I think my main point was that maybe someone was actually thinking when they chose the 0-27, 0-42, 0-54 combination beyond the fact that they are all very similar in running length (RL) which simplified manufacturing. I am pretty sure that all the track was cut the same length, rolled, and then trimmed as needed to the correct length in order to compensate for the stretch that occurs in the rolling process. But again, I do appreciate you providing the different combinations that I have yet to try and look forward to trying. I guess the best test is to set up a bunch of different options and drive some trains into them and observe what happens. FMH

Well OK Fred, I think I agree with all of that. I was assuming that you wanted to make a half-circle based on your photo. I can see in your photo that the rail joint connections are not perfectly square with each other, that is if you want a 180-degree arc. It's fairly minor discrepancy since the track is flexible enough to "fudge" connections.


If I draw it with AnyRail you can see how it arcs more than 180 if the rail ends are squared up. What I would do myself to even it out, if I wanted that configuration for a 180-degree curve in a layout, is to cut a 1/3 segment out of an O27 curve section.


Fred-demo


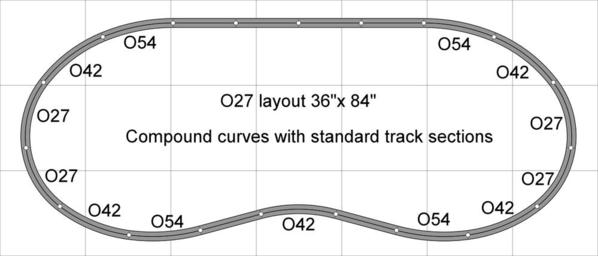
Here is a peanut-shaped oval that uses Fred's arrangement of compound curves, using all standard pieces of O27 track, no cutting required.

Easements greatly improve the appearance of trains on sharp curves without adding a lot of width to the layout.


Peanut oval-1

Attachments

Images (2)
  • Fred-demo
  • Peanut oval-1
Last edited by Ace
Originally Posted by Smitty22:

Ace,

  Thanks for the compliment!  This is last years set up and I'm getting ready to start this years.  So....... I'm open to any ideas or changes...LOL

Oh ... I had missed that part about your photos being last year's setup. So you want to do something different this year, that will be fun.


Are you using the same size table, 8' X 8' plus a 4' X 8' extension, and all MTH track? You might want to start a new thread to get input from everyone!

Ace, After having drawn it myself, I see what you mean. While I was originally showing it that way to demonstrate a symmetrical decreasing radius from both directions, if the intent is to come back to parallel tracks after a 180 degree turn, then trimming the 0-27 is better than trimming two pcs of 0-54 for several reasons. Just got some 0-34 Marx track. And would like to experiment with some of your combinations. Can you go into more detail on creating the 0-34 track in Anyrail? I can not figure out how to create the filler track so that I can right click on it. Have ver 4. and 5. Also, after seeing how long the 45 degree Marx track is compared to 0-27 and 0-54, it is clear why Lionel made 0-42 in 1/12ths instead of really short 1/16ths or really long 1/8ths. Thanks FMH

Fred, Thanks for your interest. This is how I make Marx O34 track pieces with the AnyRail software:  


Select "Track libraries", "Lionel", "O Lionel O" (the O27 track library does not have "filler track")

Select "filler track" and place it on the work area - these can be custom stretched or curved.

Right-click on the filler track, select "curve flex...", specify "45 degrees" and "16.5 radius" to create a Marx O34 equivalent

Copy and paste them to easily make more.

When dragging them, be careful not to click on the little X's which are used to reshape custom curves.


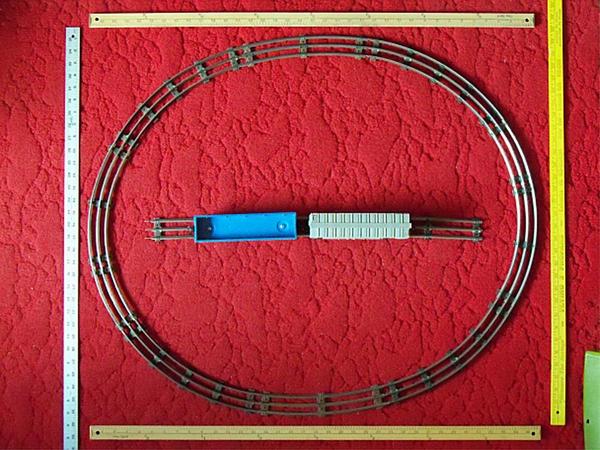
This is a configuration I made for a simple trolley oval using O27 - O34 - O54.  Note yardsticks for size reference.


2012-oval with O27-O34-O54


I like the compound curves much better than the usual O27 oval.

Attachments

Images (1)
  • 2012-oval with O27-O34-O54
Last edited by Ace
Hi Ace, I drew the 0-27,0-34,0-54 easement in Anyrail and tried it out with some track. Inspired me to nab another 15 curves on the bay. At approx 50 cents each. You are my layout guru from now on. I use mainly 0-27 Lionel with k-line switches. But I now am going to incorporate some Marx into the ever evolving layout. There was one odd piece of Marx 3 tie Marx in the last batch of curves I bought. I assumed it was 0-27 like the Lionel. Same curve, but measurably shorter by approx 1/4". Do you know if Marx used a slightly small radius? I do agree looking at you photos that adding the 0-31 does a lot to make the transition smoother looking. FMH
And since I have not been successful in finding any used it NOS K-line 0-72, I am going to make some with my new rail bender. I have a chart with all of the track dimensions for various 0-27 curves. When creating the modified filler pieces in Anyrail, do I use the Centerline Center Rail radius? Or a different reference? Thanks FMH
Originally Posted by Ffffreddd:
... creating the modified filler pieces in Anyrail, do I use the Centerline Center Rail radius? Or a different reference? Thanks FMH

I figure it's the centerline radius in AnyRail and I generally estimate O-gauge radius as half the "O" diameter, less 1/2", except for O72 diameter which is already figured to centerline.

Ace, Formed my first piece of 0-72 today from an 0-27 curve. Took about 10 minutes to disassemble, form and reassemble. Minor trimming is required but if I had a dremel set up, it might of added another 5 minutes. And that was using it held in my hand instead of a vise. Once I fab a setting tool. Specs in the manual. Or my own design, I can probably crank them out much quicker. I think it is worth the money, even just for the experience of doing it once or twice to make a unique curve for an unusual situation. I am going to use it to get to 5" OC parallel tracks for my Atlas shed And no need to look for 0-72 .

Fred, that's quite ambitious to bend your own rail. I had considered doing that, and thought about how to make a rail bender, which would require removing rails from ties, and reassembling after bending. But eventually I acquired an assortment of different curves in O27 and standard O, and decided that was enough for what I wanted to do.


Post some pics of your rail bending projects if you get a chance!

I'm considering this plan for my next revision, probably soon. It provides yard tracks for additional trains, longer straighter runs, and reversing tracks. The "mainline" circuit has O54 easements for all the O27 curves. The oval is big enough to allow two trains to orbit each other if they run at similar speeds.


Oval-and-loops-36x138g6


Only one piece of track to cut for this scheme. It uses some Marx 11.2" "long straights", and a couple half-O34 curves which I have already cut.


My table is 36"x 138", but this plan will fit on a table 32" wide with most of the track set well back from the front edge.


Attachments

Images (1)
  • Oval-and-loops-36x138g6
Last edited by Ace
Originally Posted by Ffffreddd:
Are those all o-27 switches?

Yes, all O27 track and switches. I'll use four 1022 manual switches for the two inner yard tracks and 1122 "non-derailing" switches at the other points. I've modified my 1122 switches for fixed voltage supply as discussed in a previous post:


https://ogrforum.com/d...866#9173459954187866


Power use by the 1122 switches can be an issue if too many are used together. They have a "brainless" non-derailing feature which draws power whenever metal wheelsets are on the switch. My plan is to have the 1122 switches arranged so that one train will not bridge more than two of them at a time.

Add Reply

Post
The Track Planning and Layout Design Forum is sponsored by

AN OGR FORUM CHARTER SPONSOR

OGR Publishing, Inc., 1310 Eastside Centre Ct, Ste 6, Mountain Home, AR 72653
800-980-OGRR (6477)
www.ogaugerr.com

×
×
×
×
Link copied to your clipboard.
×
×