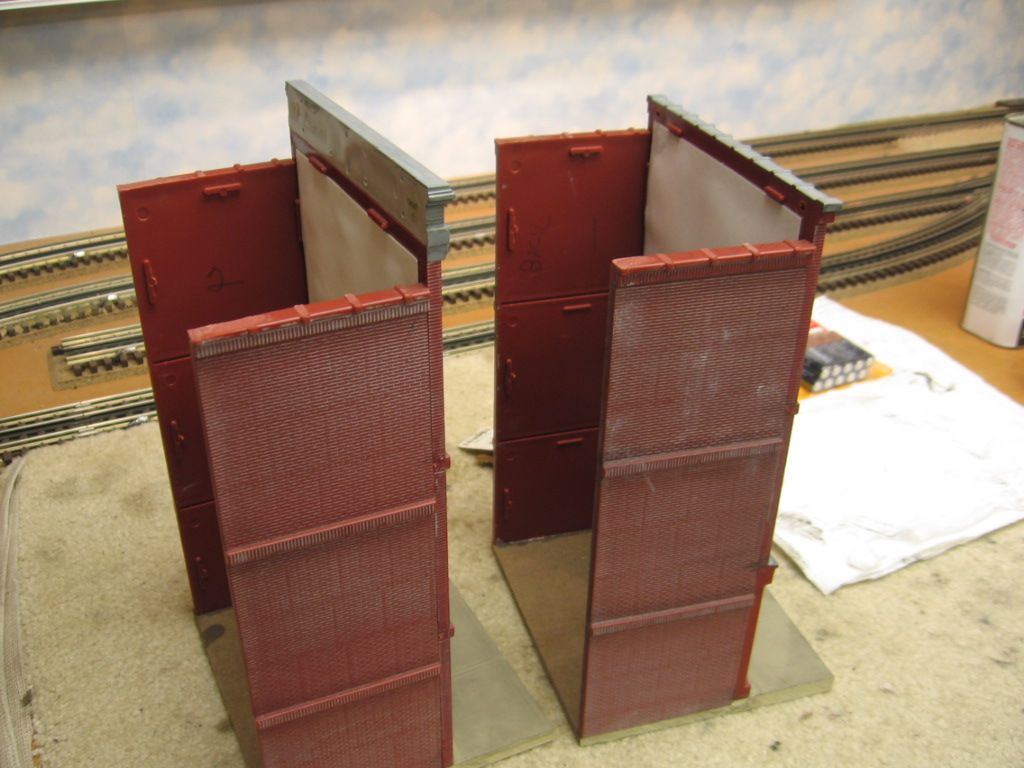
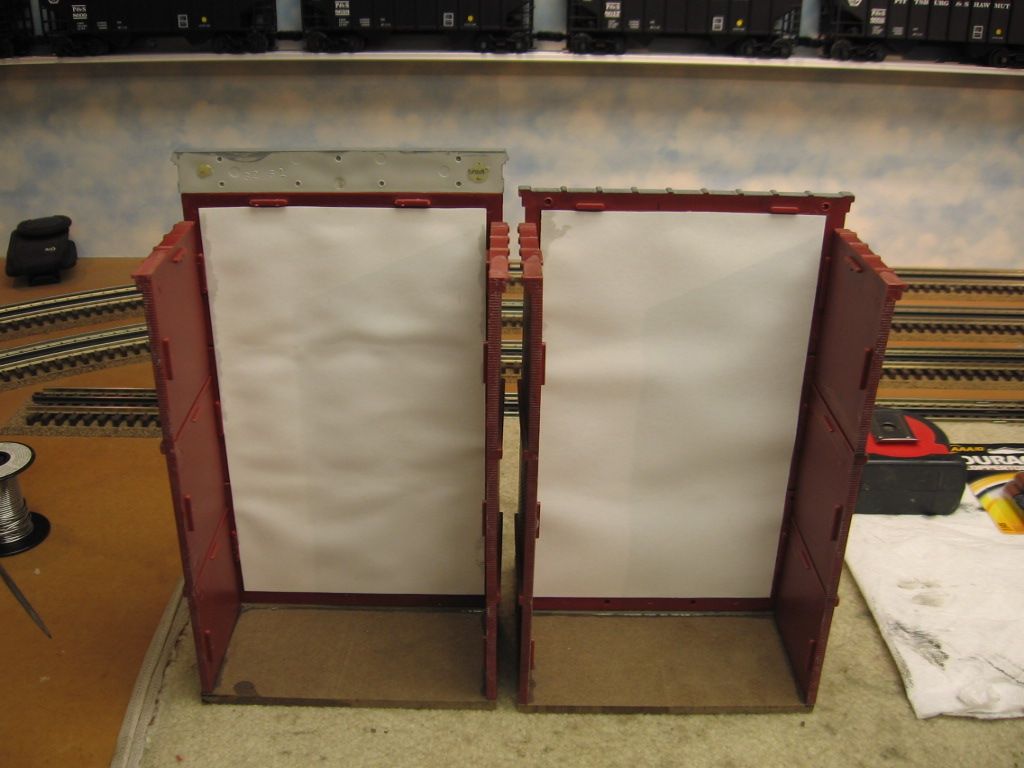
I just got my first ameri-towne kit and am planning to pick up more to perform some kit bashes.  I've got the barretsburg building and am planning to utilize the loading dock doors as the base for a five story, 3-sided brewery building that will be installed against a wall.

To get the top three stories, I'll need some of the 9 window side walls that come in many of the 3-story town building kits.  

To the questions:

I'm thinking of buying a bunch of the town building kits and utilizing the side walls from the kits for my upper floors.  Has anyone taken a bunch of fronts and backs and mounted them together with only two side walls to create a city block without alleys?  If so, can you share photos?  

I've seen photos of fronts expanded to four or five windows- has anyone added on to the sides to make the buildings 9" in depth instead of 6"?  If so, can you share photos. 

Finally , if you've built a five or more story ameri-towne building with multiple sides, can you share a photo?  I'm trying to plan this out and have never attempted anything like this before.

 Thanks!

Last edited by Rich Melvin
Original Post

Replies sorted oldest to newest

I've kitbashed quite a few Ameritowne kits.  Actually I tend to use the building fronts and not complete kits.  Here are some photos.

Rick's Army-navy sits on a corner but is not at a 90-degree angle.  I added a Tichy fire escape to one wall.

Army Navy 1

I found a couple of photos of surplus stores on the internet, printed them out and mounted them at an angle inside.  There is a 3D sales counter and a couple of figures inside as well.

Army Navy 2

Army Navy 3

The rifles, etc. in the windows are Tamiya 1/35 scale army accessories.  I tried 1/48, but they were so small you really couldn't tell what they were supposed to be.

Here is a down the street shot.  Rick's Army-Navy and the hardware store to the right of it are both stock 3-story fronts.  Next is a kitbashed 4-story Ameritowne.  The tallest grey building is a kitbashed 5-story Ameritown.

Ameritown 1

Finally, here is another city on the layout, showing larger kitbashes of Ameritowne kits.

Ameritown 2

The three large structures on the right (green building, gray building and red building are all made from Ameritowne parts.

Attachments

Images (5)
  • Army Navy 1
  • Army Navy 2
  • Army Navy 3
  • Ameritown 1
  • Ameritown 2
Last edited by Bob

I find it much more econimical to buy multiple kits to get what you want and have pieces leftover for other projects. I don't have a lot of large buildings on the layout with 4 walls. A lot are 2 sided placed against the backdropped flats. I used a number of kits in the city portion. Can't remember which exact kits. Ijustboughtenough to get the fronts Ineeded. A lot of the side and back walls were used for factories on other portions of the layout. Even the tunnel portion for autos is an  Ameritown wall minus the window inserts. They follow the wall at an angle. The side walls and roofs are cut to fit up against the backdrop.The fronts are glued to each other. To add depth I used HO flats behind them.

image

Attachments

Images (1)
  • image
davidbross posted:

Any other suggestions on cutting them?  I have used a Drexel tool with cutting disk. Not a great way to do it. 


Any hints on sanding?  I have tried with sandpaper and a block but I cannot keep them square and straight. 


A bandsaw works perfectly to cut them, but they also snap apart between floors. Just cut slightly at the edges to make a clean line. 

Sanding straight and square isn't an absolute necessity. There are plenty of gap filling products available to fill small openings.

Bob posted:

I've kitbashed quite a few Ameritowne kits.  Actually I tend to use the building fronts and not complete kits.  Here are some photos.

Rick's Army-navy sits on a corner but is not at a 90-degree angle.  I added a Tichy fire escape to one wall.

Army Navy 1

I found a couple of photos of surplus stores on the internet, printed them out and mounted them at an angle inside.  There is a 3D sales counter and a couple of figures inside as well.

Army Navy 2

Army Navy 3

The rifles, etc. in the windows are Tamiya 1/35 scale army accessories.  I tried 1/48, but they were so small you really couldn't tell what they were supposed to be.

Here is a down the street shot.  Rick's Army-Navy and the hardware store to the right of it are both stock 3-story fronts.  Next is a kitbashed 4-story Ameritowne.  The tallest grey building is a kitbashed 5-story Ameritown.

Ameritown 1

Finally, here is another city on the layout, showing larger kitbashes of Ameritowne kits.

Ameritown 2

The three large structures on the right (green building, gray building and red building are all made from Ameritowne parts.


Jacob:

I'm thinking of buying a bunch of the town building kits and utilizing the side walls from the kits for my upper floors.  Has anyone taken a bunch of fronts and backs and mounted them together with only two side walls to create a city block without alleys?  If so, can you share photos?  

As Rich stated if you are only looking for the side walls you may want to consider purchasing them separately. Compare the price of the single wall to a kit, figure out if you are ever going to use the remaining walls if you buy the kits and make you decision. Also remember if you buy a kit the sides walls are usually one window wall and one blank wall. If you want only window walls (or blank walls) you are going to be buying a whole bunch of kits!

Joe

I routinely build flats with 1/2 inch side walls (cut a blank wall) and full kits with 6 inch side walls. If you want a 9 inch side wall you will need to can cut a blank wall roughly in half. The best choices are a table saw or a band saw. To avoid wasting materiel cut each wall as close to half as you can them trim to same width. You will end up with less than 3 inches but you won't be wasting a wall. It is a different story with a window wall. You need to take into into account the window locations. If you slice the window wall at 3 inches you will be cutting through a window. Your only choices are 2 or 4 inches.

Joe

This is how I use Ameri-Towne Building Kits on my layout.

From my YouTube Channel

https://www.youtube.com/watch?...9c3u8Hbio&t=389s

Published: March 11, 2018        Play time: about 9 minutes

In this video we will take a trip to my wife’s kitchen to degrease all the plastic parts. We will come back to the train room to use Testor’s Dullcote, and Acrylic Paints to add mortar to the bricks.

The doors, window frames will be painted.  Plastic window will be cut to size and installed into the wall along with the window treatments. I will add these structures to the layout’s backdrop.

Hope this helps: Gary

trainroomgary posted:

This is how I use Ameri-Towne Building Kits on my layout.

From my YouTube Channel

https://www.youtube.com/watch?...9c3u8Hbio&t=389s

Published: March 11, 2018        Play time: about 9 minutes

In this video we will take a trip to my wife’s kitchen to degrease all the plastic parts. We will come back to the train room to use Testor’s Dullcote, and Acrylic Paints to add mortar to the bricks.

The doors, window frames will be painted.  Plastic window will be cut to size and installed into the wall along with the window treatments. I will add these structures to the layout’s backdrop.

Hope this helps: Gary

Thanks Gary, I've watched your Videos a few times including the Miller Engineering animated billboard signs as I plan on adding them to the roof tops . I'm in research mode right now, learning a lot. Just curious, how thick are the Ameritowne Sidewalks?  After I made the post to this Thread I realized it's more than two years old..

Tyler P posted:
trainroomgary posted:

This is how I use Ameri-Towne Building Kits on my layout.

From my YouTube Channel

https://www.youtube.com/watch?...9c3u8Hbio&t=389s

Published: March 11, 2018        Play time: about 9 minutes

In this video we will take a trip to my wife’s kitchen to degrease all the plastic parts. We will come back to the train room to use Testor’s Dullcote, and Acrylic Paints to add mortar to the bricks.

The doors, window frames will be painted.  Plastic window will be cut to size and installed into the wall along with the window treatments. I will add these structures to the layout’s backdrop.

Hope this helps: Gary

Thanks Gary, I've watched your Videos a few times including the Miller Engineering animated billboard signs as I plan on adding them to the roof tops . I'm in research mode right now, learning a lot. Just curious, how thick are the Ameritowne Sidewalks?  After I made the post to this Thread I realized it's more than two years old..

Hi Tyler P:

(1) The sidewalks and roofs are gray plastic, about 1/16 of an inch thick.

(2) There Miller Engineering signs are very delicate, handle with extra care.

(3) When you order the Miller Engineering signs, there are several ways to get power to them. I use  the accessory power from my master Lionel Bricks / ZW. Ask them about the best way to power them on your layout.  I have one on my work bench that runs on battery power, Three AAA.

Hope this helps: Gary

trainroomgary posted:
Tyler P posted:
trainroomgary posted:

This is how I use Ameri-Towne Building Kits on my layout.

From my YouTube Channel

https://www.youtube.com/watch?...9c3u8Hbio&t=389s

Published: March 11, 2018        Play time: about 9 minutes

In this video we will take a trip to my wife’s kitchen to degrease all the plastic parts. We will come back to the train room to use Testor’s Dullcote, and Acrylic Paints to add mortar to the bricks.

The doors, window frames will be painted.  Plastic window will be cut to size and installed into the wall along with the window treatments. I will add these structures to the layout’s backdrop.

Hope this helps: Gary

Thanks Gary, I've watched your Videos a few times including the Miller Engineering animated billboard signs as I plan on adding them to the roof tops . I'm in research mode right now, learning a lot. Just curious, how thick are the Ameritowne Sidewalks?  After I made the post to this Thread I realized it's more than two years old..

Hi Tyler P:

(1) The sidewalks and roofs are gray plastic, about 1/16 of an inch thick.

(2) There Miller Engineering signs are very delicate, handle with extra care.

(3) When you order the Miller Engineering signs, there are several ways to get power to them. I use  the accessory power from my master Lionel Bricks / ZW. Ask them about the best way to power them on your layout.  I have one on my work bench that runs on battery power, Three AAA.

Hope this helps: Gary

Thanks for the info Gary, I'm going to use the Converter Module for the signs. Ill just run it off my Z4000 Ten volt Accessory port. I have 14-2 romex ran around my platform I just tap into it where I need to.

                                                          Tyler


Last edited by Tyler P
Mike Miller posted:

PRRHorseshoecurve,

Nice "downtown" you purchased from a Forumite.  When you bought  it, was it already built or was it built for you.  I'd be interested in something like that.  Can you tell me who you got that from ?

Mike

Sorry I don't remember who I got it from However I will be happy to sell it to you if you are interested.

Last edited by prrhorseshoecurve

Add Reply

Post
×
×
×
×
Link copied to your clipboard.
×
×