
Any ideas on how to bend the ends curves of Gargraves Phantom? I have difficulty getting the ends fully bent/curved before laying it.
I've cut OSB into various arcs, but this doesn't quite make it on the ends. Any help appreciated.
Cho Cho Wally
|
|
Any ideas on how to bend the ends curves of Gargraves Phantom? I have difficulty getting the ends fully bent/curved before laying it.
I've cut OSB into various arcs, but this doesn't quite make it on the ends. Any help appreciated.
Cho Cho Wally
Replies sorted oldest to newest
I over bend the ends with a pair of needle nose pliers. Some just cut the end off, or you can solder 2 sections together then bend the entire radius.

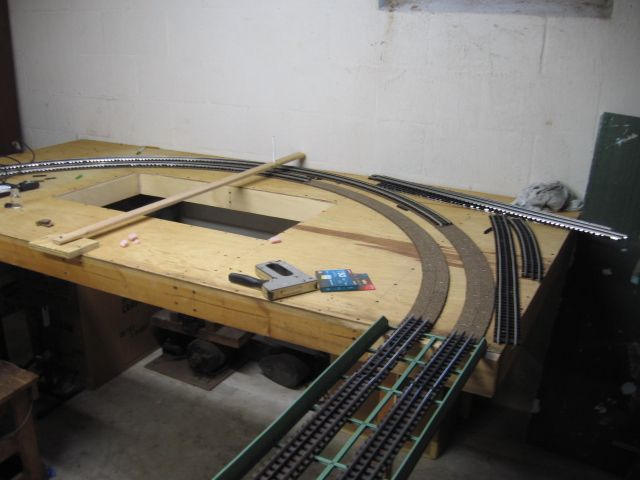
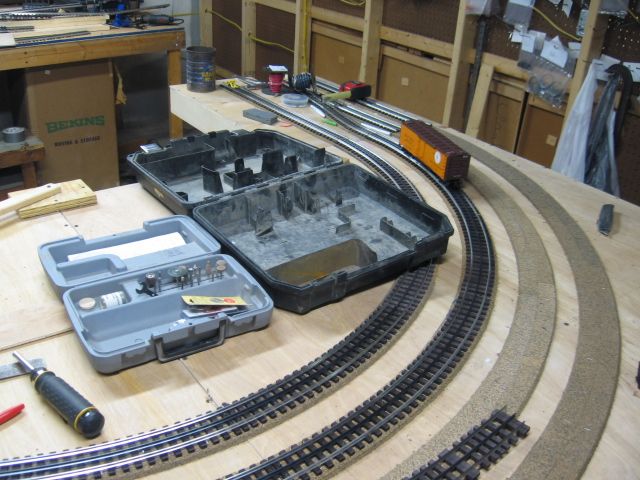


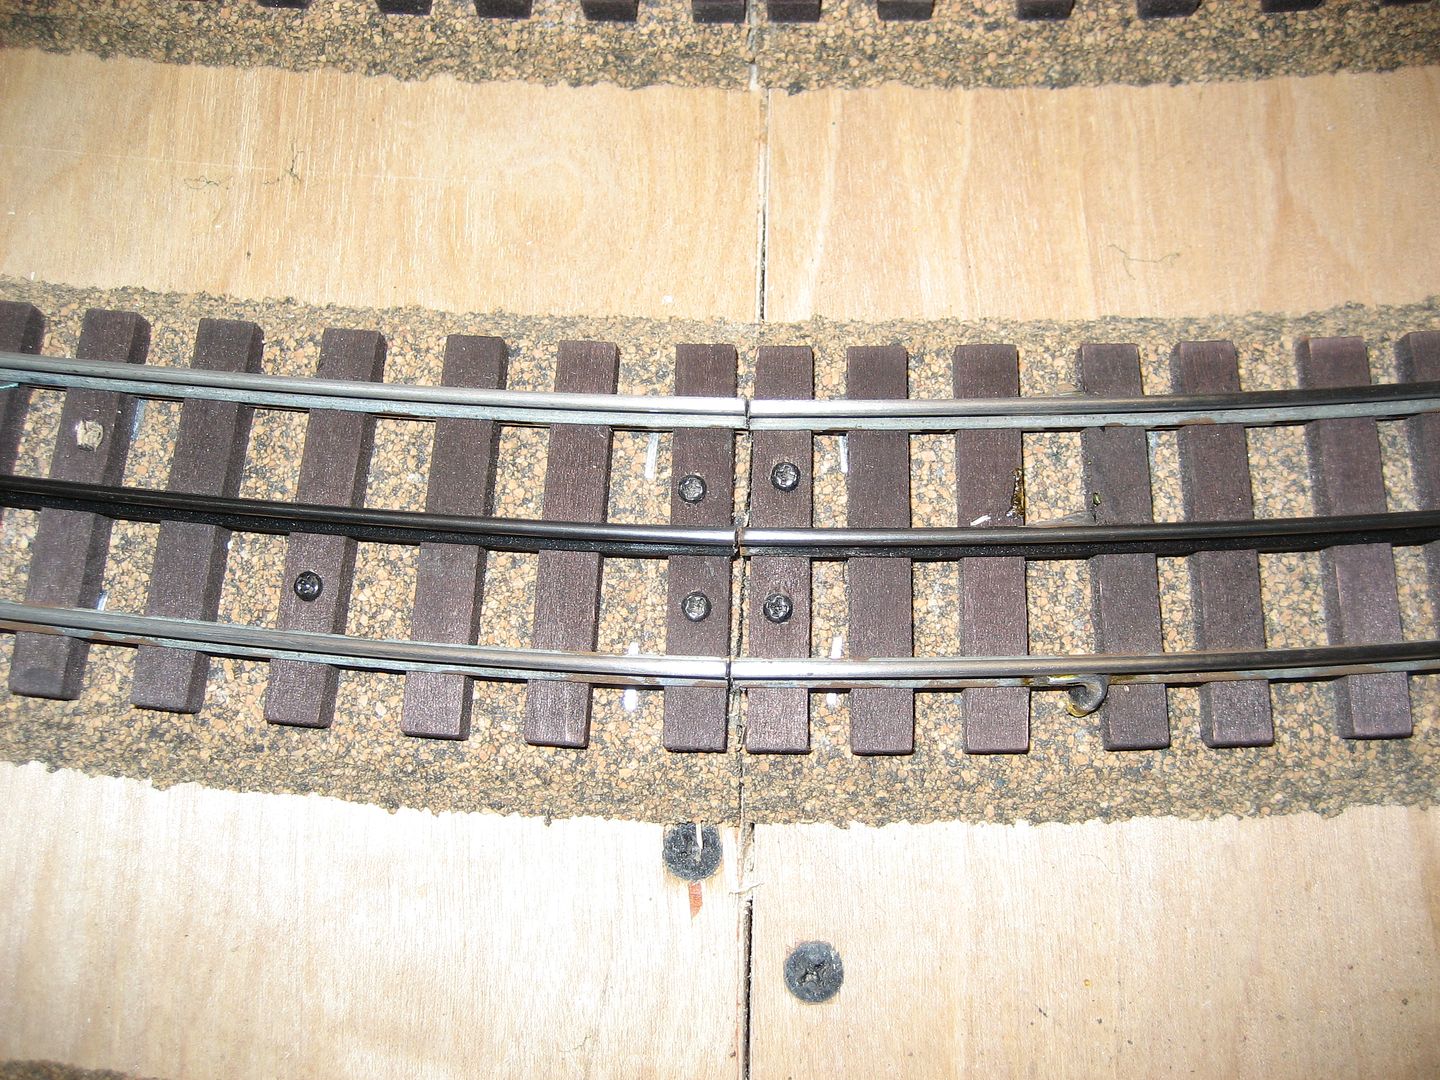
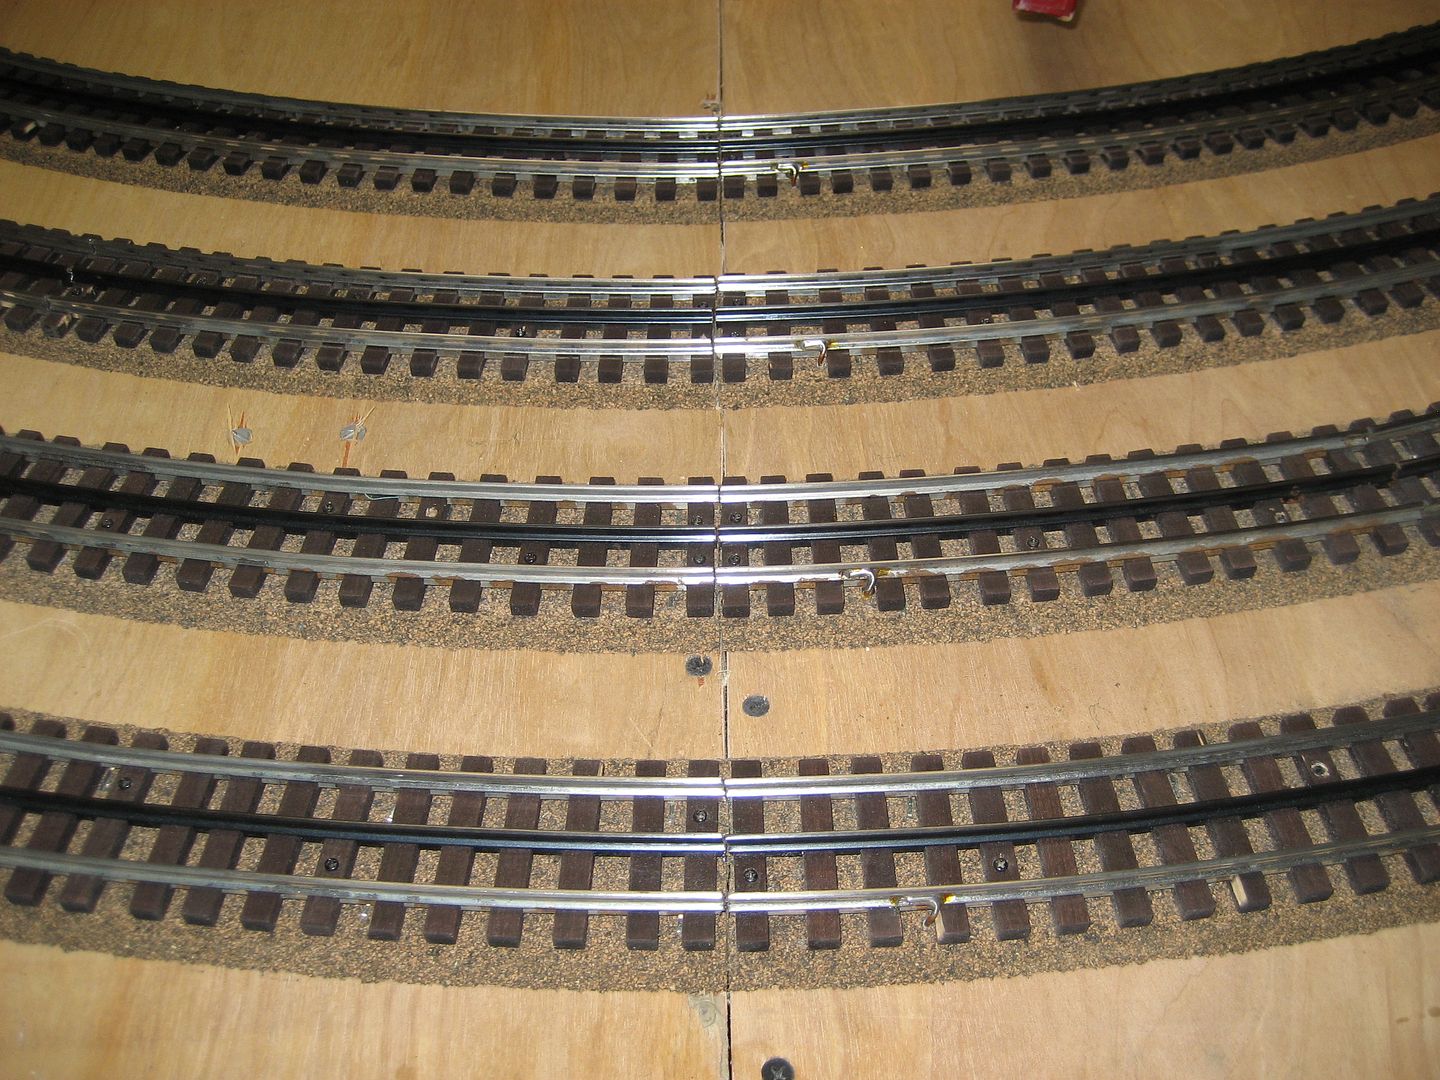
Track pictured is used Gargrave Flex track. Cork road bed is Midwest. Some of the road bed is used.
try to avoid starting a new piece of track at a place where a straight transitions into a curve. that will get rid of the problem at one end of a piece of flex. unfortunately after laying many, many pieces of flex Gargraves, i've never come across a method where you do not lose a few inches at the end of a curve. you can try some various methods of overbending the track, but believe me, it will destroy a nice smooth curve.
on the upside, you'll get a nice gondola load of small track pieces and ties.
good luck.
cheers...gary
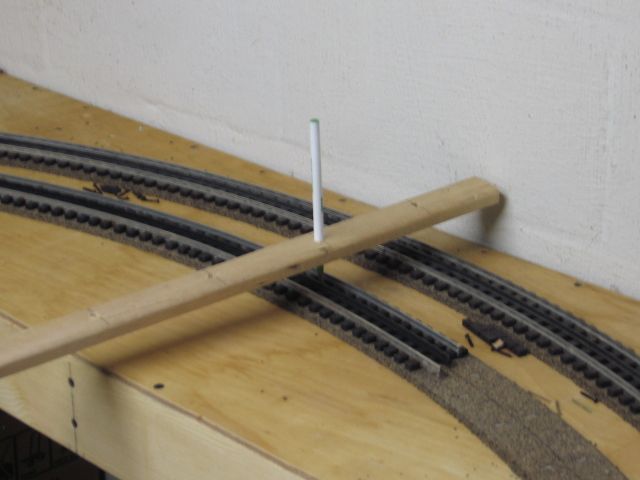
Cho Cho Wally I use an old scrap of 1x1 block of wood about 4in. long to push against the end tie on the end of the piece of track. It is easier on you than pushing against the end tie with your finger or thumb. I have A screw through A tie about 6in. back from the end of the track. Just like other people have suggested I over bend the track and let it spring back. If it is not far enough I keep doing it until it is where I want it. Another thing that helps is the fact that I have my road bed half on each side of my line I have on the plywood for where I want my tracks to go. Mike CT has some pretty good pictures of how I am talking about laying the roadbed half of it on each side of the line. Choo Choo Kenny![]()
I read where some do not cut the ends, but leave them staggered until they square up for a straight.
using gargraves method of bending around a jig, (bottom of page http://www.gargraves.com/diagramsandinstructions.html) ,does that not enable one to bend the last few inches where the ties were removed?
Or do you need to work it with a block like Choo Choo kenney.?
What's your comments, overlandflyer? Do you square yours up ? Mike CT is squaring his up mid curve for the modules.
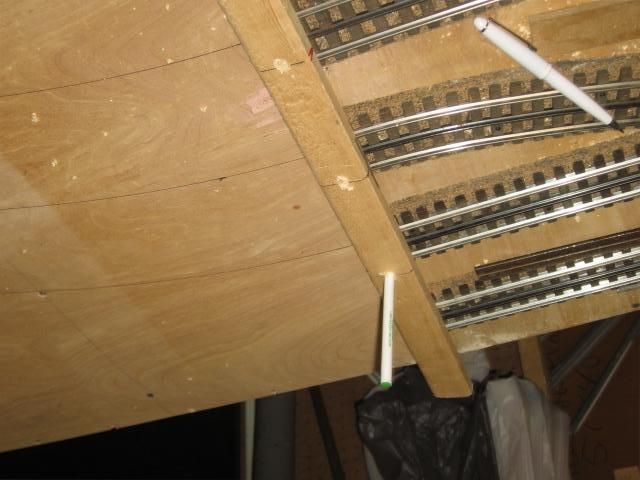
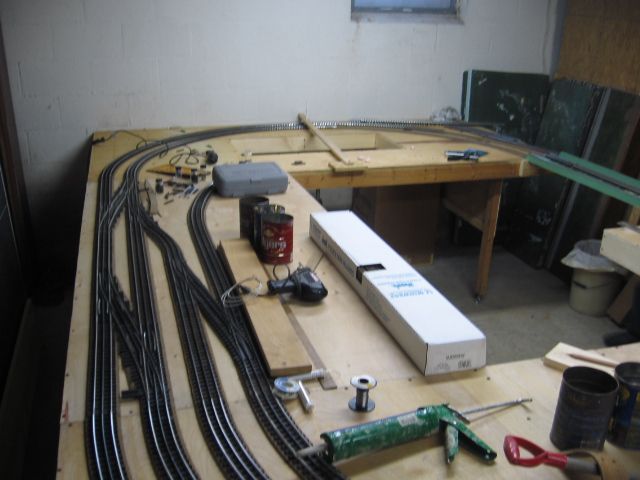
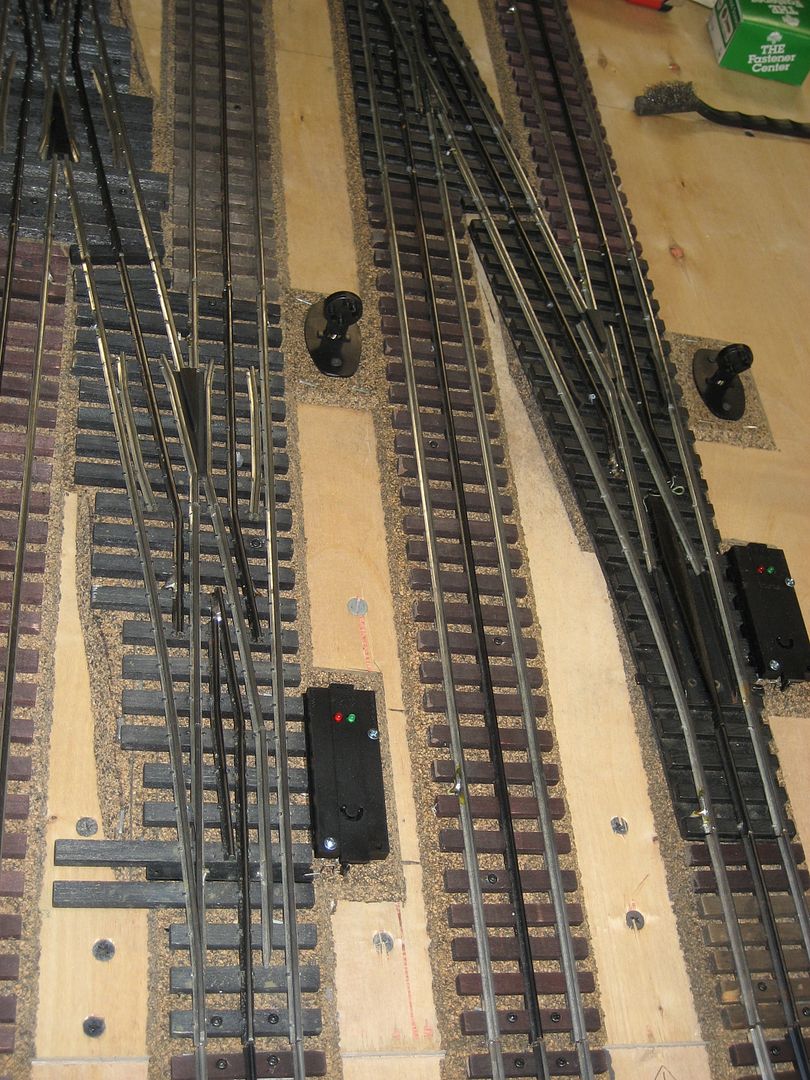
I use Atlas track screw, and a lot of them, to hold the track in place. The point of the ball point pen in the curve jig set on top of the center rail Track screws are installed ever 5" to 6" as you work you way around the curve to hold the spring-ee Gargraves. Track in place. The inside circle is always going to be smaller than the outside circle, eventually you got to use the dremel, when transitioning back to straight. With Screws holding the track in place, I spent a fair amount of time adjusting the ties to look right. I even added ties, if I thought the spacing was not right. Keep in mind this is used track. The Fort Pitt Hi-Rail Group always adds ties at the edge of the module. There are three modules pictured.
Used Gargraves track notes:
(1.) Surface rust tends to inhibit the ties from moving.
(2.) There appeared to be two different tie thicknesses/heights.
(3.) We used Ross track pins, slightly different than Gargraves.
(4.) We pre-drilled all ties before applying screws.
(5.) I recently acquire some additional Midwest cork roadbed. There was considerable material difference from the original cork we used.
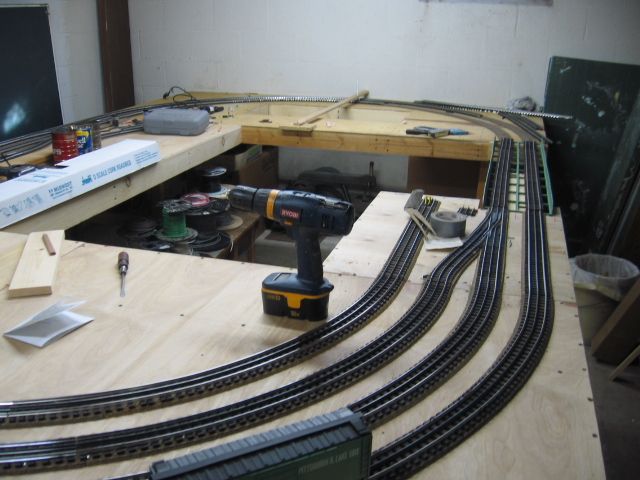
Additional pictures. Note the Module break lines. I squared the rail ends of each track piece, with a Dremel cutter as I worked around the 1/2 circle.
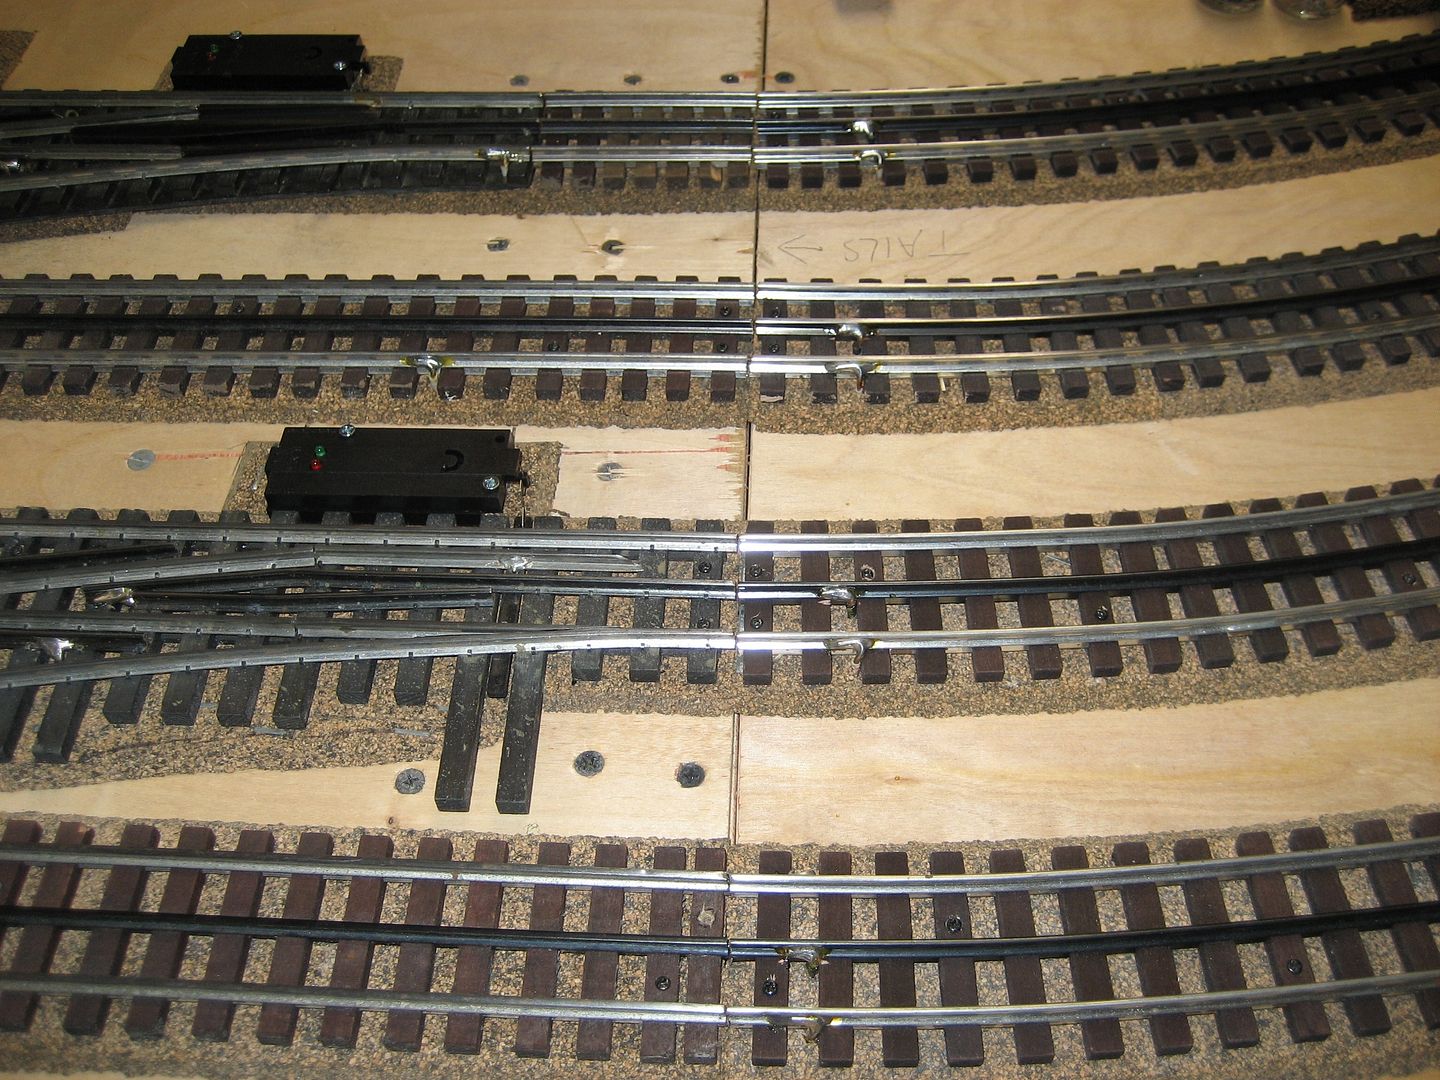
Note the difference, Ross switch(es) left, Gargraves switch(es) right.
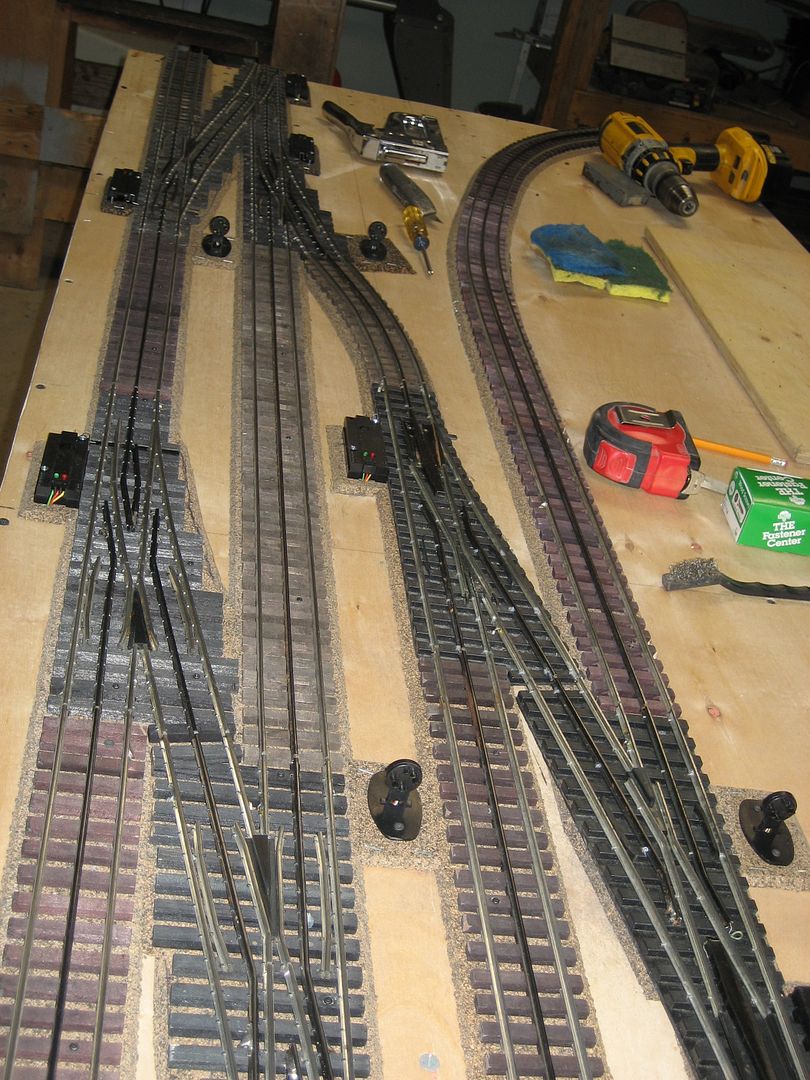
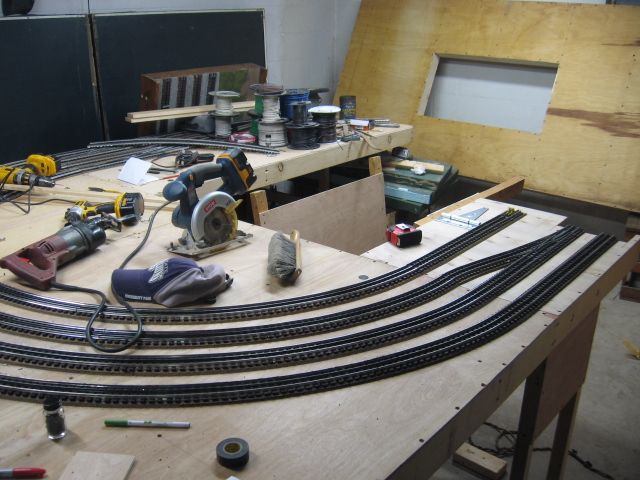
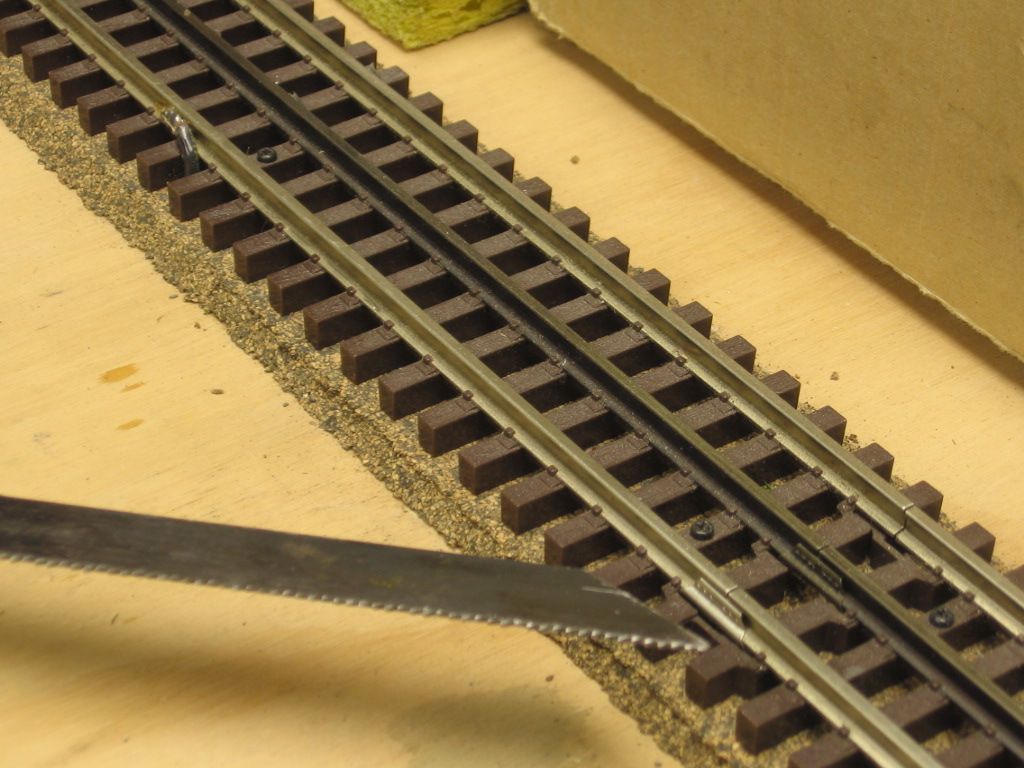
Dremel used as a cutter.
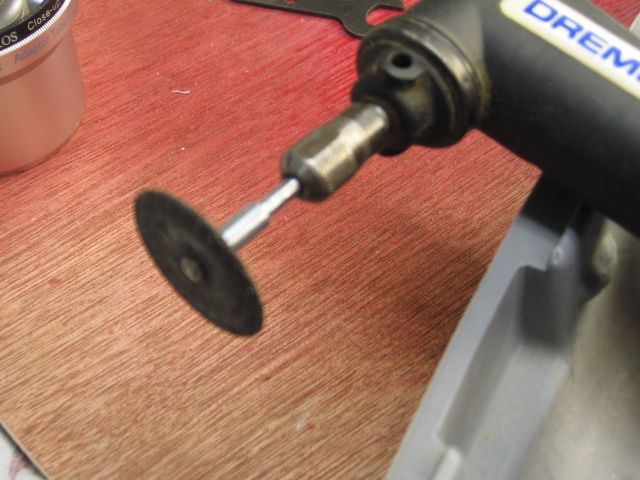
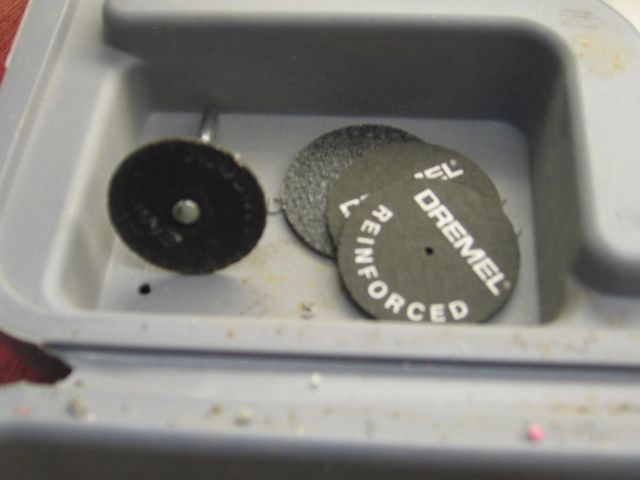
Dremel 456 Re-inforced cutters and the 402 mandrel for attaching the blades. There is also a 426 Re-inforced cut-off wheel.
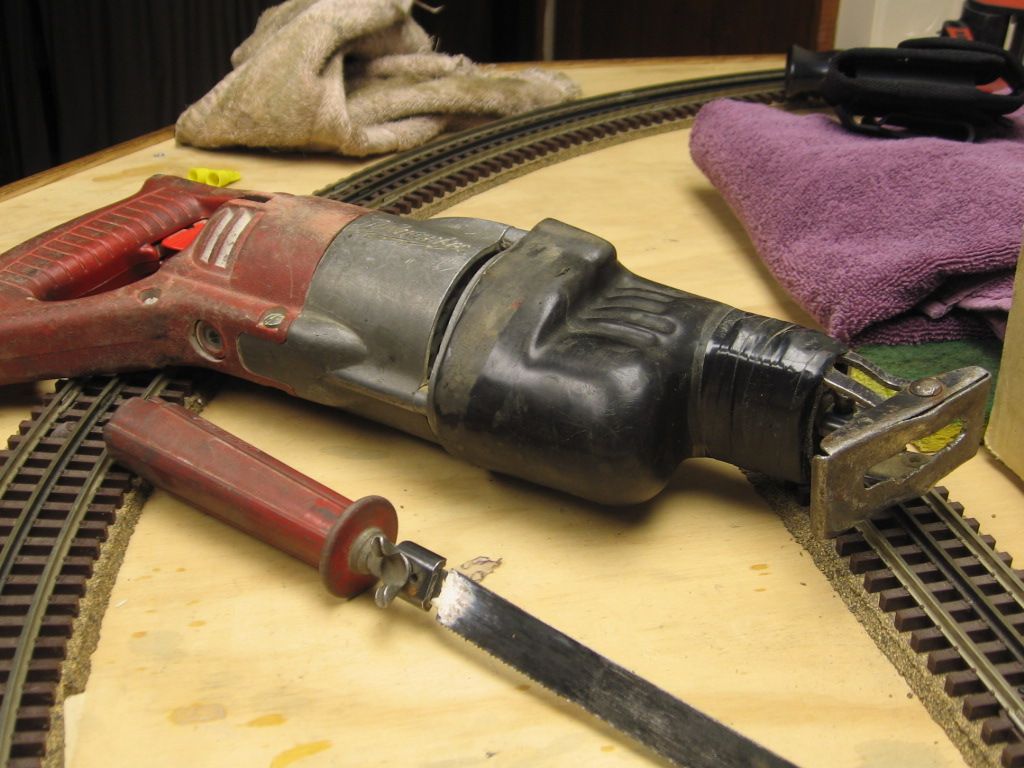
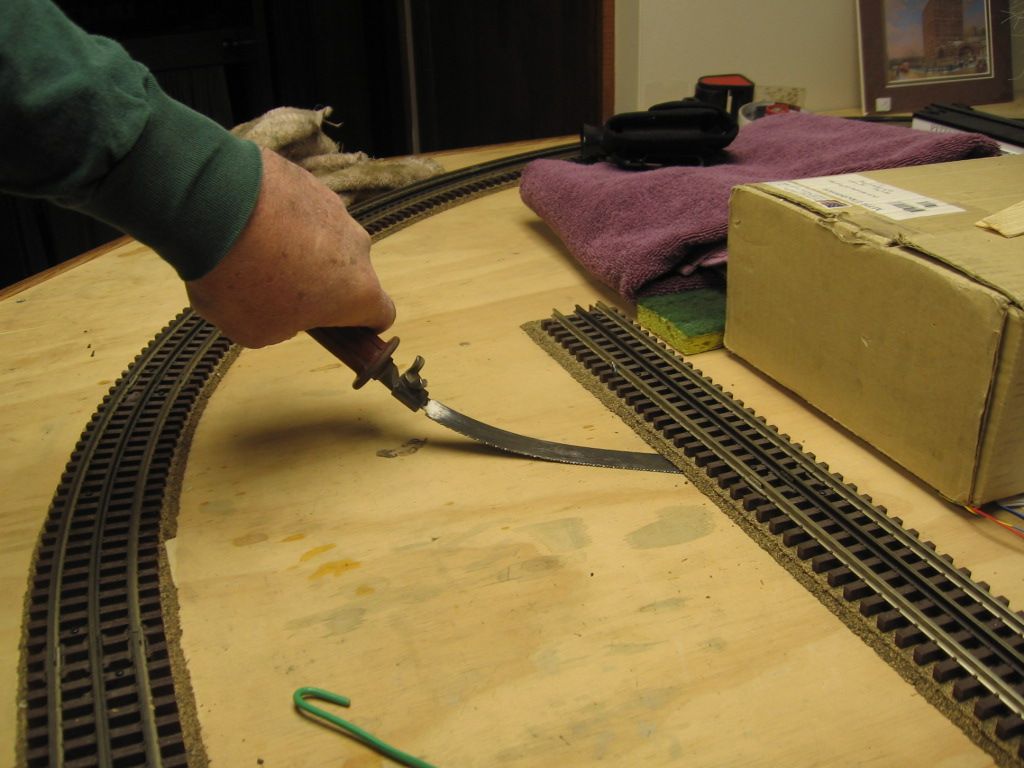
Cuts are also done with a Sawzall and fine tooth metal cutting blades.
Thanks guys. All ideas appreciated. I picked up at least two new ideas that will help - the little block to push/bend, and the angle adapter for the Dreml. Thanks a bunch! See ya at York (White Hall A-3,4)
Cho Cho Wally
I recommend against the use of Dremel cutting discs other than the reinforced ones. They break too easily. I seem to have also found that the quick-change reinforced cutting discs seem to last a lot longer than the standard ones.
I recommend against the use of Dremel cutting discs other than the reinforced ones. They break too easily. I seem to have also found that the quick-change reinforced cutting discs seem to last a lot longer than the standard ones.
RJR, if i use the thin cutoff wheels i use 2 of them together to prevent breakage. When i run out of the thin ones i will switch to the reinforced ones. The single ones can be dangerous when they break.
Both the Dremel 456, (1 1/2" diameter), and 426, (1 1/4" diameter), cut-off wheels are reinforce. I have had the 402 mandrel break, the small screw that holds the blade in place. Use caution with these cutters.
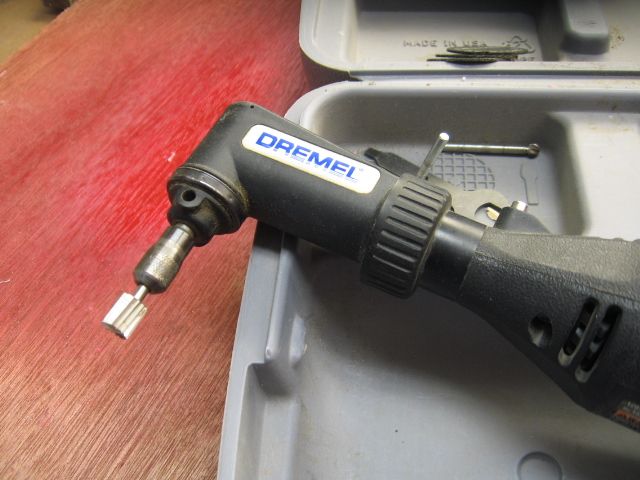
The right angle attachment 575, allows for better positioning of the cutter.
Safety meeting of the day. Eye protection is a must no matter what cutting device you are using.
Best wishes.
![]() Mike CT
Mike CT ![]()
Of course, you could always use the cut-off discs/mandrel that Gargraves recommends/sells (![]() )...
)...
Item #'s 83985 and 93108
...which are made by Gyros...
Gyros Reinforced Fiber Disc Link
Item #11-32208
I'm still using the first 2" disc since building the 25'X40' layout. Cuts through the rails as though they were butter.
Another Dremel attachment that I prefer for this job of cutting Gargraves is the 225-01 Flex Shaft Attachment...
The reason I prefer it is twofold. First, the flex shaft mandrel hand piece is lighter that the rotary tool itself, so it's easier to maneuver/position for the cut. Secondly, because the hand piece is of a much smaller size than the rotary tool motors, you can position it with a 2" disk for a perfect vertical cut of the rails.
Cannot, however, overemphasize enough the use of safety goggles when doing this job. The cutting debris consists of tiny shards/fragments of metal....not the sort of thing you want lodged in or penetrating your eyeballs!!!![]() And, don't kid yourself, there's no guarantee that the debris will ONLY follow a path directly in line with the cut itself!!!
And, don't kid yourself, there's no guarantee that the debris will ONLY follow a path directly in line with the cut itself!!!
But when the cut is done, there's minimal dressing of the rail ends with a small, fine file to smooth everything out.
As always, though, TEHO....what works for some is not the choice of others.
----------------
Re the end-bending of GG flex track....the block of wood is my choice, also. However, when I designed my layout using RR-Track and the Gargraves library (and Ross for switches) I tried to use standard pre-formed curves wherever possible. Then I ordered accordingly (RR-Track conveniently tallies up the bill-of-materials, making this a cinch!) I used the flex track for tangent (straight) and for blending alignments. Using preformed curves minimized the problems I encountered with regard to track ends. But that, again, was just my choice for expediency's sake.
If utilizing flex track throughout the layout is a preference, however, one of our (LHS) customers (Long, long ago) utilized a clever technique picked up from his HO track-laying days, and a product in that scale called Ribbonrail alignment gages. They're machined pieces of sheet aluminum designed to fit between the rails holding a specific curvature. Our customer borrowed this idea for O3R....flex track laying...by laying out and cutting pieces of Masonite to fit between the rails to hold the curvature across the joints while the track was being fastened down. He bored a couple holes in each gage which then could be positioned so that a track screw could be driven to hold the track in place. He claimed it worked like a charm. Of course, just as with the Ribbonrail product, you'd need a set of gages for each radius curvature you were building to....something that an accurate track plan...like RR-Track...would certainly help achieve. I, myself, was still wallowing around in 'The Dark Side' of the hobby...HO(![]() )...and didn't give much thought to the idea at the time. (In fact, after watching several of my fellow HObos hand lay their track tie by tie, rail by rail, spike after spike, I decided that commercial track laid with care and even painted/weathered, would suffice for me.)
)...and didn't give much thought to the idea at the time. (In fact, after watching several of my fellow HObos hand lay their track tie by tie, rail by rail, spike after spike, I decided that commercial track laid with care and even painted/weathered, would suffice for me.)
So, FWIW......
KD![]()
feet, there is also a thin version of the reinforced quick-change discs.
Some very good advice that others have mentioned. 1) eye protection! When I am cutting my rails I have my shop vac running to get the metal chips flying from the cutting wheel. 2) the Dremel flex shaft handle is smaller than the body of the Dremel. A lot better angle on cutting the track that is screwed down. Every piece of flex track that I bend I (square up) the 3 rails before I start the next piece. That way your new piece is starting off with it's original (square) rails so the ties are not already moving around to get the rails to line up with the uneven rails of the last piece if you did not cut the rails (square). Hope this helps and take care. Choo Choo Kenny![]()
225-01 Dremel Flex shaft attachment. Click on the underlined to link.
Of course, you could always use the cut-off discs/mandrel that Gargraves recommends/sells (![]() )...
)...
Item #'s 83985 and 93108
...which are made by Gyros...
Gyros Reinforced Fiber Disc Link
Item #11-32208
I'm still using the first 2" disc since building the 25'X40' layout. Cuts through the rails as though they were butter.
Note that the rotating cut-off disc is all that the small dremel motor can handle IMO. If it jambs/stops rotating as you're cutting track, the switch remains on, until you clear the jamb, or turn the switch off. Both can take enough time to do irreparable damage to the dremel tool. Again IMO. A 2" cut-off disk requires a good bit more torque than the 1 1/4" disk, standard, or the larger 1 1/2" disk. Again IMO.
![]() Mike CT
Mike CT![]()
....................................................................................
The Dremel Tool/Tool line is well marketed, but a very average, to below average tool IMO. Both in terms of quality of work, and long lasting durability.
Michael C. Thompson.
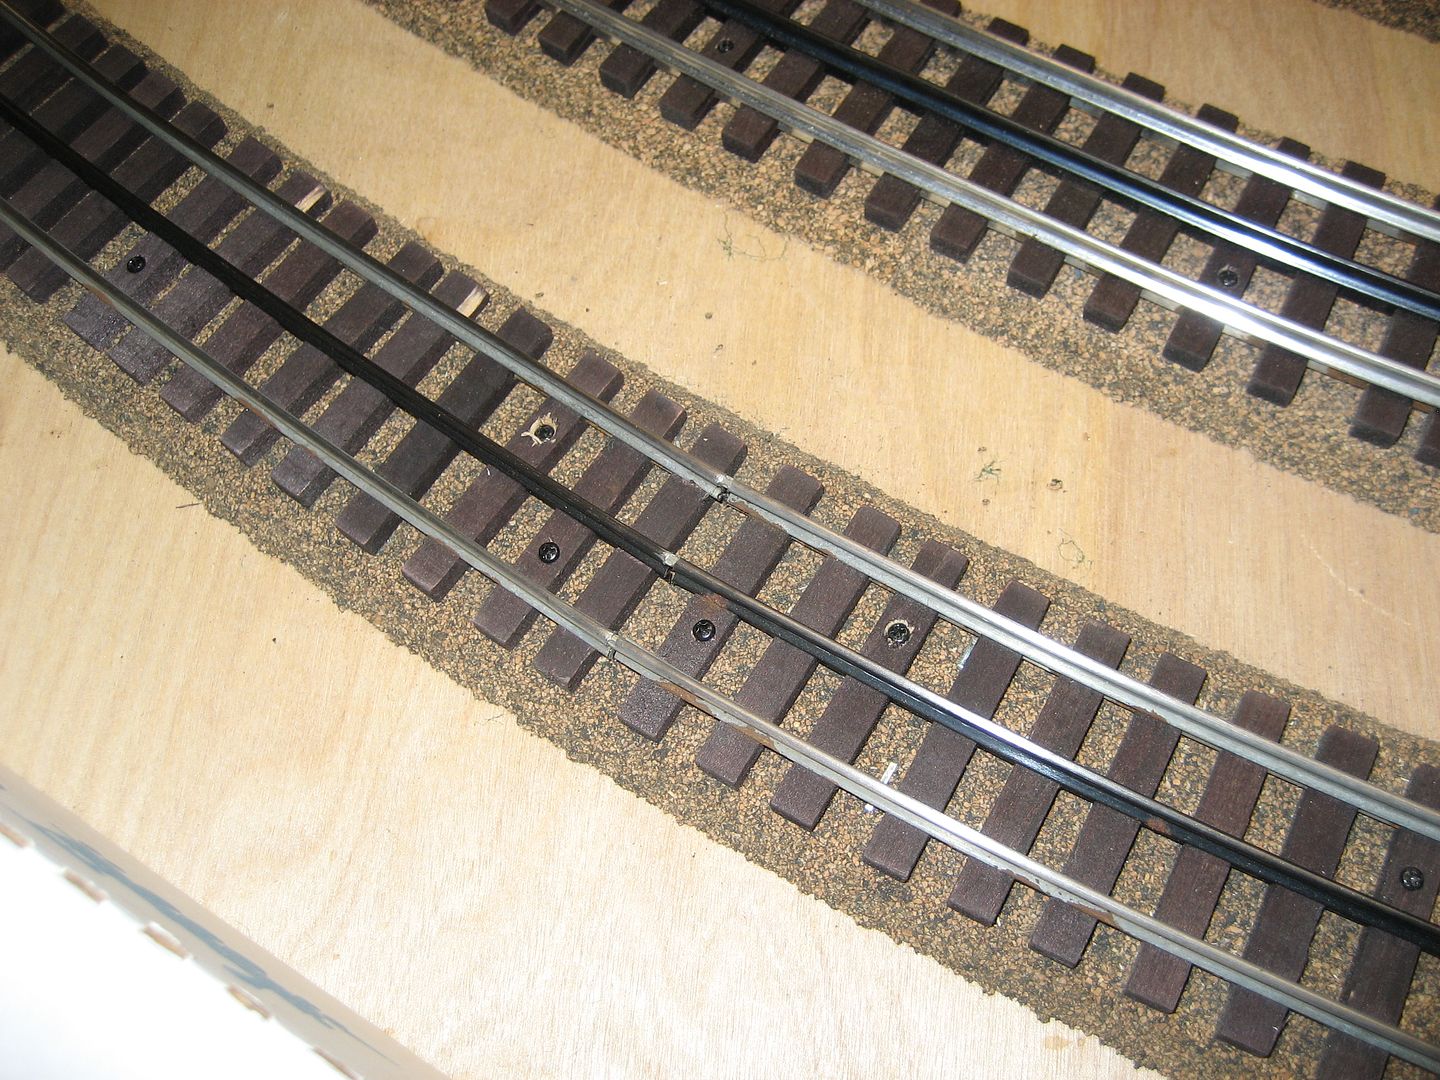
I cut a jig from 3/4'' plywood. This jig is for a 40" radii so I cut the jig to a 36'' radii. As you can see this is for dual gauge track. The track in the first image is laying on top of template used to cut the sub roadbed. In this case the track section is longer than the required length of the curve.


Access to this requires an OGR Forum Supporting Membership
