Did you need to disassemble a layout because of a relocation or other reason?

If so, did you build a new layout?

If so, did it turn out to be a blessing in disguise because your new layout turned out to be better than the prior one?

Tell us about your experience.

I am hopeful that this thread will be uplifting to many of us.

Arnold

Original Post

Replies sorted oldest to newest

Arnold - another wonderful thought provoking and support provoking thread by you!  

Although I have no plans to move or tear down my layout ... if I did move I would have to build a new layout and do so with the knowledge I've gained thru the mistakes I made building the current layout ... and of course this current layout is still not complete.

Are you planning a move in the near future?  

No, but if I did build a new layout, there is no question in my mind that it would be better than what I have now. Among other things, it would have wider radius curves, have better organized wiring and, hopefully, be substantially bigger.

For me, a new house with a much bigger basement would be the motivating factor for building a new, bigger and better layout.

The ironic twist is that I love my current house and layout in my half basement, but I could love a new and bigger house, basement and  layout more. Arnold

    Had to tear down my previous layout due to water in the basement. There was only enough to show as a puddle in a corner - but hey, it would've gotten worse. The old layout (never finished) was 6x16, had a bunch of MTH accessories as well as all my postwar, elevated track loops, 8 #022 switches, turntable, a streetcar line, etc., etc.

    It was never going to be finished. The new (and finished and last) layout is 4x12, two loops of 042 and 031 tinplate track, 4 #042 manual 031 switches and one # 712 manual 072, and my Atlas turntable with three sidings. Wiring (my nemesis) is easy: nothing under the table, all my postwar accessories take their power from the track and buttons are on the edge of the layout. No MTH accessories, no elevated track, no scenery other than green carpet with roadbed and streets painted on.

    In short, it looks like a 50's postwar sales display.

    I finally got what I always dreamed of as a kid.

Last edited by artyoung

The core section of my layout will be 32 years old this coming January and has survived two interstate moves and one intrastate. In every instance, thanks to labeling of all wires and designing for easy disconnect and reconnect, I’ve had trains running within a few hours of installing the layout in its new home.

For each move, I took about three weeks in advance to pack all trains and structures and reapply any wiring labels that had fallen off. And I never allowed the movers to touch the trains or the layout. In each instance I rented a truck large enough to move the layout and my train stuff (as well as indoor potted plants that the movers didn’t want to touch).

We’ve been in our current home now for 17 years and the layout has been enlarged three times during that period. Each addition has used a modular format for ease of disconnecting and reconnecting. Labeling wiring is the absolute key to avoiding unnecessary frustration. If that isn’t the 1st commandment of model railroading it’s certainly in the top three.

I’ve been retired a bit more than two years and we’ve no immediate plans to downsize but, I have accepted the reality that when that time comes, my layout will not be making the move. Ce la vie. 🤷

Curt

With the help of three members of LCCA I took apart the wood components of a room size layout on the third floor of my Cincinnati home.  Prior to their arrival I packed the rolling stock, track, vehicles, people and one building into cardboard cartons using what factory boxes I had.  Any buildings remaining were given to those who helped me.  The plywood sheets were given to who ever would use them as were the 4x4 legs(18" tall) and 2x6 cross pieces.  The track switches were sold.

The current layout was built using Gargraves factory curves(O-120 and O-112) and straights, Lionel 0-72 curves and 36" lengths and Ross track switches.  Far fewer track switches, far different operation and far different approach.   

John

Last edited by rattler21

My layout was made portable for two reasons.  The first is my job required frequent moving usually about every 5 years.  The second is the layout would only be used about 1 month a year around the holidays and would be on the floor of living rooms, dens or family rooms.  I did not want to make a new layout every year and did not know how long my interest in model railroads would last.  I built it to allow my young children to enjoy toy model trains as my brother and I did in the Christmas season in the 1950s.

The layout needed to be a portable, floor layout as it was desired to install the layout in a family or other room floor for two months around Christmas and then removed and stored in the garage or storage or shop room.  Since it was on the floor a Christmas tree could be on and part of the layout for the Christmas season.  In one house the layout was in front of a large bay window and the tree was beautifully shown to the street traffic.  The large living room had the room for an expansion with an added section to make an L shaped layout.    

The layout would be moved with the house hold furniture when relocating for employment  (this was a great idea as the layout has be in six different houses from 1976 to 1993 !).  All track, switches, transformers and control panel would be attached to the layout and trains, buildings, bridges, mountains, accessories, etc. would be removed for storage or transport.

The layout would have section sizes that allow easy moving in and out of the house for storage in garage, etc. and also allow packing for shipment with house hold goods for job relocation.  It proved to be good to make sections sized as to fit in queen size bed mattress boxes. The section must be small enough to go through standard size doors and up steps.  The sections must have means to allow it to be moved for storage and into the house from the garage by one person.  Each section had two wheels to allow it to be rolled on one edge.

The main board length is 11 ft, 1.5 inches in length and width is 5 ft, 9 inches   The section with the control panel is 6 ft, 3/4 inches long.  The other section is 5 ft , 3/4 inches wide.

A third train board addition ( 7ft - 6in x 4ft - 7 in) was added in 1988 and has two wheels on the edges as the first two train boards.

Pictures of wheels on board one, Pivot Wheel on one side (this is a double 6 " diameter plywood wheel for the weight of the transformers and control panel on this section)

Train Lots 5-10-2016 337


Corner wheelTrain Lots 5-10-2016 336

I have safely moved the train board sections ( 2 sections, then 3 after1988) from storage in a garage workshop, into the house and then back to the workshop 2 to 3 months later each year from 1977 until 2010 by my self.


It was built in 1977 in Jamaica and was built with a homemade $10 turntable.

It was moved to six houses from 1976 to 1993 and on the floor until 2010 when I built a room above a garage to house it and it was put on legs.

On the Floor from 1977 to 2009

trains 030


Layout up on Legs permanently since 2010
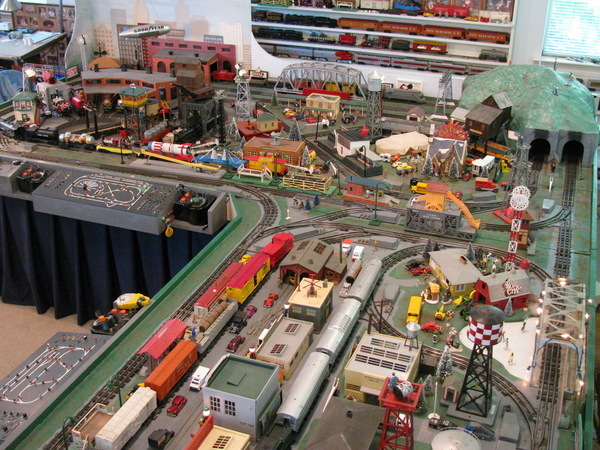
Layout Day Arial 8-18-2021 2021-08-18 015

Charlie

Last edited by Choo Choo Charlie

I had to dismantle a layout not because of a relocation, but because of a change in priorities.  When I was 14 my parents built a 24 x 40 addition onto their woodworking shop.  They asked my brother and me if we would like to have a basement included in the building for all of our sh...stuff.  My mind instantly thought of a large train layout.  Upon completion of the addition I immediately started to construct a decent sized layout.  Unfortunately, I had made no plans and just started building the structure.  As time went on I realized that I was in a rut and nothing was getting done.  I would put some track down only to pull it up after a couple of days.  The layout sat unfinished for about three years. 

My other passion being pipe organs, I had always dreamed of installing one in out home.  I had an opportunity to acquire a small pipe organ that would actually fit into the basement.  My dad agreed to let me get it with the stipulation that the train layout come down.  It was gone in less than a day!  I installed the organ in the basement and enlarged it several times.  The skills I learned from installing and enlarging the organ greatly helped in my goals of becoming an organbuilder.

Fast forward about 10 years.  My wife and I bought a home with a spare room that I could build a train layout in.  I did quite a bit of planning and came up with a layout that fit my traditional sized trains perfectly.  All was well until I bought my first scale locomotive and freight cars.  Down came the first layout, the room was remodeled and a new layout was designed and constructed with operations in mind.  Today I enjoy this layout with our granddaughter and friends.

What I learned from this experience is plan, plan, plan then plan some more.  I think my dad had a crystal ball when he allowed me to get the pipe organ.  He knew I would have to think things through and plan how things would go together.  Lessons learned.

Tom 

Yikes Arnold, you've touched a nerve here with me.  Been "1/2" building layouts since 1990 !   Received several corporate promotion/moves, a divorce move and several voluntary moves, landing here in SD,  my wife and I are here to stay !  Fixing the basement is our current priority.  I'll have to dig out the old photos sometime to mark the passage of time/layouts.  This will technically be my first layout !  And , yes, we are blessed !

It's been since 2012 since my garage layout on the mountain had to come down due to a move. Still have a flickering hope of a rebuild but I am facing another move within this next year so still on hold. Have plenty of Atlas track and some of the scenery items including the long viaduct that was prominent on my first one.  Meantime, will keep formulating ideas from the excellent photos and comments of you guys who are in operation!

Here's a few pics of the late A.T.&S.F.

DSC08985 copyDSC01423DSC07559DSC07905DSC08154DSC08334DSC08953

Attachments

Images (7)
  • DSC08985 copy
  • DSC01423
  • DSC07559
  • DSC07905
  • DSC08154
  • DSC08334
  • DSC08953

Be careful with too large sections.  I built my current pike in two 4'x8' sections.  I built each one separately in my garage.  Each one was wired, tested and sceniced before carrying into my basement for permanent placement. When it was time to install the second section I tore my rotator cuff.  That cost me an overnight stay in the hospital, several weeks of not using my right arm and permanent difficulty with my right shoulder.  Who says model railroading is a safe activity?     ODD-D

cc.Sam - that was an inspiring garage attic layout you had. At least you have some good pictures.

My tear down in 2009 was sad and painful in many respects; result of divorce and ex-wife not wanting the layout in her basement; 10 years of work and good memories made the 2-month long disassembly process emotional and painful. I wish more women liked trains and layouts!

The reality for me was simply to go on, because that's all we can sometimes...and in 2012, in another home, I began building another layout, and it's mind-boggling to now consider it's 9 years later. I suppose if there is anything good it's that I saved most of the framing lumber, wiring, Ross Switches from the older layout - and most of these materials have been reused in the newer layout. Nevertheless, much had to be thrown out, and that is sad. Yet, the really sad aspect is how much design and uniqueness went into my former layout - it was a wonderful place; and I was about 80% finished. This picture is of the finished left-hand side.

Paulslayout

Attachments

Images (1)
  • Paulslayout
Last edited by Paul Kallus

Add Reply

Post
×
×
×
×
Link copied to your clipboard.
×
×