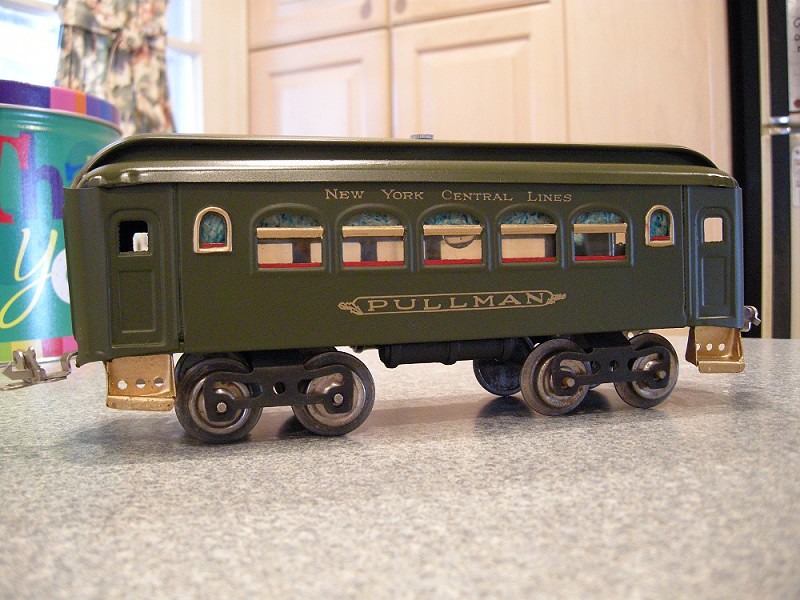
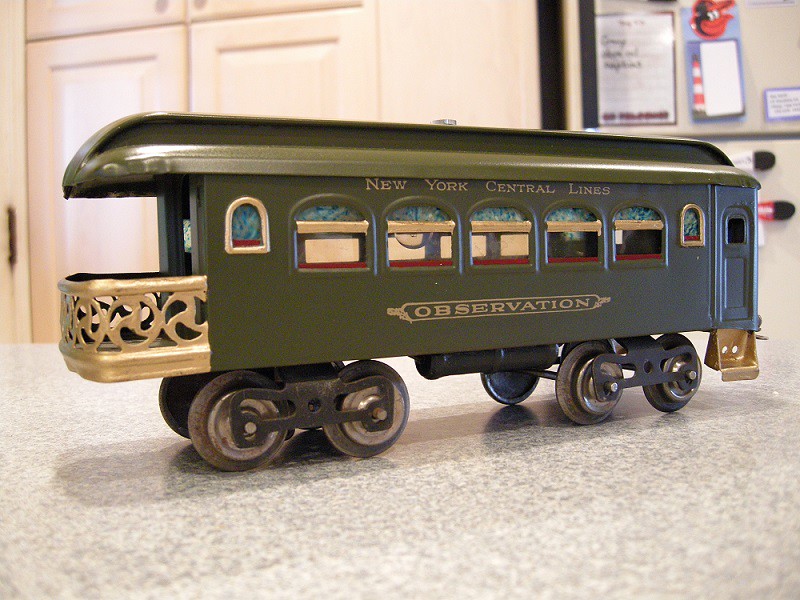
Hi I am new to tinplate standard gauge and was wondering if one of you folks could me out on the fitment of the Lionel #35 and #36 passenger car roof to the body. The three I purchased, the roof does not conform to the body, I have look at others on line and they all seem to have this problem. Is this just the way they were manufactured? Also I am in the process of stripping the paint off one car and trying to find the right color, the color looks like light greenish blue. I will attach a couple of pictures. Any help would be appropriated. Thanks in advance andHappy New Year.
Replies sorted oldest to newest
The correct color for the Loco, & the 35 & 36 cars, is supposed to be Dark Olive Green, which is available from Henning’s Trains.
No, the roofs never fit the body right. Align them up as best possible is all you can do. As Teledoc stated, the original color was dark olive green. J&A Hobbies in PA also makes some excellent dry transfer lettering to restore the cars and loco.
Thanks for the info. So my next question is did they come with window strips? Also on the observation car did they just paint the rear railings gold or brass color and are window frames red? Thanks again.
And the truck frames were black, of course.
Yes, Yes, Maroon.
Chuck, Thanks for the ‘dry transfer’ supplier.
Not sure if you can see it here, but yeah, the roof fits inside the car ends on a 35. Looks weird, but that's the design:

This is my "refurbished" Lionel 35, done many years ago.
Now, the roof of a 36 fits more appropriately:

PD
Looks good. Mine was an exterior repaint only...the interiors were in decent shape, and the “bench” seats had a finish that looked like wood that I wanted to preserve. Basically stripped out the window material, which I reused, masked the interior, then chemically stripped, washed, and repainted the exteriors. I used a can of Testor ModelMaster Dark Olive matte finish enamel, then painted the detail with Testors gold and dark red enamels. A set of dry transfers completed the look. Lastly, I gave them an overspray of ModelMaster clear gloss which dried to a satin-like finish. One thing I screwed up that you need to keep in mind - the car numbers should be applied to the car ends, not the sides.
Ran them under the tree this year...they looked pretty good considering they are ninety-some years old.
PD
Thanks for all the info. The cars i purchased were in bad shape (as you can see in the pictures I posted). To strip the paint I used a couple of dish washer tabs and hot water and a lot of scrubbing , it worked, but took about three hrs to completely strip paint. I have a question is the olive the only color they came in? The only reason I am asking is I already have a set in the olive color. I would like to match the color of the engine, but I don’t know the color of the paint. The engine has original paint (it does have a few paint chips) and I don’t want to repaint it. Maybe you or someone else could help with this.
Thanks again for all your help,
Joe
Attachments
Your 10 locomotive looks to be finished in the color known as Peacock. I believe the 31/32/35/36-series passenger cars were manufactured in four colors over their fifteen year production run: dark olive green (DOG), maroon, orange, and brown. DOG was the most common color. The 10 typically came in sets that included the next generation of small passenger cars, the 332/339/341-series. The most common scheme for these is peacock with orange trim.
That said, there's no reason you can't paint your 35/36 in peacock to match your locomotive. You're starting with a blank slate...have some fun.
Thanks Gene, great article. I am just not sure my soldering iron will do the job. I did have to solder some joints after I stripped the paint, but to solder a piece of brass rod you would have to keep the metal hot and that could be a real challenge. However I may try one roof, I have three cars that I am restoring.
Thanks again,
Joe
You are right, it was defiantly a challenge keeping the metal hot but I did it with a small Weller iron. I put solder on both parts before I joined them, that way you don't need as much heat..Don't worry about excess solder you can file it down when you are finished and make sure you keep the roof on a flat surface, clamp it down....Good Luck Gene


