Ordered a new single action pasche airbrush and central air compressor to paint the pilots. Stripped everything off the first pilot in anticipation of airbrush.
Don't forget the 3rd and 4th pilots for my set ![]()
OK, coming right up.
ok, in all seriousness, I just found out one of my sales reps also reps a 3D printer company (with 200um resolution), has a demo unit, and would build me (us) some as demonstrations of its capability for our customers.
Is there any way we can get an STL file made of your pilot (I'll take a CAD file) to make copies?
This could be cool!
Thanks,
- Mario
Mario,
I thought the 3d machines left a pebbly surface.
I think there are some inexpensive 3d scanners for building files for 3d machines.
Giving it more thought I could probably set up the tooling where I could make several of these out of brass.
I would have to build a stamping die to consistently get the curves correct. And a better solder jig.
The biggest bite is the square holes in the pilot I would have to hand file each hole square. I'll have to think about it.
The other bite is building the anti climber.
Ron
Ron,
This was news to me... but evidently it is the 3D rendering file that the machine uses to form the parts.
This is an industrial-strength 3D printer, and has won best-in-class awards.
Good idea.
That looks terrific Ron - especially good together with your 'scale' 3 rail track!
Ron - I'm very disappointed you started this project, it has and will bring work (otherwise known a pain) into my life.![]()
I worked on one PA for my CZ. I had been satisfied until Ron's first post.
Now, bob2 questioned spoke of the comparison of the Lionel and MTH models. He liked the MTH version which he said compared favorably with the Key PA, and dismissed the Lionel model. Here are some comparison pictures of MTH and Lionel and a prototype photo. (I see if I can get one of Erik's pictures for the Key engine.)
The prototype after modifications had been done by Santa Fe.
What am I missing when I think the Lionel version is a good representation of a Santa Fe PA?
The following are some of the Santa Fe specific details that I think Lionel did better. The number board should be blanked out, MTH had lighted numbers.
Lionel
MTH
The roof number boars is missing on the MTH model, and is a prominent identifying feature of a Santa Fe PA.
The side number board is correctly sized on the Lionel, the MTH board is a generic size to allow of more than two numbers. Santa Fe only had two digit numbers on their PA's.
I don't know if MTH ever modified their Santa PA. It looks like they got the HO version correct. (I've only briefly looked at it.)
I do see a difference in the windshield area. I think this is the area that bob2 is concerned with. Is it a great difference? Compare the Lionel windshield area and the brow to the prototype and the MTH shell. You decide.
The grill within the war bonnet is better on the MTH model, Lionel's is missing the vertical lines on the grill.
Attachments
Attachments
Attachments
Attachments
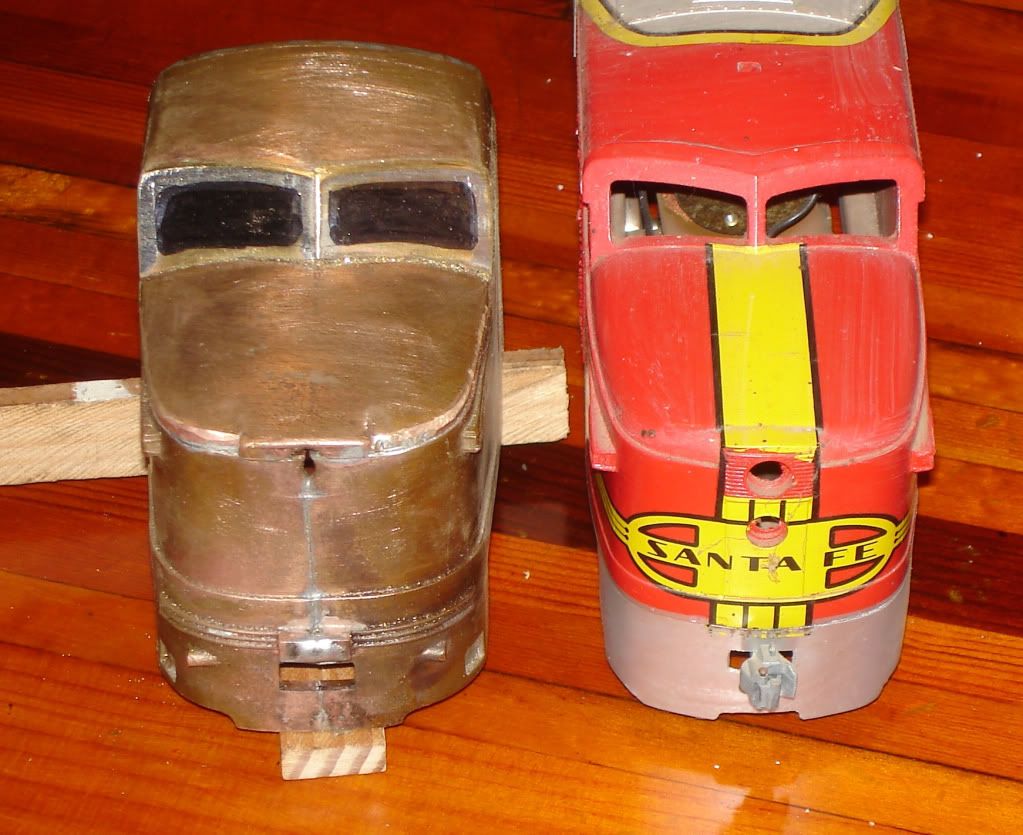
My original complaint had to do with the nose taper. It can clearly be seen on Eric's excellent photos. Two- railers are especially sensitive to this area, since CLW screwed it up so badly on their otherwise superb PA kit. It is difficult to explain in words, but once you become aware of it, it is an obvious thing to look for.
My initial impression was that MTH got it right, and Lionel did not. But then, someone said that Lionel and MTH used the same mold - so maybe it was just a photo angle? Looking at the photos of Lionel and MTH above, I am left with the opinion that one indeed has an incorrect nose taper, but I cannot tell whether it is the Lionel one. And indeed one of those windshields has a distinct widow's peak.
I will try to dig up a photo of noses to illustrate the taper.
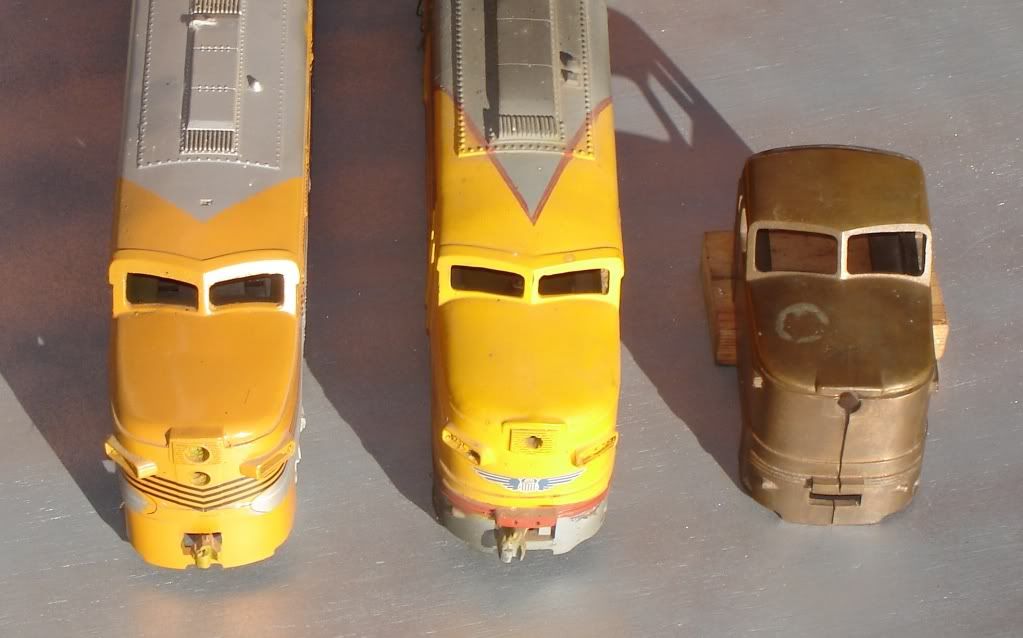
These are kind of rough, but maybe you can see what I am driving at. The one on the left is a silicon bronze version of the MTH. I don't care for the windshield, but the nose taper is more or less correct. The center unit is a very early sand- cast PA model, done from masters used for the ALCO introduction of the first PA at the Waldorf Astoria. It has a tapered nose, although perhaps slightly under-done. I am happy with it.
The casting on the right may tell the story best. It is the completely inaccurate CLW nose casting - but note the split from the headlight down. As an experiment, I drew the sides in to form a taper, and soldered it. It is that taper you should look for- the sides taper toward the nose, starting just below the windshield. I will never use it - it is too short by a bunch - but it serves a purpose.
Bob - If I read your info correctly, the taper you are referring to is from the windshield to the nose and would be most noticeable looking down on the nose.
Is the widow's peak correct? I take it that it is, although some models are more pronounced.
Thanks for taking time to showing the points that you to which you referred. Very interesting.
Attachments
Howard;
To your list I would add that Lionel has the correct side cutout on the pilot and the Lionel windshield is close to being flush mounted and has actual wipers (unlike the MTH). The lack of the roof mounted class number on the MTH is the most obvious "3 foot viewing" difference and a telling one.
Allan
Good points Allan.
The photos I've been using are on Rail Pictures .net . If you search Santa Fe Alco pa, one comes up with the site. I noticed most of these locos had wind screens and a square elevated radio antenna stand. The horns and antennas were painted black. They look really cool. Check it out.
These photos have helped me and will be the basis for my weathering of these units.
Thanks for all the kind compliments.
Ron
I wonder if someone was to add the nose grab irons and the front step, if that step would drastically reduce truck movement. Body mounting the side ladder step is one thing, but adding that step to the front has to cause problems. Notice how the real step angles outward... I wonder if it caused problems as well through tight turnouts in the yard and such??????
Attachments
Words cannot express how impressed I am. Even your track is beautiful.
Man that looks good.... now you should put a Protocraft coupler on the lead unit ![]() I know, I know, where does it end? I'll be quiet now.
I know, I know, where does it end? I'll be quiet now. ![]()
![]()
![]()
ATS shoe?
I just say this because I want to add them to all of my power, and would like to know how to do it.
Thanks,
- Mario
Attachments
Doug, I'll probably do the protocraft coupler on the lead unit. The only thing is I may want to keep the lead where it can do some shoving.
Central fan I'll build the ats shoe, the speed recorders and other air and steam receivers as my last pieces after all 3 units are done.
Little bit later today will do some light weathering on the finished unit.
Hmmm... I like to see them before you mount them; maybe I can print a few.
I found the NYC ones at Des Plaines Hobbies.
Thanks,
- Mario
Starting to weather this trailing A unit. These locos come up from the southwest north through KC on their way to Chicago. My mythical layout is south of Chicago or maybe south Ohio.
Anyway, the units in prototype pictures retain the stain from southwest deserts and I'm trying to copy that with bragdon powders. Haven't added the sooted roofs yet.
Attachments
What did you use to make the round portion of the antenna, bottom and top piece?
Hi Doug,
I soldered a piece of brass tubing for the bottom and used a piece of plastic tube for the top of the antenna. The legs are soldered brass as well. The next one I'm gonna do the upside down cone antenna.
Ron


