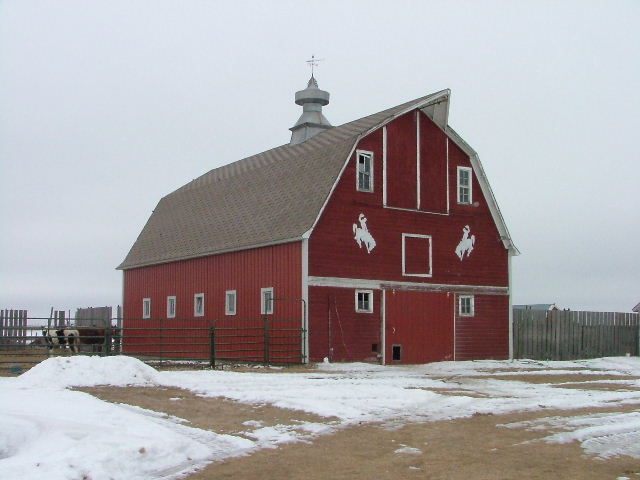
First Thursday of March and I'm still knee deep in February.  Was able to get two of the longer walls completed and glued in place.  With all my preaching about adding bracing to keep warping at bay, I noticed that the repeated washes I had added to my roof had warped it fubar and as a result it no longer fit snugly.  Thus proving the adage that all glory is indeed fleeting.  Back to build another and this time perhaps with coffee stirrers to allow some flex?  Or maybe paint the roof first to seal it? 

Doc: I agree, anything The Doan models is top shelf and something that I admire and aspire to.  Nowhere near his level or expertise but its in the journey.  I really like the streaked paint weathering you modeled and the color.  The two combine very well to give a realistic vibe. 

I tried to mimic that streaking technique using my wash on one side of my barn my pulling down with my brush instead of dabbing it on.  It was inspired by the effects you achieved by dry brushing.  I'm posting two pics, one of each side and each technique used.  They both look good and equally pleasing.

IMG_6052IMG_6067IMG_6094

 If any of you participating have added some details or are still building like me please post your progress.


Attachments

Images (3)
  • IMG_6052
  • IMG_6067
  • IMG_6094

I've seen glaciers move faster but all four walls are finally boarded up and windows are glassed and in place. This is by far the most window intensive structure I've ever built with twelve in total.  Still trying to figure out how the heck to get a working barn door to pass mustard ... any ideas, help, or tips would be of great interest to me.  As I stated in last week's post all the work I put in on the removable roof was for naught as it warped so much due to repeated washes that it became useless.  In the process of building a new and improved one hopefully learning from the mistakes I made in the past.

IMG_6210IMG_6206

Attachments

Images (2)
  • IMG_6210
  • IMG_6206

My initial plan was wood hinges with toothpick hinge pins.

For "drilling" holes, if wood is brittle & prone to splitting, burn the holes in place with a red hot pin. (it takes 3-4 heatings to get thru one popsicle stick). 

  Blacksmith style.....I just wrapped one staple around needle nose, 4 eyes total, and added that to the door. Then other staples form posts on the doorframe/wall.  I also made a swinging wood latch, pin pivot, pin head knob, staples for guide and latch bracket (don't know the real name).It is fully functional.  Next will be string/rope thru the backside of the latch, visible knot, and then up to hole in the door just above the latch. Inside, there will be a wood pull handle to open the latch from inside too.IMG_20190309_122631~5


Attachments

Images (1)
  • IMG_20190309_122631~5

I finally got around to making a roof vent. This was going to be a junk box special.

Digging thru the junk box, I came up with these.  Sometimes it's good to be a hoarder.

IMG_3016

I drilled and cut to free the inner circle of a scotch tape reel, then shortened it.

IMG_3018

Another search of the junk box yielded some thin aluminum flashing.  I rolled it to smooth it out then bent it using a steel rule as a "mini-brake."

IMG_3019

Superglued the overlapping sections.

IMG_3020

Then I trimmed it down to wrap around the aluminum tube.  I drilled the tape reel and the toy funnel and connected them with some brass wire.

IMG_3021

Then superglued it all together.

IMG_3023

I painted it all with aluminum spray paint and added a "weathered" copper horse weathervane to top it off.

IMG_3024

Bob

Attachments

Images (7)
  • IMG_3016
  • IMG_3018
  • IMG_3019
  • IMG_3020
  • IMG_3021
  • IMG_3023
  • IMG_3024

Great to see some others still working on their builds here in March.  Thanks for keeping me company fellas 

Adriatic: digging the "blacksmith style" ... and timely as I'm working on my barn doors as well.  Could you please post a close up photo of your scratch built staple latch, bracket, and guide. 

Doc: there are some advantages to hoarding as evident in your junk drawer finds.  Amazed at your imaginative way of building the roof vent from those odds and ends.  Looks just like the real thing!  Thanks so much for sharing the pics and process of your build and look forward to seeing its final placement and weathering.

I still haven't made it past the store at the corner but at least started mocking a riser frame of popsicle sticks to create a loft with this eventually.

 Make & mount them on the door 1st.  The posts are easier to judge alignment to the hole than visa versa imo.

  ATTENTION, this really should have pivoted the latch on the right door as the left door holds the vertical gap backing so the right opens first. Ideally, you only want to open one door at times (storms, etc). This way the left will drag the right one open slightly until the left's lip clears.

A hinge pin hole burt through with a ¼" 6.3mm heavy duty staple for a small staple gun. Glue will go on the back side of the hole pointing down from the hole. A fresh staple in place vs heated one. (I also added a "foundation" I wanted to look like concrete but I'm thinking dark railroad tie brown and added holes to have come from a turnout; I think I can get some graining going.)

IMG_20190316_182951

I could have nit picked more obviously. At least put my glasses on more often

Best shot of pin/knob ...maybe bar fit.IMG_20190316_183352~2

Glue may not be needed in places. (backside)

IMG_20190316_184001~2

Just below the latch pivot is a small thru hole I burnt with a pin too low. The angle of the diagnal brace wood allowed a good distance with only a slight increase in height so the wood didn't suffer any char weakness from holes being close.

I could have nipped brass or aluminum  and pulled of better; with hole punching & pins used for carriage bolt heads, and styrene square nuts. (start nut large, make hole/ mount nut to pin tip, clip pin, trim nut small, paint).

You could try grinding pin head smaller to scale turned in a dremel and rubbed on abrasives, files, etc. 

IMG_20190316_183550~2

The "catch" (I think that might be right ..?)  is just like a hinge post but trimmed to clear the latch board  ....with nippers.  The guide is a normal staple.

IMG_20190316_183650~2

Best pivot focus/contrast

IMG_20190316_183510~2

Im'a gonna yous da ropes like dis🤤 I'll bee in-tide dune updated a nott soon I no it  🤣  sketch-1552777524286

( rope goes on the left door 🤣 maybe into the gap; There is a vertical lip on the left door, right door sort of opens first )

Attachments

Images (7)
  • IMG_20190316_182951
  • IMG_20190316_183352~2
  • IMG_20190316_184001~2
  • IMG_20190316_183510~2
  • IMG_20190316_183650~2
  • IMG_20190316_183550~2
  • sketch-1552777524286

I'm not done 

But I'm not done 

No 30 second super glue bonds. One buy one white glue cures on the unpredictable imperfection that is popsicle sticks. 

IMG_20190516_200558~4IMG_20190516_200622~4IMG_20190516_201716~2


IMG_20190518_043911~3IMG_20190526_174340IMG_20190526_174445~2IMG_20190609_195239~3

The roof is on backwards here, lol. Needs eves, maybe gutters and a water trough/barrels/a cistern tank. About 4 more windows, stairs or ladder, doors back wall. I'm wondering if this wasn't the local pokey ,

IMG_20190609_195251~3IMG_20190609_195324~2

It comes apart.IMG_20190609_225519~2

Attachments

Images (10)
  • IMG_20190516_200558~4
  • IMG_20190516_200622~4
  • IMG_20190516_201716~2
  • IMG_20190518_043911~3
  • IMG_20190526_174340
  • IMG_20190526_174445~2
  • IMG_20190609_195239~3
  • IMG_20190609_195251~3
  • IMG_20190609_195324~2
  • IMG_20190609_225519~2

Add Reply

Post
×
×
×
×
Link copied to your clipboard.
×
×