I was just commenting the other day how I seem to learn all my lessons the hard way. Today was true to form.

I put a really nice even, smooth coat of rattle can satin black on my F3 'B' frame this morning. It dried fairly quick so I eagerly put a satin clear coat on this evening …. despite the instructions on the back of the satin black can that read clearly, and I'm paraphrasing, "If you're gonna put a clear coat over this black coat, do so within 1 hr of when you applied the black coat …. or wait 48 hrs and then do it."

I'm pretty sure I was somewhere around the 8 hr mark when I sprayed the clear coat. This is the result. Just to be clear, I have used these two very same cans together in the very recent past with no problems - I must have waited..... 

Any thoughts on the best way to clean this mess up? I do not have access to any kind of bead blaster, so I'm thinking a wire wheel followed by progressively finer sandpaper, finishing with probably 600 grit. 

That was wasted work  Sometimes the directions are there for a reason.....

IMG_0599

Attachments

Images (1)
  • IMG_0599
Original Post

Replies sorted oldest to newest

J. Motts posted:

I agree with Pete, also I might ask, as you certain that you had removed any and all oil or grease residue?  If its any consolation, I'm in the same boat as you, seems like I always learn things the hard way too.  Best of luck on the next paint job.

Cleaned thoroughly with alcohol, then sanded, then more alcohol. I suppose something might have evaded all that alcohol, but I really can't imagine that.

Thanks for the 'luck wish' !!

Norton posted:

Paint stripper. Fresh paint will come off in minutes with little effort. 

Pete

Yeah, not sure why I didn't think of that...well, I am sure - I hate stripper. I dislike the mess, the fumes, etc. But it makes more sense than what I was proposing. Off we go to Lowe's tomorrow.....

Good thing this was the B unit and not the powered A unit frame - I'm wanting to get that one up and running! 

GeoPeg posted:
Norton posted:

Paint stripper. Fresh paint will come off in minutes with little effort. 

Pete

Yeah, not sure why I didn't think of that...well, I am sure - I hate stripper. I dislike the mess, the fumes, etc. But it makes more sense than what I was proposing. Off we go to Lowe's tomorrow.....

Good thing this was the B unit and not the powered A unit frame - I'm wanting to get that one up and running! 

Just a heads up on paint stripper, you probably know this, do your stripping outside. I read a news story awhile back where a kid stripped a old car in his garage. It didn't work out for him, He died from the fumes from the stripper he was using.

Last edited by feet

Strip it, scrub it, dry it, rub it with paint thinner, dry it and start over.  I had to do all of the above on both plastic carbody and steel frame, last week.  I hate stripper, too, but it is what it is.  The Scalecoat stripper for plastic finally worked for me; I had tried it several years ago and it didn't.  The steel was easy, just plain old stripper.  At least its summertime and you can do it outdoors.

Good luck and patience.

Next time you see this happen you can use simple paint thinner, mineral spirits, immediately. The longer the paint cures the more you will need to use a stronger solvent. Lacquer thinner or acetone may still work but after a few more days it will require something with methylene chloride or one of the water based alkaline strippers.

No need for mechanical removal here.

Pete

Strip it and repaint.

I'd find Dupli-color semi gloss black....it's a durable automotive spray can paint and will need no clear coat. (most NAPA stores) I'd also place the frame in a food dehydrator for 30 minutes after painting. You will get a rock hard paint hard to damage. I do this on auto parts all the time.....even plastic train parts. 

The nice thing about a larger oven is even heating and low heat.  In our new house, we have a warming drawer, that might be perfect for baking enamel on....  Hmmmmm....  I wonder how long I'd get away with that?

If you do a lot of painting, about 300 watts of heat in a fairly small 2-3 cubic foot box will raise the temperature nicely for quick cure.  An exhaust fan is probably a good idea for this idea...

This one dried nicely in the sun. Well, at least the black coat did! It was good for about 8 hrs. The clear coat was applied in the shade and dried in the shade, or should I see bubbled in the shade in less than 30 min!

Wintertime? I have used the oven on numerous occasions, just not while the wife is in the house! So far, so good!

If it's just the frame...a little basic sanding/wire brushing of the affected area and give the whole thing another shot. Then, 2 days later, give it the clear coat, but, if it's just the frame, why bother with the clear coat?

This is assuming that none of this can be seen in normal operating service. The frame does not appear to be from a terribly antique loco. 

Norton posted:

Next time you see this happen you can use simple paint thinner, mineral spirits, immediately. The longer the paint cures the more you will need to use a stronger solvent. Lacquer thinner or acetone may still work but after a few more days it will require something with methylene chloride or one of the water based alkaline strippers.

No need for mechanical removal here.

Pete

Had a train buddy years ago back in the eighties who was an MD and a PHD in chemistry he jumped all over me for using paint stripper in the house. I even had it next to a window with a fan sucking the fumes out.  He referred to methylene chloride as, "heart attack in a can."   J

JohnActon posted:
Norton posted:

Next time you see this happen you can use simple paint thinner, mineral spirits, immediately. The longer the paint cures the more you will need to use a stronger solvent. Lacquer thinner or acetone may still work but after a few more days it will require something with methylene chloride or one of the water based alkaline strippers.

No need for mechanical removal here.

Pete

Had a train buddy years ago back in the eighties who was an MD and a PHD in chemistry he jumped all over me for using paint stripper in the house. I even had it next to a window with a fan sucking the fumes out.  He referred to methylene chloride as, "heart attack in a can."   J

You can put a skull and cross bones on everything mentioned. They can all kill you. 

I don't use any of them in the house and hope no one else does.

Pete

Mike CT posted:

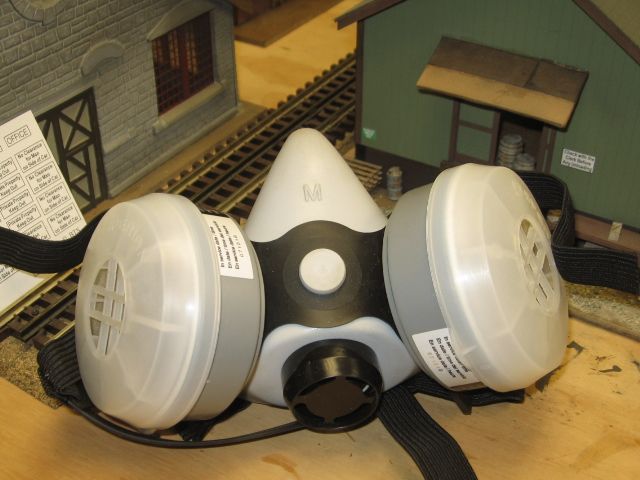
You feel much better at the end of the day using an organic cartridge type respirator.   Safety meeting of the day.  


I have a respirator very similar to yours, but rarely use it since I paint outdoors and let things dry in my garage which is open at both ends. Have I mentioned how much I dislike winters in Ohio?

About the only smell that gets into the house anymore is a vague hint of mineral spirits - parts are dried before coming in, but sometimes the odor lingers. And the occasional smell of fresh enamel parts baking in the oven, but that only happens 1) in the winter, and 2) when my bride isn't home.

BK posted:

The next time you use a clear coat, spray some on a piece of scrap to clear the nozzle of propellent. When you finish using spray paints turn the can upside down and spay a couple of times.

Bob

I've always done that in the past Bob, but the Rustoleum can I'm using has these words on it:

"ANY-ANGLE SPRAY with COMFORT TIP", and sure enough, if you hold it upside down and spray, you will empty the can! Thus the only instructions on the can for cleanup are, "Wipe nozzle tip before storing."

D500 posted:

If it's just the frame...a little basic sanding/wire brushing of the affected area and give the whole thing another shot. Then, 2 days later, give it the clear coat, but, if it's just the frame, why bother with the clear coat?

This is assuming that none of this can be seen in normal operating service. The frame does not appear to be from a terribly antique loco. 

Yep, just a frame! Why bother with the clear coat? You're right, it doesn't show, but that's just me. I like to do it that way, plus it affords me the opportunity to practice my rattle can painting skills in an area that won't show, while still serving a purpose - covering the frame. This one just exceeded my somewhat-tolerant-of-errors rule. 

Rusto on Rusto! Satin Clear on Satin Black. 


BTW (probably should start a new thread for this), does anybody know where you can purchase new spray can nozzles? Just did it again - the black nozzle gave up, so I grabbed a 2nd can of clear and used that nozzle on the black - works like a brand new can now - amazing the difference between a few pathetic splatters and a solid, hi-volume spray!

I called Rustoleum, and a polite, "No, we don't sell those." Gee, I wonder why?????? 

Soak them in lacquer thinner. It probably won't dissolve the paint but it will soften it so you can clean it up with a toothpick and music wire or a fine drill like 77 or smaller. Also helps if you pry the nozzle out. BTDT.

Some paints have a tendency to do this. On those I immediately put them in lacquer thinner after use and blow them out with compressed air.

Pete

Last edited by Norton

I immediately used mineral spirits to clean this tip …. samey, samey? Then blew 60lbs air into the spray nozzle (NOT the can )

And is a #77 drill bit a magic number? I don't have anything that small - no music wire, smallest bit is #60, etc.

I would gladly buy new spray nozzles if they are available....

Lacquer thinner and enamel reducer (less common on shelves) are two of the "hottest" paint related slovents. I've cleaned up an automotive spray gun half full of enamel, clogged tip assembly, etc. and left to dry solid for 35 years. Took a few soakings, pokings, and pulling out huge chunks, then wire brushing etc., but it came out nice and sprayed a few cars after.

For general stripping I've found most of the new age, no-order, citrus based strippers to work nearly as well as aircraft stripper; and better than the less costly, less effective, automotive strippers that often sit right next to the aircraft stripper on automotive shelves.

Early enough, the two coats can meld. Mid-cure, the paint is flattening, forming its shell first, and improving its hold while leveling, shrinking, and sinking into sanding scratches, etc..The fresh coat does not penetrate the the shell quickly enough to meld, the top coat begins to cure and as it tries to shrink, pulls at the still soft 1st coat who's cure was slowed by the second coat stopping buried carrier chemicals from their evaporation.

 Incompatible paints will do that too; for similar reasons; penetration and surface tensions vs hold.

Fortunately I found a spray gun tip that perfectly fits the intake tube/hole on the spray can head. After soaking for 3 hrs in mineral spirits, I stuck the nozzle in there and saw spray! Another lesson learned - clean your mess up immediately. I knew that with my actual spray gun that I used to paint our kitchen cabinets, didn't make the connection with rattle cans til now 

I sprayed another frame and it came out gorgeous, at least by Rattle Can standards!

IMG_0631

Keep in mind that in my early college days, I thought it would be cool to spray paint the dashboard on my 56 Chevy a nice satin black. Let's just say the paint was rough enough that you could have used my dash board as an emery board!

Attachments

Images (1)
  • IMG_0631

  You can clear a rattle can tip after use by inverting the can and giving a fast spray. It should empty the pickup tube and tip pretty well, dramatically increasing chances of an easy spray next time. Done too often, you will run out of pressure before the can is empty of paint.  I use pins & needles to clear tips if needed. Even if you open the hole a hair doing it, they usually still spray ok.

For cleaning the pickup tube of guns, strip the insulation off the end of wire. Copper should be softer than any tube so no wear or scratching it causing nooks for paint to hide in on next cleanup. Aluminum wire is softer than steel. Solid wire works to scrape better sometimes, but stranded wire turns into an wire brush real easy.

Adriatic posted:

  You can clear a rattle can tip after use by inverting the can and giving a fast spray. It should empty the pickup tube and tip pretty well, dramatically increasing chances of an easy spray next time. Done too often, you will run out of pressure before the can is empty of paint.

Can't do that with this Rustoleum can I'm using - it has these words on it:

"ANY-ANGLE SPRAY with COMFORT TIP", and sure enough, if you hold it upside down and spray, the paint will just keep coming and coming until you will empty the can! Thus the only instructions on the can for cleanup are, "Wipe nozzle tip before storing."

Add Reply

Post
×
×
×
×
Link copied to your clipboard.
×
×