Hey Folks!
Ever start a project and go "its mostly the same parts on repeat! Easy peasy!", and then when you get halfway through its just one long internal scream in agony? Yep, for me that's called 'brickwork'.
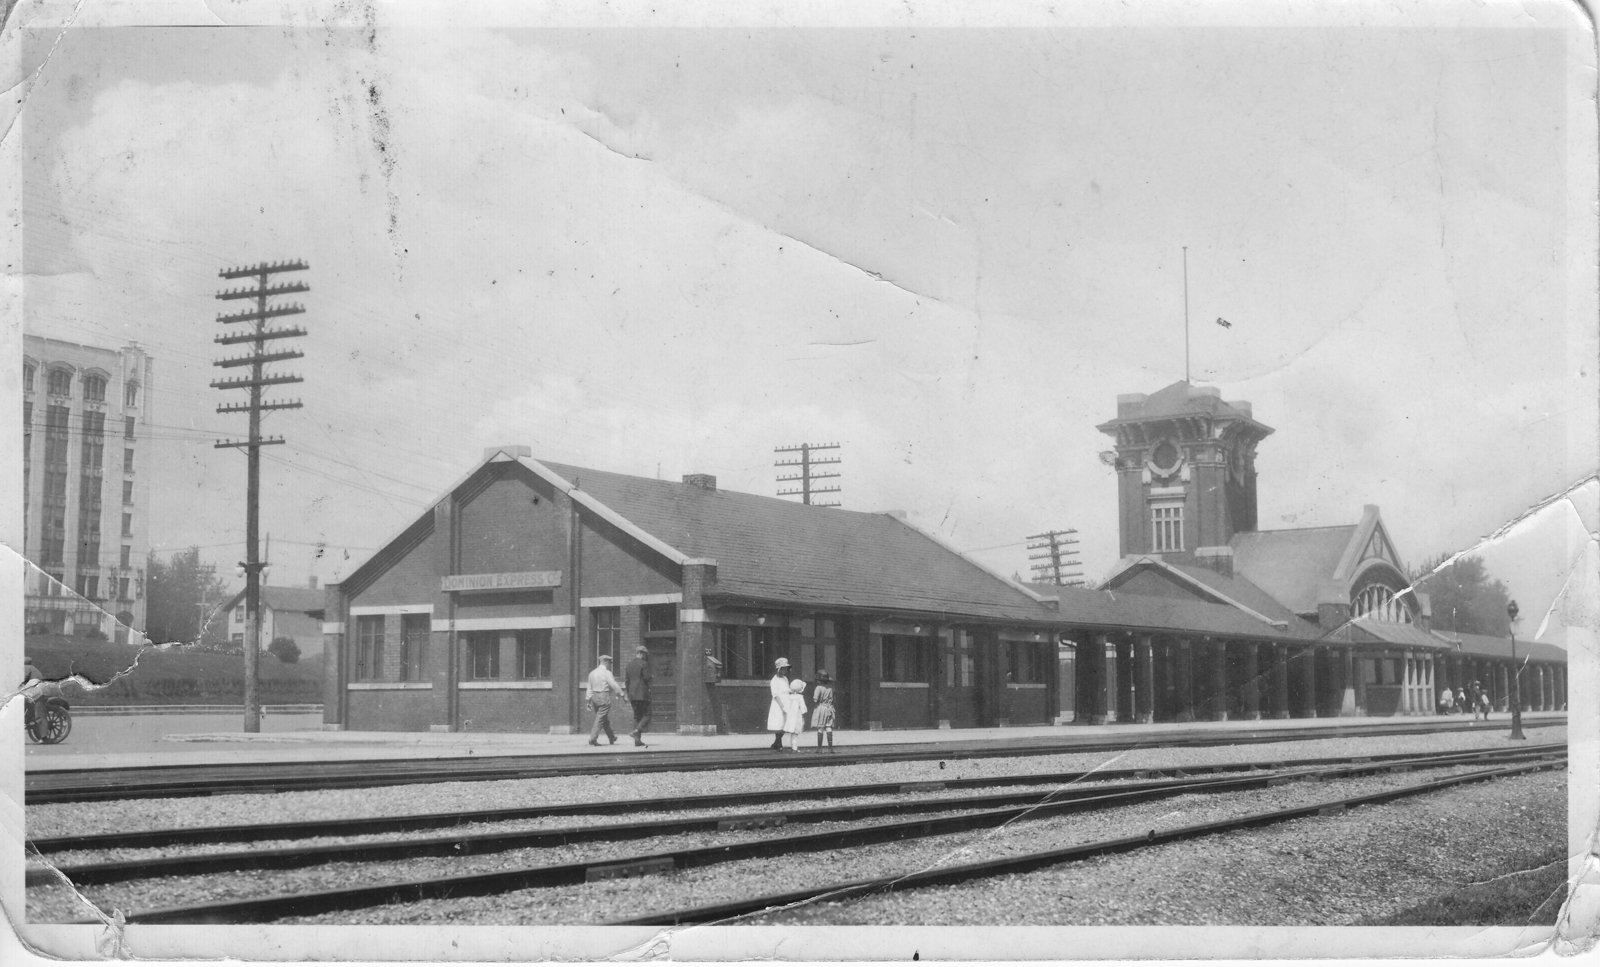
The following topic is a project recreating the Canadian Pacific Railway train station in the old city of Port Arthur, Ontario (Canada). Like the city, which ceased to exist upon merging with rival Fort William to create the Thunder Bay of today, this station is no longer on any maps either.
(Curtesy of Toronto Public Library, Confirmed in Public Domain, c.1910)
The station was built by CPR in 1907 with a Baggage house, Main building with connecting awning, and a long North awning over the platform. Across the tracks (and a skip south), the Canadian Northern Railway (later CN) built their own station, which exists to this day. The station went through many renovations through the years with a baggage house expansion, enclosure of half the trackside concourse (main building), removal of the North awning, and the removal of the 4 North/South Baggage house double doors.

(Curtesy of Toronto Public Library, Confirmed in Public Domain, c. 1934)
The station was finally demolished in April 1976 after earlier discontinuation of service, and a bid to reroute current "water street". The nearby shipyards of the CPR and CNR were also filled in and are now being developed as a waterfront marina/ residential zone.

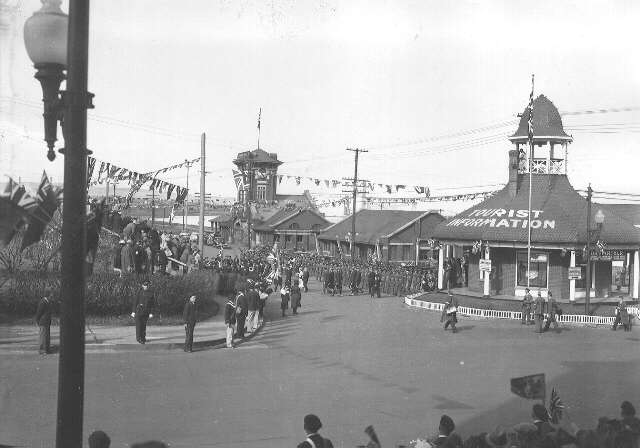
(Curtesy of the Toronto Public Library, Confirmed in Public Domain, Royal visit c.1939)
The project, commissioned by a local client, was to make a model kit as the station would have looked in the 1970's (when visited by the client). Space necessitated the non-expanded baggage house be created instead, and a shortened middle awning connector. However, for my own files, I am developing 'modified' extra parts as well which can be subbed out to replicate the 1919 original condition (after N/S double baggage doors removed) in its entirety.

Construction of Baggage house roof (pre-alteration of windows for accuracy). Needed to raise the bottoms as they were too low to the ground (and tall). There are 5 'sections' for the length; an expansion by the 70s raised this to 9 (and moved the doors).

Now that's an awning!!! The printed parts will be made into segments with each roof section printed vertically, and each ground segment printed individually. This part was removed by the 70's.

Start of construction on Main building. Surprisingly there are not many photos of the main building that are not taken from a distance. Finding out the detail on this part involved a lot of asking for photos via Facebook, museums, archives, etc. I got some really nice ones from 1919 and one of the royal tours for the street side. This part is the start for the 1970's south side with a removed concourse (it was open to the exterior trackside). Note the big pillar where the main entrance will start.

And HERE is where the torture started.... See all those bricks on the main entrance? The ones on angles? How about that [insert frustrated word here] archwork?!?!? You'd think you would not need to alter the span raising it or lowering but nope! Going one way you need to shrink the span, and vice versa for going the other direction.

By far the hardest part. Lining up all the bricks on that arch, finding photos to confirm the detailing on the main section (like none in existence), and using a slightly fuzzy angled photo to figure out how the CPR lettering was carved for replication. Its not perfect, having to build the entire thing from photos (plans unknown to still exist), but its practically perfect for a perfectionist.

Last week's work: Clocktower top and limestone! Still need to add the shingles and remove the roof for separate printing (not the bricks, roof will slide on down for access to the inside) but this was a nice change from the brick mayhem of the main building below. It will be added to the gap in the street side later with some extra segments to give the tower height. There's also some nice limestone work/windows on the tower that needs to be worked on in the days to come. (Limestone bay window anyone?!?)
Updates to come from finishing the 3D work, to printing, to processing for delivery (sanding/priming).


