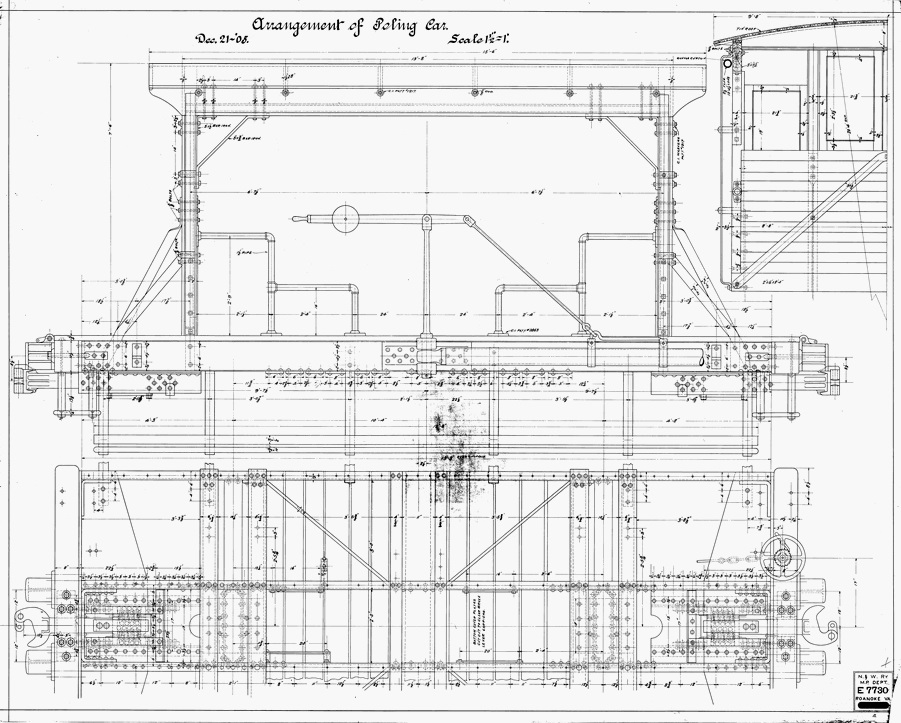
Here is the inspiration. N&W 6
This car was originally built as a "Poling Car", used to "pole" cars on adjacent tracks into position. Somewhere in its lifetime, it was converted into what I will call a "Rider Car". It was used exclusively by the "East End Shops" crew while switching and handling cars around N&W's East End Shops in Roanoke, Va. Due to many "close clearance" places around the shops, the train crews needed something to ride, while working their shift. I saw this car in use almost every day.
Below is the only photo that I know of taken of N&W 6. *Note the "Hobby Horse" on top.
After seeing the MTH WARR 19th Century Flat w/Cannon with its short wheelbase and just happening to have a surplus Williams FM Train Master body lying around doing nothing, it was obvious to me that I needed to make this "One-of-a-kind" car. Here is the starting point.

Looking at this, there was a lot that had to go. Shield & braces, cannon track, stirrups and stake brackets down the side of the car. The nice rivet detail down the side had to be "collateral damage".
After the carnage of sawing and filing molded in details into oblivion, I used different types of Evergreen plastic to build back up again. I also used some very nice spare parts from an old HO flat car that was made by Train Miniature (how many of you remember that company?).

Different sizes of angle bar were used to build up the car frame and to make stanchions so the crew wouldn't fall off the side of the car. Although I can't be sure of this, it made sense to me to leave the "B-end" open so that the crew could step over to the locomotive if coupled on that end (which it usually was). Small plastic rod was used between the stanchions and for the grab irons. It was easy to bend into shape. I used a pair of hemostats to flatten the ends of the grab irons in order to glue them to the angle bar and provide a place to mount Archer Fine Transfer rivet detail.
The black wood decking was from the HO flat car and went down over where to molded in cannon track had been.
For the lower footboard running the length of the car on both sides, the supports were made from small square brass rod, cut and bent it to shape. In order to mount the footboard, two small channel pieces of plastic were glued together, then cut to length, spaced out and glued inside of the car frame. The brass support bars fit snuggly inside of these channel pieces. The larger square plastic bar was placed there to provide additional support to the plastic channel pieces.
I am sorry that I forgot to take a picture of the metal frame of the car. I did have to use a small cutoff wheel and a file in order to cut clearance slots down both sides of the metal frame so that the frame would clear the channels when reinstalled.
A short piece of channel was cut and superglued to the top of brass support rod so that the footboard would have something to be glued to. The footboard was made from sections of the HO flat car stakes. Flat sheet plastic was used to make the back plate of the footboards. Then, Archer Finescale rivets were applied where needed.

The FM hood had been removed from the rest of its body and stripped of paint. The lower headlight was sawn off and puttied in. Then the hood was glued to the car floor.
Small plastic rivets where made to hold the safety chain place on the B-end.
All was then primed a light grey.


Then a coat of paint. I chose to use a later style of decals that I had left over from a previous project. The grabirons were painted yellow and then it was all clear coated. After drying the frame was reinstalled. And here it is.


And yes, I do have a Hobby Horse to go on top, but, I haven't decided on what type of adhesive I want to use to mount it, as I really don't want to mess up the paint on top.
Original Post
Replies sorted oldest to newest


