
Replies sorted oldest to newest

Hi guys,


Thank you for the response.  I have painted plastic with good results.  One of my main  concerns is that I have heard you need to bake the model post painting.  I would rather let it air dry for a couple days as R Nelson has suggested.  That makes sense.  Thank you again for the help.  I will post pictures of the finished project.  


Take care,


John

A fellow here mentioned using barkeeprs friend and now I swear by it.  I bought a bottled squeezed the whole thing all over a triplex I was working on and tooth brushed it with water then I let it soak fully submerged overnight.  The next day I had a super shiny and very bright looking brass body.  All the tarnish had been removed.  You have to paint right away to seal.  I primed with floquil solvent based zinc chromate, then painted with various floquil enamels.  A base coat of engine black, sanded fine before a finish cost of weathered black.  Top coat with bit of clear gloss for decals then weather.  I shoot primarily with an iwata eclipse siphon feed at 16-20psi. 

Found out something interesting yesterday. A couple of years ago I bought an Ajin Brass ATSF drover car. The car has no tarnish on it. I had heard that some "unpainted" brass items were actually painted with a shiny brass-colored lacquer to protect them. Given the appearance of the car, it makes sense. It was suggested I clean it with soap and water to remove any oils and just paint it. I guess I'll find out soon enough.

Originally Posted by John Brown:

Hi guys,


Thank you for the response.  I have painted plastic with good results.  One of my main  concerns is that I have heard you need to bake the model post painting.  I would rather let it air dry for a couple days as R Nelson has suggested.  That makes sense.  Thank you again for the help.  I will post pictures of the finished project.  


Take care,


John

Back in my HO days, I would paint with Floquil and let air dry with no problems.  I've still got and old PFM Russian Decapod bought in 1978 and the paint's still holding up on it.


CP MJ&EU 2-10-0 30r


Rusty

Attachments

Images (1)
  • CP MJ&EU 2-10-0 30r

One nice thing about brass - if it doesn't turn out well you can strip it.  I have tried them all, from a light bead blast to a lacquer thinner rub down to absolutely no prep.  Just knock the dust off, shoot with Krylon primer, then a coat of Scale Coat with an air brush.


I bake for an hour at 180 degrees, then let it cool for three hours.  I get really good results - not professional, but contest - winning.


I shoot steam mechanisms with Floquil engine black, while they are running.  I apply a thinner soaked Q- Tip to the wheel treads during the same running operation.  Not the best way, but it works!

You wanna see my results, do a search for "Back-Up Mallets".  On second thought, that search only brings up hammers - here is one:


T


his one has been painted for a quarter-century, operated, displayed, carted around the state, and in general just used.  As I recall, no special prep was used.

Last edited by bob2

Way and methods of painting brass are as many and varied as pickle recipes at the state fair. We each favor our own and once successful it becomes our standard. There are several accepted approaches to it combined with several mainstream paint products in common use. I've used several successfully and unless my paint job will come under contest level scrutiny they are more than adequate to display on my railroad.


I'm a fan of grit blasting followed up by lacquer thinner cleaning, compressed air drying just to move the process along...then let it sit in a dust free environment a couple hours while I get all the rest of the stuff ready. I use a paint booth to control that bad lung stuff. I use an old, make that well worn, Passche VL or H series air brush. I will use either floquil zinc chromate primer/paint/glosscoat/decals/dullcoat, or Scalecoat 1/decals/dullcoat. I dion't like waterbased paints for locomotive finishing. In the end my engines look fine enough and I'm still breathing normally...


Bob

Some random things not to be taken too seriously.


Not sure if I am a fan of bead blasting. Seems like an extra step and can ruin a piece if one is not careful with air pressure.


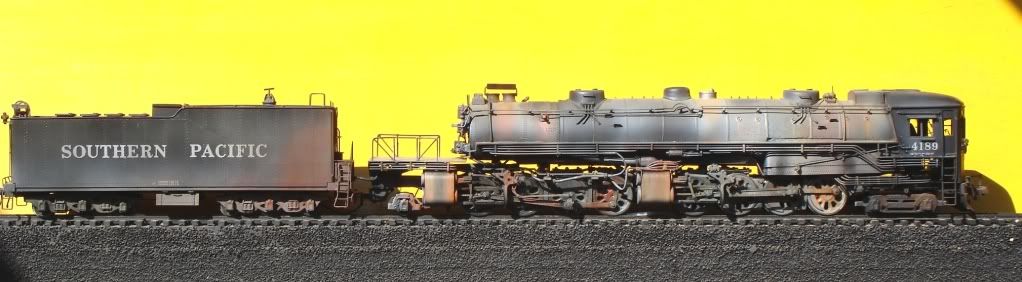
Weathering.....   I'd be loathe to award a paint prize for anything weathered. How can you tell if there is an error??? I'm sure all the weathering pundits will jump on this one, but seems to me that perfection (whatever that is) in a paint job done "as new" is much harder to achieve. For example, if Bob2 gets a little too much schmutz on one of those steam domes, how am I to know! Doesn't necessarily mean I'm against weathering though.


Two tones, striping, etc.......I vaguely remember reading somewhere about some painter wiping a "substance" along the edge of taped areas that gave a straight smooth paint edge along the edge of the tape (paint has a tendency to curl up over the edge of the tape leaving a jagged edge and this magic? stuff "sealed?" the edge and made for a crisp straight edge). Anyone remember reading/seeing anything like that?


I don't understand the guys who have a thing for bare brass. We spend a bunch of money (well, sometimes we do ) for something that is supposed to be more realistic and then leave it brass colored! I only recall seeing one real locomotive done up in "brass" (for an Indiana football game as I recall)!


Anyone ever "bake" their paint jobs in a chamber (box) using a light bulb for the heat source?


Any good method for matching paint for touch up purposes? (presuming one does not have any of the original or know what it was)


Bob Anson was among the best out there (in my opinion). You there Bob? Care to explain how you did it?


Let the firing commence!

Simon


Taken with my iPhone the image is a bit grainy.  She is a work in progress and much better looking in person (camera adds about 10 lbs).  After a beautiful paint job, bit of light weathering is what I prefer.


Westside Virginian Triplex


Here is a photo of her being rebuilt after hitting the floor from 6 feet.  The cab and tender took the brunt of the crushing forces and were totally rebuilt.


Westside Triplex

Last edited by pitogo
Originally Posted by pitogo:

Taken with my iPhone the image is a bit grainy.  She is a work in progress and much better looking in person (camera adds about 10 lbs).  After a beautiful paint job, bit of light weathering is what I prefer.


Here is a photo of her being rebuilt after hitting the floor from 6 feet.  The cab and tender took the brunt of the crushing forces and were totally rebuilt.


Mike, Wow that's some nice project, did you happen to take pictures of this rebuild? Make for an interesting thread for sure!


Bob

Most of the "contests" I have participated in were popular vote.  If you want to play in that sand box, weathering is an absolute must, and will get a poor model with a poor paint job a prize, while leaving a really good scratchbuilt brass locomotive in the "also-ran" category.


Simon is correct - weathering can cover up flaws.  I use that fact to my advantage - and admit that my paint is not contest quality.


At OSW we routinely see factory models with a light overspray of weathered black win over really good scratchbuilt models.  Not "sour grapes" for me; after I learned that bare brass would lose every time,  I applied heavy weathering and now have way more than my share of ribbons.  But ask Alf Modine, who builds better models than me - he still wants to have his brasswork admired.  I always vote for his models. They still lose to crooked, poorly built, heavily weathered junk.


I better add - opinion.

The taped edges sometimes has a tendency to siphon paint below the surface of the taped edge which has not fully adhered to the model.  The trick to this straight edge is to put on a thin layer of clear coat, the clear coat will get siphoned instead of the colored paint.  Remove the tape before the paint becomes brittle and with the colored paint on top it will leave a nice crisp straight edge. Same trick I learned on HGTV when painting walls.
 
Originally Posted by Simon Winter:

Two tones, striping, etc.......I vaguely remember reading somewhere about some painter wiping a "substance" along the edge of taped areas that gave a straight smooth paint edge along the edge of the tape (paint has a tendency to curl up over the edge of the tape leaving a jagged edge and this magic? stuff "sealed?" the edge and made for a crisp straight edge). Anyone remember reading/seeing anything like that? 

Pitogo


How long do you wait before you apply the paint (color) over the clear-coat?


I am getting ready to do striping using paint rather than decal stripes. I plan to:

1. lay down the color paint for the stripe...and let dry/cure

2. put a masking strip over the (above) paint

3. do as you suggest...hit the edges of the masking with a shot of clear-coat

4. lay down my second paint color

5. once my second paint color is dry...carefully pull back the masking strip


The base coat you want to make sure it has fully set. The blue painting tape I use is pretty strong so I waited at least a few days before masking.  I wait about an hour after the clear so its no longer gummy but still pliable.  Paint the second color on and peel after the paint has settled.  I have done both baking and air dry.  I tend to just let the model air dry in a dust free environment. 
 
Originally Posted by Rockyroad:

Pitogo


How long do you wait before you apply the paint (color) over the clear-coat?


Quite some time ago I painted a Westside Aux Water Tender. I cleaned it with soap and water after removing the trucks and let it sit several weeks until completely dry.


I hit it with Primer Grey Enamel from Rustoleum and let that sit for about a month until absolutely sniff dry.


I then hit it with Rustoleum Black and let that sit.


One special note on the trucks and wheels. I tried using DAP Caulk material on the treads prior to painting everything. The material lost half it's volume but did it's job keeping the treads bare metal.


It was my first brass painting and it did not seem all that different from the Autoshop days where rebuilding engines and painting car bodies were par for course. The biggest challenge I had for trying to do a good job was to keep the temperature around 64 with a humidity of 45 to 55 during paint ops.


A Forum Member has the tender now, he may or may not chime in on how well that paint lasted.

I actually passed through a home depot spray can section and looked at the rustoleum colors and primers section.  I walks around that isle for at least 20 minutes.  One thing that  stuck to my head was how thick will it lay paint on the model and how will I control paint flow.  I've seen good results from model paint spray cans but have not for paints made to spray on for example, large garden furniture. A tender is fairly flat my concern was getting under and around detailed parts.  The Iwata I use is able to go from hairline to 2" with high paint flow.

I use a Paasche model H when shooting Scale Coat - but I shoot primer out of the Krylon can.  I am not a pro painter.  


But Si Simonton (RIP) was!  He painted everything with Krylon.  His work was beyond reproach.  I have a GS-4 he painted and decaled.  It is as good as anything I have done; maybe better.

I wanted to thank everyone again for their insight.  The project that I was working on is an Overland coil car with hoods.  I soaked the car and hoods in lacquer thinner overnight and let dry.  Then I soaked it in white vinegar for a few hours and let dry in the sun for a couple hours.  


I used Scalecoat I to paint.  The coil car came out perfect...it looked like factory paint. The hoods didn't turn out the as well, so I dropped them in the thinner after not liking the result.  I re-did all steps and repainted the hoods the following day.  I let the paint air dry in the 95 degree sun for an afternoon.  


The decals were Overland as well and they came out perfect on the coil hoods.  I think after re-reading some of you posts it was due to the glossy finish of the yellow.  The decals on the car itself didn't sit as well as I would have wanted.  I think that may have been due to laying them down on the flat finish.  


I am not sure if I am going to weather this car yet.  I have plenty of weathered cars and I like the "fresh out of the paint shop" look of this car.  


Anyhow...thank you all again for your help and insight!  


John

Attachments

Images (4)
  • IMG_2118
  • IMG_2113
  • IMG_2115
  • IMG_2117
Post

OGR Publishing, Inc., 1310 Eastside Centre Ct, Ste 6, Mountain Home, AR 72653
800-980-OGRR (6477)
www.ogaugerr.com

×
×
×
×
Link copied to your clipboard.
×
×