What part of this building kit is "peel & stick"?
|


|
Replies sorted oldest to newest
Charles, most windows, door frames and doors are peel and stick. I personally don't like peel & stick. I go ahead and glue those parts on. I've found in the past some of the windows and doors peel off in parts. Hope this helps. Don
Don,
So they are actual windows and not paper?
Charles
They can be layered, thin cardboard or paper, stick one layer on top the other....I agree with Don...I don't like them as sometimes the thin parts tear trying to separate them...
but with patience and care, tweezers and pressing....
Thanks guys!
I live in a humid area so that be a reason they don't say put as well. Don
I received my kit today! It looks a little challenging for me but I'm ready to start. Any modeling tips before I get started? Can I use Elmer's glue on the peal n' stick parts? Or, should I rely on peal n' stick only for adhesion? Can I use acrylic house paint on the doors and windows? Both made from paper. How about using the same paint on the walls of the building? Both made from wood.
P.S. Probably should have posted under Scenery and Structures.
definitely prime ALL wood w/spray car(grey) primer and then paint otherwise will curl/warp to h**l. You will be surprised how well paint takes over primer. Hope this helps
I was thinking about staining the wood pieces brown.
I think you may have issues with the warpage w/just stain but look for other opinions here
Warping will occur if you finish just one side of a panel, so apply whatever your paint finish to both sides.
Usually the two sash pieces on this double hung window are press and stick. Different materials can effect the sticky-back material. I used acrylic paints for the entire window sheet and had no trouble attaching to the styrene clear window glass pieces cut from another sheet. Either yellow wood glue, Elmers white glue or CA to apply the window assembly to the painted wood model. Trim paint touch-up may be required BTS kit and diagram.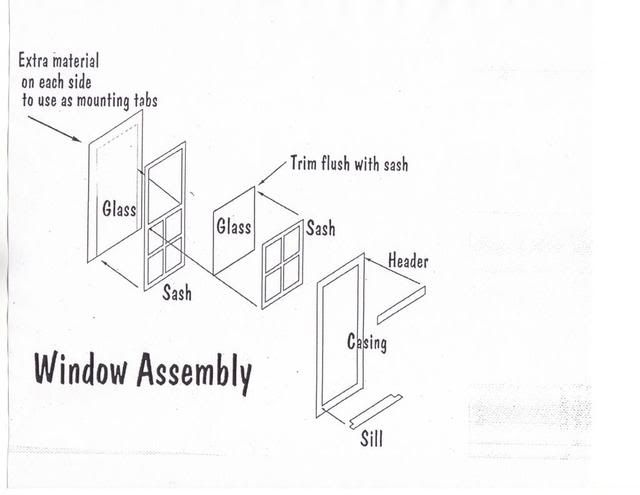

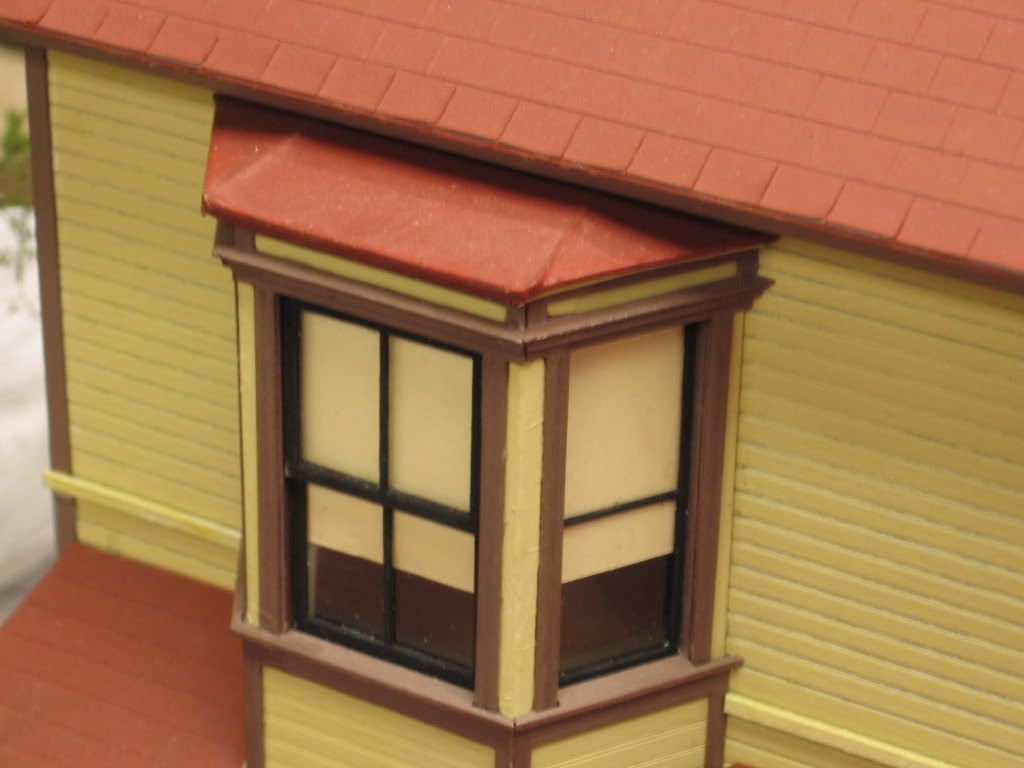
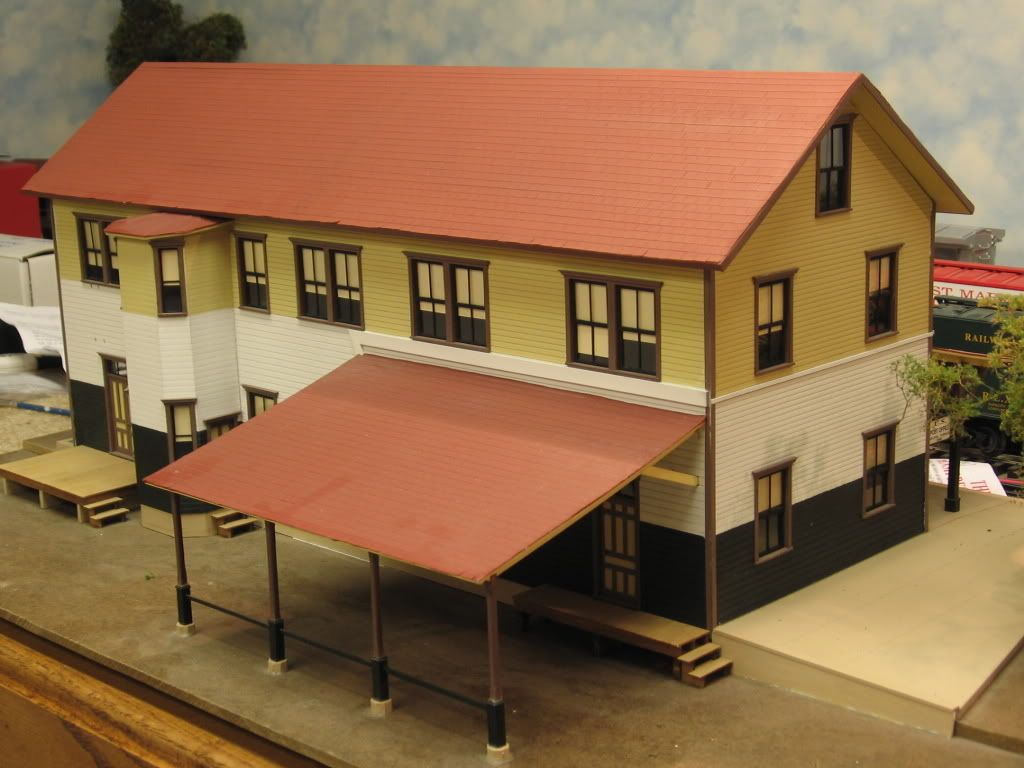
Wood or composite materials, which a kit like this is made, requires paint on both sides. There are instructions about painting the edges. Probably the biggest part of the learning curve is the use of wet adhesives and paints with these materials. Two or three models later I was much better at the assembly. Example: Working the model, there are press and stick roof shingles. I painted the underside/inside of the roof and did not paint the area/side to be shingled. The words (Banana Boat) applied. Surprisingly, I painted the side where the shingles were to be applied and it uncurled nicely.
Paints tend to make adhesives less effective. You may have to use more agressive adhesives with some paint applications. Stained pieces seem to be easier to assemble with less agressive adhesives. Also note that adhesive use may require paint touch-up.
Mike
Warping will occur if you finish just one side of a panel, so apply whatever your paint finish to both sides.
If you look at how the BTS peel & stick windows are assembled, you'd know that you can't paint both sides since you have to peel off the paper from one side to expose the sticky surface to stack the parts up with the glazing in between.
You can & should paint all of the parts that are exposed for peel & stick windows as it's the easiest time in which to do that; touch up and do the edges after they are assembled before insertion into the opening in the walls
Review 5/23/2013. ![]() Excellent points noted, Thank you Martin. Even with some experience these kits and current modeling techniques require a fair amount of additional learning, as has been noted in this tread. Take your time and work through a model to the best of your ability. Read and Understand the instructions
Excellent points noted, Thank you Martin. Even with some experience these kits and current modeling techniques require a fair amount of additional learning, as has been noted in this tread. Take your time and work through a model to the best of your ability. Read and Understand the instructions ![]() I remember my father constantly telling me to read the instructions when I worked on model airplanes as a young teenager. Thanks Dad.
I remember my father constantly telling me to read the instructions when I worked on model airplanes as a young teenager. Thanks Dad. ![]() Mike CT
Mike CT
My experience with peel & stick has been much less than satisfactory. Since it has not mattered which brand of kit, I write it off as a situation not in my "Karma"![]() . I just tried to do peel & stick shingles on an octagon roof. In spite of the use of two different sealing media, the shingles move when attempting to trim at the ridge lines. And yes, I used a brand new exacto blade. As I advanced up the roof, the shingle sections naturally got smaller, making them move even easier. I even tried to let a course of shingles set overnight to see if it helped. No dice.
. I just tried to do peel & stick shingles on an octagon roof. In spite of the use of two different sealing media, the shingles move when attempting to trim at the ridge lines. And yes, I used a brand new exacto blade. As I advanced up the roof, the shingle sections naturally got smaller, making them move even easier. I even tried to let a course of shingles set overnight to see if it helped. No dice.
So, I pulled the stuff off and will make my own shingles from scale wood strips.
When it comes to window, door, and other peel & stick trim, I just leave the backing on and glue it.
Bill
I really like the peal and stick shingles. have used them on over a dozen kits.
Just look at Mike CT photos to see the wonderful results.
Peel and stick is handy....but I worry that it will fail someday.....and it adds to the cost of a kit the double stick sheets are not cheap.
I never did one of those kits.
Question. Would a clear coat before assembly help to make them more durable. You can't do it after as it would fog the "glass".
There is no doubt a learning curve to peel and stick.
(1.) Solvent based paints tend to disolve the stick. I had better luck with acrylic paints.
(2.) Pre painting paper shingles appears to be the acceptable method of painting. The model above, I completed all shingles and then painted the roof. (2a.) Worked extremely well as far as adhesion of the pre-glued shingles. (2b.) Unfortunately the paper shingles painted with acrylic paints when dry shrank considerably causing more problems to correct.
(3.) Spray painting card stock peel and stick shingles should be done carefully with a minimum amount of paint. A powdery-shingle like surface, which might seem like a good look, tends not to adhere well with the pre-applied adhesive. Using a wall-paper roller I was able to get better adhesion. Eventually using a white glue brushed-on/under the shingles that didn't adhere well and the wall paper roller I achieved an acceptable finish product. You may want to finish the roof project with either a very light spray coat of the roof color or a mist of grimmy black IMO.
(4.) Cutting paper peel and stick shingles, as has been mentioned, can be an issue. My best results were with a very good pair of scissors used for decal cutting. Roof valleys were carefully cut as the roof progressed. All end gable cuts were done after shingle completion. Most of the peel and stick shingles I used had roof cap sheets to finish the peak of the roof.
(5.) Overall Adhesion. I went back after the shingles has been installed, cut, and trimmed, lifted the shingles along the edges and add white glue for addition stick, using the wall paper roller to compete the install. Again probably a correction that you would not expect necessary. Worst case, really a problem, I used contact adhesive, which required install on both the roof card and back of shingles, allow to dry and then stick.
(6.) These octogon shingles one of the last installed seem to work better than most to that point. Most likely I was applying too much Rustoleum Camouflage spray paint. I had used (Earth Brown 1918), (Forest Green 1919), and (Army Green 1920) All, IMO acceptable shingle colors.
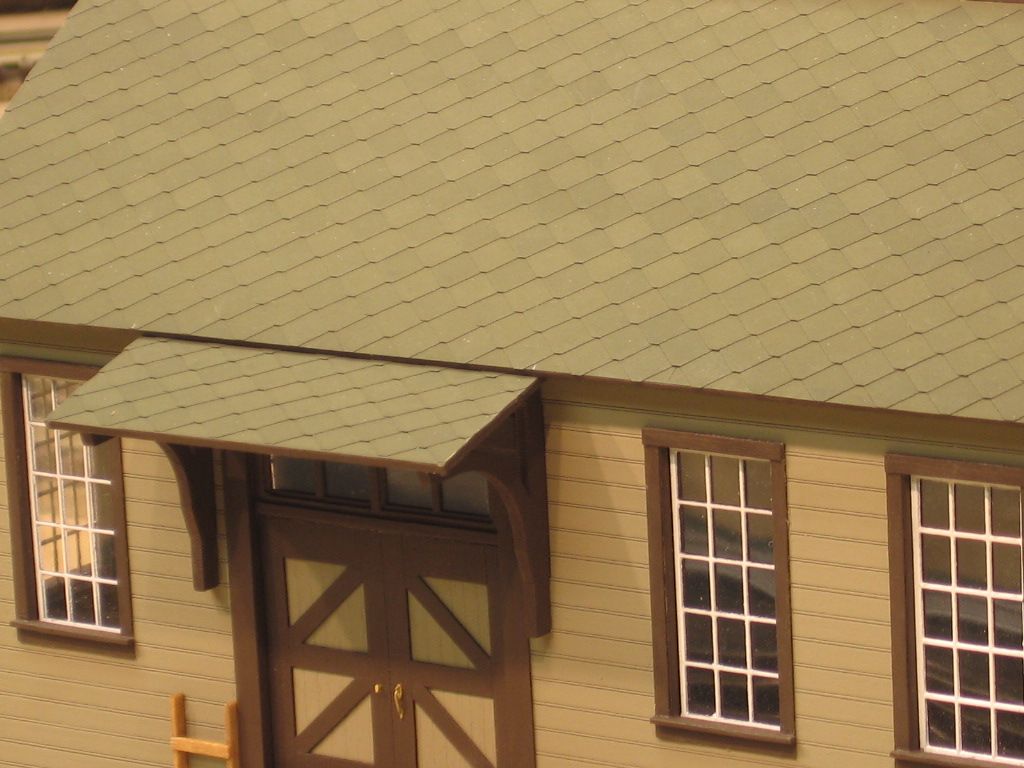
Also note that the windows are a peel and stick product.
Note the brown roof shingles still have some adhesion problems. IMO too much paint. But then some may want the lifted shingle look. Picture also shows facia boards added to stiffen the roof cards that had curled at the edge. As you continue to fix, and re-apply/re-paint the shingles you loose detail. Your choice, about what is an acceptable finish product.
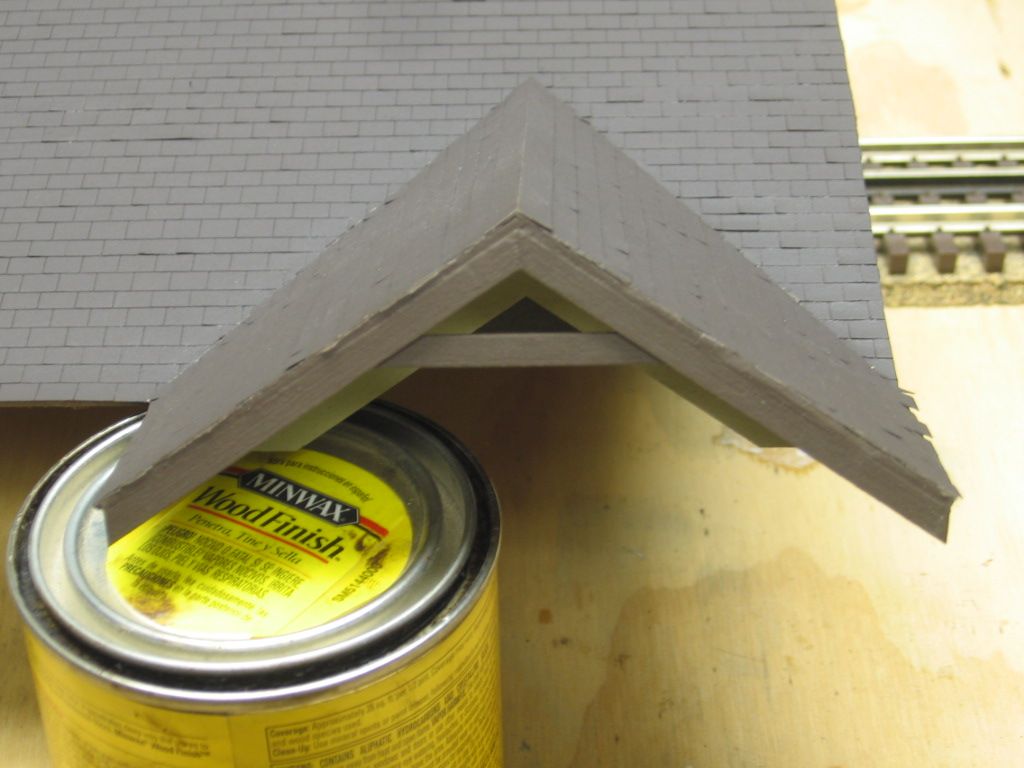
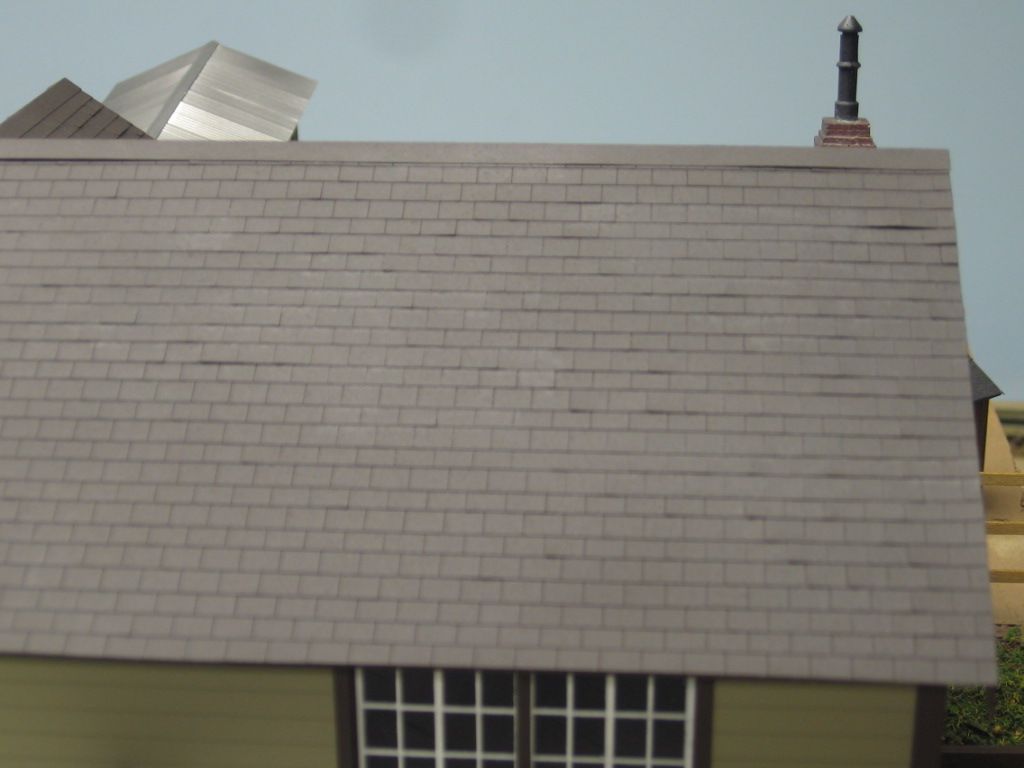
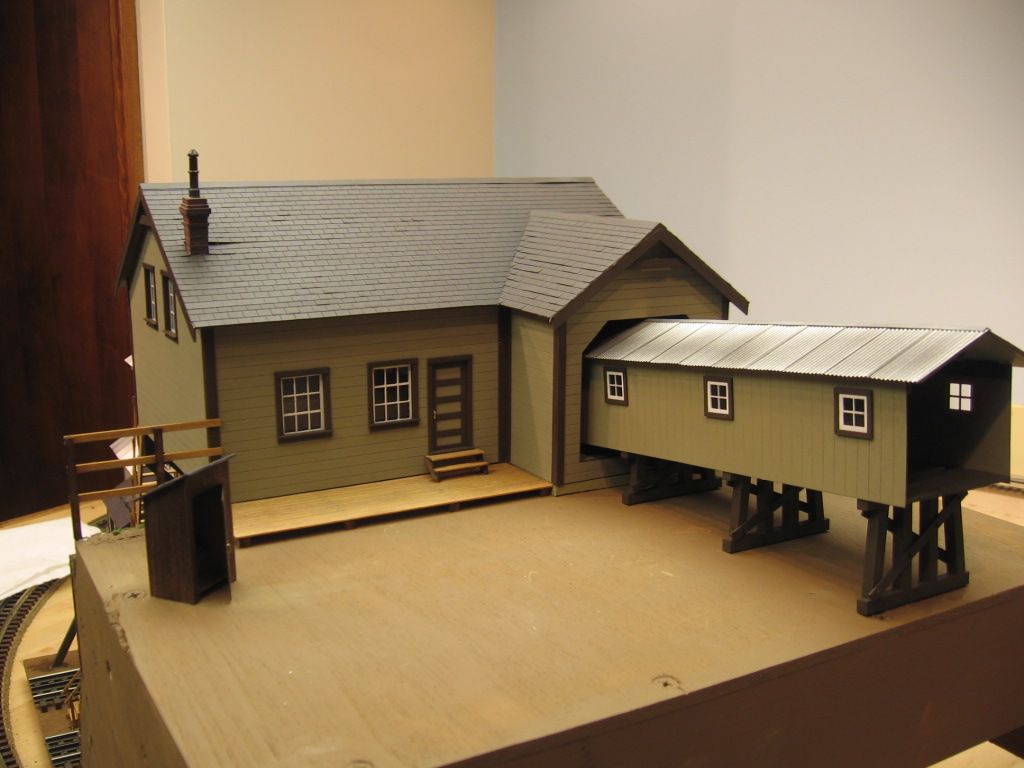
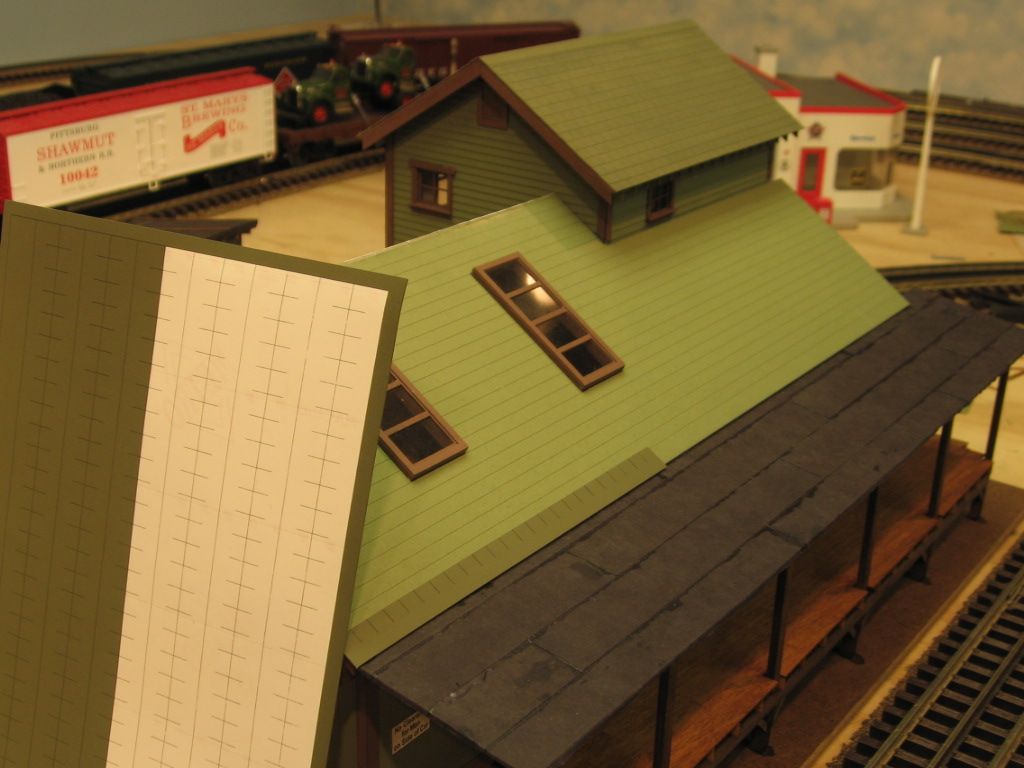
Pre-painted roof shingle cards. BTS model, Eliott and Sons Supply
I live in a humid area so that be a reason they don't say put as well. Don
So it's not paradise after all?
![]()
Access to this requires an OGR Forum Supporting Membership
