Good Morning Everyone. I will start off with a liquid oxygen sphere I constructed in conjunction with the launch gantry I just finished. Let's see what you have been working on.


Replies sorted oldest to newest
Alan, nice job on the tank.
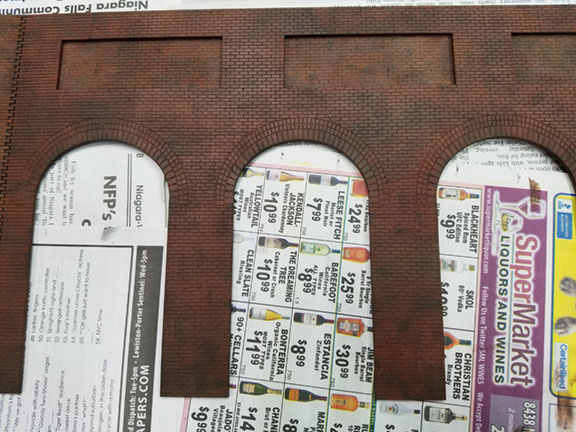
I was able to take a short break from the sawmill pond while I wait on some supplies from Scenic Express to arrive Last night I worked on painting a wall that will be installed between the 2nd and 3rd levels of layout.
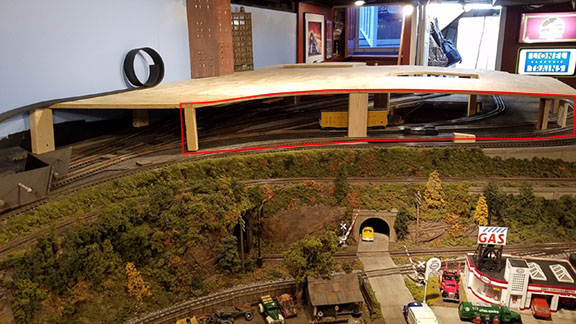
Here is a photo of the area this is going to be installed outlined in red. On the second level under the city I have a hidden storage yard. I only want this area to be visible from this view of the layout. So I had this wall sections laser cut and brick etched out of hardboard. I may add some strips about a inch wide brick sheet to the arch openings to give the wall some depth. In some of the other arches openings will be filled in with brick sheet to hide some of the 3rd level supports.
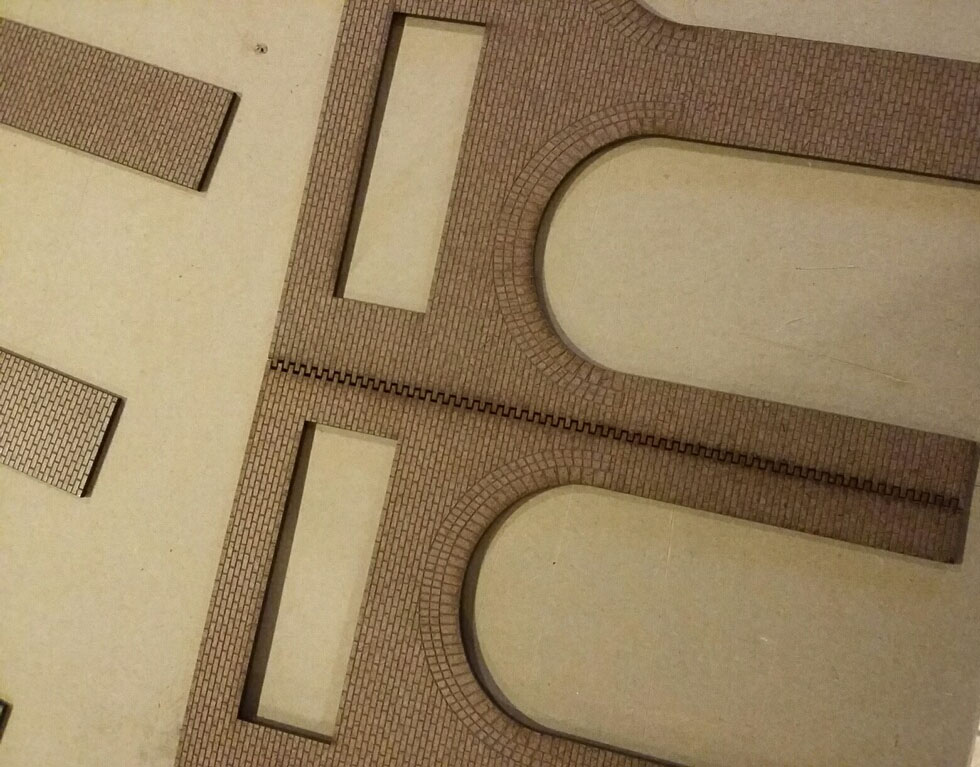
Here are a couple photos of the lasered hardboard
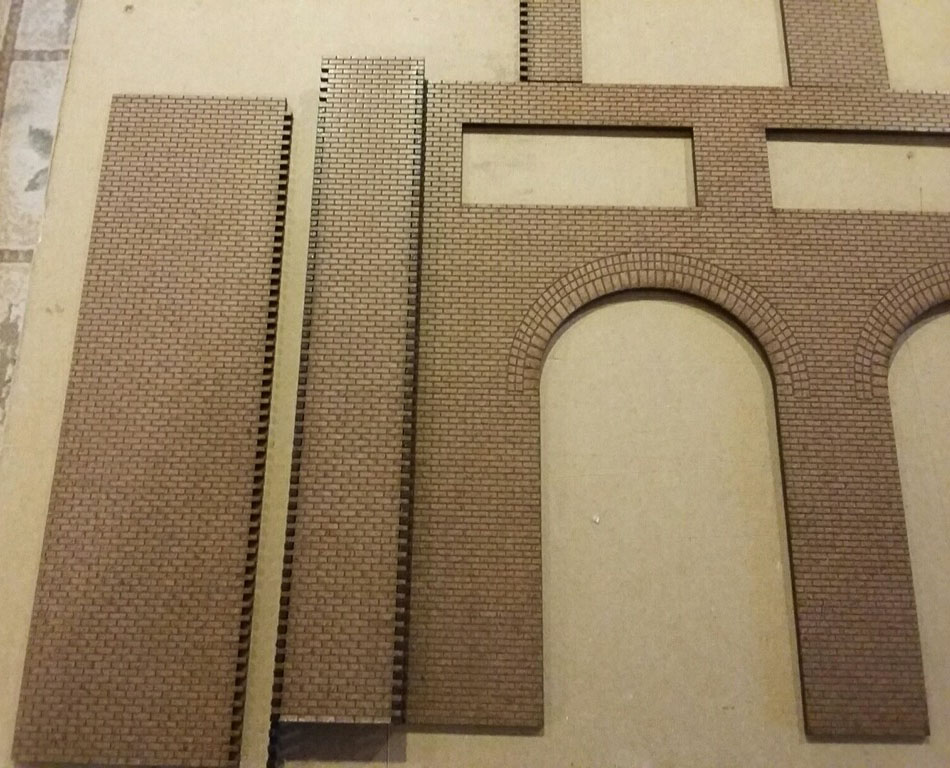
Here shows the whole wall section

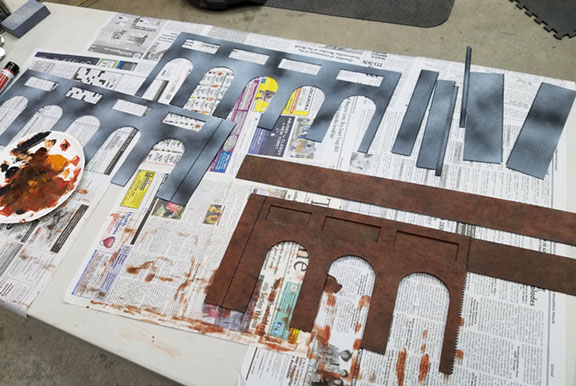
I painted the brick with white, gray & black primer and then used 4 craft paint colors applied with makeup sponge wedges. Adding a little bit of each randomly and dabbed the sponge in it to apply to the wall . Here are some shots.
Beautiful work as always, gentlemen.......the following is not my work.....this was Seth Giem's representation of Frank Ellison's "Quick Sand & Gravel Company". Mr Giem modeled this for his large layout in the Train Barn in Kalamazoo, Michigan.
The layout no longer exists. This picture is used with permission from CTT, graciously given by editor, Carl Swanson.
Copyright Classic Toy Trains, used with permission.
Here is the structure from Ellison's Delta Lines....
Peter
Attachments
Attachments
Alan and all, excellent work. Always appreciate the photo's and explanation of the process.
Thanks all.
-Tom
Added a little pizzazz to my Lionel truss bridge. I use it as a one lane road bridge on my layout. First picture is before pizzazz applied. The other pics are close up shots of bridge taken with a background screen on my desk top PC before going back on layout. Total cost 0 as I used stuff I had around the shop.
Attachments
CSX AL,
beautiful work.
Richard,
Another fabulous building.
Jackie Jr,
I love your scenes
Peter,
It is real nice seeing Seths layout. He would always pick up a few things from me at York, and I would always joke with him telling him that Giem stood for Got It Extremly Made.
Always inspiring sights to behold every Sunday here on the Showcase. Thanks as always to Alan for starting the thread and all those who take the time to display their imaginative work.
Inspired by Frank's great thread on Foliage I dug through my archives of old pics and found a few more to add to the scenic mix.
Attachments
Alan Graziano posted:
Very nice project Alan. I used a lot of liquid oxygen, (LOX), when I was cambering SD40 And 45 locomotive frames and beds.
Attachments
Alan:
Question - you seem to use clear plastic domes and hemispheres rather than the gray plastic. Is there a reason?
Thanks
Joe
CSX Al posted:Alan, nice job on the tank.
I was able to take a short break from the sawmill pond while I wait on some supplies from Scenic Express to arrive Last night I worked on painting a wall that will be installed between the 2nd and 3rd levels of layout.
Here is a photo of the area this is going to be installed outlined in red. On the second level under the city I have a hidden storage yard. I only want this area to be visible from this view of the layout. So I had this wall sections laser cut and brick etched out of hardboard. I may add some strips about a inch wide brick sheet to the arch openings to give the wall some depth. In some of the other arches openings will be filled in with brick sheet to hide some of the 3rd level supports.

Here are a couple photos of the lasered hardboard
Here shows the whole wall section
I painted the brick with white, gray & black primer and then used 4 craft paint colors applied with makeup sponge wedges. Adding a little bit of each randomly and dabbed the sponge in it to apply to the wall . Here are some shots.
Beautiful job! Who is the supplier?
Joe
Putnam Division posted:Beautiful work as always, gentlemen.......the following is not my work.....this was Seth Giem's representation of Frank Ellison's "Quick Sand & Gravel Company". Mr Giem modeled this for his large layout in the Train Barn in Kalamazoo, Michigan.
The layout no longer exists. This picture is used with permission from CTT, graciously given by editor, Carl Swanson.
Copyright Classic Toy Trains, used with permission.
Here is the structure from Ellison's Delta Lines....
Peter
I have that picture from F. Ellison's layout. I kept threatening myself to make the building when Brennan's RR came out with the kit. I bought it. Still threatening myself to build it...............
Joe Fauty posted:CSX Al posted:Alan, nice job on the tank.
I was able to take a short break from the sawmill pond while I wait on some supplies from Scenic Express to arrive Last night I worked on painting a wall that will be installed between the 2nd and 3rd levels of layout.
Here is a photo of the area this is going to be installed outlined in red. On the second level under the city I have a hidden storage yard. I only want this area to be visible from this view of the layout. So I had this wall sections laser cut and brick etched out of hardboard. I may add some strips about a inch wide brick sheet to the arch openings to give the wall some depth. In some of the other arches openings will be filled in with brick sheet to hide some of the 3rd level supports.

Here are a couple photos of the lasered hardboard
Here shows the whole wall section
I painted the brick with white, gray & black primer and then used 4 craft paint colors applied with makeup sponge wedges. Adding a little bit of each randomly and dabbed the sponge in it to apply to the wall . Here are some shots.
Beautiful job! Who is the supplier?
Joe
Joe, I had Dave at Crescent Locomotive Works make it for me. I saw one like this in HO that I liked.
Been working on an expansion to my layout dedicated to industry and switching operations. laying out the track for the second and final section today. I got around to installing the Budweiser Grain Silo and office building. Started working on a new as yet un-named building. I got the false front from Harry Heike with a provision that I would assemble and detail it to fit the space. Here are some pics of the layout expansion sections and the buildings so far
BTW Great work from everyone
Attachments
Great work everyone.
Al, great to see a picture of the master at work!!!
Great buildings everyone! I really enjoy the Sunday Showcase. I'm looking for additional laser cutting services and Crescent may be another good option.


