It took a ton of tries to get these.  Anybody have any good ways?  I'm guessing the secret is a really good camera.


I'd really like to take photos while the trains are moving.  (I only got a couple semi-decent photos after visiting several layouts.)  (The trains in the photos were not moving.)


South1

South3

RioBest


I guess you can click on them to get them more normal.  


I'm learning as I go.  The first photo changes the least after clicking on it.  The third photo changes the most (for the better).


Attachments

Images (3)
  • South1
  • South3
  • RioBest
Last edited by smlWarren
Original Post

Replies sorted oldest to newest

The secret is NOT a good camera. I've seen stunning photos taken with a throw-away 110 film Instamatic camera. The "secret" is good lighting and knowing how to use the camera you have.


Some quick rules of thumb:

  • Use a tripod. This is an absolute MUST for good photos.
  • Use a couple of small lights to light the scene. Using available light rarely yields good results. The lighting in your shots is not bad.
  • Set the camera to either full manual mode or Aperture Priority if you prefer not to use manual mode. If you don't know what "Aperture Priority" means, get out the book and find out.
  • Set the aperture (f-stop) to the highest number the lens is capable of. This is the smallest f-stop and gives you the largest depth of field. This is always a problem shooting models close-up.
  • Because you have set the f-stop to a small lens opening, the resulting shutter speed may be a second or longer. This is why you need a tripod. You cannot reliably hand-hold anything longer than 1/60 of a second.
  • NEVER -EVER - use the flash on the camera. That is the best way to get a lousy picture.
  • Get the camera down into the scene. Don't shoot down into the scenes (I call them "helicopter shots") as you have done with the two images of the 4286.


Keep shooting and practicing. The only way to learn how to do this is to do it.

Thank you very, very much!!!!  I'll have to look in the manual (it's either three or four hundred pages--I almost collapsed when I first saw it) for the techniques you mentioned.  I did use a tripod for those shots.  And a light.  And probably my flash too.  I must have taken a hundred tries to get those photos.  By the time I got them into the photo processing software I don't remember exactly how I got the photo in the first place.


I'd really like to be able to photograph moving trains on layouts I get to visit too.  It might have taken me a hundred tries to get these two new photos.  (And of course I took so many tries I don't remember what I did to get them.)


Again, thank you very much!!!!!!!


BedfordDiesel

DarkDieselCr

Attachments

Images (2)
  • BedfordDiesel
  • DarkDieselCr

Rich offers good advice. Looks like your camera is just fine.


2 of his pointers I have learned, Tripod (Good sturdy Tripod) and NO Flash. The rest is also good advice, but in no way do I have any of that mastered. Takes lots & lots of practice, at least for me anyway. Might be wrong here, but I think professional photographers take multiple shots and then pick the best also. I'm going to save his post for future reference.


I now only use an automatic camera (has a few manual adjustments), but have the same problem you do when trying to remember what settings I used for what picture. Most digital cameras have the specific photo data stored in the photo file. See if your photo software will let you read that info, if not look for some other software the will allow this. Might help you with remembering the settings that worked well and those that did not.

Last edited by rtr12

Get a bean bag to hold the camera steady on layout for extra low lever shooting. Also keep to one type light. Don't turn your overhead CFL's on and the add extra light with a tungsten or other type of light.


Get some white foamcore or poster board to reflect fill light into the dark areas.


Use a cable release or self time


ADVANCED:

Shoot with your cameras RAW mode instead of jpg. It allows a lot more correction


Learn how to set a white balance on your camera, its a lot better than Auto.

Forget about taking shots of moving trains if you want good photos. When you set your camera to its smallest F-stop, your shutter speed will be too slow to capture a moving train without it becoming a blur. If you increase your shutter speed to stop the motion then you have to use a larger F-stop which decreases your depth of field. Adding to what Rich said, achieving maximum depth of field is a requisite for good model  photography.   

Originally Posted by cbojanower:
Shoot with your cameras RAW mode instead of jpg. It allows a lot more correction

I would take issue with shooting in RAW mode. If the scene is lit properly and the camera white balance is set somewhere close, the corrections required are small and easily done on a jpg file.


I used RAW mode for a couple of months shooting images for the magazine, just to see if it really did anything for me. What I found is that RAW mode files are HUGE compared to jpg files, yet I saw no difference in image quality. I don't use RAW any more, and every image you see in the pages of OGR started life as a jpg file, shot and saved at its highest quality setting.

Last edited by Rich Melvin

(1.) Relatively good Point and Shoot. Older Cannon A520.
(2.) Turn the flash off as has been mentioned.
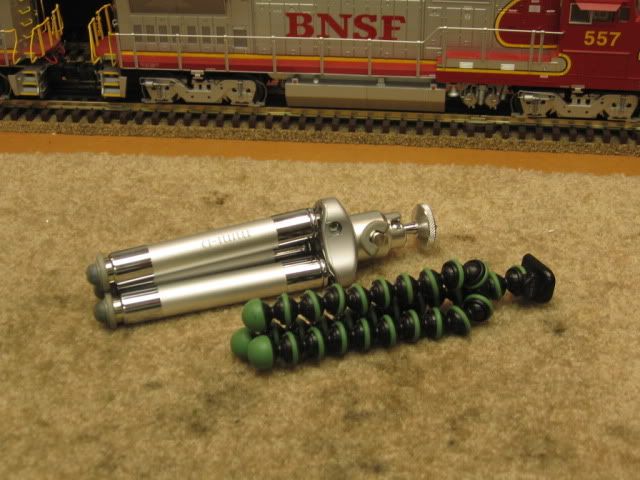
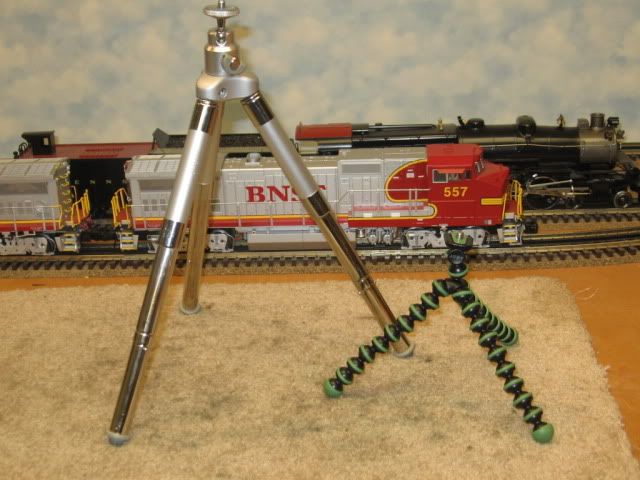
(3.) Use a small tripod.
(4.) Set the camera to a 2 second delay, and get your hands off the camera.
(5.) Interesting subject/material really helps.


Edit/add backpack friendly tripods that I use.

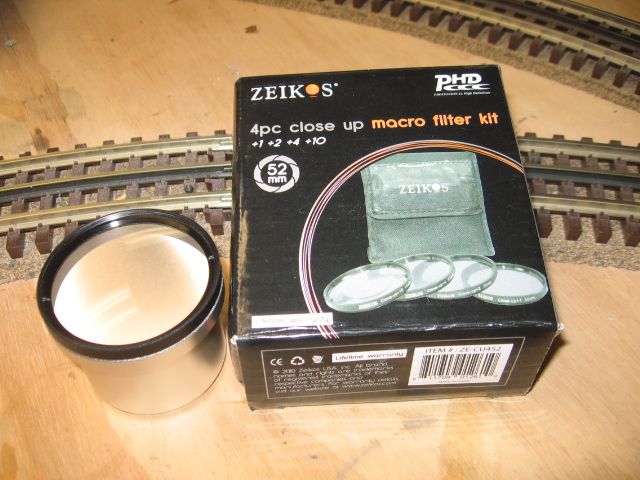
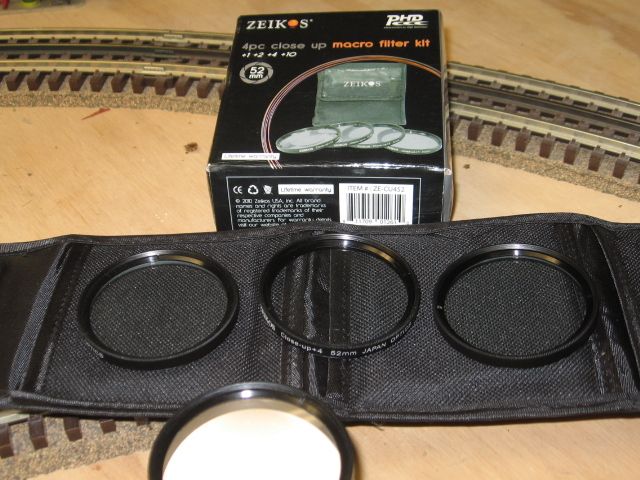
This Macro set and extension tube that fits a Cannon A520 was less than $30.  Works for close-ups of detail with a Point and Shoot.

With the Macro set.

Notice the lens distortion, top of picture, small roof.

Last edited by Mike CT
Originally Posted by rtr12:
... Might be wrong here, but I think professional photographers take multiple shots and then pick the best also...
Back in the film days, professionals always took at least 3 different exposure settings: 1 under, 1 over and 1 at the actual meter setting. With digital that's really not necessary. This is assuming one is using a good laptop and reviewing the shots as you go along. By the way, I still use a hand held light meter.
 
If you're talking about taking multiple camera angles of the same subject and then picking out the best composition after, most professionals don't do that on commercial shoots. I frame shots exactly as I want them to appear. Then I light it to enhance the scene. Composition and lighting go hand in hand.
 
Last edited by DennisB
Originally Posted by OGR Webmaster:
Originally Posted by cbojanower:
Shoot with your cameras RAW mode instead of jpg. It allows a lot more correction

I would take issue with shooting in RAW mode. If the scene is lit properly and the camera white balance is set somewhere close, the corrections required are small and easily done on a jpg file.


I used RAW mode for a couple of months shooting images for the magazine, just to see if it really did anything for me. What I found is that RAW mode files are HUGE compared to jpg files, yet I saw no difference in image quality. I don't use RAW any more, and every image you see in the pages of OGR started life as a jpg file, shot and saved at its highest quality setting.

It's a personnel call I prefer to make any corrections myself and not rely on the camera to throw out data. All the image files start out the same size, jpg just smashes them. With RAW i get everything the camera sees.

Last edited by cbojanower

These responses have opened my eyes!  I've looked a little deeper into my photo processing software with good result.  I've also looked a little closer at my camera.  I see it can do more than I thought.  Thank you!


Now I'm thinking I should ask a question, since people here seem to know so, so much about photography.  It's a larger question that plagues me with photographing my oil paintings.  


Me photographing my, and other people's, trains is to get reference material for doing oil paintings.  (I tried one train.  And have another in the works.)  When I try to photograph the paintings the digital photos hardly ever come out well.  Somebody once told me filters are needed--two on lights placed at opposing forty-five degree angles to the painting and one on my camera.


I never acted on this information.  Now I see that my camera can take a filter (thank you Mike CT for bringing up filters!!!) after looking into the mentioned macro filters.  The problem with the oil paintings is that the oil has a gloss.  Light reflects off the texture of the brushstrokes.  The brushstrokes go in all directions.  It makes for a nice mess of glossy reflections.


Does anyone know what type filters will combat the glare?  This has been killing me for years!  I've never really gotten to take quality photos of my paintings.  Once in a while one comes out well but most are defective photos.  I've learned something new about my photo processing software thanks to the responses here to my question too!  So now I am getting closer to getting better photos.  Thank you!!!


Learning some more about filters would be great!  Can a certain sort of filter do away with some painting's or object-being-photographed's surface glare?  I'd love to know that if possible.  Thanks so much!!!


(I had been overwhelmed when I heard about the two lights and three mystery filters that I mentioned above.  Now I'm thinking maybe I can, and my camera could, handle some more advanced photography.)


Last edited by smlWarren

INDIRECT LIGHT...that is the key to getting good images of paintings without glare. If you have to use a light, bounce it off the ceiling or a white card...anything that will diffuse the light.


I shoot black steam locomotives against a white background all the time. (Check out Ed's Collector's Gallery columns, for example.) But you cannot do this with your camera set to ANYTHING automatic. The key here is to use full manual and expose for the shadows, not the highlights. If you have any of the automatic modes set (full auto, aperture priority or shutter priority) you will NOT get a good exposure. The camera will see all the white and expose for that, resulting in an under-exposed steam locomotive.

Originally Posted by overlandflyer:

something that hasn't been mentioned... if you have a chance, stay away from white backgrounds, especially with black steam locomotives.  your camera will balance the scene with the white background resulting in what appears to be an underexposed engine with little detail captured.  even with a light color, you will notice a big difference over pure white.

That's why they make the + and - on the camera. If a camera reads too much black it will add light to boost the black to gray. If it sees too much white it reduces the light so the white is pushed to gray. If you are shooting something with a lot of white, go +2 (about ) and you will get your shadow detail back, if its a lot of black is -2. Basic Zone system theory

An incident light reading solves this problem for the most part but must people no longer have those handy.


As for the other question about reflection,that is where polarizer filters come in, but you end up losing 2-3 stops and they work best when the light sources are polarized as well. When we used to copy artwork we used a 4 light polarized setup, worked great, but was slow. Not too much reason to use it with trains, but does OK with artwork and other flatwork


As for RAW vs JPG. It's argument that that has been going on for years. Probably the same as when my friend the recording engineer tells me how great music sounds from his Reel to Reel  (RAW) and I tell him iTunes (JPG) sounds good enough to me

Last edited by cbojanower
Post
×
×
×
×
Link copied to your clipboard.
×
×