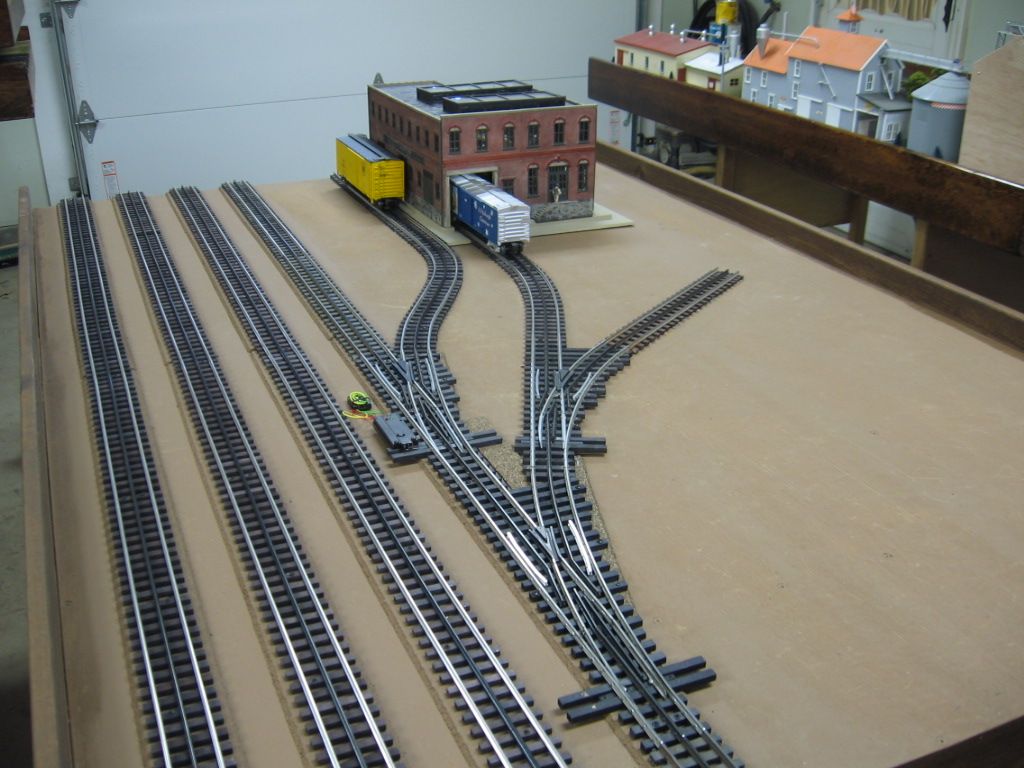
How the heck do you guys keep the excess coloring/paint off the ties? 

I'm in the process of laying down shingle granules on Gargraves track.  The ties are so close together that when I apply the colored solution much of it get on the ties.  This is making the job take much longer than I has anticipated.  I'm using those squeezable soft plastic bottles like everyone else.

Thanks!  Ponz

Original Post

Replies sorted oldest to newest

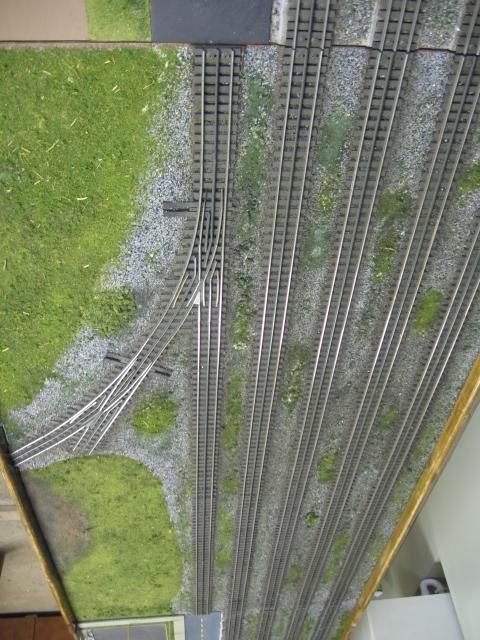
This is an air brush overspray with acrylic Railroad tie brown as a final application.  Works well to un-do the silver Gargraves track also.

I also like to add green.

Air bush paint is applied and then quickly removed from the top of rail with scotch brite pads and may be some acrylic paint thinner.

Another project,  adding 3 way switches.

Ballast is Brummy's rubber crum ballast.


Last edited by Mike CT
Mike CT posted:

This is an air brush overspray with acrylic Railroad tie brown as a final application.  Works well to un-do the silver Gargraves track also.

I also like to add green.

Air bush paint is applied and then quickly removed from the top of rail with scotch brite pads and may be some acrylic paint thinner.

Another project,  adding 3 way switches.

Ballast is Brummy's rubber crum ballast.


My issue is keeping the paint off the ties...

Ponz

Ponz posted:


My issue is keeping the paint off the ties...

Ponz

Why bother? Prior to ballasting our track, I spray painted all the track, i.e. rails, ties,,,,,,everything, with a RustOleum dark olive green (no longer made). Once the Ballast was applied, everyone thought it looked great, and nobody even notices that the plastic Atlas ties are no longer "shinny black".

Hot Water posted:
Ponz posted:


My issue is keeping the paint off the ties...

Ponz

Why bother? Prior to ballasting our track, I spray painted all the track, i.e. rails, ties,,,,,,everything, with a RustOleum dark olive green (no longer made). Once the Ballast was applied, everyone thought it looked great, and nobody even notices that the plastic Atlas ties are no longer "shinny black".

Because the ties are brown wood and the ballast color is bluish gray.

Ponz

Ponz posted:
Hot Water posted:
Ponz posted:


My issue is keeping the paint off the ties...

Ponz

Why bother? Prior to ballasting our track, I spray painted all the track, i.e. rails, ties,,,,,,everything, with a RustOleum dark olive green (no longer made). Once the Ballast was applied, everyone thought it looked great, and nobody even notices that the plastic Atlas ties are no longer "shinny black".

Because the ties are brown wood and the ballast color is bluish gray.

Ponz

A lot depends on what era you are modeling. Since I model in the late 1940s thru the mid 1950s, i.e. the Steam Era, I must admit that I've never seen "bluish gray" ballast, nor were the ties "brown" back in the steam era. You might check out color photos of real wood ties, especially newer ones, as they are black due to the pressure impregnated creosote treatment.

Hot Water posted:
Ponz posted:
Hot Water posted:
Ponz posted:


My issue is keeping the paint off the ties...

Ponz

Why bother? Prior to ballasting our track, I spray painted all the track, i.e. rails, ties,,,,,,everything, with a RustOleum dark olive green (no longer made). Once the Ballast was applied, everyone thought it looked great, and nobody even notices that the plastic Atlas ties are no longer "shinny black".

Because the ties are brown wood and the ballast color is bluish gray.

Ponz

A lot depends on what era you are modeling. Since I model in the late 1940s thru the mid 1950s, i.e. the Steam Era, I must admit that I've never seen "bluish gray" ballast, nor were the ties "brown" back in the steam era. You might check out color photos of real wood ties, especially newer ones, as they are black due to the pressure impregnated creosote treatment.

My mistake - the ties are black wood.  Online research said that, here in Missouri, the ballast is taken from quarries i gray with a bluish tint??


Ponz

Ponz posted:

How the heck do you guys keep the excess coloring/paint off the ties? 

I'm in the process of laying down shingle granules on Gargraves track.  The ties are so close together that when I apply the colored solution much of it get on the ties.  This is making the job take much longer than I has anticipated.  I'm using those squeezable soft plastic bottles like everyone else.

Not everybody uses squeezable soft plastic bottles - better control using disposable pipettes. 

Alternately, color the ballast 1st.

Last edited by mwb
mwb posted:
Ponz posted:

How the heck do you guys keep the excess coloring/paint off the ties? 

I'm in the process of laying down shingle granules on Gargraves track.  The ties are so close together that when I apply the colored solution much of it get on the ties.  This is making the job take much longer than I has anticipated.  I'm using those squeezable soft plastic bottles like everyone else.

Not everybody uses squeezable soft plastic bottles - better control using disposable pipettes. 

Alternately, color the ballast 1st.

Where do I fine the pipettes??

Ponz

I tend to take the view that I should build the colours in the order of the prototype.

That is; paint the ties first, add the ballast (I use Woodlands Scenics medium grey blend), and then brush paint the rails with raw umber acrylic.

As I go, I wipe the rail heads with my finger.  The paint washes off my finger in warm soapy water.

A bit of rust on the ballast looks realistic.  Dots of black on the spikes.

Then I add some grass around the ties by putting on small dots of PVA and pressing static grass into the dots.

The residue is carefully sucked away with a vacuum cleaner - which helps to stand the the grass up.

Then dry brush the ballast with black in the middle.

Finally I brush on some weathering powders which tend to dull down the look of the grass.

PE 67

I work the weathering powders right out to the sides, using different colours in each section of tracks.

Weathering powders help the look of the level crossing boards, as well.

Just sayin' 

Attachments

Images (1)
  • PE 67
MaxSouthOz posted:

I tend to take the view that I should build the colours in the order of the prototype.

That is; paint the ties first, add the ballast (I use Woodlands Scenics medium grey blend), and then brush paint the rails with raw umber acrylic.

As I go, I wipe the rail heads with my finger.  The paint washes off my finger in warm soapy water.

A bit of rust on the ballast looks realistic.  Dots of black on the spikes.

Then I add some grass around the ties by putting on small dots of PVA and pressing static grass into the dots.

The residue is carefully sucked away with a vacuum cleaner - which helps to stand the the grass up.

Then dry brush the ballast with black in the middle.

Finally I brush on some weathering powders which tend to dull down the look of the grass.

PE 67

I work the weathering powders right out to the sides, using different colours in each section of tracks.

Weathering powders help the look of the level crossing boards, as well.

Just sayin' 

Very nice Max.  I'm beginning to enjoy this aspect of the hobby.  At first, all I wanted to do was watch the trains go 'round and 'round.

Ponz

Add Reply

Post
×
×
×
×
Link copied to your clipboard.
×
×