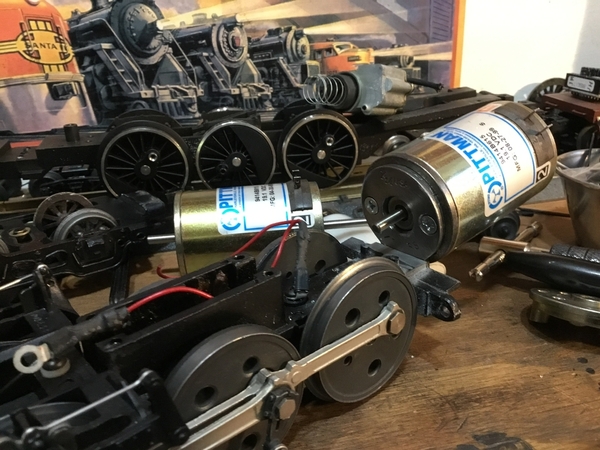
Not too long ago I picked up a 3rd Rail 4-8-2 Water Buffalo and a brass Williams Southern 4-6-2 #5013 that I would like to put ERR in. I would like to pickup a Cruise Commander and Railsounds Commander, maybe GRJ's chuff generator also (if possible/needed? not sure) and install myself - alternatively I could get in touch with a repair center and see if they could do it.

I have read around here on the forum that installing ERR is pretty straight forward. I have also heard that with MTH locos they require substantially more work to convert from DCS to ERR than other typical locos. While 3rd Rail/Williams are of course not MTH/DCS, are there any potential issues that might make the conversion more challenging, especially for a first-timer?

Also, is soldering required? Highly recommended? Can do without? I would need to buy the proper tools if yes, but better to take these things apart only once!

Hiring someone to do it would be the easier option, however I am interested in learning how to maintain and repair/upgrade my own collection. Then there is the cost, I understand that paying someone to do this is not cheap. If I have the option of paying someone to do the install, or pay the same amount to buy a new locomotive, I will almost certainly buy a new loco!

Thanks for the input!

Original Post

Replies sorted oldest to newest

First off ERR upgrades are definitely user friendly. The instructions give great tips and instructions on how to do a basic install. Soldering is technically not required if you are use things like crimp connectors or wire nuts, however it is definitely recommended to solder wires. If you use any GRJ products you will need to do a decent amount of soldering. There are three main things that I would call struggles or obstacles to consider. First off is an antenna. Since they are brass models you can't use the handrails so you will have to insulate the tender shell or locomotive shell for your antenna. Second is a tether. You will need more than 4 wires for the new tether since the electronics will likely be in the tender. ERR sells a tether, though there are better options. Finally mounting brackets for smoke units will likely need to be made. The setup in brass engines is either the spring method as I call it or a brass plate bracket. Just some things to keep in mind. This is definitely the place to ask questions. Hope you can get these projects going.

@Norton posted:

Do either or both engines have fan smoke and 4 chuffs? If so that will make the installation somewhat easier.

Pete

The 3rd Rail engine has 4 chuffs but I think it has the old Suethe(?) smoke units.

As of now the Williams Engine will power up (headlight comes on) but does not move, that will need diagnosing. Given that it is a very old engine I don't think it has either 4 chuffs or puffing smoke.

Four chuffs will save you from needing a chuff switch but John’s Super Chuffer will add extra features and take care of splitting the signal for chuff sound and fan. It gets a bit tricky installing smoke units in brass engines with little room to work with assuming you want to keep the lead weight. Also you may have to install everything in the tender for the same reason.
Best download the manuals from ERR to get an idea of the size of the boards and see what kind of room you have in your engine and tender.

Pete

First off ERR upgrades are definitely user friendly. The instructions give great tips and instructions on how to do a basic install. Soldering is technically not required if you are use things like crimp connectors or wire nuts, however it is definitely recommended to solder wires. If you use any GRJ products you will need to do a decent amount of soldering. There are three main things that I would call struggles or obstacles to consider. First off is an antenna. Since they are brass models you can't use the handrails so you will have to insulate the tender shell or locomotive shell for your antenna. Second is a tether. You will need more than 4 wires for the new tether since the electronics will likely be in the tender. ERR sells a tether, though there are better options. Finally mounting brackets for smoke units will likely need to be made. The setup in brass engines is either the spring method as I call it or a brass plate bracket. Just some things to keep in mind. This is definitely the place to ask questions. Hope you can get these projects going.

Thanks so much, Sid! I was actually just watching one of your videos on a super chuffer install! I admire your handywork and skill! Thank you for the note about the antenna, I completely forgot about that. Can I ask why I would need smoke unit mounting brackets? Would that be for installing a fan-driven smoke unit? (I was not planning on that but I am far from opposed to it!). Would that need to be something custom made or are they sold somewhere? And you mentioned there are better tethers, are there any you recommend?

@Norton posted:

Four chuffs will save you from needing a chuff switch but John’s Super Chuffer will add extra features and take care of splitting the signal for chuff sound and fan. It gets a bit tricky installing smoke units in brass engines with little room to work with assuming you want to keep the lead weight. Also you may have to install everything in the tender for the same reason.
Best download the manuals from ERR to get an idea of the size of the boards and see what kind of room you have in your engine and tender.

Pete

About GRJ's Super Chuffer/Chuff Generator - I was thinking about installing it purely to get the four chuffs/revolution. Am I thinking of the wrong product? Also, where could I pick up fan-driven smoke units? Installing around the lead weight was my biggest concern, not sure how difficult that will be, but I suppose I won't know until I take the shell off.

Beyond the challenges both of you have mentioned, this absolutely sounds like a doable project with a little upfront investment.

The chuff generator and super chuffer are two items. If you hear four chuffs you already have a chuff switch which is what the chuff generator does. There are some small fan smoke units now that you should be able to fit forward of the weight.
This is a Lionchief unit in a brass 2-8-0 supported by a spring.

234BABA7-FDBC-4A1F-B1B9-17753677D4B7

Pete

Attachments

Images (1)
  • 234BABA7-FDBC-4A1F-B1B9-17753677D4B7

For full sized brass steamers, I typically use the MTH steam smoke unit with a spring and a stack extension.  For ERR, I change the two resistors out for a single 20 or 22 ohm 2W wirewound resistor.  I also add a connector to the four wires from the smoke unit, this allows you to easily remove it for service (and smoke units do need service).  The stack extension screws in from the top, this allows you to remove the stack extension and remove the smoke unit out the front of the boiler.

Brass Steamer Fan Driven Smoke Installation

As Pete mentions, the LC+ smoke unit is another good choice, and I've used a few of those in upgrades as well.

Many times I have to give the weight a haircut to fit the smoke unit in, but it's usually not more than a few ounces and doesn't affect the locomotive performance much.  You can also add in weight elsewhere if that really offends your sensibilities.

One pet peeve I have is when I get a locomotive where the boiler shell is hard wired to the chassis.  This makes it a royal PITA to work on or test.  Do yourself a favor and have a connector between the shell and the chassis so you can fully separate the two.

The two products mentioned in previous posts above are the Chuff-Generator and the Super-Chuffer II, obviously I'd highly recommend them. 

Attachments

Images (1)
  • Brass Steamer Fan Driven Smoke Installation

Lots of useful info, thank you all for your input!

Before I go out and purchase the solder/soldering iron, are there any other tools I should pick up? I have a handful of traditional handtools (screwdrivers, etc.) but wondering if there are any other tools that might by handy to have during the upgrade. I'd like to have all the tools I need before I order any of the ERR/GRJ parts.

Also, any recommended soldering irons? Types of solder?

"Coaching" from the sidelines ...

It's clear from GRJ's comments and free tips that he's the King of the Mountain for doing locomotive work such as you describe. Unless you are "mechanically gifted," I recommend you hire him to do the job -- you'll get a perfect result. GRJ did a ERR installation for me (a diesel, not a steamer), and it is working great. There's never any regret for having a job done right by a seasoned pro!

Admittedly, I'm not a semi-pro tinkerer with trains. IMHO, it's often best to err on the side of caution; don't delve into a project with a false sense of "I can do this." A little humility is good for the soul - and often for your trains!

Mike Mottler   LCCA 12394
Uncompensated satisfied customer of GRJ

Another approach if you don't mind...

Quite a few years ago, I was in the same place you are.  I knew I wanted to do my own upgrades but hadn't ever done one.  I decided to have a sample of engines professionally upgraded: a brass steam locomotive with a large tender, a brass steam locomotive with a smaller tender and a twin motor Diesel.  When I received them back from the installer, I took them apart to see how it was done.  I now had something to copy.  Copying is easier than figuring it out on your own.

I now do all of my own upgrades.  I've done over 40 to date.

Last edited by Bob

As far as I know there has never been a school on doing upgrades. Everyone, including those who now do work for others, had to start doing them on their own. Its the only way to learn. Admittedly, a brass engine will present a few extra challenges beyond what a die cast engine, in particular a Lionel diecast engine would have presented, its just a matter of taking your time and asking questions if there is any doubt.
Consider also its would be hard to destroy an engine doing this and many brass engines can be had for less than the labor charge for doing an upgrade. Not much to loose here other than your time.

Pete.

One recommendation might be to start with a diecast model first, they do present fewer challenges as a rule.  I find that the MTH steam is usually the easiest models to upgrade.  Before the craziness of MTH pricing, I used to look for older PS/1 Premier steam for upgrades, however now with MTH pricing through the roof it's a little less attractive.

One thing you'll find with older brass is the quality of the soldering can be spotty, and it could have deteriorated over the years as well.  It's pretty distressing when pieces start falling off your prize brass locomotive.

Sound advice all around, I appreciate people chiming in. But as @Norton pointed out, the best way for me to learn is to do it myself. Also, one of the aspects about this hobby I enjoy is the option to work with my hands - benchwork, etc. Upgrading my own locomotive is one more avenue for such work.

John, I actually have a few diecast conventional steamers, including an old NYC L-3a Mohawk (6-18009) from the 90s? that I wouldn't mind upgrading. Very long tender and long boiler, that is probably one of the best steamers I have for practice. It also has the added bonus of being relatively cheap (at least compared to today's models) and not too difficult to find - if I royally screw up I can always shop for another and try again. Thank you all again for the wisdom!

My 2 cents are: From one of your early statements it appears you have never done any or much soldering, and perhaps even any repair work on post war Lionel. If this assumption is accurate read on; if not stop here and accept my apologies for the error of assuming too much.

ERR kits are easy to install and have well written instructions plus a plethora of sound advice here on the forum from the likes of gunrunnerjohn, Norton, and many others. My advice is to acquire a used Williams, KLine, Rail King or other inexpensive diesel and practice by installing an ERR Cruise Commander on one of these.  No smoke, synchronized chuff, tether, antenna isolation problems to deal with, and lots of room to work in. Once you feel comfortable with that installation then move on to a brass steam loco.

Good luck in any case and happy railroading.

The old Mohawk would give you good practice putting a can motor in to replace the Pulmore motor!

John, if I can pick your brain again, do you have suggestions about where to buy a can motor? I went to Trainz and they had a handful of different kinds. Some were specified as being for accessories, others were simply described with a 4- or 8-digit code.

I am assuming I might/will need to replace the motor in the Williams 4-6-2, it receives power (headlight comes on) but doesn't budge.

My 2 cents are: From one of your early statements it appears you have never done any or much soldering, and perhaps even any repair work on post war Lionel. If this assumption is accurate read on; if not stop here and accept my apologies for the error of assuming too much.

ERR kits are easy to install and have well written instructions plus a plethora of sound advice here on the forum from the likes of gunrunnerjohn, Norton, and many others. My advice is to acquire a used Williams, KLine, Rail King or other inexpensive diesel and practice by installing an ERR Cruise Commander on one of these.  No smoke, synchronized chuff, tether, antenna isolation problems to deal with, and lots of room to work in. Once you feel comfortable with that installation then move on to a brass steam loco.

Good luck in any case and happy railroading.

Your assumptions hit the nail on the head

Thank you for your advice - I'm not as much of a diesel person as I am a steamer but I'll take that into consideration. There are a few diesel prototypes I'd like to get my hands on

@0-Gauge CJ posted:

Sound advice all around, I appreciate people chiming in. But as @Norton pointed out, the best way for me to learn is to do it myself. Also, one of the aspects about this hobby I enjoy is the option to work with my hands - benchwork, etc. Upgrading my own locomotive is one more avenue for such work.

John, I actually have a few diecast conventional steamers, including an old NYC L-3a Mohawk (6-18009) from the 90s? that I wouldn't mind upgrading. Very long tender and long boiler, that is probably one of the best steamers I have for practice. It also has the added bonus of being relatively cheap (at least compared to today's models) and not too difficult to find - if I royally screw up I can always shop for another and try again. Thank you all again for the wisdom!

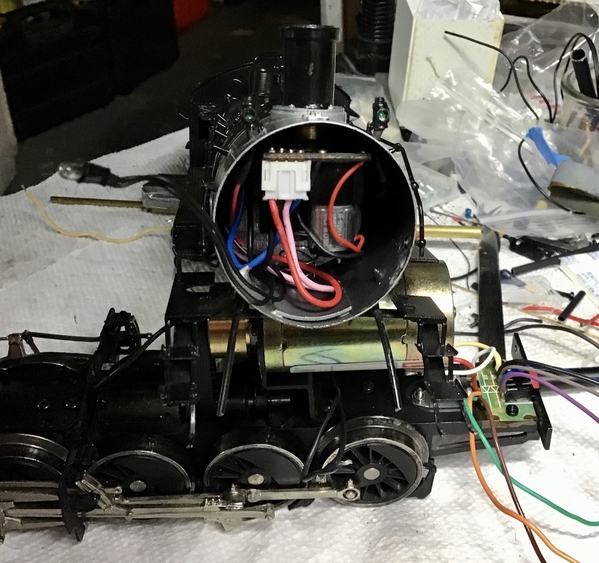
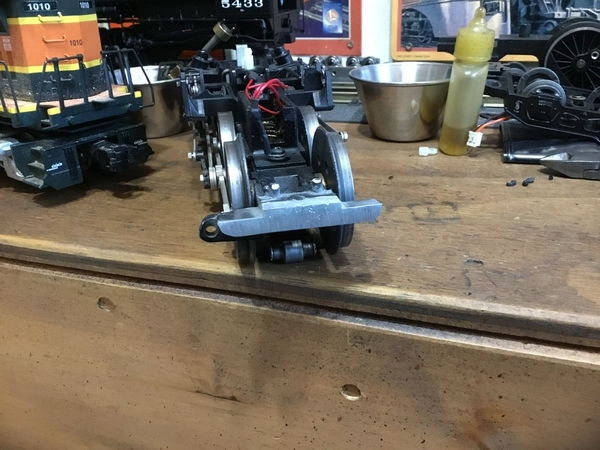
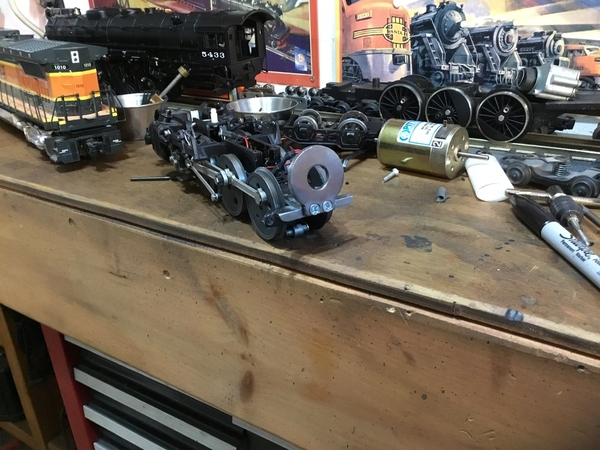
Not to discourage you, but the older Pulmor equipped steamers are not for the faint of heart when attempting to swap in a large can motor.......lots of cutting and machining of parts to make an accurate, clean, undetectable swap......That being said, Timko offers a direct bolt in swap for these steamers, with a much smaller motor.......that’s what I’d suggest to use to get your “feet wet” in learning to do swaps and upgrades. Timko’s swap is a bolt in swap, so no cutting or grinding required.....if you still desire to do the larger can motor swap, feel free to contact me via my profile, and I’ll be happy to show you the myriad of tools and machines I use to accomplish these kind of swaps,....

Pat 55024FE8-5C7A-4107-9415-42F0D68220540177048C-6EA6-4BD0-A6E7-44A2FD466BD6729CA967-DDFB-4E6D-8D37-89AD1E2D55DB

Attachments

Images (3)
  • 55024FE8-5C7A-4107-9415-42F0D6822054
  • 0177048C-6EA6-4BD0-A6E7-44A2FD466BD6
  • 729CA967-DDFB-4E6D-8D37-89AD1E2D55DB

Add Reply

Post
×
×
×
×
Link copied to your clipboard.
×
×