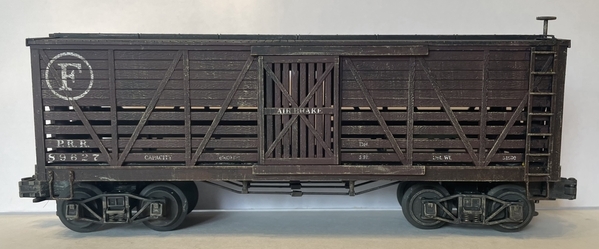
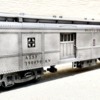
Chris, love the way those came out. Especially the varied colors in the boards. I’m going to have to pick your brain for a how to.

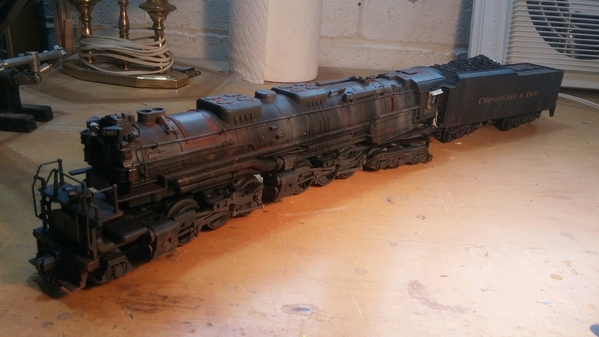
This is the very first diesel I weathered. Many years ago.  All the pics. I’ve seen they were seldom clean. Unless they were being used for a rail fan trip. These engines were built at the start of WW2. They pulled passenger trains in the day and freights at night. Probably not seeing the wash racks very often. I recently dug them out to see if I could put fixed pilots on them. Also got some fresh batteries in them. The pilots were somewhat of a success. The work fine on my 072 curves. But because of there length. They need a 70 ft. car behind them. So they are barred from freight service. At some point I’ll try to match the paint for the stripe and continue it up the pilot.

5B85C9F7-125D-4A87-A6AA-0247FEDB6946

Attachments

Images (1)
  • 5B85C9F7-125D-4A87-A6AA-0247FEDB6946

                     7-17-2024

To paraphrase the inscription on the Moynahan Train Hall at Penn Station, New York City, the former central U. S. Post Office building, ‘Neither snow nor rain nor this stinking, excruciating, 101-degree northeast coast heat nor gloom of night stays Weathering Wednesday, 7/17/2024 Edition from making its regular appearance on the OGR Forum.’

So, it is time to show off your weathered engines, rolling stock, buildings, scenery and post your results here on Weathering Wednesday. I and your fellow forum members are eager to see your see your artistry and learn from your techniques.

But first, here are the forum ground rules:

  • Have fun and enjoy!
  • Post only photos that you have taken.  
  • If you post a photo taken by someone else or a copyrighted photo be sure you have express written permission from the photo's owner to post their photo.  
  • Any individual who posts copyrighted material is subject to legal liability. Furthermore, that individual will be banned from the OGR Forum.  
  • Please consult the OGR Forum TOS (Terms of Service) for further information regarding copyrights.

Not only has my son, Chris has been at it again this week but, my friend and Sunday morning layout assistant, Ms. Zora Maya Keith, has also gotten into the weathering act. Below photos of their work.

The hopper car below was painted, decaled and weathered by Chris.

GNR 487 Cose Up 2

Great Northeastern Railway (GNR) hopper #487 was immediately dispatched to Mount Carroll Yard and is being added to a train by the GNR's dockside switcher and the switcher's GNR bobber caboose.

GNR Fopper in Mt Carroll

The tank car below is the work of Zora Maya. It is her fist serious try at weathering with some coaching by Chris. I am very impressed by her eye for color and restraint when doing a light weathering project. I say a big BRAVA to Zora Maya and look forward to more weathering from her.

ZM Domino Tank 2ZM Domino Tank 3

          Now it is your turn to show us your weathering artistry as well as how you achieved yours results.

Attachments

Images (5)
  • 7-17-2024
  • ZM Domino Tank 2
  • ZM Domino Tank 3
  • GNR 487 Cose Up 2
  • GNR Fopper in Mt Carroll
Last edited by Randy Harrison

Randy - That's a great first weathering job by Zora Maya!!   

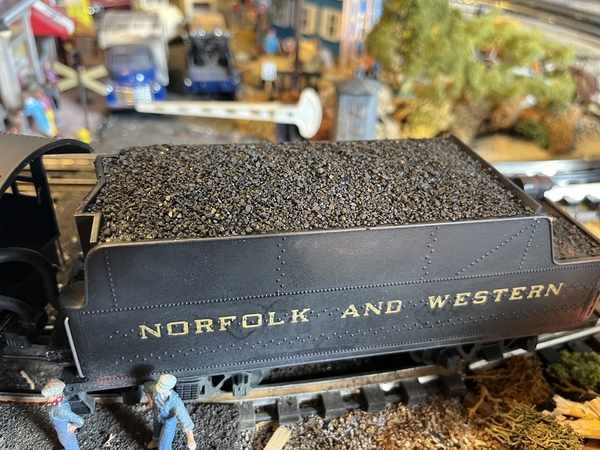
Last week I showed my weathering of a RailKing N&W 0-8-0 number 244  ( The prototype being last reciprocating steam locomotive manufactured in the U.S. ).  At that time the coal load was not done.  Here are photos ( before & after ) of the coal load ( which I also showed on the most recent edition of Switcher Saturday).  Sorry I don't have a better before photo of the coal load. IMG_3641IMG_3649

The loco after weathering.  

IMG_4586

After washing off the original factory installed coal load, I brushed on scenic cement to that factory installed load.  I then sprinkled on some scenic coal which I had on hand.  Here is a photo of the coal bunker with the new load.

IMG_4558

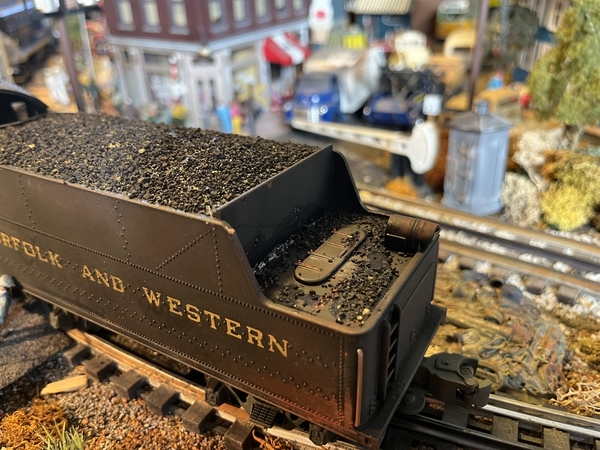
The rear tender deck shows spilled coal.

IMG_4559IMG_4521

I spilled coal on the tender apron to give a more prototypical effect.  I'm sure that back in the steam era, the firemen were not too particular about keeping a clean tender apron.  I'm sure that every once in a while there would be a fireman was a case of OCD ... lol!  

IMG_4520

Attachments

Images (7)
  • IMG_4586
  • IMG_4558
  • IMG_4559
  • IMG_4521
  • IMG_4520
  • IMG_3641
  • IMG_3649
Last edited by trumpettrain

Randy - That's a great first weathering job by Zora Maya!!   

Last week I showed my weathering of a RailKing N&W 0-8-0 number 244  ( The prototype being last reciprocating steam locomotive manufactured in the U.S. ).  At that time the coal load was not done.  Here are photos ( before & after ) of the coal load ( which I also showed on the most recent edition of Switcher Saturday).  Sorry I don't have a better before photo. IMG_3641IMG_3649

The loco after weathering.  

IMG_4586

After washing off the original factory installed coal load, I brushed on scenic cement to that factory installed load.  I then sprinkled on some scenic coal which I had on hand.  Here is a photo of the coal bunker with the new load.

IMG_4558

The rear tender deck shows spilled coal.

IMG_4559IMG_4521

I spilled coal on the tender apron to give a more prototypical effect.  I'm sure that back in the steam era, the firemen were not too particular about keeping a clean tender apron.  I'm sure that every once in a while there would be a fireman was a case of OCD ... lol!  

IMG_4520

@trumpettrain

Pat:

Your weathering of this locomotive is SUPERB!!!!!!! The coal load with the spillage on the tender deck and apron is the "icing on the cake".

BRAVISSIMO!!!!!!!

I decided to jump in the weathering pool. Well maybe put my big toe in.
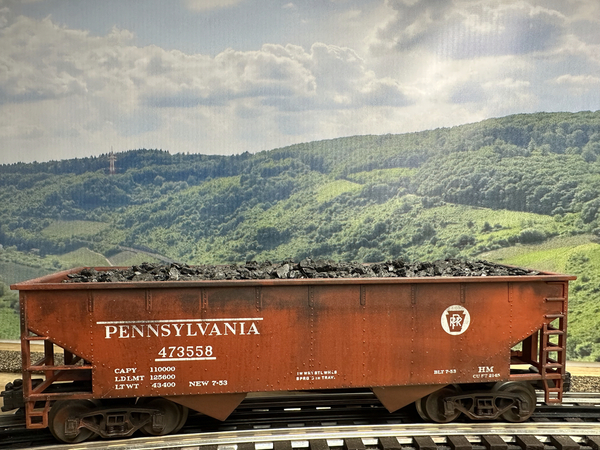
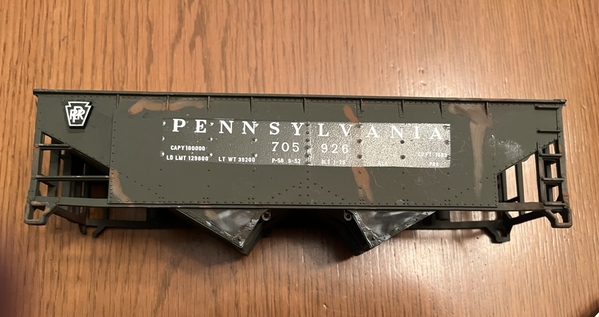
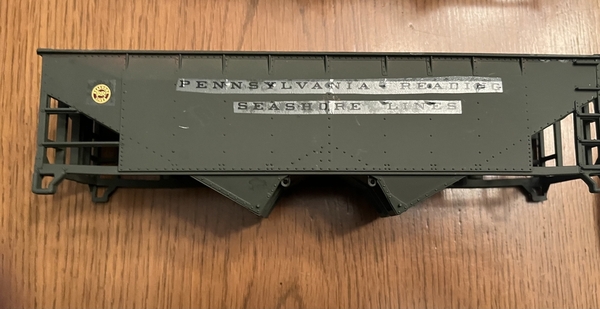
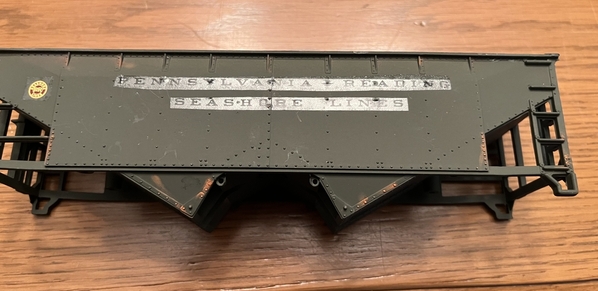
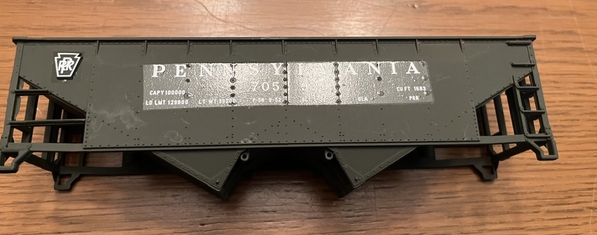
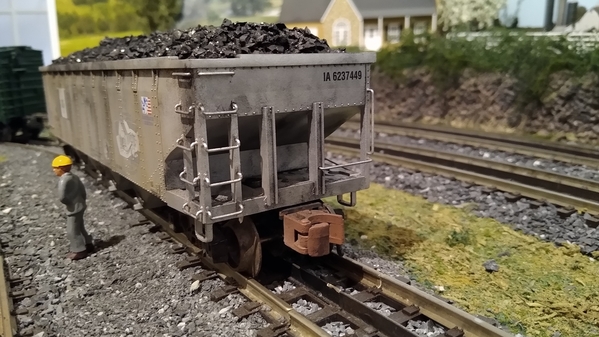
I have 8 of these hoppers that were unpainted red. Here are my first attempts with large decal strips. I did ok with the Farmingdale Traction Trolley; but these were much harder because the trolley had a defined space. I tried some weathering powder. Given the heat and humidity they won’t be getting a dull coat just yet.
IMG_2276
IMG_2277
IMG_2278
IMG_2279
IMG_2280

Attachments

Images (5)
  • IMG_2276
  • IMG_2277
  • IMG_2278
  • IMG_2279
  • IMG_2280
@pennsyfan posted:

I decided to jump in the weathering pool. Well maybe put my big toe in.
I have 8 of these hoppers that were unpainted red. Here are my first attempts with large decal strips. I did ok with the Farmingdale Traction Trolley; but these were much harder because the trolley had a defined space. I tried some weathering powder. Given the heat and humidity they won’t be getting a dull coat just yet.
IMG_2276
IMG_2277
IMG_2278
IMG_2279
IMG_2280

I appreciate the likes; but I could really use some suggestions or constructive criticism.
I was born and bred in Brooklyn NY, and lived there for 70 years. You couldn’t insult me if you tried.

@pennsyfan

Applying an initial coat of clear gloss is not the perfect answer to hiding decal film, but it really helps.  Using products equivalent to Decal Sol and Decal Set also make the decals lay down nicely over ribs and rivets, etc.

Your coal hoppers are not light colored like this GARX insulated boxcar, so weathering will not make any molded details stand out to the extent it does with light colors.  The biggest mistake I have made doing cars like this is weathering directly after the decal work.  At least one application of dullcoat should be made after the decals are applied.  Then do any weathering and finish with several more passes of dullcoat.  That is the grievous mistake I made with this car below...you can see the edges of the decals instead of achieving a "painted on look".

I created a lot of messes in the past before my methods got better.

Attachments

Images (2)
  • mceclip0
  • mceclip1
Last edited by Rob Leese
@Rob Leese posted:

@pennsyfan

Applying an initial coat of clear gloss is not the perfect answer to hiding decal film, but it really helps.  Using products equivalent to Decal Sol and Decal Set also make the decals lay down nicely over ribs and rivets, etc.

Your coal hoppers are not light colored like this GARX insulated boxcar, so weathering will not make any molded details stand out to the extent it does with light colors.  The biggest mistake I have made doing cars like this is weathering directly after the decal work.  At least one application of dullcoat should be made after the decals are applied.  Then do any weathering and finish with several more passes of dullcoat.  That is the grievous mistake I made with this car below...you can see the edges of the decals instead of achieving a "painted on look".

I created a lot of messes in the past before my methods got better.

@Rob Leese

Rob:

Rob:

Your work is EXCELLENT!!!!  Also, thank you for being a voice of experience with your tips on decaling and weathering. Sharing your knowledge with the rest of us is also what Weathering Wednesday is about. Thank you for being a regular contributor.

@pennsyfan posted:

I decided to jump in the weathering pool. Well maybe put my big toe in.
I have 8 of these hoppers that were unpainted red. Here are my first attempts with large decal strips. I did ok with the Farmingdale Traction Trolley; but these were much harder because the trolley had a defined space. I tried some weathering powder. Given the heat and humidity they won’t be getting a dull coat just yet.
IMG_2276
IMG_2277
IMG_2278
IMG_2279
IMG_2280

@pennsyfan

Bob:

I am glad to see that you finally took the plunge and tried your hand at weathering and decaling. Rob Leese's post offers many helpful suggestions on both of the aforementioned.

I am a big advocate of Micro Set and Micro Sol. They are available from Amazon.com. When decaling, I use an artist's paint brush to apply both solutions as follows. First, with an artist's paint brush, I apply Micro Set to the area on the model where the decal will be applied. I hold my decal under water for 20 to 30 seconds and, with both hands, position the decal on its wet backing paper over the Micro Set on the model. Then, I gently hold my finger on the right side of the decal and begin to, with my left hand, gently slide the backing paper from under the decal while holding the decal in contact with the model very close or right on its final resting place. Micro Set does soften the decal so final adjustment of the decal's position should be minimal in that the softened decal may tear. Wash your brush in water and dry it with a handy paper towel. Use your brush to apply Micro Sol to the surface and edges of the decal. This will soften the decal even more and the decal will conform to any ribs or rivets on your model and the stark edges will smooth out and make the decal look to be a paint job. LET YOUR DECALS DRY OVER NIGHT BEFORE APPLYING "DULL COTE" OVER THE WHOLE MODEL INCLUDING THE DECALS!!!

I like the idea that you want to include a rust effect to your model. Don't overdo rust and make appear very stark. Think about where rust may appear on your model. On hoppers and boxcars, rust will generally appear on the rivets and the tops of the couplers and on the trucks. If you are using rust colored paint, use a small brush and a "dry brush" technique to apply the paint gently and sparingly to the rivets and on the top of the couplers.  For a dry brush, have a paper towel lying next to your pant. dip your bush in the paint and, using a painting motion, gently stroke the brush back and forth on the paper towel removing excess paint. Then use your brush to GENTLY paint over the rivets and the tops of the couplers highlighting the rivets and the high parts of the coupler. On the sides of the car, the rust stains run downward, so start at the top of the car body and gently work downward with your brush. Think about "indicating" rust rather than shouting it. You may have to replenish the paint on your dry brush as you go.

There is much more I can say but, the information above is a good starting point. Keep at it. We all started from scratch at one time. Experience and trial and error are your best teachers. Also, feel free to ask for advice here on Weathering Wednesday.

7-24-2024

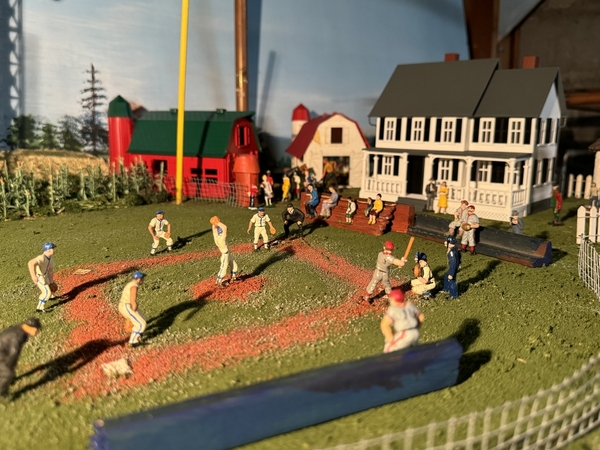
The pitcher looks in for the signals. He winds up. He delivers it right down the middle (of the week, that is), Weathering Wednesday, 7-24-2024 Edition! So, it is, once again, time for you to swing and drive it over the fence and out of the park with photos of your weathered engines, rolling stock, buildings, scenery and post your results here on Weathering Wednesday. I and rest of the fans are eagerly cheering to see your see your artistry and learn from your techniques.

But first, here are the forum ground rules:

  • Have fun and enjoy!
  • Post only photos that you have taken.  
  • If you post a photo taken by someone else or a copyrighted photo be sure you have express written permission from the photo's owner to post their photo.  
  • Any individual who posts copyrighted material is subject to legal liability. Furthermore, that individual will be banned from the OGR Forum.  
  • Please consult the OGR Forum TOS (Terms of Service) for further information regarding copyrights.

My son, Chris has been at it again this week. Below is a photo of a K-Line, wood sided, New York Central reefer that he weathered.

K-Line NYC Refer 1

          Now it is your turn to show us your weathering artistry as well as how you achieved yours results.

Attachments

Images (2)
  • 7-24-2024
  • K-Line NYC Refer 1

Hello everyone and happy Weathered Wednesday!

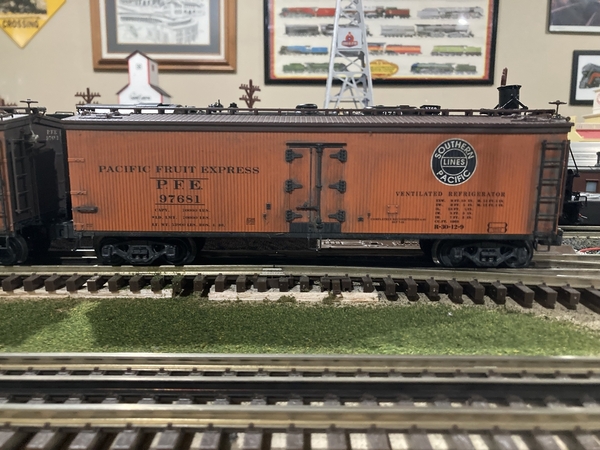
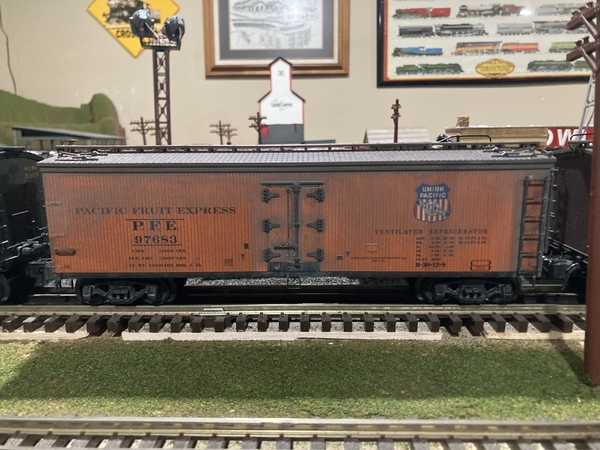
Here is my contribution. Recently finished weathering some wood sided reefers I have had for a few years. I still need to clear coat the PFEs but they are drying nicely. Currently I am working on two more reefers, a two bay hopper and a PRR ore car.
IMG_6209IMG_6210IMG_6211IMG_6212IMG_6213

@Trainmaster04

That is SUPERB work!!!! Thank you for sharing your photos.

@pennsyfan

Bob:

I am glad to see that you finally took the plunge and tried your hand at weathering and decaling. Rob Leese's post offers many helpful suggestions on both of the aforementioned.

I am a big advocate of Micro Set and Micro Sol. They are available from Amazon.com. When decaling, I use an artist's paint brush to apply both solutions as follows. First, with an artist's paint brush, I apply Micro Set to the area on the model where the decal will be applied. I hold my decal under water for 20 to 30 seconds and, with both hands, position the decal on its wet backing paper over the Micro Set on the model. Then, I gently hold my finger on the right side of the decal and begin to, with my left hand, gently slide the backing paper from under the decal while holding the decal in contact with the model very close or right on its final resting place. Micro Set does soften the decal so final adjustment of the decal's position should be minimal in that the softened decal may tear. Wash your brush in water and dry it with a handy paper towel. Use your brush to apply Micro Sol to the surface and edges of the decal. This will soften the decal even more and the decal will conform to any ribs or rivets on your model and the stark edges will smooth out and make the decal look to be a paint job. LET YOUR DECALS DRY OVER NIGHT BEFORE APPLYING "DULL COTE" OVER THE WHOLE MODEL INCLUDING THE DECALS!!!

I like the idea that you want to include a rust effect to your model. Don't overdo rust and make appear very stark. Think about where rust may appear on your model. On hoppers and boxcars, rust will generally appear on the rivets and the tops of the couplers and on the trucks. If you are using rust colored paint, use a small brush and a "dry brush" technique to apply the paint gently and sparingly to the rivets and on the top of the couplers.  For a dry brush, have a paper towel lying next to your pant. dip your bush in the paint and, using a painting motion, gently stroke the brush back and forth on the paper towel removing excess paint. Then use your brush to GENTLY paint over the rivets and the tops of the couplers highlighting the rivets and the high parts of the coupler. On the sides of the car, the rust stains run downward, so start at the top of the car body and gently work downward with your brush. Think about "indicating" rust rather than shouting it. You may have to replenish the paint on your dry brush as you go.

There is much more I can say but, the information above is a good starting point. Keep at it. We all started from scratch at one time. Experience and trial and error are your best teachers. Also, feel free to ask for advice here on Weathering Wednesday.

Randy, Rob, I finally received the MicroSol and MicroSet yesterday.
Would it do any good to apply  either on the 7- 10 day old decals? Thanks again for your help  

@pennsyfan posted:

Randy, Rob, I finally received the MicroSol and MicroSet yesterday.
Would it do any good to apply  either on the 7- 10 day old decals? Thanks again for your help  

@pennsyfan

Bob:

I can't say for sure but, it might be worth a try using the Micro Sol solution on the surface and edges of the decal. If that does not work, if you have duplicates of the decals that you used, remove the existing decals by pressing tape (I use clear packing tape) firmly over the decals. Then, peel the tape off. The decal should also come off stuck to the tape. Next, Apply Micro-Set solution to the area to that the new decal will cover. Apply the new decal over the Micro-Set solution and gently smooth the decal onto your freight car. Then, apply Micro-Sol over the top of the decal and use the brush with which to apply the solution and stroke from the center of the decal to over the decal's edges and along ridges and rivet lines. The decal should then appear to be a "painted-on" lettering. Use several applications of Micro-Sol while the decal is still freshly wet until you are satisfied with the end result. Let the decals dry THOROUGHLY (I usually let them dry overnight). They will look better once they are dry.

@Randy Harrison

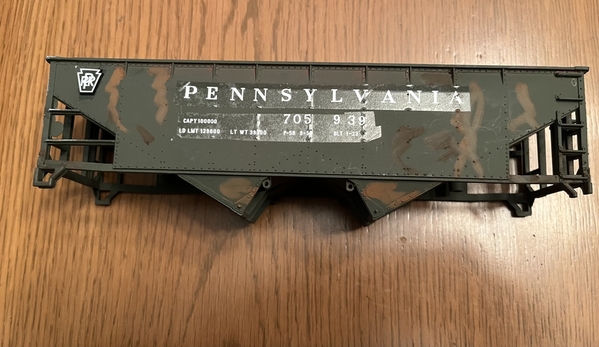
Randy, It looks to me that the Micro Sol worked. The cars in the first 4 pictures were treated with Microsol. I worked to address the screaming rust on the car in the first two pictures. In the last two pictures I show a car that I used micro set and micro sol to place the decals. Now I have another question how do you patch a decal? If you look at picture 2 you will notice some text missing. That’s because when I tried to change the road number I messed it up. If you look at the car in picture 5 you can see that I cut the decal to change the number. That was a little askew. I thought I could do better on the other side oif I cut part of the number  with a knife. I thought it worked; until I tried to place the decal and it got all over the place  picture 6 shows that i  just applied the decal the way it was.IMG_2448

IMG_2441IMG_2440
IMG_2444IMG_2445
IMG_2447
IMG_2446

Attachments

Images (7)
  • IMG_2441
  • IMG_2440
  • IMG_2444
  • IMG_2445
  • IMG_2446
  • IMG_2447
  • IMG_2448
Last edited by pennsyfan

7-31-2024

The end of July is upon us and, coincidentally, it falls on the same day as Weathering Wednesday, 7-31-2024 Edition! So, it is, once again, time for you to share with us photos of your weathered engines, rolling stock, buildings, scenery and post your results here on Weathering Wednesday. I and rest of the of this topic’s followers are eagerly looking forward to seeing your see your artistry and learn from your techniques.

But first, here are the forum ground rules:

  • Have fun and enjoy!
  • Post only photos that you have taken.  
  • If you post a photo taken by someone else or a copyrighted photo be sure you have express written permission from the photo's owner to post their photo.  
  • Any individual who posts copyrighted material is subject to legal liability. Furthermore, that individual will be banned from the OGR Forum.  
  • Please consult the OGR Forum TOS (Terms of Service) for further information regarding copyrights.

My son, Chris has been out of town on vacation this past week and has not had any time to do any new weathering. So, below are some previously displayed photos of The Great Northeastern Railway’s weathered locomotives done for us by Harry Hieki of Mt. Ephriam, New Jersey.

IMG_20210903_1201147601 [1)1205231415

Now it is your turn to show us your weathering artistry as well as how you achieved yours results.

Attachments

Images (3)
  • 7-31-2024
  • IMG_20210903_1201147601 (1)
  • 1205231415
@pennsyfan posted:

@Randy Harrison

Randy, It looks to me that the Micro Sol worked. The cars in the first 4 pictures were treated with Microsol. I worked to address the screaming rust on the car in the first two pictures. In the last two pictures I show a car that I used micro set and micro sol to place the decals. Now I have another question how do you patch a decal? If you look at picture 2 you will notice some text missing. That’s because when I tried to change the road number I messed it up. If you look at the car in picture 5 you can see that I cut the decal to change the number. That was a little askew. I thought I could do better on the other side oif I cut part of the number  with a knife. I thought it worked; until I tried to place the decal and it got all over the place  picture 6 shows that i  just applied the decal the way it was.

IMG_2441

You need to gloss clear coat your entire model first.  Then apply decals using the micro-sol and micro- set.  When the decals are finished you then clear coat again over the entire model with flat, satin, or semi gloss... Whatever your taste is. 

I would also recommend making smaller decals.  Looks like you cut out one big piece and applied it.  I would say you could have make 7 or 8 decals from that and separately applied all of them to reduce the clear parts.

If you do it this way, you will have zero sheen and evidence a decal is there.  There are 8 decals in this photo.  The only evidence of a decal is where my where weathering wash bunched up by a few edges.

IMG_20240630_172442455

Attachments

Images (1)
  • IMG_20240630_172442455
@Ron045 posted:

You need to gloss clear coat your entire model first.  Then apply decals using the micro-sol and micro- set.  When the decals are finished you then clear coat again over the entire model with flat, satin, or semi gloss... Whatever your taste is.

I would also recommend making smaller decals.  Looks like you cut out one big piece and applied it.  I would say you could have make 7 or 8 decals from that and separately applied all of them to reduce the clear parts.

If you do it this way, you will have zero sheen and evidence a decal is there.  There are 8 decals in this photo.  The only evidence of a decal is where my where weathering wash bunched up by a few edges.

IMG_20240630_172442455

Thanks Ron! What’s the secret for keeping it all straight?

Last edited by pennsyfan
@pennsyfan posted:

Thanks Ron! What’s the secret for keeping it all straight?

Use a fine tip brush or toothpick to move it around as you like.  If it does not move freely, tap some water on top. 

Use a q-tip or tissue to absorb excess water if needed. 

Be careful not to over play with it to avoid rolling or tearing. 

Here is a short video.  If you don't want to watch the entire thing, just watch from 4:00 to 5:30.

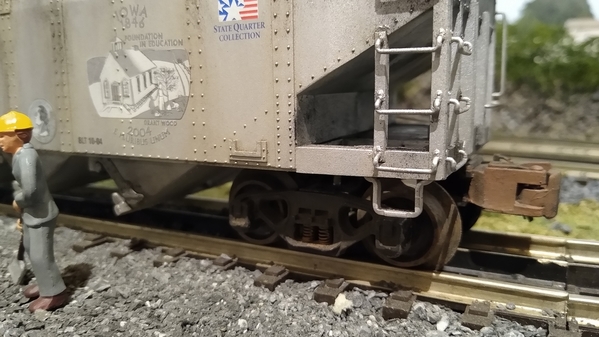
Back to weathering.... Here was an early first try.  My friend did not like the shinny toy like look of this K-Line car and asked me to tone it down.  This is mostly powder, then clear coat.

The coal load is real coal.

IMG_20200228_174012724IMG_20200228_174038692IMG_20200228_174030341

I did not think to take a before photo, but here is a link from our forum sponsor to show what it looked like.

https://www.trainz.com/product...-quarter-hopper-bank

Attachments

Images (3)
  • IMG_20200228_174012724
  • IMG_20200228_174038692
  • IMG_20200228_174030341
Last edited by Ron045
@pennsyfan posted:

Thanks Ron! What’s the secret for keeping it all straight?

If you can stretch a rubber band around the sides and ends of the car, measure it and get it straight and level. Then use it as a “line” to place the decals.

As Ron suggested, cut the decals smaller. Eliminate all the blank area between the letterings. Start on a glossy surface. This helps hide the decal.

Also use Solvaset or Microsol under the decal when placing it. Blot it lightly and before it dries, apply a bit of solvent on the top of the decal…

@Ron045 posted:

Use a fine tip brush or toothpick to move it around as you like.  If it does not move freely, tap some water on top.

Use a q-tip or tissue to absorb excess water if needed.

Be careful not to over play with it to avoid rolling or tearing.

Here is a short video.  If you don't want to watch the entire thing, just watch from 4:00 to 5:30.

Ron:

Thanks for sharing your superb, self-made and narrated video! I have used Highball Graphics several times to make custom decals for me. Jim has been GREAT!!! He sends proofs prior to finalization and his turnaround time has been fast.

Also, BRAVO sir on your great custom tank car!!!!!

@Krieglok posted:

If you can stretch a rubber band around the sides and ends of the car, measure it and get it straight and level. Then use it as a “line” to place the decals.

As Ron suggested, cut the decals smaller. Eliminate all the blank area between the letterings. Start on a glossy surface. This helps hide the decal.

Also use Solvaset or Microsol under the decal when placing it. Blot it lightly and before it dries, apply a bit of solvent on the top of the decal…

Thanks Tom

I was new to decaling a few years ago. Some great advice already given. I found like a lot of jobs. The right tools sometimes make the job easier. One of my best investments was a very small pair of scissors from Micromark.
They allow to get really close. Another thing I do is try not to leave a square edge. I just think it’s easier to hide the decal. Try to follow the shape of the last letter. These scissors aren’t cheap. But I’ve used them for years and they make the job so much easier.

B8BE353F-F031-47D3-AADE-1C7F1E9916FB

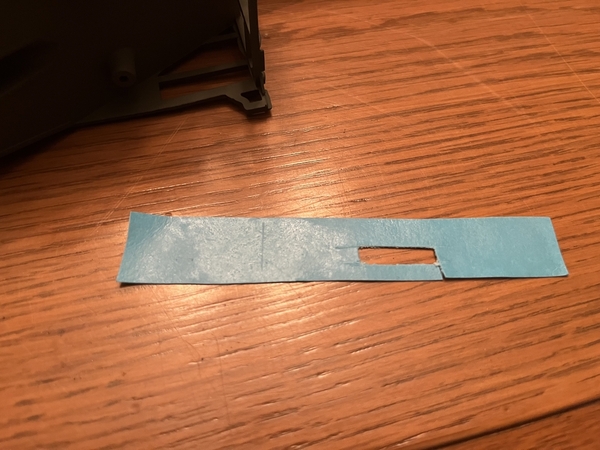
Any small decals can easily get lost dipping them in a bowl or transferring them with tweezers. Try cutting them out and placing them about where they will be placed on the car.Hold them down with a toothpick and put a few drops of water on it using an eye dropper. Just let it sit in the puddle for about 30 seconds. Once it slides off it shouldn’t have to travel far.

Attachments

Images (1)
  • B8BE353F-F031-47D3-AADE-1C7F1E9916FB

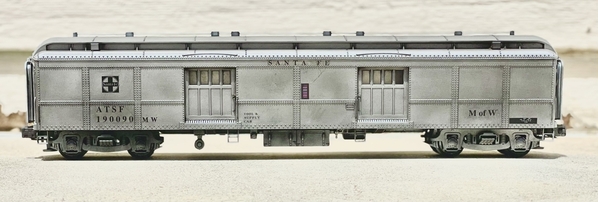
I repainted and decaled this outfit car years ago. After adding a few more decals and heavy weathering it turned out decent. Adding decals to something that has already been dullcoated can be a problem…the old decal film is going to show.
IMG_0790IMG_0791IMG_0792IMG_0793
I like to run outfit cars at the end of a freight consist just like we did on the 1:1 railroad.

Attachments

Images (4)
  • IMG_0790
  • IMG_0791
  • IMG_0792
  • IMG_0793
@Dave_C posted:

I was new to decaling a few years ago. Some great advice already given. I found like a lot of jobs. The right tools sometimes make the job easier. One of my best investments was a very small pair of scissors from Micromark.
They allow to get really close. Another thing I do is try not to leave a square edge. I just think it’s easier to hide the decal. Try to follow the shape of the last letter. These scissors aren’t cheap. But I’ve used them for years and they make the job so much easier.

B8BE353F-F031-47D3-AADE-1C7F1E9916FB

Any small decals can easily get lost dipping them in a bowl or transferring them with tweezers. Try cutting them out and placing them about where they will be placed on the car.Hold them down with a toothpick and put a few drops of water on it using an eye dropper. Just let it sit in the puddle for about 30 seconds. Once it slides off it shouldn’t have to travel far.

Thank you Dave!

@Rob Leese posted:

I repainted and decaled this outfit car years ago. After adding a few more decals and heavy weathering it turned out decent. Adding decals to something that has already been dullcoated can be a problem…the old decal film is going to show.
IMG_0790IMG_0791IMG_0792IMG_0793
I like to run outfit cars at the end of a freight consist just like we did on the 1:1 railroad.

Rob, I’m not familiar with the term outfit cars. I see the picture is of a M of W; is that an outfit car?

WW 8-7-2024

The “dog days” of summer are here and barking at us in full force! The weather outside is so hot that you can bake a lasagna in your street-side mailbox. But, who wants to go outside in this sweltering heat to do that? Therefore, as a public service, I offer the following solution to beating the heat. Stay inside and weather your engines, rolling stock, buildings, scenery and post your results here on Weathering Wednesday, 8-7-2024 Edition!. I and rest of the of this topic’s followers are eagerly looking forward to seeing your see your artistry and learn from your techniques.

But first, here are the forum ground rules:

  • Have fun and enjoy!
  • Post only photos that you have taken.  
  • If you post a photo taken by someone else or a copyrighted photo be sure you have express written permission from the photo's owner to post their photo.  
  • Any individual who posts copyrighted material is subject to legal liability. Furthermore, that individual will be banned from the OGR Forum.  
  • Please consult the OGR Forum TOS (Terms of Service) for further information regarding copyrights.

Today, we feature the weathering artistry of my friend and layout helper, Ms. Zora Maya Keith and another great weathering job on the Atlas O tank car, below her photo.

0702231101 [4)ZN Domino Tank

Now it is your turn to show us your weathering artistry as well as how you achieved yours results.

Attachments

Images (3)
  • WW 8-7-2024
  • 0702231101 (4)
  • ZN Domino Tank
@trestleking posted:

Randy, you are very kind.  I have one for next week, but after that submission I’ll have to get busy !

@trestleking

Rich:

We will look forward to your post next week. I was just joking about 40 more weeks in succession. As you continue to complete your weathering projects, don't forget us here at Weathering Wednesday.

Again, BRAVO on your submission this week!!!!!!

Add Reply

Post
×
×
×
×
Link copied to your clipboard.
×
×