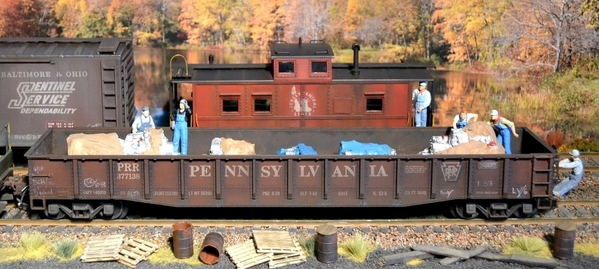
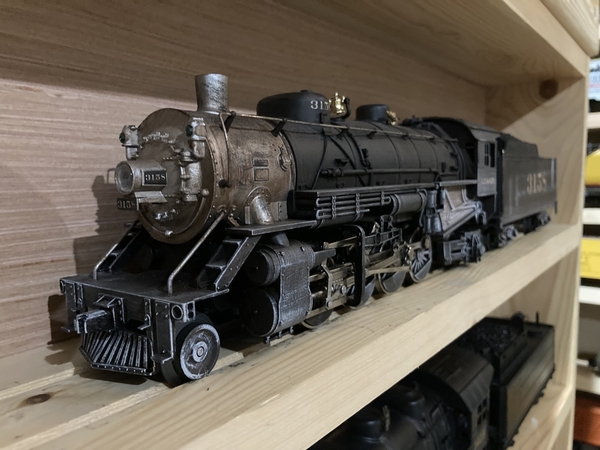
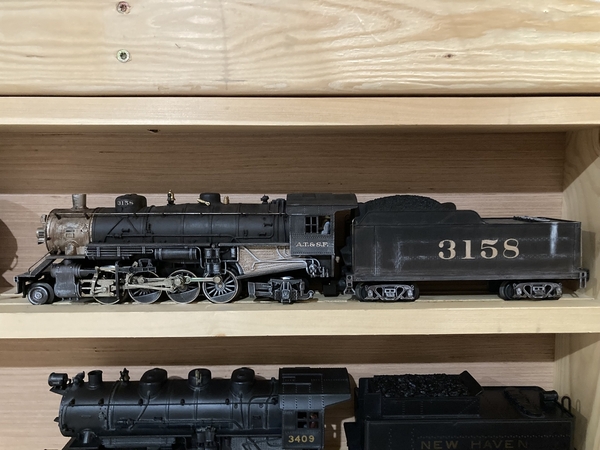
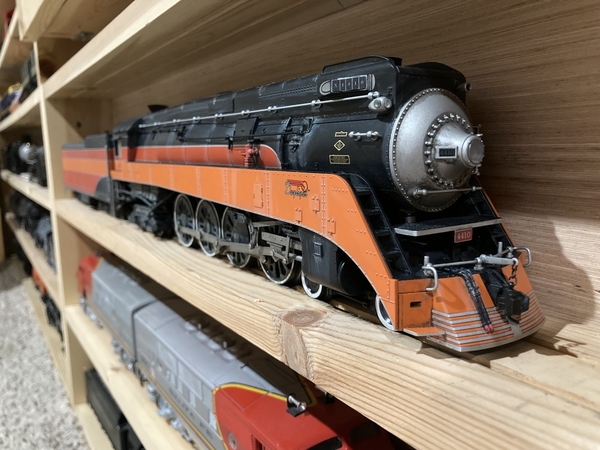
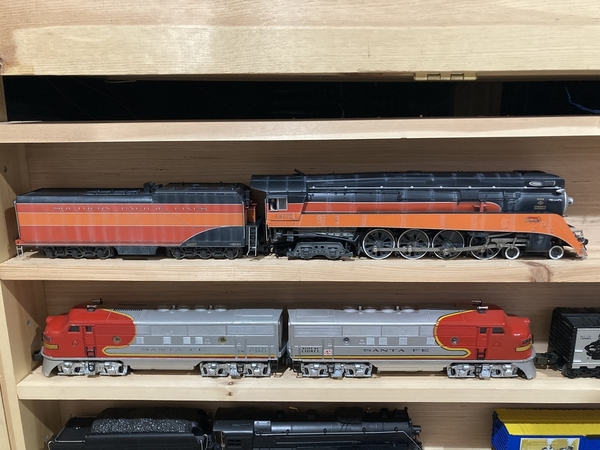
See the last post at the bottom of this topic.
Replies sorted oldest to newest
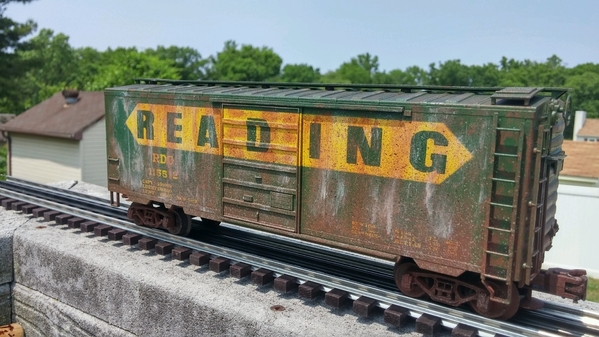
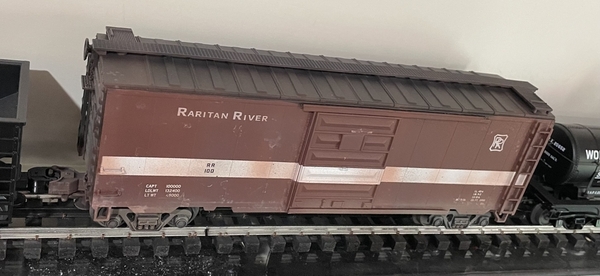
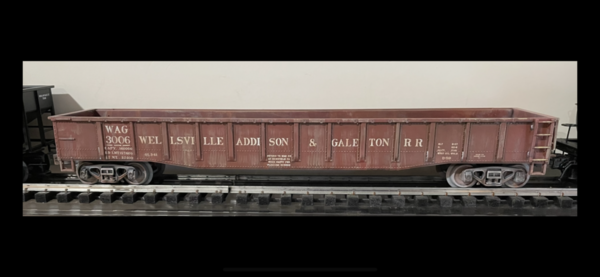
I love weathered items!
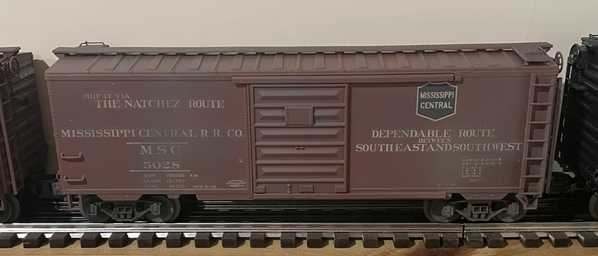
I tried a few years ago and weathered a boxcar with chalks. Looked pretty good. I then sprayed it with dullcote and the weathering all but disappeared. ![]()
When I have the time I'd like to take it up again.
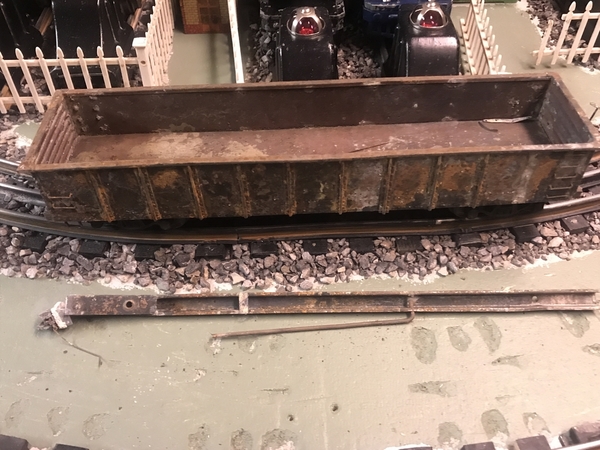
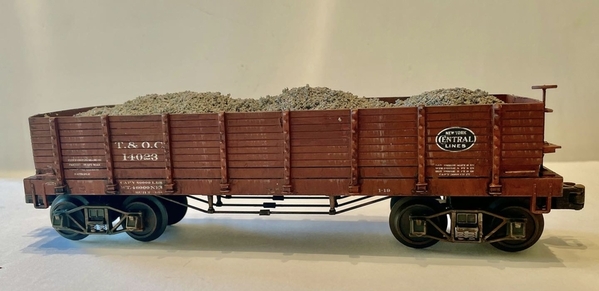
I picked up a resin kit years ago at the Amherst show. A NYC gondola by Funaro & Camerlengo. They are big in HO kits. Just finished it up. Involved gluing up the body, drilling numerous holes for grab irons and modifying some Atlas trucks to go under it. The B&A also had them. I usually weather just using an airbrush. I did some experimenting to give its well worn look. The car would be 20 years old in the era I’m modeling and spent it’s life hauling metal of some sort.
Attachments
@Dave_C, great job on that gondola! I had no idea F&C made O-scale kits. Very cool!
Attachments
Good idea Randy.
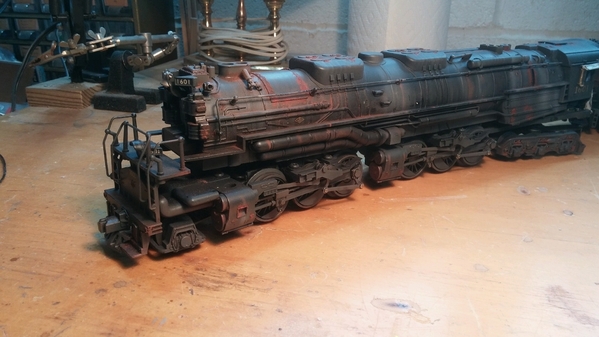
I've dipped my toes in the pool. Not much to show for it so far. I scratch built this body on an All-nations track cleaner. The trucks came out good but the body could have used a little more.
The powders do tend to vanish when sprayed with clear coat.
Bob
Attachments
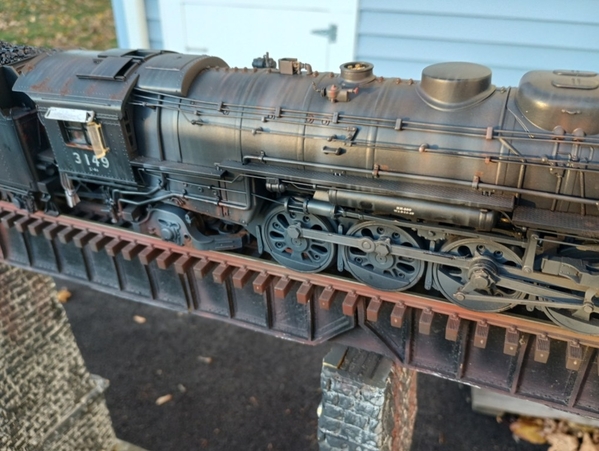
Wonderful idea Randy! Here's my B&O C- 16 Docksider, also known to B&O crews as a "Little Joe", which I weathered some years ago. My intention was to show a heavily weathered locomotive which had been earning its keep for decades without ever having been steam cleaned. The C-16s were build by Baldwin in 1912. These photos show it in different settings. I snapped all of these photos in natural light. 


Attachments
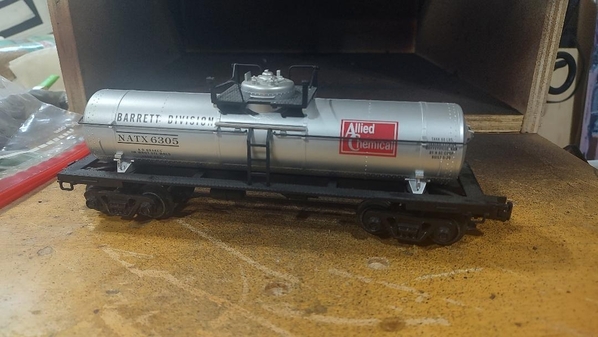
This is my first attempt at weathering. I used weathering powders, and applied them using paint brushes from the dollar store as well as cotton swabs. The tanker looked a little pink, I sprayed it with orange spray paint, I stood a few feet away and hit the tanker with a light mist. Then I finished it with rust-oluem matte clear. The Timmy graffiti i put on with a paint pen. I watch railfan videos and some of them are from the Ohio region, and a lot of hoppers have the Timmy on them. It looked easy to do so I decided to try it.
Attachments
Just started this K-line E-9. Still alot to do. Windows,portholes, full length antennas, winterization hatches, pilot mods, and also going to add up the nose grab rails so the crew can get to the windshield to clean it. I tend to overdo things. I am not convinced I like the grey dusting on the lower body shell. Is this too much weathering? Thoughts please. Don't hold back.
Attachments
Thank you to all who posted on this inaugural edition of "Weathering Wednesday". There is some great work by talented forum members out there. Again, Bravo to all who participated and be ready next week for round 2.
P. S - Tell your friends about this topic.
Here's some freight cars I have weathered over the past 5 years. Most are done with acrylic washes then followed up with Pan Pastels. It takes time to develop a technique that you like... I started with some cheap Lionel MPCC cars that I picked up at local shows for a few bucks so I didn't initially ruin anything.
Attachments
Some of mine over the years.
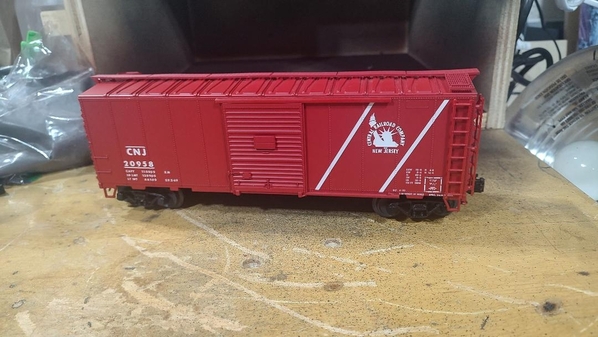
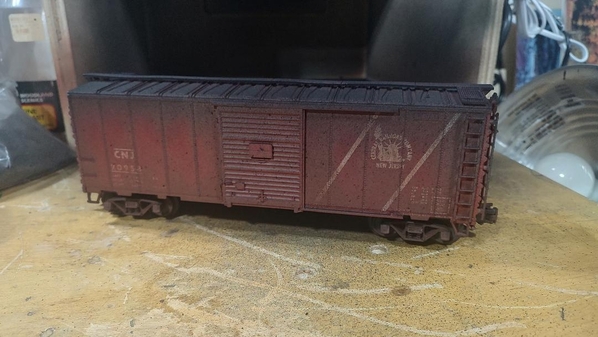
Athearn CNJ Boxcar. Probably a little on the over weathered side, but there is an online photo of this car in the late 1970's that has this level of patina. I just don't think it was in service then.
Lightly weathered F40PH showing the dirt kicked up off the roadbed onto the sides, a Conrail NE6 caboose that has not seen the wash rack in a while, and that same CNJ box car.
Conrail GG1 4840 still in it's PRR DGLE single stripe scheme. It would be retired in 1977 wearing this same paint.
Modified MTH NE caboose with some rust added in addition to the streaks running down the side.
From my HO days done with Floquil rattle can weathering over 25 years ago when I was still in my 20's.
Another NJT repaint and weathering project.
Fun topic. One day when I get back to painting, I will be doing more weathering, but probably will be a little gentler on my approach.
Attachments
I like this topic. There's nothing like getting rid of the "new car shine" from locomotives or rolling stock to give us a bit of realism to our models.
Here are a couple of examples of my weathering attempts.
Lionel Wabash gondola with coal load. Dullcoted the car then use a wash of oily black then a rust wash. Used Rustoleum's stone effects paint to stimulate a load of Limestone.
MTH slag car, a natural for weathering. Flat black rattle can base, then rust effects finish. Dullcote comes next then a wash of ordinary white flat house paint to simulate lime.
MTH ALCO RSD4/5, used acrylic washes on it for the body and trucks, then dullcoted , followed by rust colored powder applications then a final shot of dullcote. Since I model a steel mill layout, I want my models to have a heavy coat of rust colored dusting on them.
With powders I've found that you have to lay it on heavier than you think is enough since the final matte finish tends to mask some of the color.
Attachments
Attachments
I have a nice collection of weathered cars that I have purchased over the years. Would really love to figure out how to do it myself. The people that have posted so far make it look so easy.
@corsair29 posted:
I have one of these (converted to ERR). My favorite Berkshire. I weather, but have yet to do this one. Maybe I'll put it higher on the to-do list. I use the dry pigment method, with a wee bit of dry brushing (got to watch that). I admire your work.
Attachments
Great job guys. Keep up the good work.
Never found a switcher that didn't need some weathering.
Lionel FM H12-44 and ALCO S 2. Both done the same way as the previous pictures.
Attachments
The premier of my son Chris' brainchild, "Weathering Wednesday" seemed to be very well received. There was some FABULOUS work displayed last week and we are hoping to see more. So, the bell is ringing for the beginning of Round 2. Prepare your photos and narratives and come out of your corners for another exciting week of "Weathering Wednesday".
But first, the forum ground rules as so stated by my good friend Patrick Whitehead (aka trumptrain), host of the popular topic of this type, Switcher Saturday:
- Have fun and enjoy!
- Post only photos that you have taken.
- If you post a photo taken by someone else or a copyrighted photo be sure you have express written permission from the photo's owner to post their photo.
- Any individual who posts copy written material is subject to legal liability. Furthermore that individual will be banned from the OGR Forum.
- Please consult the OGR Forum TOS (Terms of Service) for further information regarding copyrights.
Chris and I will start with some photos by more of Chris' work and some work done for us by other talented artists on the OGR forum. Remember, in addition to locomotives and rolling stock, buildings are also fair game. Also, please feel free to include photos and narratives of your techniques. We are all interested in learning from our friends on the forum.
A Weaver, brass, PRR G-5, 4-6-0 expertly weathered by our friend, Harry Hieki in New Jersey. This locomotive was also converted to MTH PS-3 by Louie at the recently closed Engine House Hobbies in Gaithersburg, Maryland.
An MTH dockside tank engine and a Great Northeastern Railway caboose expertly weathered by my close friend, Patrick Whitehead, aka trumptrain on the OGR Forum. The tank car in the middle was weathered by Chris Harrison.
A close-up photo of the tank car above.
OK ladies and gentlemen. now it is your turn. Let's see what you have this week.
Attachments
Continuing on from last week, here are a couple of examples of my weathering attempts. MTH Railking CNW NW2 number 1017 and his trusty sidekick MTH Railking CNW/CMO SW8 #126. Both have been converted to TMCC by the crew at CLRC and weathered by me.
They are my go to units whenever I want to run trains.
Attachments
For this fine weathering Wednesday!
Here are photos of my K line A2 which I bought brand new in 2019. The bottom 3 photos show the locomotive new before I weathered it.
I wanted to create a look of a locomotive that had been earning its' keep for many decades. I chose to heavily weather the locomotive to give it just that. I first applied Testor's Dullcote to take off the shiny sheen. Next I applied some Floquil Grimmy Black spray paint to the wheels and running rear & a various other spots on the locomotive. I then applied chalk pastels, rubbing the pastels on with my fingers. Once I finished with the pastels, I sealed the pastels with Testors Dullcote.
I took great care in weathering the tender's apron and slopping back. I made sure to show spilled coal. 
The final result showing the A5 within the context of scenery. 
Tender apron. Lots of spilled coal. 

Another pic showing the locomotive and tender in context of scenery. 

Spilled coal on the sloping tender's sloping deck. 

Attachments
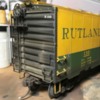
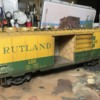
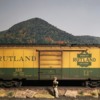
This weeks project. MTH 50 ft. Automobile boxcar. I model the Rutland. You see a lot of these cars in the backgrounds of photos. Added Atlas’ trucks to get the ride height down a bit. Used Tamiya paints for the weathering.
Attachments
These weathering examples are amazing! This is something I have not attempted but once on rolling stock, and it was a disaster. If you all can tell us HOW you did your weathering when you show the examples, that would be helpful. Just a quick, “used an airbrush, or used powders, used a matte coat over top” etc. Thank you
Mike
I love the effects of weathering on locomotives and cars. I detest graffiti. Fortunately, my modeled era (1964), so such was not seen.
My proto-free lance modeling theme was crafted to represent a Class 1 that had very poor family-owned management during the 1950s. (Thus, instead of continued investing in motive power, physical plant, etc, the were siphoning off funds via dividends, exorbitant salaries, and so forth.) By 1960 the cash was running out, and early in the 1960s bankruptcy was declared. The courts came in, the bad seeds rooted out, and a Receiver appointed. The road is now trying to re-organize. So it is, that my Kansas City & Gulf railroad is trying to make a successful trek back into solvency, but the road is a long and hard one, and thus far fraught with setbacks.
I wanted the bulk of my modeled KC&G engines to look like what they were: Engines that were run hard, had minimal upkeep, and essentially a "patch up and make do". Some of the engines are fairing better than others, but some are really hurting.
I base my weathering effects on photos I have of prototype engines. I also use my "Foundational Four" prototype railroads to guide my weathering decisions as well as my motive power logic, etc. Those four railroads were part of the region I model: They are, the Frisco, the Missouri Pacific, the Rock Island, and the Kansas City Southern. Simply put, if an idea I have for motive power (and etc) was NOT present on any of my Foundational Four, I reject it for use on my KC&G. By doing so, I hope to keep an degree of "plausibility" in my theme and my modeling. My friends tell me it's working for me. I hope so.
ANYWAY... over the course of this thread, I'll post a few examples of the engines on the KC&G's roster.
First up is KC&G GP7 #412. This engine is still wearing it's original (and fading/eroding) paint scheme as delivered in late 1950:
And for contrast, here is one of the fortunate GP7's that actually received a shopping after the bankruptcy. In so doing, it received a "simplified" paint scheme to help reduce costs:
Last pic for now. Here's a down-on shot from the hill overlooking the mountain town of "Ozarka". The trio of road switching engines are used out of Ozarka to cover two turns (the GP7's) and the power for the "Ozarka Switcher" at Ozarka (the RS-3). At times any of them can be called upon to help a freight up the long climb from Ozarka, around the end of Hogback Mountain, up through Possum Holler, around Hickory Knob into Buck Holler, and the final ascent of Buck Mountain to arrive at the small summit town of Piney. Piney lays in the natural gap there called Piney Gap. At Piney Gap, there is also the Piney Gap Tunnel by which the KC&G pierces the divide to eventually end up in at their subdivision point at Branson, Missouri.
Note: That last pic has temporary scenic elements in place so I could get an idea of what the final scene could look like. All the foreground photoflat free standing tree lines will be replaced by actual 3D modeled trees, and the there will be a scenic form to convey the side of hill where the road is. If you'll look closely, you'll note that almost all the trains/etc are weathered to various degrees.
All fer now!
Andre
Attachments
This is an "old" Atlas (Bev-Bel) 40' boxcar that I modified by adding Kadees and wire grab irons...and weathered, of course!
Attachments
This was my first and only attempt at weathering. Haven’t done any Locomotives or rolling stock.
Attachments
I weather this workman shack last year with powder rust colors. The steam engines that you guys have done are fantastic a job well done!![]()


Attachments
@corsair29 posted:
Yeah, that guy. I have one of these, still bright and shiny. May be a "soon" weathering project; I weather, so it will get done, I guess. The loco has been a bit of a problem child, so I don't tend to mess with it so much.
Edition 2 of "Weathering Wednesday" was another great success. Again, some fine work was displayed here. I am always impressed with how much talent there is among our OGR Forum members.
Thank you all for participating and get your photos ready for next week's "Weathering Wednesday".
Welcome back another exciting week of "Weathering Wednesday" where things that have been "schmutz-up" reign supreme. I am really eager to see what you all have to show us this week.
But first, the forum ground rules as so stated by my good friend Patrick Whitehead (aka trumptrain), host of the popular topic of this type, Switcher Saturday:
- Have fun and enjoy!
- Post only photos that you have taken.
- If you post a photo taken by someone else or a copyrighted photo be sure you have express written permission from the photo's owner to post their photo.
- Any individual who posts copy written material is subject to legal liability. Furthermore that individual will be banned from the OGR Forum.
- Please consult the OGR Forum TOS (Terms of Service) for further information regarding copyrights.
Chris and I will start with some photos of more of Chris' work and some work done for us by other talented artists on the OGR forum. Remember, in addition to locomotives and rolling stock, buildings are also fair game. Also, please feel free to include photos and narratives of your techniques. We are all interested in learning from our friends on the forum.
Here is a shot taken of Mt. Carroll yard showing gondolas with Chris' custom coal loads. Also in the photo is an MTH dockside switcher weathered by my good friend Pat Whitehead (aka trumptrain).
A close-up of the Lackawanna gondola and scrap load also expertly weathered by Chris.
Here is a close-up photo of our K-Line C&O Allegheny weathered for us by Harry Hieki. Note the window awning and wind deflector also added by Harry. Though not in this photo, Harry also added cab curtains. Harry Hieki's artistry is second to none!!
This is a full shot of the C&O on my work bench. Though not readily visible, Harry also included an enhanced coal load.
Here are two better photos of the coal load.
Also, here are the cab curtains
Attachments
The Texas Zephyr had 86 ft. RPO's in the consist. Although the entire train usually gleamed after a good washing, the RPO's were often set out at the station mail track and missed the wash rack. Part of the weathering for Silver Messenger includes an area where catching the mail bags has beat the devil out of the door frame.
Attachments
Chris, your weathering is just outstanding! I hope to get there one day 🙏
Attachments
Got sun-damaged at a swap meet years ago when I had it for sale in a "window" box (doors warped on one side of car; second photo). So, couldn't sell it at a decent price; decided to have some fun with it. Like the modern Wms diesel to the left, not really "my" era, but there it is. The warped doors look authentically dented/pushed in, to me.
Funny - now I have had offers for the car exceeding what the un-damaged NIB car would have ever brought. I also now do not want to sell it. This blasted hobby is just one Catch-22 after another.
Attachments
@chris a posted:@mike g. Mike - thanks for the kind words..... Experimenting with weathering is a great activity when you're between layouts !
@chris a I would love to try doing something like this, but everything is packed up for our future move. I know the CEO would kill me if I opened up a packed box and started taking things back out! LOL
Untill then I will just have to live threw all you guys and the amazing work that you all are sharing!
I'm late today! Sorry!
Well, hopefully better late than never, I open Weathering Wednesday, the topic where we like to share with you some of our projects as well as those done for us by other fine artists. Also, we invite you to share your weathered items with the forum as well as weathering techniques so that all can benefit from your expertise and experience. Today, per suggestions from Dava (aka luvindemtrains) and other readers, I will go back to the format of just renaming the entire topic from page one on with the new edition so that readers can scroll back through past port to admire and learn from previous posts. But first, the forum ground rules as so stated by my good friend Patrick Whitehead (aka trumptrain), host of the popular topic of this type, Switcher Saturday:
- Have fun and enjoy!
- Post only photos that you have taken.
- If you post a photo taken by someone else or a copyrighted photo be sure you have express written permission from the photo's owner to post their photo.
- Any individual who posts copy written material is subject to legal liability. Furthermore that individual will be banned from the OGR Forum.
- Please consult the OGR Forum TOS (Terms of Service) for further information regarding copyrights.
To start today, I want to feature a piece weathered for me by Pat Whithead that has appeared in previous posts. But today, I will show Pat's artistry in full detail.
The first 2 photos are of the Great Northeastern Railway's first caboose in GNR livery.
...and a photo of pat's final weathering product when it arrived back on GNR property.
Here are photos of the caboose, taken by Pat Whitehead and used with his permission, on a siding of the Free State Junction Railroad (FSJR) awaiting transport back to the GNR. Roof and end views of show the great detail of Pat's artistry.
Now, let us see what you have been working on or have completed.
Attachments
@corsair29 posted:
Wow great job corsair!
Attachments
Steve, I had to do some research to see if that was a Weaver Consolidation. I’ve looked at a few. Frankly. I never new they had that much detail. The weathering really makes it pop. GREAT job.
Here's a MTH N8 Caboose I lowered weathered and installed Kadee's.
Also a before and after shot of a 50 foot Rock Island Woodside Auto Box car that I really liked how it turned out. Before the acrylic washes, I used water color pencils to tint individual wood siding boards both darker and lighter than the factory Rock Island Box Car red/brown.
Attachments
Late entry for me this week. Here's a Lionel PS-2 hopper that was factory decorated for the PRR. I removed all lettering, then redecorated (3 cars total) for the CNJ. The CNJ used these cars for bulk cement loading, so I weathered it to represent a car that has seen many years in cement service. If you've never seen these PS-2 hoppers up close, they are really nice! IMO they are one of Lionel's best-detailed scale freight cars.
Here's how it was decorated by the factory...
Here's how it looked after re-lettering and before weathering...
Attachments
@corsair29 posted:That looks so much better!
What did you do to lower it?
Steve, Thanks for the kind words. To lower the N8 Caboose, I did the following:
- Drilled out the "top hat" metal stampings in the floor of the caboose. I typically use a Unibit to do this with the steel floor secured in a bench top vise.
- I typically find a large "Fender Washer" that has an ID hole that matches up with the MTH trucks, can't remember right now if it's 1/4" hole.
- Then I epoxy the washer to the interior side floor of the metal caboose frame/floor.
- In this case after studying a bunch of prototype photos and finding some mechanical PRR drawings, I moved the trucks further toward the end platforms so they were the correct distance apart from each other.
- Finally, I had some 0.020" ABS plastic stock, and super Glued it to the underside of the metal frame so that the top of the rivet/spring assembly for the pick up roller could not short out against the metal frame.
Attachments
It is early for this post. But I have a busy day tomorrow. So, to paraphrase the Ringling Brothers Barnum and Bailey Circus Ringmaster, 'LADIES AND GENTLEN! CHILDREN OF ALL AGES! RANDY HARRISON OF THE GREAT NORTHEASTERN RAILWAY PRESENTS THE GREATEST(?) TOPIC ON THE FORUM,,,,WEATHERING WEDNESDAY, 3/13/2024!!!' The topic where messy is OK. Artistically messy, that is. Otherwise, I could just post photos of the condition of my workroom, and no-one would be impressed.
Today, we are hoping to see more of your GREAT weathering creations, both rolling stock and skillfully weathered buildings as well as scenery. But first, the forum ground rules as so adroitly stated by my good friend Patrick Whitehead (aka trumptrain), host of the popular topic of this type, Switcher Saturday:
- Have fun and enjoy!
- Post only photos that you have taken.
- If you post a photo taken by someone else or a copyrighted photo be sure you have express written permission from the photo's owner to post their photo.
- Any individual who posts copy written material is subject to legal liability. Furthermore that individual will be banned from the OGR Forum.
- Please consult the OGR Forum TOS (Terms of Service) for further information regarding copyrights.
I will start today off with two of my completed projects for the Red Lion (PA.) Model Railroaders' club layout at the old Ma & Pa RR Station in Red Lion, Pennsylvania. The first offering is my first assignment I was given when joined as a member of this great club. It was to create a filler piece for a vacant rear corner of the layout. Prior to my arrival, someone had roughed out a steep but undefined in shape structure out of insulation foam that they wanted to be a coal mine and coal delivery station. Here was the starting point that I was given.
Here is the finished product with smoke and soot-stained track retaining walls, as well as weathered rock facing, buildings, track and trestle.
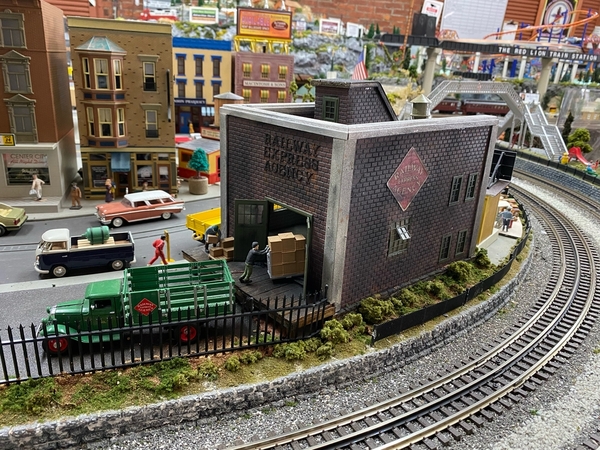
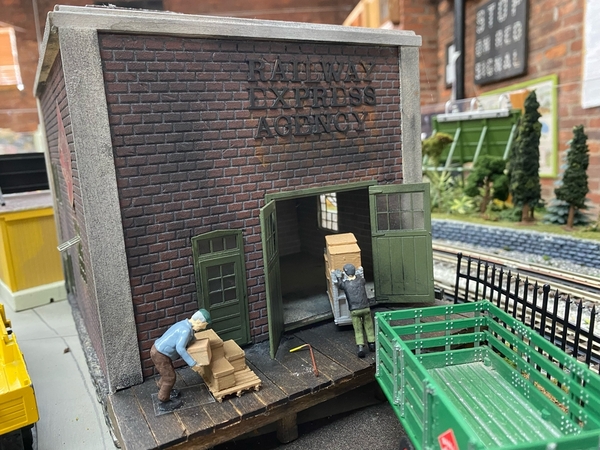
My next assignment was a Railway Express Agency freight house and office. I scratch-built the building and weathered it to show the results of many years on the 2-track mainline of a steam railroad. Much of the weathering was done with graphite powder covered with Testor's Dull Cote spray.
Now, it is your turn. Show us MORE of your great weathered creations.
Attachments
K-line girder bridge painted with red car primer then used rust powders for ageing.

Attachments
Randy thanks for starting this thread. Again these types of threads showcase some nice work from members on the forum. Here's my entry for today. This is an Atlas Southern Berwick Boxcar.
Dave
Attachments
To echo luvdemtrains, thanks for starting this thread Randy!! Your two weathering projects for the club in Red Lion look terrific!!
Luvdemtrains - your boxcar weathering work is superb!!
Rob Leese - got love those grimmey Friscos. Wonderful job!!
Sitka - Your girder bridge wears your weathering well!! Looks like it's been out in the elements for many decades. Great job!!
One of my early weathering projects was the MTH coil car back in 2018. I first sprayed a coat of Testor's Dullcote ... let it dry ... then lightly sprayed a bit of Floquil Grimmey Black here and there.
Next I used gray pastel chalk to give it that "been in a dusty region " look ... I also applied rust pastel chalk along the some of the sill areas and some parts of the lifting bars. My process for applying the pastel chalk was to make a short chalk line then rub the chalk in a circular motion with my fingers. For hard to get at areas, I used a small paint brush creating circular motions with the brush.
Once I got the car to look the way I wanted it, I applied another coat of Testor's Dullcote to seal pastel chalks.
Incidentally I purchased this car at York from the MTH Parts Booth. For some reason there were some Premier freight cars on a table with a sign that read" make an offer". Mike Wolf was standing there and I made him an offer of $20.00. He accepted. I should have asked him to sign the box .... oh well. 


Attachments
Legacy Michigan Central Berkshire. It had a correct B&A rd. number for an A1. 1420. Bought it to doublehead with #1404. Re lettered and weathered using airbrush.
Attachments
@Dave_C posted:
I cant figure out why Lionel rarely produces a Berkshire for its namesake Boston&Albany line. K Line and MTH B&A models seem to sell well and its hardly some obscure regional short line. Cudos to a doing a fine looking model.
Great work all! I hope one day I will get to that point! First I need to get a new home! LOL
Farmall-Joe, thank you for nice comment. The B&A although part of the NYC. Didn’t have a huge variety of steam motive power. Yes what has been done does sell well. What I don’t get is why no one produced the small tender. Yes some were retrofitted with Hudson tenders. I understand the economics having an already produced tender. But the small tender could have been used on other models and roads.
Again, it is early for this post. But I had a busy day today and have another one tomorrow.
So, to again paraphrase the Ringling Brothers Barnum and Bailey Circus Ringmaster, 'LADIES AND GENTLEN! CHILDREN OF ALL AGES! RANDY HARRISON OF THE GREAT NORTHEASTERN RAILWAY PRESENTS THE GREATEST(?) TOPIC ON THE FORUM,,,,WEATHERING WEDNESDAY, 3/20/2024!!!' The topic where messy is OK. Artistically messy, that is. Otherwise, I could just post photos of the condition of my workroom, and no-one would be impressed.
Today, we are hoping to see more of your GREAT weathering creations, both rolling stock and skillfully weathered buildings as well as scenery. But first, the forum ground rules as so adroitly stated by my good friend Patrick Whitehead (aka trumptrain), host of the popular topic of this type, Switcher Saturday:
- Have fun and enjoy!
- Post only photos that you have taken.
- If you post a photo taken by someone else or a copyrighted photo be sure you have express written permission from the photo's owner to post their photo.
- Any individual who posts copy written material is subject to legal liability. Furthermore that individual will be banned from the OGR Forum.
- Please consult the OGR Forum TOS (Terms of Service) for further information regarding copyrights.
Today was extremely hectic. I don't have much new to show you. So, I will start with a retrospective from some of my previous posts. I promise to try to be more prepared next week.
I will start with some scenes of our weathered engines and rolling stock around Mt. Carrol Yards on the Great Northeastern Railway.
So now, go to it and post your great work for this week.
Attachments
A beat up Great Northern gondola is caught resting in the New Haven yard before catching another load west. I used a hair dryer to heat the sides so they could be pushed out to show wear and some 3/4" round wood dowel to bend the sides and a mixture of 70% alcohol and india ink to apply a dirt and grime look.
Attachments
@Bill Park posted:A beat up Great Northern gondola is caught resting in the New Haven yard before catching another load west. I used a hair dryer to heat the sides so they could be pushed out to show wear and some 3/4" round wood dowel to bend the sides and a mixture of 70% alcohol and india ink to apply a dirt and grime look.
Fabulous Bill!!! Very creative weathering technique with using the hair dryer! BRAVO!!
My contribution for this fine Weathering Wednesday are these five cars that I've weathered. Heading the consist, the K line Shay will continue to wear its shiny gloss paint ... the boys down at the roundhouse keep the Shay clean as a whistle!
Attachments
Attachments
Bless me Father for I have sinned. I am very late in starting Weathering Wednesday this week. For my penance, I will hit the floor and do 20 push-ups (in my wildest dreams) and get it started NOW!!!!!
But first, the forum ground rules as so adroitly stated by my good friend Patrick Whitehead (aka trumptrain), host of the popular topic of this type, Switcher Saturday:
- Have fun and enjoy!
- Post only photos that you have taken.
- If you post a photo taken by someone else or a copyrighted photo be sure you have express written permission from the photo's owner to post their photo.
- Any individual who posts copy written material is subject to legal liability. Furthermore that individual will be banned from the OGR Forum.
- Please consult the OGR Forum TOS (Terms of Service) for further information regarding copyrights.
Today, I will start with a scratch-built creation of my own, a Union Station, that will go in our layout when we get to the fun part of refurbishing, the part where we get to do the final scenery. It was weathered for me by master weathering artist, Harry Hieki, of Mt. Ephriam, NJ. I told Harry that I wanted it lightly weathered and he really captured my wishes.
Here is an overall shot of the station's head house prior to weathering.
Here is an overall shot of the station's head house after Hary worked his magic.
Here are some close-up photos to show Harry's attention to detail. The first shows subtle streams of rust from the large metal lettering in addition to the runs of ambient city grime.
Similar runs of grime and rust stains from the window frames
This photo shows more of the weathering but is mainly to show some of the interior detail such as the dispatch board and the ticket window, just visible to the left.
Now, Let's see your creations.
Attachments
Attachments
@Laidoffsick posted:
Subtly done, but very effective. It looks like the Santa Fe RR takes good care of their motive power and rolling stock. Sometimes, less is more. Also, though not related to weathering, your scenery breathtaking!
Attachments
I hope all of you who celebrate had a joyous Easter holiday.
Though last week, I was way behind schedule starting this topic, the topic is still alive and well. This week, I hope that many of you will join in with your artistry and show us your work on weathering locomotives, rolling stock, scenery and building structures.
But first, the forum ground rules as so adroitly stated by my good friend Patrick Whitehead (aka trumptrain), host of the popular topic of this type, Switcher Saturday:
- Have fun and enjoy!
- Post only photos that you have taken.
- If you post a photo taken by someone else or a copyrighted photo be sure you have express written permission from the photo's owner to post their photo.
- Any individual who posts copy written material is subject to legal liability. Furthermore, that individual will be banned from the OGR Forum.
- Please consult the OGR Forum TOS (Terms of Service) for further information regarding copyrights.
I did not get much time this past week to do any weathering myself. So, I will start by offering photos of work some of my talented friends did for me.
A Weaver, brass, PRR, 4-6-0 weathered by my friend, Harry Hieki of Mt. Ephriam, NJ.
A K-Line, C&O Allegheny also weathered by Harry Hieki.
A PRR cabin car beautifully weathered by my friend of MANY years, Patrick Whitehead.
Great Northeastern Railway caboose also weathered by Pat.
The caboose again plus an MTH, dockside switcher in Great Northeastern Railway livery also weathered by Pat.
Now, it's your turn. Let us see what you have created!!!!!!!
Attachments
Attachments
Lionel bridge painted auto primer then I used powder rust colors to give it a weathered look.

Attachments
Attachments
These are some GREAT submissions so far.
@Bill Park: That is a great job. Enough to look weathered but not over-done.
@Sitka: Your bridge is fabulous! I also like the fact that you gave a description of how you achieved your results. In addition to a finished product, the process that was used to get the finished product is also important. Inquiring minds (even mine) want to know.
@TrainWatcher: That is a great step one! How did you get to the look we see in the photo? Also, what is your plan for step two?
Thank you all, again.
For this delightfully soggy ( in Maryland ) Weathering Wednesday!
I bought this hopper off e bay back in 2018. I bought it as is for $5.00 plus $4.00 shipping because I was interested in the obtaining the Weaver trucks. The car was listed as having heat damage, as the photos depicted. Once I received the car, upon unboxing it I suddenly had an idea to created a scene depicting a wrecked hopper car that had been towed to a siding for possible repair. As the car was brand new and suffered severe heat damage, it still had to be weathered to replicate its' dues paying time on the railroad.
For weathering I sprayed it with Dullcote to take down the shine. After the Dullcote dried, I later sprayed some Floquil Grimmy Black with the spray can held about 18 inches away from the car. After the Grimmy Black dried I applied pastel chalks, rubbing them in with my fingers and a dry paint brush for the crevices. Once the weathering process was completed, I created a scene and took photos to use in the a thread I once created and hosted " Team Track Tuesday" which ran for 2.5 years hear on the OGR Forum. These are the photo I took then. The guys from the car dept are on the scene checking the car over after it arrived on the the Mountain Division team track at Danlilu. 


Attachments
@Randy Harrison posted:
Randy, I hate to rain on your parade, but in the 1920's (when tender striping was on the passenger locomotives), that PRR 4-6-0 would have been almost immaculately clean, with bell and side rods regularly polished. There certainly would have been zero rust.
Pat:
That is GREAT work on that hopper. Your weathering artistry has always impressed me.
WOW! I am on time starting this week's edition of Weathering Wednesday two weeks in a row! I don't have any new weathering projects to show you this week. But our new spray booth is now a reality. We have done a video showing off the new booth and its many features starring me. The video was taken by my friend and Sunday morning helper, Ms. Zora Maya Keith. Also, we invite you to share your weathered items with the forum as well as weathering techniques so that all can benefit from your expertise and experience.
But first, the forum ground rules as so adroitly stated by my good friend Patrick Whitehead (aka trumptrain), host of the popular topic of this type, Switcher Saturday:
- Have fun and enjoy!
- Post only photos that you have taken.
- If you post a photo taken by someone else or a copyrighted photo be sure you have express written permission from the photo's owner to post their photo.
- Any individual who posts copy written material is subject to legal liability. Furthermore that individual will be banned from the OGR Forum.
- Please consult the OGR Forum TOS (Terms of Service) for further information regarding copyrights.
Below is a link to the video of our new spray booth. It was totally unrehearsed. So please cut me some slack if I more than occasionally sound like Daffy Duck.
Now, let us see what you have been weathering.
@Bill Park posted:Hi Randy, Nice job on the spray booth. I now have an idea what I need to do to make one. While visiting my friend Rick Tota, I took some pictures of his weathering projects. His friends call him Rusty. It's easy to see why.
Wow Bill, his heavy realistic weathering makes these borderline ready for decommissioning and scrapped. Nice work!
Gene
I'm running behind schedule today! Randy your paint booth is terrific!!! Thanks for sharing![]() Here's my contribution for this fine Weathering Wednesday!
Here's my contribution for this fine Weathering Wednesday!
I've shown my B&O Docksider many times on various OGR Forum threads. This time I'm showing it in several different photos ( top 8 photos ) with each photo showing the Docksider in a different natural light. These photos were taken in my train room as the light shown through the windows at various times in one afternoon. The different lightings give the locomotive a different look in each photo IMHO.
Photos 9 plus show a gondola and work caboose, both of which I weathered. I wanted this entire little train to have a " well worn trio look that tells the story of a short train that has been earning its' keep on the railroad for many decades". Again I employed my usual technique of applying Testors Dullcoat to take down the sheen, pastel chalks, and Floquil Flat Grimmey Black spray paint. I rubbed chalks in circular motion with my fingers and used a small paint brush to rub the pastel chalk into hard to get at areas. Lastly I sealed the rubbed in pastel chalk and Grimmey Flat Black spray paint with a final coat of Dullcote. 


A weathered gondola with a junk load that I created from just picking up stuff out of a junk pile I happened to create on my layout. As I worked on my layout I would throw excess scrap pieces of track, railroad ties, metal fencing, couplers, wheel sets, etc into a pile without intending to create a junk pile. One day I looked at the pile and thought "wow that looks like a junk pile I've seen in industrial areas alongside railroad tracks." At that moment I decided to keep the pile as a "scenic" part of my layout. 

Attachments
@Bill Park posted:
Wow Bill! These locomotives are the most decrepit ( in a good way ) looking power I've ever seen. Their roads have squeezed every last once of goodness out of these puppies. Your buddy did a terrific job with these jewels!!!
@Bill Park: Your weathering work on your locomotives is SUPRB! Bravo!!!!
@trumpettrain: Pat - Your weathering artistry is second to none. Also, thank you for sharing your weathering techniques and scenery tips. That is also meant to be a major part of Weathering Wednesday.
@trumpettrain
Pat, excellent sequence of pictures and the weathering is tastefully done.
Gene
@Genemed posted:@trumpettrain
Pat, excellent sequence of pictures and the weathering is tastefully done.Gene
Thanks so much for kind words Gene!
Tomorrow is the start of the great York meet for the spring of 2024. Many of you will be coming home with new treasures for your layouts. That sounds to me as if there will be many new items that need to be turned in to old-looking items for those of you that weather your engines, rolling stock, buildings and other scenery. So, in the weeks to come, I am hoping for many of you to share more of your creations as well as weathering techniques here on Weathering Wednesday for us to admire and also learn new tricks of our own from your artistry.
My start to this week’s edition is sharing the weathering technique of my son, Chris Harrison, with all of you. You have seen, in previous iterations of this forum topic, several of Chris’ weathered freight cars. Some samples are in the following photos.
But first, the forum ground rules as so adroitly stated by my good friend Patrick Whitehead (aka trumptrain), host of the popular topic of this type, Switcher Saturday:
- Have fun and enjoy!
- Post only photos that you have taken.
- If you post a photo taken by someone else or a copyrighted photo be sure you have express written permission from the photo's owner to post their photo.
- Any individual who posts copyrighted material is subject to legal liability. Furthermore, that individual will be banned from the OGR Forum.
- Please consult the OGR Forum TOS (Terms of Service) for further information regarding copyrights.
So now, get your popcorn ready, find a nice comfortably seat and enjoy today’s feature video presentation starring my son Chris showing you his technique of weathering freight rolling stock.
Now it is your turn to show us your weathering artistry as well as how you achieved yours results.
Attachments
Here is a MTH Railking PRR Crane and a MTH Premier Crane Tender (originally CNW).
Both cars lowered to the rails, and I lowered the rotating crane housing to the die cast base to reduce the unrealistic gap. Kadee 80 couplers installed on both cars.
Attachments
De-streamstyled ATSF Valley Flyer 4-6-2. Weaver brass. Came with T/A TMCC/sounds from Weaver, I removed the streamsyling - mostly. The flat area under the smokebox front should not be there, but it is a thick brass casting, as I recall - this was years ago - and was structurally important, so I let it stay. Today I would probably try to replace it. One day I may correct this....nah. Probably not. The pilot is the original brass casting, cut out to open it up, leaving a frame, then separate boiler tubes (wire) attached. There should be more "tubes".
I painted it weathered black from a gray automotive primer spray can, then weathered using an airbrush. I haven't used an airbrush in years; I tend toward dry pigments these days. Runs well. Old photo.
Attachments
This is a run of misc cars on my club layout. Acrylics, powders, and dullcote. Some heavier than others.
Attachments
The only time I tried to weather some thing was the body of a lionel Milk car body that I was using for storage behind a grocery store, and I wanted to rust it out a little bit. Oh, that was a flop. I recently purchased a beep that was sold as Weathered and it didn’t look bad looking at the pictures front view, side view etc. when I got it I’m not too happy with the top view. So I don’t know if I should wet sand with light sand paper to remove the weathering on the roof; or use a chemical. looking for some help here.


Attachments
@pennsyfan posted:The only time I tried to weather some thing was the body of a lionel Milk car body that I was using for storage behind a grocery store, and I wanted to rust it out a little bit. Oh, that was a flop. I recently purchased a beep that was sold as Weathered and it didn’t look bad looking at the pictures front view, side view etc. when I got it I’m not too happy with the top view. So I don’t know if I should wet sand with light sand paper to remove the weathering on the roof; or use a chemical. looking for some help here.
Bob:
I personally do not think the roof looks to be that bad. It seems to work in context with the weathering of the rest of the locomotive.
I would welcome hearing other opinions from those with more experience than me.
You know guys I came across this page a little while ago and have fell in love with it everything you all do! I sure would like to pick out one or 2 guy's, but you all do such amazing work! I don't comment a lot on here but sure enjoy what you all do!
Keep up the wonderful work!![]()
@Randy Harrison posted:Bob:
I personally do not think the roof looks to be that bad. It seems to work in context with the weathering of the rest of the locomotive.
I would welcome hearing other opinions from those with more experience than me.
Thanks For your input Randy, I just feel the roof looks like a smear.
@pennsyfan posted:The only time I tried to weather some thing was the body of a lionel Milk car body that I was using for storage behind a grocery store, and I wanted to rust it out a little bit. Oh, that was a flop. I recently purchased a beep that was sold as Weathered and it didn’t look bad looking at the pictures front view, side view etc. when I got it I’m not too happy with the top view. So I don’t know if I should wet sand with light sand paper to remove the weathering on the roof; or use a chemical. looking for some help here.
My recommendation would be to try "red" Scotch Brite pad to try and remove the darker blotchy areas. I'd do it dry first attempt and keep a damp paper towel handy so you can wipe the area and see if you're making any progress.
The wet sanding could work, but you run the risk IMHO of burning through the red paint on any high spot or corner.
You could add dish detergent if it's stubborn. The Scotch Brite pad if you work from the top (crown) of the roof down should leave you a surface with a little "tooth" that you can go back and apply Pan Pastel or weathering powders to blend it in. If you don't have any Pan Pastels, you could experiment with some lightly diluted acrylic washes in Burnt Umber/Grimy Black. Key word here is lightly diluted, very little craft water based paint, lots of water.
Thanks for the suggestion and quick course.
Here's my contribution for this fine Weathering Wednesday. I may have already shown, here on WW, most everything that I've weathered this far ... which tells me I better get busy! .. LOL! On the docket to be weathered is a scale MTH O-8-0, a Kline box cab switcher, more boxcars and more open top hoppers.
Everyone has contributed superb content today, as usual!! Chris Harrison - very nice "how to" weathering video! Thanks for sharing your technique!!
Here is a MTH gondola that I've not shown on WW yet. I employed my usual technique of first applying Dullcote to take down the shine, rubbed on pastel chalks using my fingers, then sealed the chalks with dullcote. The junk load is a standard MTH junk load. This car was one of my earliest weathering projects. 
My junk pile ... Not exactly a weathering project, although I did weather some of these pieces. I created the pile just by throwing unwanted debris in this area of my layout without intentionally meaning to create a junk pile. 
Attachments
@Randy Harrison posted:Now it is your turn to show us your weathering artistry as well as how you achieved yours results.
Chris, thanks for posting your video. I’m going to try your technique on 8 unpainted hoppers which I recently got on the bay. they’re not delivered yet. They were molded red. My intention is to make them sand hoppers for the PRSL, so I’m going to paint them gray and then I thought I’d use your techniques to weather them, so after I paint them gray, I’ll letter them and then should I clearcoat the lettering before I do your process for the weathering?
@pennsyfan posted:Chris, thanks for posting your video. I’m going to try your technique on 8 unpainted hoppers which I recently got on the bay. they’re not delivered yet. They were molded red. My intention is to make them sand hoppers for the PRSL, so I’m going to paint them gray and then I thought I’d use your techniques to weather them, so after I paint them gray, I’ll letter them and then should I clearcoat the lettering before I do your process for the weathering?
Bob:
I check with Chris this morning before he went to work. He thinks that a clear dull coat before your applied lettering before weathering can't hurt but is probably not absolutely necessary. We will look forward to seeing your results next Wednesday.
As a side note, though I have a pair of RMT, PRSL coal hoppers, the PRSL owned no freight rolling stock labeled with the PRSL name and logo.
@Randy Harrison posted:Bob:
I check with Chris this morning before he went to work. He thinks that a clear dull coat before your applied lettering before weathering can't hurt but is probably not absolutely necessary. We will look forward to seeing your results next Wednesday.
As a side note, though I have a pair of RMT, PRSL coal hoppers, the PRSL owned no freight rolling stock labeled with the PRSL name and logo.
Thanks for the reply. It will be awhile Randy. I paint outside.
Which type of weathering is better, airbrushing or using powder? (I don't have an airbrush right now)
Kyle - A Fellow "Rail-Nerd"
Kyle, to answer your question. I would go on You Tube and try and watch as many videos as you can on weathering. There are many techniques and many use combinations of both airbrushing, artist tube acrylics and powders. One of the best I’ve seen on a freight car tutorial was Boomer Diorama on You Tube. An HO modeler but he did an o scale boxcar.
Cost is going to be around $100 whether you go for an airbrush or weathering powders such as Pan Pastels and artists acrylics. A bit more if you also need a air compressor. While it’s nice to have a huge assortment of colors. You can get started with 4 or 5.
Practice on some inexpensive cars you have no attachment to get the feel of how much to apply. Once you get your technique down move on to your prized rolling stock and engines. Weathering is designed to make the details pop so that you notice them. From my experience. It’s easier to get consistent results on say an Atlas Master series car than a simple car with molded in details.
Welcome to Weathering Wednesday’s 4/24/2024 edition, the forum topic where old and dirty are OK. I hope that you have had time to make new into old engines, rolling stock, buildings and scenery
But first, the forum ground rules as so adroitly stated by my good friend Patrick Whitehead (aka trumptrain), host of the popular topic of this type, Switcher Saturday:
- Have fun and enjoy!
- Post only photos that you have taken.
- If you post a photo taken by someone else or a copyrighted photo be sure you have express written permission from the photo's owner to post their photo.
- Any individual who posts copyrighted material is subject to legal liability. Furthermore, that individual will be banned from the OGR Forum.
- Please consult the OGR Forum TOS (Terms of Service) for further information regarding copyrights.
My son, Chris Harrison, has been at it again. My start to this week’s edition is sharing 2 photos, a before and after, of an RMT, Pennsylvania – Reading Seashore Lines cabin car that Chris weathered using craft acrylic paints and applying the paint via a dry brush technique. The photos are below.
Now it is your turn to show us your weathering artistry as well as how you achieved yours results.
Attachments
Randy - Thanks for kicking off another fine episode of Weathering Wednesday!
For this edition I have several items: The first two images are of a wooden tunnel portal ( actually it's made of styrofoam ) used on the Mountain Division of my layout. I used flat black spray paint by hold the can at a distance and just giving a squirt here and there. Next I used some spray glue so the edges of the braces ( acting like shelves ) would catch the debris I sprinkled here and there ... as if the bracing had caught some of the stone that had fallen from the above mountain. Of course I made sure the center of the portal got a good dose of flat black to give the effect of decades of steam locomotives entering and exiting. 

Here is a GN boxcar ( by Weaver ) that I weathered using pastel chalks. I wanted to give a dusty look to the car. 
Here's a Santa Fe boxcar where I used Floquit Grimmey Black spray paint held at a distance. This may have been one of the first attempts of weathering using spray paint. I also used pastel chalks ... especially at the bottom of the car to show ballast dust which has been thrown upward from the wheels as the car travels the mainline. 
Attachments
@pennsyfan posted:Chris, thanks for posting your video. I’m going to try your technique on 8 unpainted hoppers which I recently got on the bay. they’re not delivered yet. They were molded red. My intention is to make them sand hoppers for the PRSL, so I’m going to paint them gray and then I thought I’d use your techniques to weather them, so after I paint them gray, I’ll letter them and then should I clearcoat the lettering before I do your process for the weathering?
Good job. I tend to use powders lately, but I may get back into the rattle-can method, borrowing some of your techniques.
As an FYI, I weathered this brass Williams Niagara many years ago (my first weathered loco, actually) using Dullcote and spray-can Testors Flat Black (full disclosure: I did paint the shiny rods and wheel rims with a brush and flat black enamel). I like the results, but some of your techniques/colors would have added to the effect - camo spray paints weren't around then! I did bounce some sort of flat "tan" along the loco wheels and tender bottom, but the drivers could use more.
The Testors Flat Black was held well above the loco and sprayed straight down; multiple light passes.
Not a great photo, but, like your video, it does show that some basic procedures can yield pretty good results.
Attachments
@chris a posted:My recommendation would be to try "red" Scotch Brite pad to try and remove the darker blotchy areas. I'd do it dry first attempt and keep a damp paper towel handy so you can wipe the area and see if you're making any progress.
The wet sanding could work, but you run the risk IMHO of burning through the red paint on any high spot or corner.
You could add dish detergent if it's stubborn. The Scotch Brite pad if you work from the top (crown) of the roof down should leave you a surface with a little "tooth" that you can go back and apply Pan Pastel or weathering powders to blend it in. If you don't have any Pan Pastels, you could experiment with some lightly diluted acrylic washes in Burnt Umber/Grimy Black. Key word here is lightly diluted, very little craft water based paint, lots of water.
Chris A Your suggestion nailed it; once I realized I couldn’t get scotch bright red in a grocery store. LOL. I ever so lightly moved the pad and then wiped it with the damp towel. I did it 3x and got to the level I was looking for. As I had said the rest of the engine and trucks looked good to me. So thanks to you I have my weathered piece. 

Attachments
Bob, I am so glad it worked for you. Thanks for sharing the photos, it looks great. Glad to help.
Chris
Its “MAYDAY” and time for Weathering Wednesday’s 5/1/2024 edition, the forum topic where we celebrate the artistry of “schmutzing up” our pristine models in the interest of realism. I hope that you have had time to make new into old engines, rolling stock, buildings and scenery this past week and will share them with us today.
But first, the forum ground rules as so adroitly stated by my good friend Patrick Whitehead (aka trumptrain), host of the popular topic of this type, Switcher Saturday:
- Have fun and enjoy!
- Post only photos that you have taken.
- If you post a photo taken by someone else or a copyrighted photo be sure you have express written permission from the photo's owner to post their photo.
- Any individual who posts copyrighted material is subject to legal liability. Furthermore, that individual will be banned from the OGR Forum.
- Please consult the OGR Forum TOS (Terms of Service) for further information regarding copyrights.
Since both my son and I have been feeling a bit “under the weather” (sorry for the bad Weathering Wednesday pun), there has been little energy or time for either Chris or me to do any new work. So, I will start today’s Weathering Wednesday with a few past photos of Chris’ work.
The next 2 photos are of a Lackawanna gondola that Chris weathered using the technique that he demonstrated 2 weeks ago in his video that was featured here on Weathering Wednesday.
Look at the great job he did on the previously monochromatic scrap load bringing out all of the details in the casting of the load!
My next offering is a PRR, previously Tuscan red with white lettering tank car by Industrial Rail. Again, weathering brings out all of the details in a lesser expensive model and makes it into something special. Also, in the background, is a C&O boxcar also weathered by Chris.
Now it is your turn to show us your weathering artistry as well as how you achieved yours results.
Attachments
@86TA355SR posted:
Welcome to Weathering Wednesday! I believe that you are a first-time contributor to the topic?
Your refurbishing, painting and weathering of this UP behemoth is masterful! Also, thank you for the sequential organization of your photos. It helps in conveying your process of completing the project.
Again, your artistry is second to none. Thank you for sharing this.
@trumpettrain posted:
Pat:
The tankers are really GREAT!!!! Also, what a deal. I wish we could send compliments to the previous owner on his/her weathering job.
Thanks for sharing these.
@trumpettrain posted:Thanks Randy for getting us started for this fine Wednesday! Here are a couple of Lionel modern tank cars which I purchased at a local train show which were already weathered by the previous owner. I got a great deal at $8.00 each.
Wow, you certainly did Pat and they look good too.
Gene
Its that time of the week again, time for Weathering Wednesday, 5/8/2024 (better early than never). So, gentlemen and ladies, start your air brushes, acrylic paints and pastel chalks. I and your fellow forum members are eager to see your engines, rolling stock, buildings and scenery that you have weathered and don’t forget to explain and demonstrate your techniques for us.
But first, here are the forum ground rules as so adroitly stated by my good friend Patrick Whitehead (aka trumptrain), host of the popular topic of this type, Switcher Saturday:
- Have fun and enjoy!
- Post only photos that you have taken.
- If you post a photo taken by someone else or a copyrighted photo be sure you have express written permission from the photo's owner to post their photo.
- Any individual who posts copyrighted material is subject to legal liability. Furthermore, that individual will be banned from the OGR Forum.
- Please consult the OGR Forum TOS (Terms of Service) for further information regarding copyrights.
Again, it has been a busy week filled with commitments that did not allow much layout work time. So, I will, again, start today’s Weathering Wednesday with a few more past photos of our weathered rolling stock, a building and scenery.
The next 3 photos are of a scratch-built Railway Express freight depot that I built for the club layout of the Red Lion (PA) Model Railroaders. The building was weathered using powdered graphite, my fingers and Testor's Dullcote to seal the graphite.
The next photo is of a layout corner filler scene, the Schmutzig Coal Company.
My final offerings are the Great Northeastern Railway caboose and Dockside, 0-6-0 switch engine expertly weathered for me by my friend of 49 years, Patrick Whitehead (AKA trumptrain),
Now it is your turn to show us your weathering artistry as well as how you achieved yours results.
Attachments
Thanks Randy for getting us started! 49 years is a long time my friend! Here's to many more ahead!
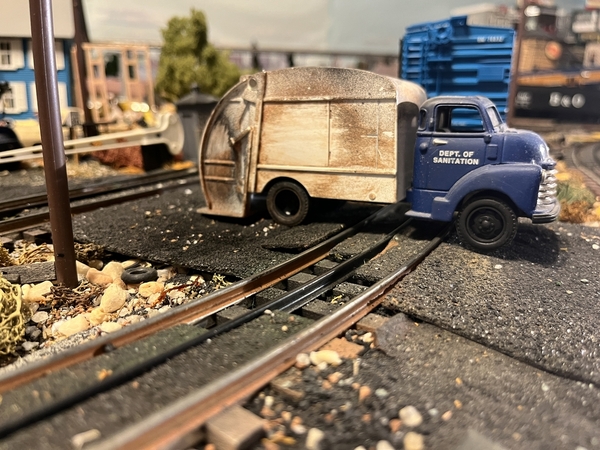
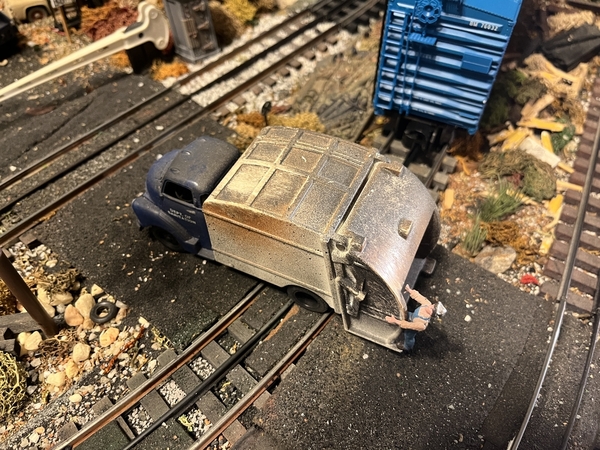
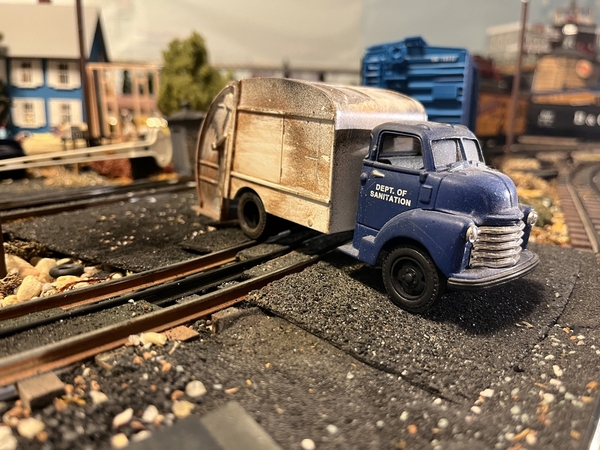
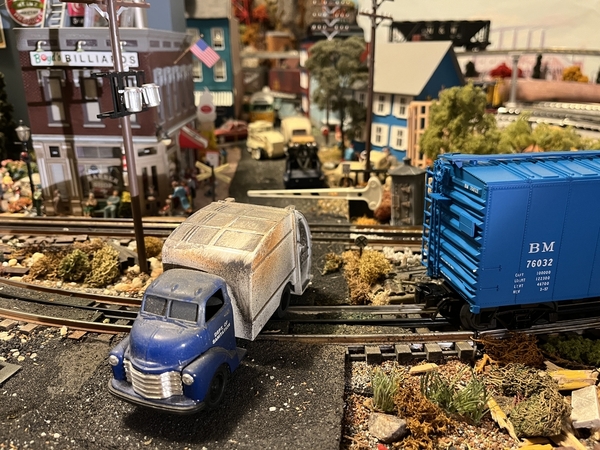
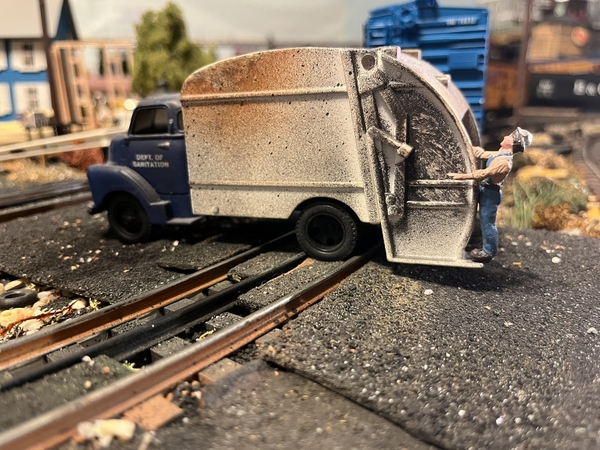
My offering for this fine Weathering Wednesday is this 1953 Chevrolet garbage truck which I bought new in 2010 from a former OGR advertiser who's located in Weedville, Pa. I would not have known about this retailer if I had not read OGR magazine. The exact name now escapes me, however, I think ( ? ) it's the Valley Farm Market which is a convenience store that also sells trains. The only store I've ever experienced where you can pick up a loaf of bread and an MTH boxcar right next to each other on the same shelf while your car's gas tank is being filled... lol !
Since I model the Transition Era of railroading, it is essential that my street vehicles are reflective of that period ( 1946 - 1959/60 ). When the Patsburg Town Council passed a measure to create a Dept. of Sanitation a garbage truck was needed. Indeed, the Mayor himself went searching for the "perfect" rig and this is the one he chose.
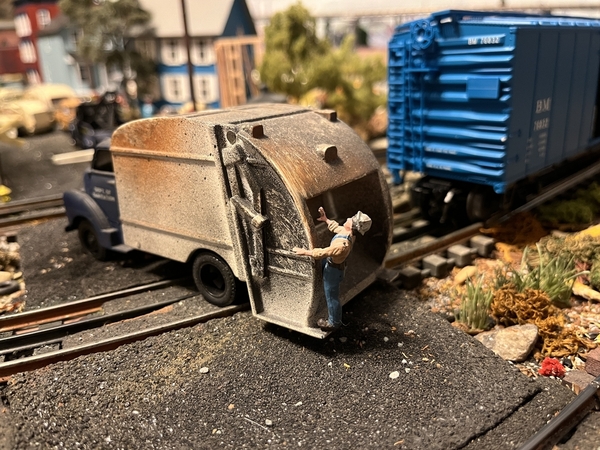
I don't have any before and after shots. Here is one side of the truck coming out of Patsburg on its way to the dump with a full load. I first sprayed the vehicle with Testo Dullcote to take down the sheen. Once the Dullcote dried I used spray paints ( grimmey black and earth tone ) applied by holding the can about 1.5 - 2.0 ft away and giving a few very short bursts. Holding the can this distance and applying a few short bursts allowed for a thin mist rather than a thick coating. With the paint still wet I wiped the wet paint with a paper towel to give a smudge/well used effect. I should point out that I sprayed only one color at a time. After the wiped paint dried, I then applied the second color and repeated the wiping process. Actually while taking photos of this truck last night I noticed the front grill could use some schmutzing up, which I will do soon. I hope these photos will be inspirational! I can't wait to see what you all post today ... I learn so much here on this thread!
The rear of the truck. That's Winkie Wheeler riding the rear step. That man can throw a garbage can quite a distance. 
Attachments
I did one side of this Lionel Round Roof Boxcar yesterday, along with weathering 4 pairs of trucks. The only weathering process used on the D&M Round Roof Boxcar at this point is an initial coat of Krylon Flat clear, then Pan Pastels. Haven't top coated/sealed it yet.
Also a shot of an MTH Premier flatcar delivered with a simulated wood deck (plastic)... Scratched and scribed the plastic decking with my medium tooth razor saw blade then used acrylic craft paints diluted and a final wash.
Since it's raining today, need to weather the side rails of the flatcar, and do the other 1/2 of the D & M boxcar
Attachments
Ok guys I have been fallowing along and in amazement of the work you all do! I have to say I find it kind of funny that we look for wonderful car to buy and then the next thing you know spending hours on end to make them look OLD and USED! LOL
I can't wait to give it a try down the road! But I will keep fallowing so I can be somewhat educated before I start! LOL![]()
@mike g. posted:Ok guys I have been fallowing along and in amazement of the work you all do! I have to say I find it kind of funny that we look for wonderful car to buy and then the next thing you know spending hours on end to make them look OLD and USED! LOL
I can't wait to give it a try down the road! But I will keep fallowing so I can be somewhat educated before I start! LOL
Mike:
Your plan is a good one. Several weeks ago, my son, Chris, produced a how-to video explaining, in detail, his weathering technique for freight cars. Watch his video and try his technique. It is easy and the results are great!
We will be eager to see your weathering results in the future. Also, we all are eager to see your new, layout evolve. Keep us posted.
Chris and Pat:
Thank you for your posts, both showing fabulous weathering artistry! Also, thank you for explaining your techniques to achieve the results that you got. That is also an important purpose of this topic.
Just thought I would throw some thoughts out for those "thinking" about weathering. A couple of years ago I bought 50 various freight cars for $100. I knew someday I would try to weather. I have thought about it a lot over the last 3-4 months, but was really not sure how to even start. The very idea of powders or pastel paints was enough to make me sick, it was all Greek to me. Watching videos of those using spray cans struck a chord with me, I could do this. I took a deep breath, reminded my self if I screwed it up, it was just a $2 caboose, not the end of the world and I could probably primer it and start over. I made some mistakes, learned some things. Overall, the caboose came out pretty good. And I only used spray cans I had in my surplus paints. So my advice is to just do it, don't try your first run on a $1600 engine, but on a car cheep car you can throw away if it comes out bad. Channel your inner 10 year old and have some fun!
Your advice is great. Have a go at it. You may surprise yourself with the results.
Attachments
Pennsyfan it is the best kind of weathering: free and done with no effort!
@pennsyfan posted:
Bob:
Though I am hardly qualified as arbiter of what is and what isn't, it does look to me like natural weathering. I like it.
@Randy Harrison posted:Bob:
Though I am hardly qualified as arbiter of what is and what isn't, it does look to me like natural weathering. I like it.
Thanks for your input Randy, that tells me that it’s a keeper.
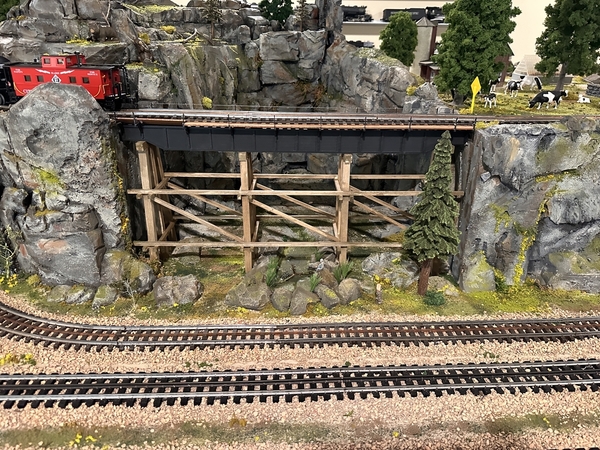
Hello, I have lots of weathered items I can share on my layout, but for starters I’d like to highlight my new Viaduct Bridge. The Viaduct was 3D Printed. Amazing what can be done these days. A before and almost after photo I am replacing an existing trestle bridge I built using bass wood and a Ross Bridge. Please check out my YouTube 

Attachments
@Alabama Joe posted:Hello, I have lots of weathered items I can share on my layout, but for starters I’d like to highlight my new Viaduct Bridge. The Viaduct was 3D Printed. Amazing what can be done these days. A before and almost after photo I am replacing an existing trestle bridge I built using bass wood and a Ross Bridge. Please check out my YouTube
Joe:
Your viaduct before and after photos are great. What did you use to get your weathered effect? The difference is striking.
In in future editions of Weathering Wednesday, please do share other weathered items in your layout.
@chris a posted:I did one side of this Lionel Round Roof Boxcar yesterday, along with weathering 4 pairs of trucks. The only weathering process used on the D&M Round Roof Boxcar at this point is an initial coat of Krylon Flat clear, then Pan Pastels. Haven't top coated/sealed it yet.
Also a shot of an MTH Premier flatcar delivered with a simulated wood deck (plastic)... Scratched and scribed the plastic decking with my medium tooth razor saw blade then used acrylic craft paints diluted and a final wash.
Since it's raining today, need to weather the side rails of the flatcar, and do the other 1/2 of the D & M boxcar
I like those!
@Dennis Holler posted:
Absolutely fabulous!! Love it!!
Weathering Wednesday, 5/14/2024 is upon us. So, gentlemen and ladies, again start your air brushes, acrylic paints and pastel chalks. I and your fellow forum members are eager to see your engines, rolling stock, buildings and scenery that you have weathered and don’t forget to explain and demonstrate your techniques for us.
But first, here are the forum ground rules as so adroitly stated by my good friend Patrick Whitehead (aka trumptrain), host of the popular topic of this type, Switcher Saturday:
- Have fun and enjoy!
- Post only photos that you have taken.
- If you post a photo taken by someone else or a copyrighted photo be sure you have express written permission from the photo's owner to post their photo.
- Any individual who posts copyrighted material is subject to legal liability. Furthermore, that individual will be banned from the OGR Forum.
- Please consult the OGR Forum TOS (Terms of Service) for further information regarding copyrights.
I will start today’s Weathering Wednesday with a few more past photos of one of our weathered locomotives.
Our K-line C&O Allegheny weathered and super-detailed for us by Harry Hieki.
Now it is your turn to show us your weathering artistry as well as how you achieved yours results.
Attachments
@Randy Harrison posted:Weathering Wednesday, 5/14/2024 is upon us. So, gentlemen and ladies, again start your air brushes, acrylic paints and pastel chalks. I and your fellow forum members are eager to see your engines, rolling stock, buildings and scenery that you have weathered and don’t forget to explain and demonstrate your techniques for us.
But first, here are the forum ground rules as so adroitly stated by my good friend Patrick Whitehead (aka trumptrain), host of the popular topic of this type, Switcher Saturday:
- Have fun and enjoy!
- Post only photos that you have taken.
- If you post a photo taken by someone else or a copyrighted photo be sure you have express written permission from the photo's owner to post their photo.
- Any individual who posts copyrighted material is subject to legal liability. Furthermore, that individual will be banned from the OGR Forum.
- Please consult the OGR Forum TOS (Terms of Service) for further information regarding copyrights.
I will start today’s Weathering Wednesday with a few more past photos of one of our weathered locomotives.
Our K-line C&O Allegheny weathered and super-detailed for us by Harry Hieki.
Now it is your turn to show us your weathering artistry as well as how you achieved yours results.
Err you’re a day ahead Randy the 14th is Tuesday.
@pennsyfan posted:Err you’re a day ahead Randy the 14th is Tuesday.
Swing and a miss!STEEERIKE ONE!!!!
Bob:
Thanks for the heads-up. Unfortunately, I don't know how to retract the post.
A day early, no big deal! I say what the heck, let's roll with it...
Here's a Lionel Maine Central PS-5 drop-end gondola that I did in 2016, about two years or so after I started weathering. I was literally weathering everything I could get my hands on back then in an effort to try different techniques, learn from my mistakes, and improve my skills. I distinctly remember the goal with this particular car was to experiment with rust techniques. For the record, I typically don't like my cars to be this rusty, and only have a few like this on my roster.
I sold off almost all of these early weathering attempts--including this car--to help pay for more cars to weather. Buy-weather-sell...buy-weather-sell. I guess you can say I caught the weathering bug really bad!!
Attachments
@CNJ #1601 posted:A day early, no big deal! I say what the heck, let's roll with it...
Here's a Lionel Maine Central PS-5 drop-end gondola that I did in 2016, about two years or so after I started weathering. I was literally weathering everything I could get my hands on back then in an effort to try different techniques, learn from my mistakes, and improve my skills. I distinctly remember the goal with this particular car was to experiment with rust techniques. For the record, I typically don't like my cars to be this rusty, and only have a few like this on my roster.
I sold off almost all of these early weathering attempts--including this car--to help pay for more cars to weather. Buy-weather-sell...buy-weather-sell. I guess you can say I caught the weathering bug really bad!!
Joe, I really like the "rust effects" on that Maine Central Gondola... So I know it's been over 2 years, but do you happen to remember what you did to achieve that effect. Like you, I am more interested in duplicating "your rust" effect on other items, ie. deck bridges, truss bridges, steel in the scrap yard etc.
I applied a final coat of Pan Pastel "Raw Umber" to this MTH Flat Car, both on the deck and on the sides then found a better location to shoot a photo where the lighting was more forgiving...
Attachments
@chris a posted:Joe, I really like the "rust effects" on that Maine Central Gondola... So I know it's been over 2 years, but do you happen to remember what you did to achieve that effect. Like you, I am more interested in duplicating "your rust" effect on other items, ie. deck bridges, truss bridges, steel in the scrap yard etc.
I applied a final coat of Pan Pastel "Raw Umber" to this MTH Flat Car, both on the deck and on the sides then found a better location to shoot a photo where the lighting was more forgiving...
Hi Chris...thanks for the kind words. I always enjoy seeing your weathering work, and I think the MTH P-M flat car looks great!
It was actually 8 years ago when I did that MEC gondola (2016), so I may not remember every single detail (such as exact colors used), but I do know the basic concept because I've since adopted it as sort my "go-to" method for achieving rust effects.
Basically I use weathering powders and matte medium. I pour some matte medium into a small artist's paint cup or tray, then stir in a small amount of weathering powder to form a "paint" or paste. What's really cool about this method is that there's actually a texture--or substance--to the rust effect. To me that looks much more realistic than just using brushed or spayed-on rust-colored paint or powder with no texture to it.
It's trial and error to get the correct consistency (but usually more matte medium that powder!) for the desired effect you're trying to achieve. More powder equals a thicker or heavier rust appearance...less powder equals lighter rust. BTW, this effect looks great (and very realistic IMO) on trucks and couplers!
As for application...when doing larger rusty areas, I tend to dab it on with a short-bristled brush rather that using strokes. I use a bigger brush for larger surface areas, and a smaller brush for small areas. Just like other weathering, I mix up different powder/matte medium color mixtures and layer them on. Obviously you don't want a rusty area to be 100% the same color from edge to edge.
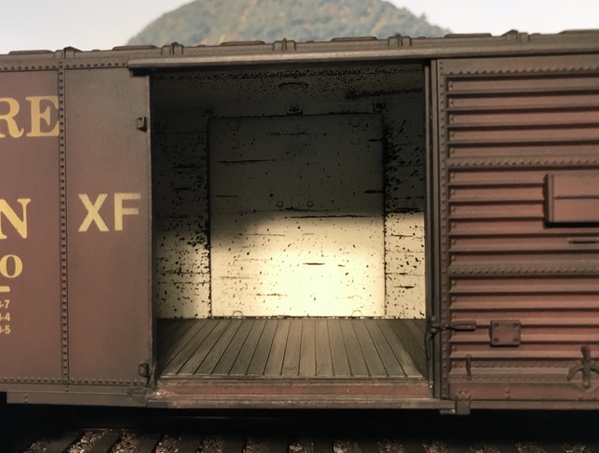
When imitating rusty scratches, I use artist's knives and load the thin edge side of the knife with the matte medium/powder mixture and simply transfer it to the surface. You can also load a small amount of the mixture onto an artist's fine sponge and dab on to create some light rusting effects. One example of where I would use these two effects would be on the inside of boxcar doors and walls as shown in the photos below.
Hope this helps explain things a little bit. Please keep us posted here on the Forum if you give this "rust" method a try!
Attachments
Joe, your killing me with that Rutland boxcar. I’m stuck in the late 40’s and everything’s boxcar brown or red. I have a couple of MTH RS1’s on order. I may have to dip into the future at some point. I see a number of them for sale. Just curious as to the manufacture. Great Job on it.
Chris, those cars look great. I need to make another visit and watch you do a couple. I’ve never tried Pan Pastels. I really like the look and need to step out of my airbrush comfort zone.
Joe, I can't thank you enough for the great description. It all makes perfect sense ! The Matte Medium I have on hand is dead flat and dries clear, layering on different color pastels/powders creates the different shades of rust.
Dabbing or stamping with different size brushes is a technique I use frequently to prevent obvious brush strokes.
I really like the use of the blade edge to simulate scratches, great idea again.
Hey Dave, yes we should get together, I need help putting Kadee's on one of my TMCC 0-8-0 Yard Goats,
@CNJ #1601 posted:
Your weathering results are superb! Also, thank you for your explanation of your techniques. Sharing techniques is also a major purpose of this weekly thread.
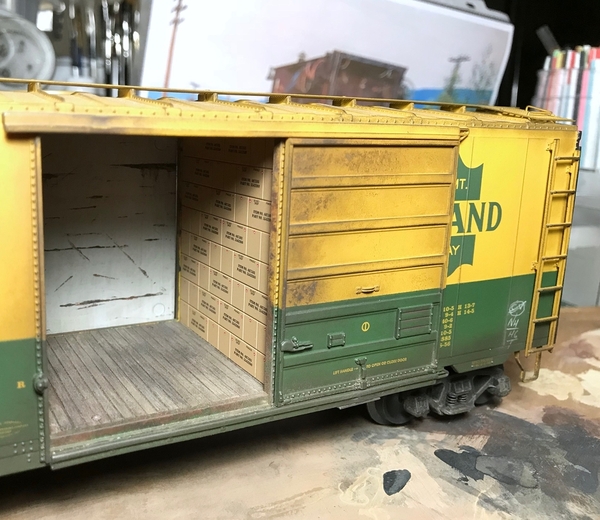
I have one non-weathering question for you. In the Rutland boxcar above, how did you make the stacked load of boxes? Its appearance and detail are GREAT!
Thank you.
@Dave_C posted:Joe, your killing me with that Rutland boxcar. I’m stuck in the late 40’s and everything’s boxcar brown or red. I have a couple of MTH RS1’s on order. I may have to dip into the future at some point. I see a number of them for sale. Just curious as to the manufacture. Great Job on it.
Chris, those cars look great. I need to make another visit and watch you do a couple. I’ve never tried Pan Pastels. I really like the look and need to step out of my airbrush comfort zone.
LOL, Dave...I think you need some more color!! Thanks for the complements on the Rutland boxcar. It's a Lionel PS-1 model that I modified with Kadees. I see them listed on the Bay quite often...a lot cheaper now then when I purchased this one! Really nice detail on these cars. I used mostly pan pastels on this car--and most of my cars these days. Love working with them. Here are a few more photos...come on, I know you want one! ![]()
Attachments
@Randy Harrison posted:Your weathering results are superb! Also, thank you for your explanation of your techniques. Sharing techniques is also a major purpose of this weekly thread.
I have one non-weathering question for you. In the Rutland boxcar above, how did you make the stacked load of boxes? Its appearance and detail are GREAT!
Thank you.
Thank you very much, Randy! I can't take credit for the box loads. They come included with the Lionel PS-1 boxcar model.
@chris a posted:Joe, I can't thank you enough for the great description. It all makes perfect sense ! The Matte Medium I have on hand is dead flat and dries clear, layering on different color pastels/powders creates the different shades of rust.
Dabbing or stamping with different size brushes is a technique I use frequently to prevent obvious brush strokes.
I really like the use of the blade edge to simulate scratches, great idea again.
You're welcome, Chris. Happy weathering!
@Dave_C posted:Joe, your killing me with that Rutland boxcar. I’m stuck in the late 40’s and everything’s boxcar brown or red. I have a couple of MTH RS1’s on order. I may have to dip into the future at some point. I see a number of them for sale. Just curious as to the manufacture. Great Job on it.
Chris, those cars look great. I need to make another visit and watch you do a couple. I’ve never tried Pan Pastels. I really like the look and need to step out of my airbrush comfort zone.
Dave, Here's another Rutland Green/Yellow boxcar, weathered with Pan Pastels. You sold me this boxcar the first time I came over to visit you, many moons ago !!!! Also, moved an Atlas O State of Maine BAR Boxcar into the photo.
The Pan Pastels do a great job of fading out really vibrant colors and making them look more realistic.
I'll send you an email we can talk about a day and time to get together.
Chris
Attachments
It is time for the Weathering Wednesday, 5/22/2024 edition (Though I am starting a day early, at least I have the correct Wednesday date this week). This is the weekly thread where we celebrate dirt, grime and rust in the interest of simulating realism in our trains and layouts. So, gentlemen and ladies, I hope that you again have your air brushes, acrylic paints and pastel chalks fueled and ready to GO! I and your fellow forum members are eager to see your engines, rolling stock, buildings and scenery that you have weathered and don’t forget to explain and demonstrate your techniques for us.
But first, here are the forum ground rules as so adroitly stated by my good friend Patrick Whitehead (aka trumptrain), host of the popular topic of this type, Switcher Saturday:
- Have fun and enjoy!
- Post only photos that you have taken.
- If you post a photo taken by someone else or a copyrighted photo be sure you have express written permission from the photo's owner to post their photo.
- Any individual who posts copyrighted material is subject to legal liability. Furthermore, that individual will be banned from the OGR Forum.
- Please consult the OGR Forum TOS (Terms of Service) for further information regarding copyrights.
My son, Chris, has been at it again. Below is a before and after photo of a Jersey Central RR Refer that Chris completed over the weekend using his technique that he explained in a video on a previous Weathering Wednesday.
Now it is your turn to show us your weathering artistry as well as how you achieved yours results.
Attachments
Rutland 73 started out as a Northern Pacific. I added a few things. Arttista figures, cab curtains. Kadee’s front and rear, water lines from engine to tender, Alco builders plates, higher coal pile and the biggest change. Closing the gap between the engine and tender. Not that it was a huge gap. They are now about 1/8” apart. I have 5 on the roster and try to do each one a little different to give them sort of a personality. The weathering was pretty much all airbrush. Used Tamiya lacquer. Flat black, German Gray and Flat Earth.
Attachments
@Randy Harrison posted:My son, Chris, has been at it again. Below is a before and after photo of a Jersey Central RR Refer that Chris completed over the weekend using his technique that he explained in a video on a previous Weathering Wednesday.
Now it is your turn to show us your weathering artistry as well as how you achieved yours results.
Randy, your son is doing a great job with his weathering technique. I did a light weathering to all my buildings, but I just can’t bring myself to weathering my rolling stock. Maybe in the future I’ll give it a shot.
Attachments
@Genemed posted:
That is GREAT weathering! What materials and techniques did you use to obtain such fine results?
@Randy Harrison posted:That is GREAT weathering! What materials and techniques did you use to obtain such fine results?
Randy, thank you. I used 2 shade groups of Pan Pastels with the foam applicators. These sets gave me a nice combination of necessary colors to achieve a natural weathered look and add some rust and dirt where needed.
Attachments
Keeping with my gondola theme from last week, here's an "old" Atlas (now Atlas Trainman) Pennsylvania gon that I completed in October 2021. It's another in a long line of cars I weathered to develop my skills and try new techniques. As mentioned in my post last week, I weathered these cars, then sold them to raise some $$ to purchase more cars to weather, so it's long gone from my collection. Hopefully someone is enjoying it today!
Lots of different techniques were used on this car. I remember using mostly dry-brushed acrylics and acrylic washes on the inside of the car, and mostly powders and pan pastels on the exterior. The trucks and couplers received a combination of acrylics, powders and pan pastels. The simulated "chalk" markings were done with colored pencils. Of course the entire car received a flat dull-cote to lock everything in.
Attachments
Attachments
Thanks Randy! There is always room for improvements with my work. I may do a little dry brushing to add some highlights.
Your work (and others here) with powders for weathering, are interesting. The results are outstanding!
I may give them a try.
Tom
Weathering Wednesday, 5/29/2024 is here. So, gentlemen and ladies, again start your air brushes, acrylic paints and pastel chalks. I and your fellow forum members are eager to see your engines, rolling stock, buildings and scenery that you have weathered and don’t forget to explain and demonstrate your techniques for us.
But first, here are the forum ground rules as so adroitly stated by my good friend Patrick Whitehead (aka trumptrain), host of the popular topic of this type, Switcher Saturday:
- Have fun and enjoy!
- Post only photos that you have taken.
- If you post a photo taken by someone else or a copyrighted photo be sure you have express written permission from the photo's owner to post their photo.
- Any individual who posts copyrighted material is subject to legal liability. Furthermore, that individual will be banned from the OGR Forum.
- Please consult the OGR Forum TOS (Terms of Service) for further information regarding copyrights.
I will start today’s Weathering Wednesday with another of my son Chris’ recently weathered Jersy Central boxcar with before and after photos:
Now it is your turn to show us your weathering artistry as well as how you achieved yours results.
Attachments
Nice weathering work, Chris! Definitely looks like a car from Jersey! lol
Some light weathering projects of mine…
MTH 19th Century reefer, modified painted and weathered…
A MTH 19th Century gondola, modified, painted and weathered…
Finally, a MTH 40’ boxcar, painted and weathered…
Tom
Attachments
@Krieglok posted:
Tom:
Chris says thank you for the compliment. Coming from a man of your skills, that is high praise.
Your painting, decaling and weathering is the definition of artistry!
Hello everyone!
Here is some of my old weathered projects.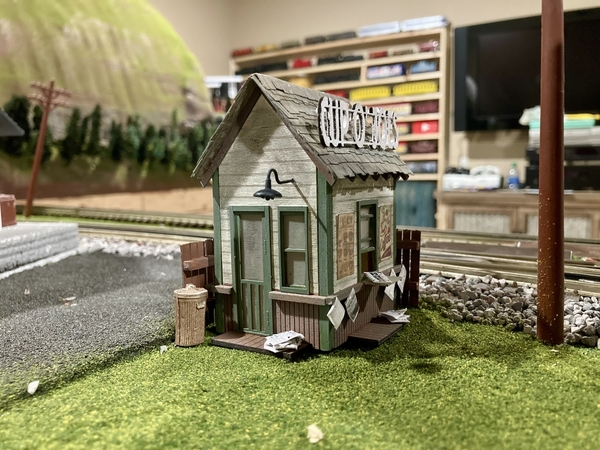
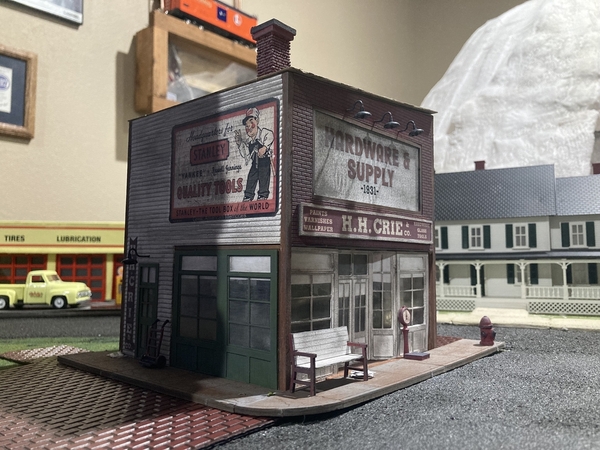
For these two buildings I used a dry brush technique with cheap acrylic paints. I like my stuff to be dirty so I like to use grey and black paint to dull the clean bright look.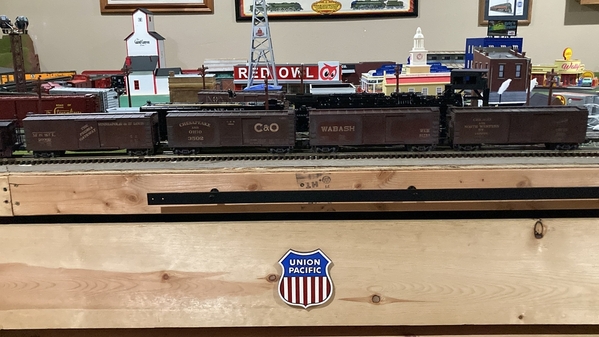
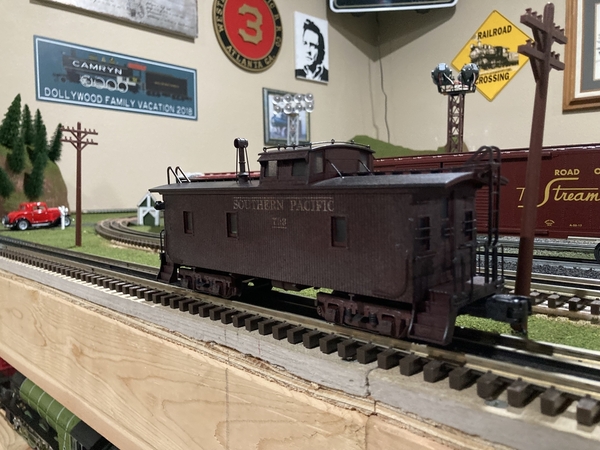
These cars I used the same dry brush technique for the base weathering but I then took a can of black spray paint and applied the black sooty effect. Finally, a mat clear coat raps things up.
Attachments
ATTENTION ALL REALISM-IN-MODEL-RAILROADING FANS!!!! It is that time of the week again. Weathering Wednesday, 6/5/2024 is here. So, I hope that you have more of your GREAT weathered engines, rolling stock, buildings and scenery to share. I and your fellow forum members are eager to see your see your artistry and learn from your techniques.
But first, here are the forum ground rules:
- Have fun and enjoy!
- Post only photos that you have taken.
- If you post a photo taken by someone else or a copyrighted photo be sure you have express written permission from the photo's owner to post their photo.
- Any individual who posts copyrighted material is subject to legal liability. Furthermore, that individual will be banned from the OGR Forum.
- Please consult the OGR Forum TOS (Terms of Service) for further information regarding copyrights.
I will start today’s Weathering Wednesday with one of my son Chris’ recently weathered tank cars with before and after photos
Now it is your turn to show us your weathering artistry as well as how you achieved yours results.
Attachments
Attachments
Ladies and gentlemen! Children of ALL ages! Bungling Brothers Circus presents the Greatest(?) Topic on the OGR Forum, Weathering Wednesday, 6/12/2024!! You will be thrilled by GREAT weathered engines, rolling stock, buildings and scenery! You will be amazed by GREAT artistry! You will learn new weathering techniques from the contributing artists!
First, I draw your attention to the center ring! Here are the forum ground rules:
- Have fun and enjoy!
- Post only photos that you have taken.
- If you post a photo taken by someone else or a copyrighted photo be sure you have express written permission from the photo's owner to post their photo.
- Any individual who posts copyrighted material is subject to legal liability. Furthermore, that individual will be banned from the OGR Forum.
- Please consult the OGR Forum TOS (Terms of Service) for further information regarding copyrights.
And now, our first featured performer…that master of schmutz, grime and rust, Chris Harrison with some of his weathered freight cars!
Lionel, MPC hoppers in Mt. Carroll Yards on the Great Northeastern Railway (GNR).
A weathered, Lackawanna gondola with a weathered scrap load.
A Reading boxcar by Weaver.
An Atlas, Industrial Rail tank car weathered by the GNR weathering wizard, Chris!
Now! In the center Ring! Our featured act of the day… ALL OF YOU!!!! It is your turn to show us your weathering artistry as well as how you achieved yours results.
Attachments
Some weathered cars.
The reefer is a MTH factory paint job, with details and weathering added…
A weaver car, painted and weathered by me…
A MTH gondola, painted and weathered by me…
Tom
Attachments
Atlas car converted to a D&H Cement car. Lucked out on the auction site and found a NYC car with a damaged brake wheel that had to be changed out anyways at a great price. Hatches and chutes were courtesy of Forum member AlanRail. Removed the stock lettering with an air eraser. Repainted using a Tamiya custom mix starting out with Dull Red. I really wanted to simulate spilled cement from filling. I started with a white chalk and ended up misting on some flat white. Not sure if it’s completely done yet but it’s in service on the layout now while I experiment with some ideas.
Attachments
Attachments
Here's an "old" Atlas gondola that I modified and weathered several years ago. It was originally decorated for the Norfolk and Western. I repainted and re-lettered it for the Jersey Central, replaced the old Atlas plastic trucks and couplers with Weaver die-cast ones, added brake hoses and a few wire grab irons...and of course weathered it. The awesome "muck" load was made for me by fellow Forum member "Rail" (aka Don K.) @rail.
Unfortunately, it was one of my very first attempts at repainting a freight car, before I knew how to remove lettering, so you can see the N&W lettering under the new paint job if you get up close...but it looks great from 4' away! ![]() The new CNJ lettering was a set of dry transfers from CDS Lettering. Wish they were still around!
The new CNJ lettering was a set of dry transfers from CDS Lettering. Wish they were still around!
Weathering was done with acrylics, oils, chalks and powders. This was before I discovered pan pastels. White chalk was used to represent the fading/running of the white lettering.
A few more photos below.
Attachments
@CNJ #1601 posted:Weathering was done with acrylics, oils, chalks and powders. This was before I discovered pan pastels. White chalk was used to represent the fading/running of the white lettering.
Nicely done! The photos look excellent with that background, very realistic.
Gene
Nice job Norm. The weathering really pops all the plumbing on the Allegheny. As cool as your layout is. So is your workshop. Always looks so organized.
Joe, I love the chalk marks you do on your cars by hand. Unfortunately my full scale writing is bad enough. I can’t imagine trying to scale it down to O scale. I like the decals but while they are still attached to the sheet. I find it hard to pick out individual ones to cut out.
Thanks for the nice comments, Gene and Dave. Norm's work is at a completely different level. Outstanding!
ATTENTION ALL REALISM-IN-MODEL-RAILROADING FANS!!!! It is that time of the week again. Weathering Wednesday, 6/19/2024 is here. So, I hope that you have more of your GREAT weathered engines, rolling stock, buildings and scenery to share. I and your fellow forum members are eager to see your see your artistry and learn from your techniques.
But first, here are the forum ground rules:
- Have fun and enjoy!
- Post only photos that you have taken.
- If you post a photo taken by someone else or a copyrighted photo be sure you have express written permission from the photo's owner to post their photo.
- Any individual who posts copyrighted material is subject to legal liability. Furthermore, that individual will be banned from the OGR Forum.
- Please consult the OGR Forum TOS (Terms of Service) for further information regarding copyrights.
I will start today’s Weathering Wednesday with one of my son Chris’ recently weathered freight cars and a building I scratch-built and weathered.
Now it is your turn to show us your weathering artistry as well as how you achieved yours results.
Attachments
Attachments
Nice work, Tom. Looks realistic. Not overdone.
My first attempt at weathering with chalks and alcohol. You have to start somewhere. I have 6 of these black New Haven boxcars, so that was a good place to start.
Attachments
@Randy Harrison posted:
I will start today’s Weathering Wednesday with one of my son Chris’ recently weathered freight cars and a building I scratch-built and weathered.
Randy, that’s a cool, unique building you made and weathered, fits perfectly within that scene. Nice layout too.
Gene
@Bill Park posted:My first attempt at weathering with chalks and alcohol. You have to start somewhere. I have 6 of these black New Haven boxcars, so that was a good place to start.
Looks good Bill, especially for being your first.
Gene
Attachments
@Bill Park posted:
Bill:
You have achieved GREAT results!!!! Had you not told us that was a first attempt, we would have assumed that you were quite experienced.
Question for you Bill: was the alcohol mixed with chalk or used internally to steady your hand! ![]() Seriously, great results, would you mind sharing the steps? I have played with chalk but they seem to dissolve with any liquid...
Seriously, great results, would you mind sharing the steps? I have played with chalk but they seem to dissolve with any liquid...
Here's a Weaver Lehigh & New England 40' PS-1 Boxcar I did back in 2016 when I was still fairly new at weathering and trying different techniques. I used an airbrush, acrylics, powders and pan pastels on this one. I sold it several years ago.
Attachments
Hi guys I just handed out a bunch of like because you all are doing outstanding work! When I first came to this page I was thinking ok weathering some rolling stock maybe an engine. I never thought about weathering buildings, but that is what I love about this forum. It gets folks like me to start thinking outside the box, the best part is I have amazing teachers right here for free!![]()
Thank you all so much for sharing your outstanding work!
@Genemed posted:Randy, that’s a cool, unique building you made and weathered, fits perfectly within that scene. Nice layout too.
Gene
Gene:
Thanks for the compliments. That REA depot was made while I was a member of the Red Lion (PA.) Model Railroad Club for their layout. They had a piece of real estate near their lower-level main line tracks that needed a structure and want one with a loading dock for REA trucks. It turned out well. Thank you again.


