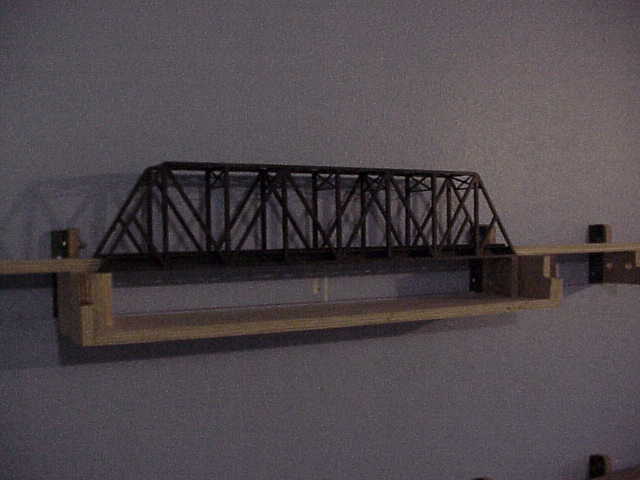
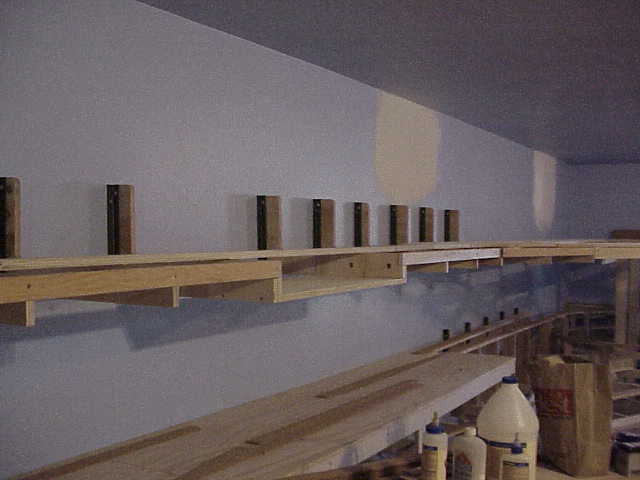
This is the bridge I have on the attic layout. Took me forever to find the pic. The area has been cleaned up since I took this. There is one more spot where I will be adding another bridge to this layout...........Paul
Frank M, MOONSON, Your Scenery, Bridges, Trackwork, (are you using K-Line Phantom Track?), is simply Breathtaking! You are Very Artistic, and your colors are so Realistic.They Blend....Your choice of scenic materials, whether scratch built, kit built, or Whatever, are Really Fun to See! Thank You....Happy Railroading..
Lobato trestle

Rio Chama bridge pair


A bridge cause we liked it!
Future home of Hangman's trestle
leapinlarry posted:Frank M, MOONSON, Your Scenery, Bridges, Trackwork, (are you using K-Line Phantom Track?), is simply Breathtaking! You are Very Artistic, and your colors are so Realistic.They Blend....Your choice of scenic materials, whether scratch built, kit built, or Whatever, are Really Fun to See! Thank You....Happy Railroading..
Hi Leapinlarry! Wow! Certainly exceptional of you to say what you did. I appreciate your taking the time and having the interest in posting this reply, Very much. And Thank You, especially, for being so specific about what you thought was nice.
Sharing on this excellent forum is most enjoyable, and when posting photos can turn into a bit of a dialogue, I am glad I came for a visit.
Thanks again! FrankM
P.S. Most of the track is Kline's "Hi-rail, " from years ago, and one loop in the newer section, the inner loop (third photo above), is Gargraves.
Attachments
Frank, that is another great scene. The detail put into that area goes without saying you are good at making scenes so interesting. I especially like the curved bridge. Is that something you built from scratch or is that a bridge readily available.............Thanks Paul
Attachments
Attachments
Amazing stuff here guys. Enjoyed it much ![]()
Attachments
paul 2 posted:Frank, that is another great scene. The detail put into that area goes without saying you are good at making scenes so interesting. I especially like the curved bridge. Is that something you built from scratch or is that a bridge readily available.............Thanks Paul
THanks, Paul2, good to hear from you.
The curved bridge was custom-made for that space and place by Stainless Unlimited. All of the bridges in photos by me on this thread, except for the obvious toy ones, including the black bridges were, also, made by Stainless. They are seemingly indestructible.
Here's a lift out bridge I made to connect my "main" train table to the freight yard addition.
This was two layouts ago in PA:
Attachments
Attachments
So many fantastic scenes and bridges in this thread. Thank you all for posting. BXCXDAN, great work on a 12' long trestle, I'm jealous you have enough room for so long a bridge. Larry Sr., just outstanding. So nice of the railraod to come up with a trestle design that allows the locals access to such a nice swimming hole. Even nicer of the RR to add lighting so the locals can enjoy at night. Skip the layout is beyond words, that 59th St. bridge is unbelievable, someone has modelling skills above and beyond mere mortals. Erik C again the combination of your modelling and photographic skills bring me back to the old "Is live or is it Memorex?" commercials, "Is it live or is it Erik C.?". Don, that trestle looks scary high, I believe you accomplished the look you were going for. Eric N. what a wonderful plate girder bridge you've built. I can't wait to see pictures after you get it painted.
Bridge on old layout....probably 1999-2000
My son will be 25 in August and is 6'2" Enjoy them while they are young.....they grow up too fast!
Peter
Attachments
Moonson, your bridge weathering and simply the entire setting is Awesome..Wow.Your layout is three dimensional Art, a Masterpiece...Thank You
Putnam division Above, the young fellow in control is looking good, in a vintage layout Scene...Dreams were made there....Very nice picture, nice Bridge.. Wow.
Attachments
luvindemtrains posted:
OK, Luvindemtrains. Here were the steps, taken a decade ago in effecting this project:
1. Visited an actual rusty bridge known to me to make sure I would not overdo the project. Took these photos.
2. Dull-coat/matt sprayed the entire Atlas bridge once it had been constructed. Not before.
3. Worked the following product onto the surfaces of the bridge with brushes:
Weather System, Rust & Weather Kit, by Bragdon Enterprises, 2960 Garden Tower Lane, Georgetown, CA 95634 [1-530-333-1365]
P.S, I did not spray an overcoat atop the powders, since I did not like the results of doing so on a test piece.
P.P.S. Here is another bridge project on which I used the same process (Lionel bridged):
Attachments
Moonson posted:luvindemtrains posted:OK, Luvindemtrains. Here were the steps, taken a decade ago in effecting this project:
1. Visited an actual rusty bridge known to me to make sure I would not overdo the project. Took these photos.
2. Dull-coat/matt sprayed the entire Atlas bridge once it had been constructed. Not before.
3. Worked the following product onto the surfaces of the bridge with brushes:
Weather System, Rust & Weather Kit, by Bragdon Enterprises, 2960 Garden Tower Lane, Georgetown, CA 95634 [1-530-333-1365]
P.S, I did not spray an overcoat atop the powders, since I did not like the results of doing so on a test piece.
That is an all so common sight you took pictures off, love it! Your so kind to share how you accomplished this. Let me attempt and see what happens.
I tried this over a year ago on the same bridges. I was ok with the turn out but have since replaced those bridges.
Attachments
luvindemtrains posted:I tried this over a year ago on the same bridges. I was ok with the turn out but have since replaced those bridges.
I think they look very nice, especially apparent on that second photo where all four are visible at once.
Moonson posted:luvindemtrains posted:I tried this over a year ago on the same bridges. I was ok with the turn out but have since replaced those bridges.
I think they look very nice, especially apparent on that second photo where all four are visible at once.
Thanks, I appreciate that. Unfortunately I had to remove them because the husky stacks were too high and the larger engines hit their edge as they entered them.
luvindemtrains posted:Moonson posted:luvindemtrains posted:I tried this over a year ago on the same bridges. I was ok with the turn out but have since replaced those bridges.
I think they look very nice, especially apparent on that second photo where all four are visible at once.
Thanks, I appreciate that. Unfortunately I had to remove them because the husky stacks were too high and the larger engines hit their edge as they entered them.
Oh , OK, well that's better, since I thought you were indicating you removed them because you were unhappy with the weathering results. Plus, they were quite dramatic stretching right across that broad space, something like what I may have seen as a boy in real life somewhere in Pennsylvania. I thought the stretch of them plus that very handsome weathering was something to be well proud of.
FrankM.
Moonson posted:luvindemtrains posted:Moonson posted:luvindemtrains posted:I tried this over a year ago on the same bridges. I was ok with the turn out but have since replaced those bridges.
I think they look very nice, especially apparent on that second photo where all four are visible at once.
Thanks, I appreciate that. Unfortunately I had to remove them because the husky stacks were too high and the larger engines hit their edge as they entered them.
Oh , OK, well that's better, since I thought you were indicating you removed them because you were unhappy with the weathering results. Plus, they were quite dramatic stretching right across that broad space, something like what I may have seen as a boy in real life somewhere in Pennsylvania. I thought the stretch of them plus that very handsome weathering was something to be well proud of.
FrankM.
Frank M. you just made my day! I am originally from the Ohio Valley so the look I was going for was that of the area I grew up in as well as Western PA.
Nice photos, All.
Here are some bridges on my layout. I do have one of the big Atlas bridges on the layout but I don't have a good shot of it on hand.
Attachments
christopher N&W posted:
Hi Chris. I have seen a couple of videos of your layout and my question is have you considered doing a video on your approach to scenery? Many of us would benefit from a product like this. You have mastered this art form and I am mesmerized every time I see pictures of your layout.
This is from a modular layout that belonged to a friend of mine that we ran for the public. They started life as the original Tin Plate Trackers modules, but over a period of a year a group of fellow TCA members got together to recondition them and make them command compatible. I redid the river as the original resin had cracked. Fun times.
Attachments
Found another photo with the backgrounds on the rear module panels....
First, just adding some 2'x4' hardboard panels painted in a sky color with a printed and mounted background makes all the difference in how a module feels.
This is the final version of the bridge module with the river extending up the rear panel just enough to give the simulation that the river is continuous. Amtrak is obviously cruising through the frame in this image.
Attachments
Here are a few shots of my homemade arch bridge made from wood that is on my standard gauge layout.
Attachments
Luvindemtrains, Absolutely super to hear you say that! I appreciate the feedback, as well as hearing another person's perspective on my creative shenanigans.
FrankM


