"HONGZ" stands for HO scale, N scale, G scale, and Z scale.

Post your non-O scale stuff here!

Finished up the smoke boxes on the AC-5/7.  The AC-7 also has the front painted silver.  Another 2 hours in the toaster oven.  The aluminum foil in the tray works well in keeping fresh paint from sticking to it.

SP AC-7 4-8-8-2 cab forward key 33SP AC-7 4-8-8-2 cab forward key 34SP AC-7 4-8-8-2 cab forward key 35

Started to put stripping on the walk boards.  I found paint pens to work well.  I pick them up at Michael's craft store. Trying to paint them with a brush can be tricky without getting paint on the top of the walk board.  I've also used chart tape but it can come off when handled plus, when baked after putting a dull coat finish on, it can come loose.

SP AC-5 4-8-8-2 cab forward key 17SP AC-5 4-8-8-2 cab forward key 18

Attachments

Images (5)
  • SP AC-7 4-8-8-2 cab forward key 33
  • SP AC-7 4-8-8-2 cab forward key 34
  • SP AC-7 4-8-8-2 cab forward key 35
  • SP AC-5 4-8-8-2 cab forward key 17
  • SP AC-5 4-8-8-2 cab forward key 18
Last edited by samparfitt

Finished up the smoke boxes on the GN O-8 and SP AC-9.  Like the DM&IR yellowstone, little of the smoke box shows on the AC-9 so only the sides and front are painted.

GN O-8 01

Started hand painting the fire boxes and piping on the multi-colored boiler engines.

fireboxes 01

'Shot' the maroon on the DM&IR caboose and cab roofs of those that are Sacramento gray. 

With the yellow, had 4 spots where there was some overspray that got by the masking and onto the yellow but able to easily remove it with water and a tooth pick, before baking.

Should be no more masking and air brush painting: just a lot of hand painting, then add decals, then dull coat all parts and finally, install all those marker light LED's, sound and assembly.

DM&IR M4 2-8-8-4 20


Attachments

Images (3)
  • GN O-8 01
  • fireboxes 01
  • DM&IR M4 2-8-8-4 20
Last edited by samparfitt
samparfitt posted:

Finished up the smoke boxes on the AC-5/7.  The AC-7 also has the front painted silver.  Another 2 hours in the toaster oven.  The aluminum foil in the tray works well in keeping fresh paint from sticking to it.

SP AC-7 4-8-8-2 cab forward key 33SP AC-7 4-8-8-2 cab forward key 34

Started to put stripping on the walk boards.  I found paint pens to work well.  I pick them up at Michael's craft store. Trying to paint them with a brush can be tricky without getting paint on the top of the walk board.  I've also used chart tape but it can come off when handled plus, when baked after putting a dull coat finish on, it can come loose.

SP AC-5 4-8-8-2 cab forward key 17

Interesting. You do realize that the SP no longer used the gray boiler jacketing by the time the "silver" was applied to the fronts of the cab forwards? 

hotwater,

 I see what importers did back in the 80's and 90's on their factory painted models and I follow that.  I'm  pretty strict on my main railroad, ie GN but I follow what I like on other roads.

I'm partial to multi-colored engines so if the rules are bent, I don't mind.  I have a friend that says the Sacramento gray was not a 'standard' for SP but the builder's colors.  I like the color scheme so I use it.  I also model 1938 on my GN so other railroad's engines that I have are not really from that date: so be it.  I 'bend the rules' for my own GN, as a lot of colored engines and electrics that I have painted did not exist in 1938. 

I also build RC airplanes and 'bend the rules' on those, also.

I treat this hobby as a hobby. 

Sam

Usually, the importers are pretty accurate on what they do.  I'm speaking about the brass importers.  Lionel and MTH do what they want on paint schemes.

I double checked my AC-4,5,6,7's and the only one I put the silver on was the AC-7, which I didn't paint with a gray boiler, so I'm 'factual' on that engine.

What I try to do is get a picture of an engine that the manufacturer has painted and copy that.

My SP friend has THE cab forward book and, looking through it, I believe he is correct as I didn't see any, although most of the pictures are black and white, reference nor saw any that looked like they had a Sacramento gray boiler.   For some reason, I love cab forwards so I like modeling them (probably because they are so different). 

I like NP also and have the northerns painted up with gray boilers, including the Z-5 and Z-8.  I found no evidence of NP ever having a Z-8 in Gray but I do.  I also painted one of my GN Z-6's in glacier park green: highly unlike that they ever did this, but, in my GN empire, they exist!

Last edited by samparfitt

Hotwater,

You're right on my AC-6.  This morning, I noticed that the FP engine has the silver on the front that I painted with Sacramento gray.  Not being my main railroad, I didn't know about that.  Such as it is!

======

Cab/engine detail:

Spent the morning using white, red and gold painting up the cabs gauges , handles and knobs.

Also, did the boiler piping, poppet valves and knobs, and adding a 2nd coat of white to the walk boards for side trim.

Cab detail 01Cab detail 02Cab detail 03Cab detail 04Cab detail 05

Attachments

Images (5)
  • Cab detail 01
  • Cab detail 02
  • Cab detail 03
  • Cab detail 04
  • Cab detail 05
Last edited by samparfitt

Hotwater,

You're making me feel guilty on the SP lettering so I bought new lettering on ebay for the 'southern pacific lines' for the AC-6 that has the large 'southern pacific' decal.  I'm going to try to remove just the decal but that probably won't work and I'll have to strip it and re-paint it.   That won't be a big deal since it's just the tender and no masking will be needed so it will go fast.  Thanks for the info that I didn't know about.

=======

Decaling.

Started to decal one of the cab forwards and big boy and, in both cases, the decals dissolved in the water so I bought some micro decal film solution on ebay (should be here, today), which covers the decals and prevents them from falling apart.

Better luck with the new decals (just made) for the DM&IR 2-8-8-4 yellowstone.

I've found cutting a 45 degree corner on all the corners help keeps those 90 degree corners from 'folding on themselves' which is really hard to correct.

DM&IR M4 2-8-8-4 22DM&IR M4 2-8-8-4 23DM&IR M4 2-8-8-4 24DM&IR M4 2-8-8-4 25

Also, did the caboose.

DM&IR M4 2-8-8-4 21

Been using this same bottle of solvaset for probably 20 years and it still works great.  Not sure if they even make it any more.  I used a nice soft paint brush to add the solfaset.

DM&IR M4 2-8-8-4 26

Attachments

Images (6)
  • DM&IR M4 2-8-8-4 22
  • DM&IR M4 2-8-8-4 23
  • DM&IR M4 2-8-8-4 24
  • DM&IR M4 2-8-8-4 25
  • DM&IR M4 2-8-8-4 21
  • DM&IR M4 2-8-8-4 26
Last edited by samparfitt

Decaling:

SP AC-9.

Using microscale decal sheet 87-75 SP steam locos- heavy.  These are very nice decals, thin and able to conform to rivets, etc.  They also give an instructional sheet with pictures and engine classes and numbers that the engine has.

When putting the decal on the side of the tender, the rivets are pretty pronounced but, using a folded tissue, I can press down on the decal and they conform to the rivets so no bubbles are under the decal.  Some solvaset and soft brush finished the job.  The solvaset works quickly to soften the decal so, one can't be 'playing around' with the decal, once the solvaset has been applied.

Regular water in a bowl is used to free the decal from the backing paper.  The water needs to seep into the backing paper enough to easily remove the decal without the decal still sticking to the paper.  Also, best to remove the decal from the water before the decal separates from the backing paper so the glue on the back side doesn't wash off (I'm assuming there is glue on the backside, but possibly, not).  Even if no glue is present, it's a lot easier to slide the decal onto the surface from the backing paper, as the decal may 'fold' on itself.

With white lettering on a lite colored backing paper, I needed my magnifying glass to see the small nomenclature that goes under the numbers on the side of the cab.

The final coat of scalecoat satin clear was applied to seal the decals and extra protection to the paint.  A final 2 hrs at 200 degrees in the toaster oven so next is electrical and assembly.

ps: there is cab detail but, without the cab being removable, there's no way to hand paint gauges, valves, etc.

SP AC-9 2-8-8-4 19SP AC-9 2-8-8-4 20SP AC-9 2-8-8-4 21


Attachments

Images (3)
  • SP AC-9 2-8-8-4 19
  • SP AC-9 2-8-8-4 20
  • SP AC-9 2-8-8-4 21
Last edited by samparfitt

Decaling:

SP AC-4.

This engine was factory painted but the Sacramento gray was added to the boiler plus painting the cab interior a light green and the cab roof maroon.  The cab roof was masked off for shooting the green and maroon.  The cab interior was hand painted: being an interior and not much surface area, a nice soft brush worked fine.

Some additional nomenclature was added under the cab numbers and on the front bottom of the tender that were not added at the factory. 

The satin gloss was shot over the entire engine to get a uniform look and baked for 2 hours at 200 degrees.  The wheels were removed from the tender trucks as I never bake wheels.

SP AC-4 4-8-8-2 Key 19SP AC-4 4-8-8-2 Key 20SP AC-4 4-8-8-2 Key 21

Attachments

Images (3)
  • SP AC-4 4-8-8-2 Key 19
  • SP AC-4 4-8-8-2 Key 20
  • SP AC-4 4-8-8-2 Key 21
Last edited by samparfitt

Decaling:

Milwaukee EP-2 bipolar electric.

Had to get the decals from a Milwaukee historical society member as there is not a large selection of Milwaukee electric decals available.   A lot of the decals were 'double' layered as one decal was laid down and then another on top of it, ie, Milwaukee road sign (white over red), danger signs (white over black) and builder plates (gold over black).

After all decals applied, the usual coat of satin gloss applied and baked.

milwaukee EP-2 bi polar 16milwaukee EP-2 bi polar 17milwaukee EP-2 bi polar 18milwaukee EP-2 bi polar 19milwaukee EP-2 bi polar 20milwaukee EP-2 bi polar 21milwaukee EP-2 bi polar 22milwaukee EP-2 bi polar 23

Attachments

Images (8)
  • milwaukee EP-2 bi polar 16
  • milwaukee EP-2 bi polar 17
  • milwaukee EP-2 bi polar 18
  • milwaukee EP-2 bi polar 19
  • milwaukee EP-2 bi polar 20
  • milwaukee EP-2 bi polar 21
  • milwaukee EP-2 bi polar 22
  • milwaukee EP-2 bi polar 23

Yo Jerry.

Thanks for the compliments and all the 'likes'.  Hey, it keeps me off the streets at night.  Ya' gotta' do something when you're retired

========

SP AC-9.

I think this is the first engine that I've had where the number boards are open and not a solid piece of brass.  Of course I couldn't pass up the opportunity to light them up!

I used some thin plastic for windows, applied the engine numbers to it and used Kristal klear to secure them to the number boards.  Close up, the clear plastic sticks out but, under normal viewing, you really can't see it.

SP AC-9 2-8-8-4 22SP AC-9 2-8-8-4 23

Attachments

Images (2)
  • SP AC-9 2-8-8-4 22
  • SP AC-9 2-8-8-4 23

Decaling:

UP big boy by Key.

Again, another model that specifically has the 4020 on the box label so the engine was decaled as such.

I found this web site that says the lettering was never white or silver but aluminum and they never used white for the main lettering.  They said it only looks white due to black and white pictures plus aluminum oxidizes to white.

http://utahrails.net/up/up-steam-paint-index.php   

This took awhile to research as my Tenshodo big boy and all the factory painted engines that I was finding looked white.    I see the web sites point in that even the colored pictures of the tender look white as the 'union pacific' lettering is aluminum and the 'fire hose only' is white yet they look the same in the picture.

UP big boy key 17

My references showed '25,000 gal' at the bottom of the tender with some nomenclature under it which I was not able to read.  Fortunately, the decal set had some nomenclature under the '25,000 gal' , which I also was unable to read, but I added it anyway!

UP big boy key 18

It took some research to find what that writing on the air tanks was but I found a picture of it and the decal sheet had copies.   (pressure tested and the date).

UP big boy key 19UP big boy key 20

The front UP emblem was a brass, raised lettering so I used a 'dry brush' approach to getting paint on the very shallow raised lettering by dipping a piece of  paper in the cap of some aluminum paint, wiping the excess tip off and gently touching the paper to the raised lettering.

UP big boy key 22UP big boy key 23

Some brass owners plates were on the tender, again with raised lettering but suppose to be in brass, so I used a woman fine nail sander and gently rubbed off the top layer of black paint.

UP big boy key 24

Attachments

Images (7)
  • UP big boy key 17
  • UP big boy key 18
  • UP big boy key 19
  • UP big boy key 20
  • UP big boy key 22
  • UP big boy key 23
  • UP big boy key 24
Last edited by samparfitt

Decaling (cont).

Got the UP 4-12-2 done.  There were only 8 of these engines that were numbered 'bald face', ie compound air pumps moved from the smoke box front to the under the 'walk way'.  I like to choose numbers that already occur on the decal sheet but that doesn't happen too often so I choose 9012.

UP 4-12-2 Key 32

Also, finished the DM&IR yellowstone.

It's nice having high quality decals and a good decal softener to make the 'work' go quickly and easily.

Two engine left to do: the SP AC-6 and GN O-8 mike.

DM&IR M4 2-8-8-4 28

DM&IR M4 2-8-8-4 29

Attachments

Images (4)
  • UP 4-12-2 Key 32
  • DM&IR M4 2-8-8-4 27
  • DM&IR M4 2-8-8-4 28
  • DM&IR M4 2-8-8-4 29

Decaling (cont)

SP AC-6.

This is the factory painted engine that had the late model large SP on the tender that I had to strip and re-paint for the earlier smaller 'southern pacific lines' logo.

I tried using solvaset to just dissolve the decal but the factory must of put a clear coat on so the shell was stripped.

SP AC-6 Key, 4-8-8-2 FP 15

Two coats of black and in the toaster over for two 'cookings'.

SP AC-6 Key, 4-8-8-2 FP 16

New decals added and all parts clear coated with satin gloss.

SP AC-6 Key, 4-8-8-2 FP 17

I just noticed that the SP tenders have number boards so those got 'numbered': always fun putting on those microscopic nomenclature!

SP AC-6 Key, 4-8-8-2 FP 18

FINALLY: Except for the GN O-8 mike tender that needs decals (waiting for those to arrive), all the engines are painted and decaled....yeah!

10 engines and one cabeese:

DM&IR 2-8-8-4

SP AC-4,5,6,7,9

GN O8 mike.

Milwaukee EP-2 bi-polar electric.

UP 4-12-2 and 4-8-8-4

DM&IR caboose

engines painted 01engines painted 02engines painted 03

Attachments

Images (7)
  • SP AC-6 Key, 4-8-8-2 FP 15
  • SP AC-6 Key, 4-8-8-2 FP 16
  • SP AC-6 Key, 4-8-8-2 FP 17
  • SP AC-6 Key, 4-8-8-2 FP 18
  • engines painted 01
  • engines painted 02
  • engines painted 03

Cool.

Once in awhile, one stumbles across something new!

I happen to find that the smoke box door opens on my Key UP 4-8-4 FEF-2 engine.

This engine is 'super' detailed with movable sand hatches, access doors open to steam piping on top of boiler in front of cab, cab roof hatch open, cab doors open, hatches on tender open and coast drive.  Very nice model that is factory painted.

The headlight also works.

UP FEF-2 4-8-4 key 12

Attachments

Images (1)
  • UP FEF-2 4-8-4 key 12

Whitewalls:

I find Tamya paint very durable for such purposes.  I connect the drivers up to the power supply and operate the wheels slowly, first cleaning them with some alcohol and cue tip and then touching a paint brush to the edge as the driver turns, resulting in a nice whitewall.   The truck wheels have to be done manually.

SP AC-4 4-8-8-2 Key 22

Attachments

Images (1)
  • SP AC-4 4-8-8-2 Key 22

Springfield, Ohio train show.

60 miles from my home but worth the drive as, since going to this show since 1979, I've found some of my best buys at this show and only a modest 5 bucks to get in.

It's on the county fair grounds with two large buildings with a 'connecting' building between them.

springfield meet 01springfield meet 02springfield meet 03springfield meet 04

Being a GN modeler, there's usually not a lot of GN stuff to buy in Ohio but, this was a good day

I'm a sucker for the old silver streak kits and there were 7 of them, all at one table.  Four GN cabeese, one GN auto car and an NP reefer; all for 50 bucks.

With modern adhesives (ie, CA) they go together pretty quickly and are comparable to a nice brass caboose (3rd picture).  They include trucks, though I'll put in new wheels sets, cast ends and cupola, and the rest is wood, plus a lot of cast parts to be attached.  A couple even had some paint bottles, although I'll use my scalecoat paint.

I like looking at some the original prices, a whole 2.98 back then: of course that was about twice as much a 'shake the box' athearn kit!

silver streak kits 01silver streak kits 02silver streak kits 03silver streak kits 04silver streak kits 05silver streak kits 06

Attachments

Images (10)
  • springfield meet 01
  • springfield meet 02
  • springfield meet 03
  • springfield meet 04
  • silver streak kits 01
  • silver streak kits 02
  • silver streak kits 03
  • silver streak kits 04
  • silver streak kits 05
  • silver streak kits 06
Last edited by samparfitt

Soldering wires to the LED's.

As mentioned, previously, it's easier to just buy the LED's ready with resisters, etc already attached from lights4models.com but I, previously, bought these LED's so I soldered wires to them and will probably use them in the cabeese.

I found putting the two wires in a pin vise worked best to twist the 2 wires together, before soldering them to the LED.  A fine needle nose tweezers were used to hold the LED and liquid flex seemed best to solder the wires to each end of the LED.  A 'third' hand with two alligator clips was used to hold the tweezers and wire. While testing, the positive side wire was painted for later install.

Out of the 25 LED's, I was able to make 16: some flew off into 'never land' and the rest was destroyed due to too much solder or heat or both!  A 15 watt, fine tip solder was needed with very little solder and heat applied only a fraction of a second to the parts.

LED wires 01LED wires 02LED wires 03LED wires 04LED wires 05

Attachments

Images (5)
  • LED wires 01
  • LED wires 02
  • LED wires 03
  • LED wires 04
  • LED wires 05
Last edited by samparfitt

Marker (classification) and head lights installed.

After much frustration and time, I finally got the marker and head lights installed on one boiler front.

boiler front 01

I forgot to clear, lacquer spray the LED's, before putting them in the marker housings and they grounded out, and I already added some Kristal Klear to seal the lights in the casings so they got destroyed when removed.  I have some warm LED's so I can solder those onto the small electronic components provided with the LED's.

lights for models 05

I cut the shrink tubing off so I could see the 'guts': Looks like a bridge rectifier, a capacitor and a resistor. 

lights for models 06

Each LED comes with it's own electronic components.  I thought I'd save space by soldering my extra warm glow LED's in parallel with the original LED to use up my spare LED's and save space on extra electronic components but that ended up as a failure.  Evidently either/or both capacitor and resistor can only handle one LED and when I added two more LED's, the lights started to blink. 

I'm surprised that the electronic components don't get hot without a motor but the components stayed cool.  The boiler front LED's can be in series with the motor but, in the tender, I'll have to run a wire to the engine.  To be safe, I'm adding a 12 volt bulb in series with the lights as a 'heat sink'.

Each LED with it's electronic components are $3.10 each so, just doing a headlight is pretty cheap.  Some of the engines will get headlight, front marker lights, cab light, tender marker lights and tender head light so they will cost $27.70 but worth it to have everything lighted

lights for models 07

Attachments

Images (4)
  • boiler front 01
  • lights for models 05
  • lights for models 06
  • lights for models 07
Last edited by samparfitt

Milwaukee EP-2 bipolar assembly.

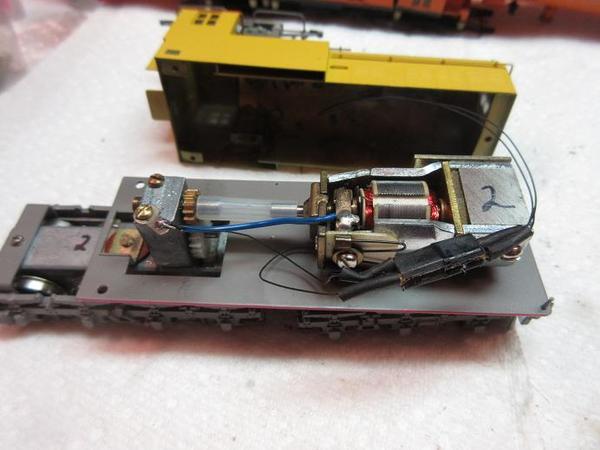
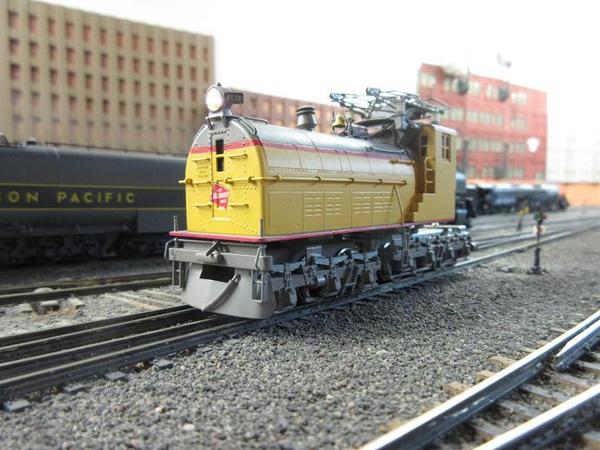
I installed the warm LED's for the head lights.  Since there are two motors and separate drives, I connected the LED wires to to each separate motor and used a 2 wire connector so I can work on the engine assembly separate from the super structure. 

I taped the wires and electronics to the top of the cab and also added clear plastic  to all the windows.  Scotch tape worked great giving a 'frosted' look to the windows since there is no interior detail.
milwaukee EP-2 bi polar 24milwaukee EP-2 bi polar 25milwaukee EP-2 bi polar 26

SOMETIME'S IT PAYS TO BE LUCKY!

The engine ran great on the bench so I put the one end on the layout and it was hesitating.  After about 30 minutes (or so, more 'or so') of checking for shorts, etc, and not finding the problem, I put the other EP-2 on the track and it did the same thing. 

Luck #1: found out it was one of the cabeese on the cabeese track that was causing the problem.  Those cabeese have been sitting there for years and one decided to short out!

Then I had more problems with the 2nd EP-2.  One set of drive engines would not run (more time investigating): turns out to be a broken wire to the motor.

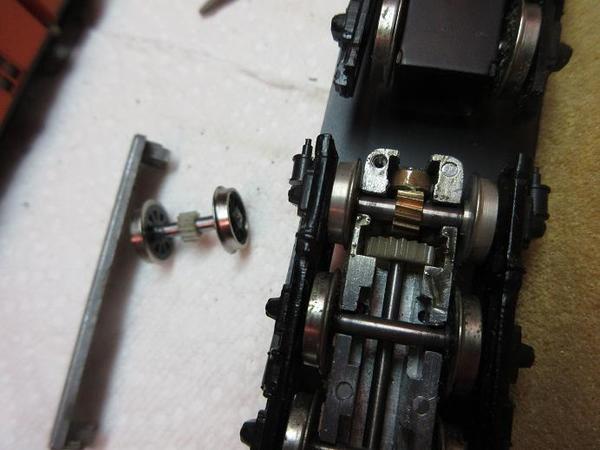
Then the other drive engine wouldn't work.  Found that one of the plastic axle gears was split and, thus, slipping.  Tried to CA it but didn't work.

Luck #2: I haven't had any diesels since the 70's (HO wise) but I remember some hobby town (?) wheel sets with gears in my parts cabinet.  What's the chance that not only is the gear an exact match but the ends of the axles were the same small diameter for the wheels!  Well, almost, the axle diameter was just a 'skoch' too narrow.  The wheel was pretty firm on the axle but I could turn it.  A pair of dikes worked great to put several marks along that part of the axle, causing some of the metal to be raised.  That fixed that problem. 

Of the 4 sets of wheels in the drive train, only the end two sets are powered. Unusual as usually, I find that all wheels are powered, giving more traction.

Back to the layout of testing and the mechanism was slipping.  After spending another 30 minutes, or so, checking the drive train, turns out the front free wheeling truck wheel was binding and causing too much drag on the engine.  The retaining plate was filed and bent a 'skoch' and, finally, all's working again. 

milwaukee EP-2 bi polar 28

milwaukee EP-2 bi polar 27

Attachments

Images (5)
  • milwaukee EP-2 bi polar 24
  • milwaukee EP-2 bi polar 25
  • milwaukee EP-2 bi polar 26
  • milwaukee EP-2 bi polar 28
  • milwaukee EP-2 bi polar 27
Last edited by samparfitt

Sunset GN O-8 mike, open cab assembly.

GN had the largest mike ever made and done in their own 'shops'.

Tender:

Tape was removed from all electrical contact points and cleaned with a 'bright boy'.  The speaker and components along with a tender rear light were installed.

The usual for power and ground: tender facing left on back, insulation side towards the viewer.  On the engine, insulation side on the far side.

One wire for the sound (far wire) and one for the tender light.  Pin for the tender light made from RC airplane connecting pins: just using the metal pins, they can be made very small (plus cost effective!).

GN O-8 2-8-2 open cab 11GN O-8 2-8-2 open cab 12GN O-8 2-8-2 open cab 13

Engine:

Drive train:

Checked each driver for insulation/power side for proper install and one driver set  has a bad insulation side.  Tried using the tip of an Xacto blade to clear any foreign objects along the insulation but no luck.  Heated up the 'tire' and used some needle nose pliers to pry the tire from the rim.  Moved it about a 1/64" out and, using the NMRA gauge, I found the original setting was too narrow and the new location correct.  The tire wasn't moving and it was still on very tight to the rim so I left it 'as is'.  I've noticed on previous drivers where the tire has an inner lip and it can contact the rim, shorting out the wheel.

Springs installed for each journal and drivers installed.  Good time to install the brake shoes before the side rods are added.

Side rods then installed.  I tried using some hex head screws over the original slotted screws but they, eventually interfered with the push rods so I had to put the original screws back in, save the back set where nothing moved over them.

Push rods and offset crank installed last.  The offset crank gets set just forward of center.

After each of the above 3 installs, the mechanism is placed on the track to insure all is moving freely, limiting time and effort on finding any binds.

GN O-8 2-8-2 open cab 14GN O-8 2-8-2 open cab 15GN O-8 2-8-2 open cab 16

Attachments

Images (6)
  • GN O-8 2-8-2 open cab 11
  • GN O-8 2-8-2 open cab 12
  • GN O-8 2-8-2 open cab 13
  • GN O-8 2-8-2 open cab 14
  • GN O-8 2-8-2 open cab 15
  • GN O-8 2-8-2 open cab 16
Last edited by samparfitt

Amazing, everything works!

Tender:

I realized that the tender only needs one wire to the engine as both wires in the tender go to the engine frame.

Engine:

Made a brass tab for the ground as the manufacturer only had a piece of wire wrapped  around the screw.

Hooked up the contact for the sound cam and used two sets of 2-wire connectors from lights4models.com: one to disconnect the boiler from the frame and another to separate the boiler from the front boiler cover that has the marker/head lights and electronic components for ease of maintenance.

Sound and lights are all working  

GN O-8 2-8-2 open cab 17GN O-8 2-8-2 open cab 18GN O-8 2-8-2 open cab 19GN O-8 2-8-2 open cab 20

Attachments

Images (4)
  • GN O-8 2-8-2 open cab 17
  • GN O-8 2-8-2 open cab 18
  • GN O-8 2-8-2 open cab 19
  • GN O-8 2-8-2 open cab 20

GN O-8.

Lead weight added over motor and gear box.  No glue needed over motor as the lead is easily pushed into the sides and friction holds it in place.  The lead over the gear box had to be cut in half to get into such a small area so some wood glue used to 'spot' glue the lead to the boiler.

GN O-8 2-8-2 open cab 21GN O-8 2-8-2 open cab 22

Back on the road!

GN O-8 2-8-2 open cab 23GN O-8 2-8-2 open cab 24

Tender:

GN O-8 2-8-2 open cab 25

Made by Samhongsa, this engine has an incredible amount of detail.

GN O-8 2-8-2 open cab 26GN O-8 2-8-2 open cab 27

Attachments

Images (9)
  • GN O-8 2-8-2 open cab 17
  • GN O-8 2-8-2 open cab 18
  • GN O-8 2-8-2 open cab 21
  • GN O-8 2-8-2 open cab 22
  • GN O-8 2-8-2 open cab 23
  • GN O-8 2-8-2 open cab 24
  • GN O-8 2-8-2 open cab 25
  • GN O-8 2-8-2 open cab 26
  • GN O-8 2-8-2 open cab 27

SP AC-4 assembly.

Marker lights.

The holes that I drilled are very small and will only take the thin wires so the LED's are, first, mounted into the marker lights.  Some Kristal Klear used to hold them in place.   The wires will, then, be cut and routed to the bottom of the cab.  Prior to installation, I painted the green/red lead wires black.  The LED's are so small, I keep them lighted during the install to insure proper placement.

SP AC-4 4-8-8-2 Key 23SP AC-4 4-8-8-2 Key 24

Attachments

Images (2)
  • SP AC-4 4-8-8-2 Key 23
  • SP AC-4 4-8-8-2 Key 24
Last edited by samparfitt

SP AC-4 assembly (cont)

That took a couple hours just to route 4 sets of wires from the cab to the inside of the boiler!  The wires are so small that they don't bend easily so one needs to make sure there are no 'loops' when 'fishing' the wires through the holes.  The marker light wires had to go through a hole on the face of the cab and then into a hole on the floor and then bypass all the detail under the cab to get to the boiler interior.  Additional wires had to be added to the LED wire leads to reach the boiler.  Plus, the wires tend to snag on the small access holes: drilling those small holes, I'm sure there were some burrs along the edges.  

The marker lights that came with the engine are on this engine and I was able to drill them out, in place.  I opted for this method as the markers are the old style and I only have brass copies of the modern style.  One other AC, the original markers were kept but the Tomar markers were put on the other 2 AC's. 

The headlight and cab light was much easier to install.  All the small electronic components were scotch taped to the top of the boiler and all the wires were routed to about the center of the boiler as the motor is huge and takes up a lot of room. 

I added some lead weight but it was minimal due to the motor, virtually, taking the entire width of the fire box area.  Normally, there is a good 1/4" on both sides of the motor but not in these engines.

Along each step of connecting the wires back to the electronic components, the LED was checked to insure I didn't 'hose' the connections.  On the final check, I ran a lead from the hot and ground side to the boiler frame to insure none of the LED wires were grounded out to the boiler: better to find out now rather than after final assembly!

SP AC-4 4-8-8-2 Key 25SP AC-4 4-8-8-2 Key 26SP AC-4 4-8-8-2 Key 27

Attachments

Images (3)
  • SP AC-4 4-8-8-2 Key 25
  • SP AC-4 4-8-8-2 Key 26
  • SP AC-4 4-8-8-2 Key 27
Last edited by samparfitt

I agree that they are called classification lights but all the stuff I buy says marker lights.  People looking on  the manufacturer's web site will be able to find them if they put in what the manufacturer calls them.  It's like the railroads call them turnouts and the modeling world calls them switches.  At crossing 7 decades this year, I could care less what they're called as I'm more interested in working on my hobby.  A rose by any other name is still a rose.  A lot of stuff for me is 'good enough'.

marker lights 01

======

SP AC-4 assembly (cont)

Tender:

Speaker and electronic components installed.  This is the first engine where I have tried the new 'sugar cube' speakers.  I've only got about 7 of the old PFM edge speakers left.  The 'sugar cube' speakers give a good quality sound; being steam, it's important to have the low frequencies.  They are not as loud as the PFM speakers but one usually doesn't need the sound to be too loud.

SP AC-4 4-8-8-2 Key 28SP AC-4 4-8-8-2 Key 29SP AC-4 4-8-8-2 Key 30

Engine:

Pre-test of sound before assembling engine.

SP AC-4 4-8-8-2 Key 31

Had to solder one of the small valve linkages as it was broken in the middle.

SP AC-4 4-8-8-2 Key 3

Some 1/16" thick lead sheeting rolled and installed for the smoke box area.   A hole drilled in the lead and a small screw used to secure it. 

SP AC-4 4-8-8-2 Key 33

With the lead added to the smoke box, the spring was a little weak to support the extra weight so a spring was put over the existing plunger and a black plastic washer was CA'ed (thick stuff) on the plunger to secure the spring.

SP AC-4 4-8-8-2 Key 34

First, the front engine drive assembly was attached to the boiler.  It takes a little 'fiddling' as there are 4 steam pipes that aligned into the steam chest cylinders plus 2 screws in front and 2 more in the back.

The back engine drive assembly has a male/female connection between the two engines(for motor power transfer to each gear box) plus a sliding steam pipe to be connected.

Everything was bench tested after each procedure.

Had trouble with the lead trucks coming off on the layout (railroad!): found some burrs along the slot that needed to be cleaned up.

SP AC-4 4-8-8-2 Key 35

To be safe, I ran an extra wire from the motor to the back of the engine that connects to a wire coming out of the tender.  I figure that this wire, which normally connects to the rigid engine frame, but in this case, connects to the pivoting frame, which probably doesn't have as good electrical contact to the motor as the pivoting frame only touches the boiler via a small piece of  brass and the plunger.

A nice quiet runner, with the sound off.  Difficult for me to get clear pictures with the engine moving.

SP AC-4 4-8-8-2 Key 36SP AC-4 4-8-8-2 Key 37SP AC-4 4-8-8-2 Key 38SP AC-4 4-8-8-2 Key 39SP AC-4 4-8-8-2 Key 40

Attachments

Images (15)
  • marker lights 01
  • marker lights 01
  • SP AC-4 4-8-8-2 Key 28
  • SP AC-4 4-8-8-2 Key 29
  • SP AC-4 4-8-8-2 Key 30
  • SP AC-4 4-8-8-2 Key 31
  • SP AC-4 4-8-8-2 Key 3
  • SP AC-4 4-8-8-2 Key 33
  • SP AC-4 4-8-8-2 Key 34
  • SP AC-4 4-8-8-2 Key 35
  • SP AC-4 4-8-8-2 Key 36
  • SP AC-4 4-8-8-2 Key 37
  • SP AC-4 4-8-8-2 Key 38
  • SP AC-4 4-8-8-2 Key 39
  • SP AC-4 4-8-8-2 Key 40
Last edited by samparfitt

SP AC-4 assembly (cont).

Tender shorting out:

While testing the engine on the railroad, the engine was hesitating every once in awhile.  Key used blackened tender screws and draw bar and pin so I thought, for sure, these were the culprits.  After about an hour of 'fixes', I finally turned up the throttle to full and the circuit breaker 'went'.  These motors are so efficient that the low voltage/amps don't trip my CB's.  Using a voltmeter, I found one brake shoe touching the insulated side wheel on the tender.  A jeweler's flat edge screw driver prying it away from the tire fixed it.

SP AC-5 assembly.

Engine assemblies.

To get good electrical contact between the axle/journals and frame, the slots where the journals fit have the paint scraped from those surfaces.

SP AC-5 4-8-8-2 cab forward key 21

The journals are oiled and the springs put into the journal recesses.

SP AC-5 4-8-8-2 cab forward key 22


Before assembly, checking each driver, one insulated tire was shorting out.

Putting on a new cam must have pushed the tire too far onto the rim (hub) and the lip along the inside of the tire touched the counter weight on the rim (hub).  A soldering iron heat used to expand the tire (just like the prototype!), the tire was removed, a little filing on the counter weight and inside rim, plus some paint for insulation, and the parts were re-assembled.  The red strip is the insulation.  I moved the rim in a small amount on the axle and left the tire a small amount off from the rim to insure the two did not touch each other. 

SP AC-5 4-8-8-2 cab forward key 24

SP AC-5 4-8-8-2 cab forward key 25Drivers mounted on the frame with the springs mounted in the journals.

SP AC-5 4-8-8-2 cab forward key 23

Before lunch, inserted LED's and glued them in place with Kristal Klear.

The original marker lights were replaced with the tomar markers on this model.

SP AC-5 4-8-8-2 cab forward key 26

Attachments

Images (6)
  • SP AC-5 4-8-8-2 cab forward key 21
  • SP AC-5 4-8-8-2 cab forward key 22
  • SP AC-5 4-8-8-2 cab forward key 24
  • SP AC-5 4-8-8-2 cab forward key 25
  • SP AC-5 4-8-8-2 cab forward key 23
  • SP AC-5 4-8-8-2 cab forward key 26

Always like hearing the UPS truck!

UP 4-12-2 just arrived.

Very nice model from KEY.

factory painted

coast drive

working geasley valve: bar across the front steam chest oscillates.

functioning smoke door, sand dome covers, cab hatches and tender water hatches.

Nicely detailed cab.

deck plate.

working tender/engine head lights

see through walk boards.

Either the factory made a mistake or tenders got swapped because the numbers aren't the same.  Will see about re-numbering the tender.

The marker lights are indented quite a bit so it looks like it would be easy to drill out the markers to add LED's.

UP 4-12-2 KEY FP #79 01UP 4-12-2 KEY FP #79 02UP 4-12-2 KEY FP #79 03UP 4-12-2 KEY FP #79 04UP 4-12-2 KEY FP #79 05UP 4-12-2 KEY FP #79 06UP 4-12-2 KEY FP #79 07UP 4-12-2 KEY FP #79 08UP 4-12-2 KEY FP #79 09UP 4-12-2 KEY FP #79 10UP 4-12-2 KEY FP #79 11UP 4-12-2 KEY FP #79 12

Attachments

Images (12)
  • UP 4-12-2 KEY FP #79 01
  • UP 4-12-2 KEY FP #79 02
  • UP 4-12-2 KEY FP #79 03
  • UP 4-12-2 KEY FP #79 04
  • UP 4-12-2 KEY FP #79 05
  • UP 4-12-2 KEY FP #79 06
  • UP 4-12-2 KEY FP #79 07
  • UP 4-12-2 KEY FP #79 08
  • UP 4-12-2 KEY FP #79 09
  • UP 4-12-2 KEY FP #79 10
  • UP 4-12-2 KEY FP #79 11
  • UP 4-12-2 KEY FP #79 12
Last edited by samparfitt

Add Reply

Post

OGR Publishing, Inc., 1310 Eastside Centre Ct, Ste 6, Mountain Home, AR 72653
800-980-OGRR (6477)
CONTACT US
www.ogaugerr.com

×
×
×
×
Link copied to your clipboard.
×
×