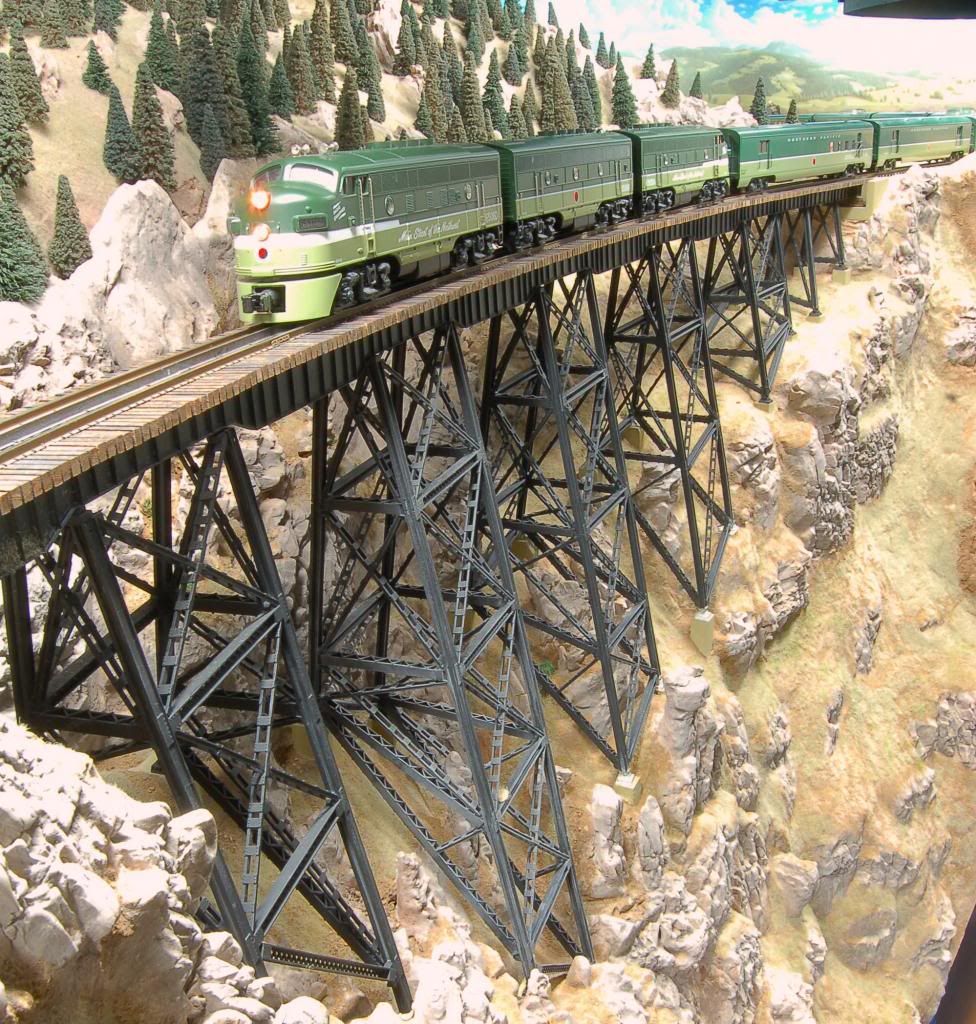
John....I think you are doing a expert job of putting a difficult kit together.  The first time I opened a box to one of these kits, I thought to myself that they would make good kindle for the fireplace!!  I have since been scratch building all kinds of things but still have not challenged myself to one of these kits.  You sir are doing great and it looks like it will be a masterpiece when it is finished...


Alan

Thanks to all who have fought through the kits and their instructions! J Daddy, that is truly a nice piece of work and great comments.


I have had a less than enjoyable experience with my boxcar kit - bad parts and very slow response by the Labelle folks. Otherwise, it has been a pleasure seeing it come together. I wanted to do a combine next, but don't need the frustration. We'll see...

Originally Posted by mwb:
Originally Posted by Burlington Route:

mwb....I hear ya, but the issue for me was it was my 1st Labelle kit...there ain't gonna be a 2nd if I never finish the darn 1st one....and I really like the looks of that Q drovers caboose too....I should just scratch or bash one and follow my usual self instructions!

You started with that Q drovers caboose!  Yikes! 


I thought I was going to go nutz doing one of the pass cars as my 1st La Belle kit.  But, once I got it done, I had learned enough to build a few more and then take on a couple of trolley kits.


Now I look at them as just good fun or raw materials.


No, I wanted to but chose the interurban to be my 1st tooth cutter, so to speak.

Originally Posted by win86:

Thanks to all who have fought through the kits and their instructions! J Daddy, that is truly a nice piece of work and great comments.


I have had a less than enjoyable experience with my boxcar kit - bad parts and very slow response by the Labelle folks. Otherwise, it has been a pleasure seeing it come together. I wanted to do a combine next, but don't need the frustration. We'll see...

Dont let this take you away from a build...I guess I just expected things to go smoother. On my Interurban things had to line up just right{as they should anyway} and I found I had made cuts and such where I should've waited to double check length beforehand...this being my 1st kit I didn't know the usual lay of the build in such a kit. Let a thread such as this be your guide to help better understand the things the instructions don't tell you....

Imho- we could dedicate a support thread for those folks who attempt to build a kit to avoid some typical pitfalls and lessen the possible bad experience for a 1st time person...though I'd doubt they'd{admins} allow such a forum for lack of followers{not meant in a bad way there- just not too many folks build kits any more.

Originally Posted by Burlington Route:
Originally Posted by mwb:
Originally Posted by Burlington Route:

mwb....I hear ya, but the issue for me was it was my 1st Labelle kit...there ain't gonna be a 2nd if I never finish the darn 1st one....and I really like the looks of that Q drovers caboose too....I should just scratch or bash one and follow my usual self instructions!

You started with that Q drovers caboose!  Yikes! 


I thought I was going to go nutz doing one of the pass cars as my 1st La Belle kit.  But, once I got it done, I had learned enough to build a few more and then take on a couple of trolley kits.


Now I look at them as just good fun or raw materials.


No, I wanted to but chose the interurban to be my 1st tooth cutter, so to speak.

I see.  Well, I've built the Lake Shore Electric kits and they were fun to do since you can get all of the detail parts for the underbody and the interiors.   And I have 3 more of the La Belle trolley kits to do someday in the future, but for the next couple of months scratchbuilding an articulated B+B-B+B inspired by the P&N 5500 is on the one end of my bench. 

Originally Posted by leavingtracks:

John....I think you are doing a expert job of putting a difficult kit together.  The first time I opened a box to one of these kits, I thought to myself that they would make good kindle for the fireplace!!  I have since been scratch building all kinds of things but still have not challenged myself to one of these kits.  You sir are doing great and it looks like it will be a masterpiece when it is finished...


Alan

Well put- when "you" scratchbuild something you have a predetermined path, you know what to expect- you build this to fit onto that, and next to this, in this way- the process is all in your head. In one of these kits one has to be very intuitive as to what to expect from this build stage and then for it to jive with the next of later on one...sometimes it's not so easy to read into it.

Originally Posted by mwb:
Originally Posted by Burlington Route:
Originally Posted by mwb:
Originally Posted by Burlington Route:

mwb....I hear ya, but the issue for me was it was my 1st Labelle kit...there ain't gonna be a 2nd if I never finish the darn 1st one....and I really like the looks of that Q drovers caboose too....I should just scratch or bash one and follow my usual self instructions!

You started with that Q drovers caboose!  Yikes! 


I thought I was going to go nutz doing one of the pass cars as my 1st La Belle kit.  But, once I got it done, I had learned enough to build a few more and then take on a couple of trolley kits.


Now I look at them as just good fun or raw materials.


No, I wanted to but chose the interurban to be my 1st tooth cutter, so to speak.

I see.  Well, I've built the Lake Shore Electric kits and they were fun to do since you can get all of the detail parts for the underbody and the interiors.   And I have 3 more of the La Belle trolley kits to do someday in the future, but for the next couple of months scratchbuilding an articulated B+B-B+B inspired by the P&N 5500 is on the one end of my bench. 


If that's the one you posted about a while ago....I do hope your planning on a build thread with pics- don't hold out on us now!

Originally Posted by brr:

Thanks for posting this on the forum. I've been working on a Labelle passenger car kit off and on for years now, and will reference this topic in the future. I recently completed a Labelle flatcar, and that wasn't near as easy as I thought it would be.


The idea of a 1:1 drawing to build over would help against the dreaded "this part is actually two parts but the end one is trimmed to the needed length that you'll see about 3 steps donw the instructions" thing. "Thats'" what I don't like about the kits{read kit as I only have one}...the materials are fine and the build really doesn't require you to be a craftsman{you know how to glue, sand and cut things, right}- it's "the knowledge of how to build the kit properly" that's required to suceed.

Well after the car was primed, roof and body and chassis square. I realized the truck package is going to make a difference here, so I better wait for the trucks. Meanwhile I figured I better work on the color.

This is a harder step than you thing... trying to decipher what the color looked like 50 plus years ago, w/o the wear, and UV fade..

John helped me out here and researched his car faithfully and sent me the paint. Also sent a set of Walthers trucks which he said needed lots of clean up.

so here it is fresh out of the paint shop,


423

418

419

420

Attachments

Images (4)
  • 423
  • 418
  • 419
  • 420
Last edited by J Daddy

To clarify my concerns...  I worked my way through the instructions somehow, the cutting/gluing/sanding has gone well and I got some great help from several forum members. The "help" articles available on Labelle's web site are great for us newbies, as are forum posts such as this one.  Bad parts and Labelle's lack of response to emails has been the hard part.


I think that the kits are an opportunity to add unique cars to one's layout, and the pride of a successful build just cannot be measured.

Owen- good luck on your kit, any pictures? I know I got stuck plenty of times. I had to walk away from it, think it out, and come back. I had to fabricate allot of items.

The most disappointing was the castings, just came out of the package like dust.

John helped me order replacements and that was a big help. But out of the 8 they sent me only 4 were usable and fractured when I tried to install them. Patients is a virtue here.

Originally Posted by mwb:
Originally Posted by J Daddy:

Now that is cool! DC powered?

Yes.  Complete under the floor Q-car drive.


Once you build a couple of these La Belle kits, scratching together wooden cars is pretty straightforward since the experience that you gained really puts such an exercise right in your grasp. 


Going to install a full set of underbody details and brake system in your car?

Wow, now that is a great model. Right now since I am building for a fellow forumite, I am going to mount the details as given in the kit, but I am constantly known to gold plate everything I make... now where is that brass rod... crap another hour drive to the hobby shop....

Originally Posted by J Daddy:

The most disappointing was the castings, just came out of the package like dust.

...........out of the 8 they sent me only 4 were usable and fractured when I tried to install them. Patients is a virtue here.

I generally don't use the castings in most car kits - tend to be at best 2nd rate in quality and detail.  Most of what I need are either resin castings that I've made or parts from PSC or Q-car.


I think that the kits are an opportunity to add unique cars to one's layout, and the pride of a successful build just cannot be measured.

A true statement.


Last edited by mwb

Thank you, however as you guessed it, I passed this step and installed it already... I think I will have to go to confession twice this Sunday...ah yes the obscenities I was shouting as I had super glue stuck to all my finger tips and as I pulled my hand away the fishing line came with it.

However, I stuck it out and it saved me a long drive. Note to self. buy some more brass rod stock next visit to the Hardware store...


Joe


Thanks for the detailed and well illustrated posts on you project.  This is great reading.


3rd rail said:


I can say that because I'm lucky enough to have a link through relations from the 'greatest generation' which may be the last time this country had a population of craftsman.


In can assure you that the are plenty of wonderful craftspeople in younger generations.  There are some fantastic modelers who live in my area.


Todd Gamble does superb rock work. 
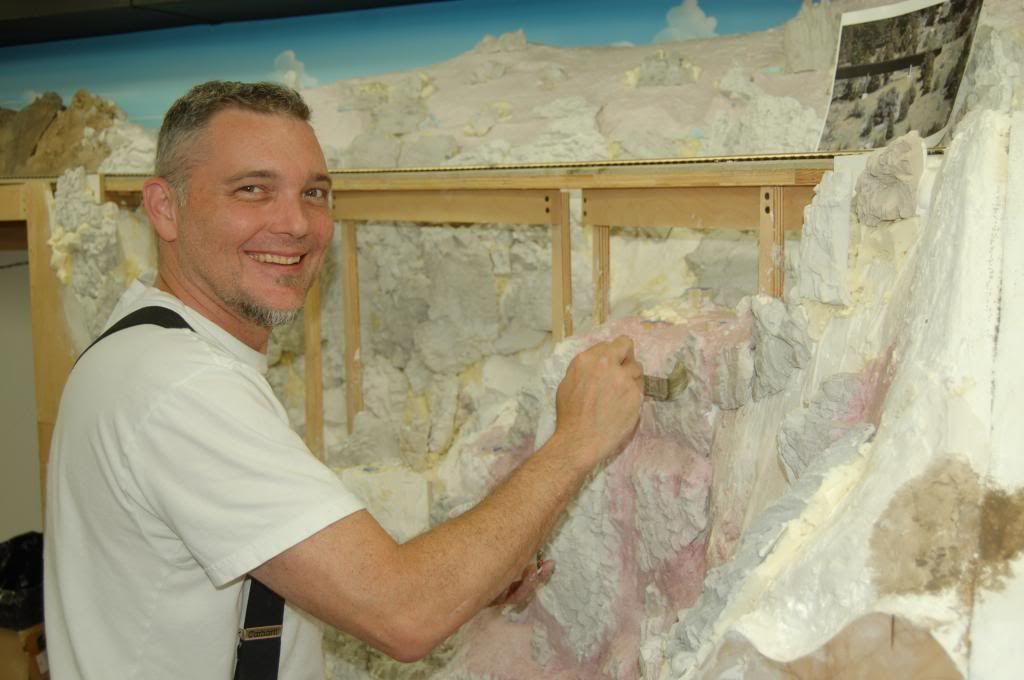


He is also an accomplished scratch builder of structures.  Todd built this model of the Shykomish substation for the GN electrification on Stevens Pass.


Todd's good friend Jen Theroux is also a talented scenery modeler.  Todd did the rock work here and Jen did the dirt, ground cover and trees.  Jen is a little younger that the "greatest generation."


David Hazelton is just a few years out of college.  When he was in high school he was scratch building intermodal cars.  Now he is on the leading edge of scratch building.  David drew the 3D printed towers for this scratch built trestle.


There are plenty of good tips and tricks to learn from more experienced modelers.  Old school techniques will always have a place.  And there is plenty worth learning from younger modelers who are working with new materials and techniques.


Joe


Thanks again for starting a great thread. 

Last edited by Ted Hikel

Nice work Ted thanks for sharing, I have always been a NP fan. I remember when they closed this line over Homestake I hiked this bridge many a times lamenting the lines closure...not sure if Montana Rail Link is using it anymore....

So after wrestling with this fishing line I had to develop this interesting fixture to hold everything while it dried!

Bottom line if you have some brass rod use it for this step!


642

643

Attachments

Images (2)
  • 642
  • 643

So while this dried I applied the acetates for the glass. I used white tissue paper for the upper glass for the glazed look or shades... this took some time. Unfortunately, there was not enough "glass" in the kit but I had some clear over head acetates unused for making presentations.

Here is the body complete...


638

639

Attachments

Images (2)
  • 638
  • 639

I tacked the glass in with super glue then used yellow carpenter glue around the edges. for the tissue paper, I used regular elmers glue.

BTW, as you see I installed the Walthers trucks, unfortunately I scaled the center lines off of the drawing and glued in the bolsters, with the freight trucks previously shown, everything looked great! Alas I had to glue in additional bolters...the passenger style trucks were just to big to swing by the steps.

Last edited by J Daddy
Originally Posted by Burlington Route:

Your our Hero...Nice work!


...so, when are you starting another one?!

Thanks, LOL! Well as they say when things are fresh in the mind and tools are out on the table...


I think if I had ventured to do it for myself it would still be under the layout. I had a much higher incentive on this kit. 


I really like the closed vestibule cars and I have been eyeing up this one.... What one are you doing?

 I like this observation car:


product_thumb

Attachments

Images (1)
  • product_thumb
Post
×
×
×
×
Link copied to your clipboard.
×
×